## Installation process overview
When obtaining software online, there is usually a long and complicated PGP verification process where you need to import keys, verify key fingerprints, download the software and its detached signature, verify the software with the signature, and then install the software if everything was okay.
TFC is installed with a one-liner, a kind of mini-program, that does all the complex steps above for you. It does everything except one thing: You must compare the signature verification key's BLAKE2b fingerprint `4a0a8bac2001e629889e56bc7b12f20122e83101504e24f5dcf125675c9fb4ec6cd35cdd20418bccee8d739d613a07236a455a82476f5a2729d7395ebea325dc` used in the one-liner with a copy obtained from a trustworthy source, before executing the one-liner. The fingerprint is the root of trust for the entire project.
If you do not have a way to verify the fingerprint, you should at least write it down for [TOFU](https://en.wikipedia.org/wiki/User:Dotdotike/Trust_Upon_First_Use), meaning you will detect an attack if the key fingerprint changes prematurely. The current signature verification key expires on `April 29, 2026`. Your connection will also be protected by GitHub's TLS (which is [excellent](https://www.ssllabs.com/ssltest/analyze.html?d=github.com&s=192.30.255.112&hideResults=on) but not designed against nation-state actors).
For a complete explanation on what the one-liner does, see [this](https://github.com/maqp/tfc/wiki/Installer-One-Liner) wiki article.
## 0. Preparation of hardware
Before installing TFC on Source/Destination Computer, you must make sure both have been stripped from all devices that malware might use to covertly leak data:
* 3G/LTE/WIFI/Bluetooth/NFC interfaces and antennas
* speakers (including the one on the motherboard)
* microphones
* webcams (covering with thick tape is enough)
* mechanical fans (if possible)
* vibration elements
* mechanical hard drives
* CD/DVD/BR-drives
* hardware LEDs (covering with thick tape is enough)
The computer should be connected to the network with an Ethernet cable; If the computer has no Ethernet port, a USB-to-Ethernet adapter should be used. The OS installation must be fresh, and full-disk-encryption (not just encryption of home directory) must be enabled during installation.
## 1. Preparation of OS
Debian 10 (add sudo privileges)
If you're installing TFC on Debian, make sure the user has sudo privileges.
$ su -
# usermod -aG sudo
# reboot
After reboot, you should be able to sudo. You can test this by running e.g.
$ sudo echo test
If the message `test` is echoed after you enter password, you now have sudo privileges.
All (Update packages)
**For Qubes**, you should [update](https://www.qubes-os.org/doc/updating-qubes-os/) both [Dom0](https://www.qubes-os.org/doc/software-update-dom0/) and all [Template VMs](https://www.qubes-os.org/doc/software-update-domu/#updating-software-in-templatevms) before installing TFC.
**For all other operating systems**, it's highly recommended you update the OS before installing TFC with
$ sudo apt update && sudo apt upgrade -y
This prevents the installer from failing due to background update process with the following message:
E: Could not get lock /var/lib/dpkg/lock-frontend - open (11: Resource temporarily unavailable)
E: Unable to acquire the dpkg frontend lock (/var/lib/dpkg/lock-frontend), is another process using it?
Enable Wayland
**Warning!** The X11 window manager [does not protect](https://theinvisiblethings.blogspot.com/2011/04/linux-security-circus-on-gui-isolation.html) inputs to e.g. TFC Transmitter Program from other user-level applications running in the background. Use of [Wayland is thus necessary](https://wiki.debian.org/Wayland).
---
## 2. Select configuration specific instructions
Hardware-isolated configuration
You should select the `hardware-isolated configuration` when the communication must stay secure even if an organized crime group or nation state actor tried to remotely hack your devices to steal the keys and messages from the endpoints. See full threat model [here](https://github.com/maqp/tfc/wiki/Threat-model#hardware-isolated-configuration).
### 3. Execute following one-liner in the terminal:
* Source/Destination Computer (Debian / PureOS / *buntu / Mint / LMDE)
c='tcb'; f='4a0a8bac2001e629889e56bc7b12f20122e83101504e24f5dcf125675c9fb4ec6cd35cdd20418bccee8d739d613a07236a455a82476f5a2729d7395ebea325dc'; p='pubkey.asc'; i='install.sh'; s=$i.asc; while sudo fuser /var/lib/dpkg/lock >/dev/null 2>&1; do sleep .5; echo -ne "\rAPT is busy"; done && sudo apt update && sudo apt install apt-transport-https -y && sudo apt install tor wget -y && sudo systemctl start tor && cd $HOME && echo -e '\nLaunching Torsocks. Please wait...\n' && until torsocks wget -T 10 https://raw.githubusercontent.com/maqp/tfc/master/{$p,$i,$s} -q; do sleep 1; done && sudo mv -f {$p,$i,$s} /opt/ && cd /opt/ && sudo chmod 644 {$p,$i,$s} && sudo chown root {$p,$i,$s} && if b2sum $p | grep -Eo '^\w+' | cmp -s <(echo $f); then gpg --import $p && gpg --verify $s $i && bash $i $c; else echo "ERROR: $p has invalid BLAKE2b fingerprint"; fi;
* Networked Computer (Debian / PureOS / *buntu / Mint / LMDE)
c='relay'; f='4a0a8bac2001e629889e56bc7b12f20122e83101504e24f5dcf125675c9fb4ec6cd35cdd20418bccee8d739d613a07236a455a82476f5a2729d7395ebea325dc'; p='pubkey.asc'; i='install.sh'; s=$i.asc; while sudo fuser /var/lib/dpkg/lock >/dev/null 2>&1; do sleep .5; echo -ne "\rAPT is busy"; done && sudo apt update && sudo apt install apt-transport-https -y && sudo apt install tor wget -y && sudo systemctl start tor && cd $HOME && echo -e '\nLaunching Torsocks. Please wait...\n' && until torsocks wget -T 10 https://raw.githubusercontent.com/maqp/tfc/master/{$p,$i,$s} -q; do sleep 1; done && sudo mv -f {$p,$i,$s} /opt/ && cd /opt/ && sudo chmod 644 {$p,$i,$s} && sudo chown root {$p,$i,$s} && if b2sum $p | grep -Eo '^\w+' | cmp -s <(echo $f); then gpg --import $p && gpg --verify $s $i && bash $i $c; else echo "ERROR: $p has invalid BLAKE2b fingerprint"; fi;
* Networked Computer (Tails)
c='tails'; f='4a0a8bac2001e629889e56bc7b12f20122e83101504e24f5dcf125675c9fb4ec6cd35cdd20418bccee8d739d613a07236a455a82476f5a2729d7395ebea325dc'; p='pubkey.asc'; i='install.sh'; s=$i.asc; cd $HOME && sudo apt update && sudo apt install apt-transport-https -y && torsocks wget https://raw.githubusercontent.com/maqp/tfc/master/{$p,$i,$s} -q && sudo mv -f {$p,$i,$s} /opt/ && cd /opt/ && sudo chmod 644 {$p,$i,$s} && sudo chown root {$p,$i,$s} && if b2sum $p | grep -Eo '^\w+' | cmp -s <(echo $f); then gpg --import $p && gpg --verify $s $i && bash $i $c; else echo "ERROR: $p has invalid BLAKE2b fingerprint"; fi;
The installer is fully automatic. For TCB (Source and Destination Computer) configurations, once everything has been downloaded from the network, the installer will turn down the network interfaces of the system. TFC will notify you about this and wait for you to hit a key before continuing. You can confirm the network connection goes down from the GNOME menu, where the network interface message `Wired Connected` disappears. To guarantee the system stays offline, you should disconnect the Ethernet cable permanently at this point. Other installation configurations do not show this behavior as they are not supposed to be disconnected from the network.
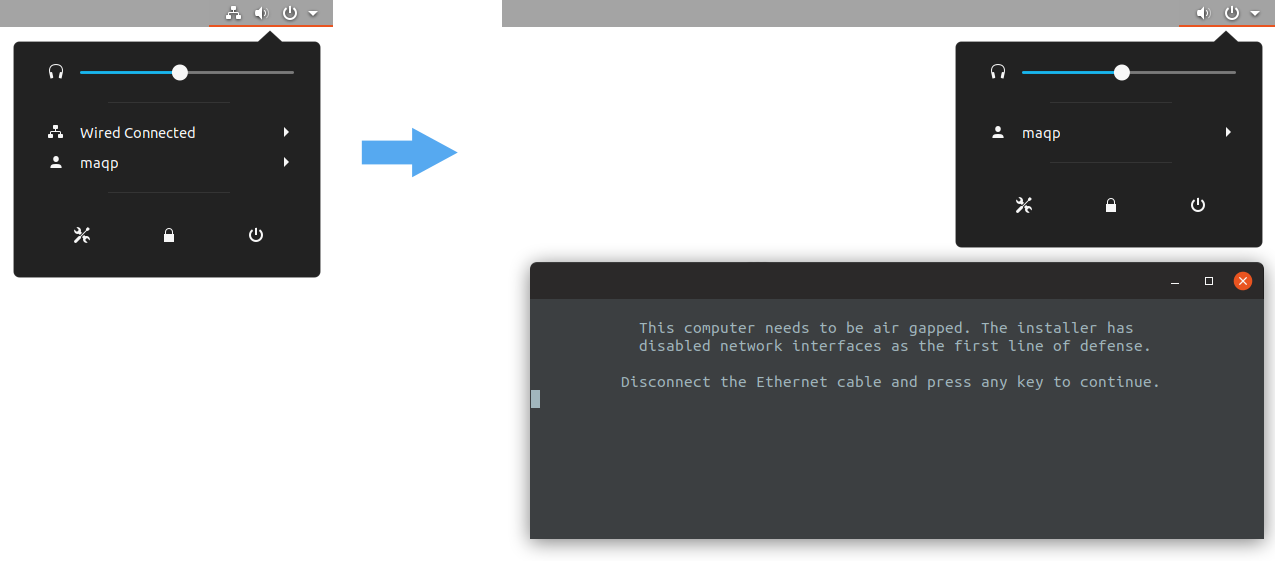
[Indication of disabled network interface](https://www.cs.helsinki.fi/u/oottela/wiki/installation/0.png)
----
For TCB and Relay configurations, the installer will prompt you to insert the USB-to-serial/TTL adapter. If you intend to use a data diode that uses separate USB adapters for serial conversion, you should insert it at this point before pressing Enter. If instead you use a data diode that relies on the built-in serial interface (more common with older hardware), you only need to press Enter to proceed. If the interface is not plugged at this point, serial permissions can not be set for the session, and you must restart your computer before TFC can use the serial port. Note that in the case of Tails configuration, the user `amnesia` is already in the dialout group, thus no restart is required.
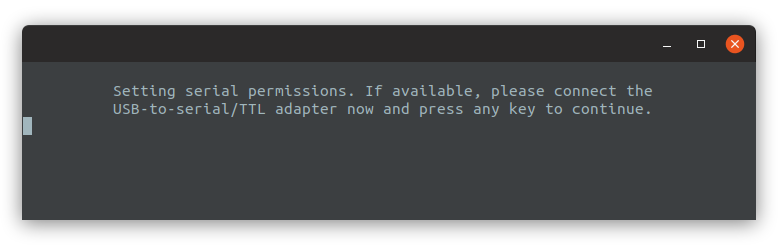
[Indication of disabled network interface](https://www.cs.helsinki.fi/u/oottela/wiki/installation/1.png)
---
The installer will notify you when the installation completes. You can then close the installer by hitting any key.
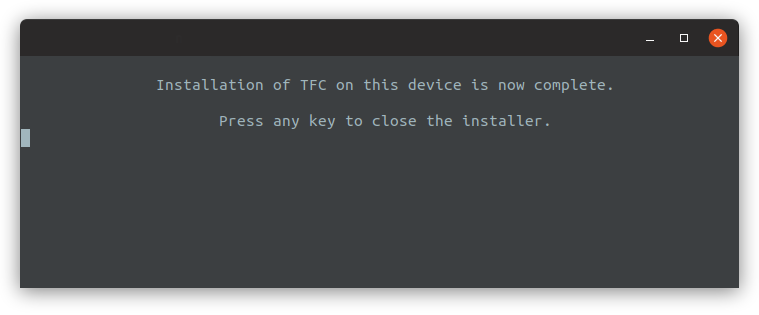
[Message about completed installation](https://www.cs.helsinki.fi/u/oottela/wiki/installation/2.png)
### 4. Launch Transmitter / Receiver / Relay Program
In the case of TCB configurations, TFC is launched from the `TFC-Transmitter` and `TFC-Receiver` launcher which you can find in the OS specific app search system, or under the `Internet`, `Messaging`, or `Security` submenu of the OS's Applications menu.
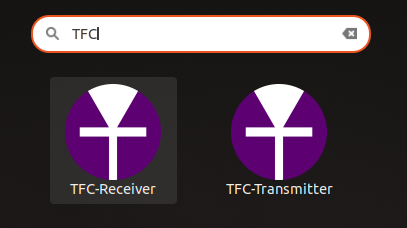
[Transmitter and Receiver Program launchers](https://www.cs.helsinki.fi/u/oottela/wiki/installation/launchers_tcb.png)
You can find the launcher for Relay Program for Networked Computer the same way.
[Relay Program launcher](https://www.cs.helsinki.fi/u/oottela/wiki/installation/launcher_relay.png)
Qubes-isolated configuration
Running TFC on [Qubes](https://www.qubes-os.org/) allows [Xen hypervisor](https://xenproject.org/) based isolation for the TCBs. In `Qubes-isolated configuration`, each TFC program runs on a dedicated Debian 10 virtual machine (VM) called a Qube. The Source and Destination VMs are isolated from the network by the hypervisor, and inter-VM data transfers are handled with [qrexec](https://www.qubes-os.org/doc/qrexec/) RPC calls.
The `Qubes-isolated configuration` adds **some** protection against remote key/plaintext compromise. It is not (and will never be) as secure as the `hardware-isolated configuration`:
* If the Networked VM running the Relay Program and the hypervisor are compromised with a chain of exploits where one allows VM escape, the endpoint security of the entire host OS will fail catastrophically.
* If the Networked VM is compromised and the attacker manages to compromise the Destination VM through the qrexec's vchan channel, the attacker can then exfiltrate keys and plaintexts [via Xen's shared memory](https://github.com/QubesOS/qubes-issues/issues/6102#issuecomment-704593163
), or they can establish a slow, control flow based covert channel, where e.g. the RPC buffer's "full" status is used to signal whether a bit in some sensitive key is one or zero.
* Furthermore, there are numerous bugs in CPUs that allow VMs to [access sensitive data of another VM via CPU cache](https://github.com/QubesOS/qubes-issues/issues/6102#issuecomment-704593163
).
That being said, architecture-wise, the `Qubes-isolated configuration` is still much, much more secure than e.g. the
`local testing configuration`, or any other E2EE messaging app on a single networked OS, whether that OS is running as
host or as a Qubes guest VM. An attacker can compromise a networked OS via many paths, and if keys and plaintexts
reside in that system, they are trivial to exfiltrate. In contrast, TFC's `Qubes-isolated configuration` has extremely
tiny attack surface, as compromise of Destination VM requires compromising the qrexec framework, or TFC's RPC service:
* Xen / qrexec is much easier to secure than an entire OS, and only [60 Xen vulnerabilities](https://www.qubes-os.org/security/xsa/) over the past ~9 years have affected Qubes.
* The TFC's RPC service merely caches the incoming ciphertexts into files. Furthermore, the stored data is always
encoded in Base85 which adds to the execution prevention that's already provided by the guest OS's access control
lists.
The `Qubes-isolated configuration` should thus be used when the adversary is assumed to be in possession of some exploits, but not in possession of rare Xen exploits.
To get started, [download](https://www.qubes-os.org/downloads/#qubes-release-4-0-3) the Qubes OS 4.0.3 ISO file, [authenticate](https://www.qubes-os.org/security/verifying-signatures/) it, and [install](https://www.qubes-os.org/doc/installation-guide/) Qubes on your computer.
### 3. Update QubesOS
[Update](https://www.qubes-os.org/doc/updating-qubes-os/) the [dom0](https://www.qubes-os.org/doc/software-update-dom0/) system, and both the `debian-10` and the `fedora-30` [Template VM](https://www.qubes-os.org/doc/software-update-domu/#updating-software-in-templatevms) before installing TFC.
This can be done by opening the `Qube Manager` by navigating to `Applications menu` > `System Tools` > `Qube Manager`...
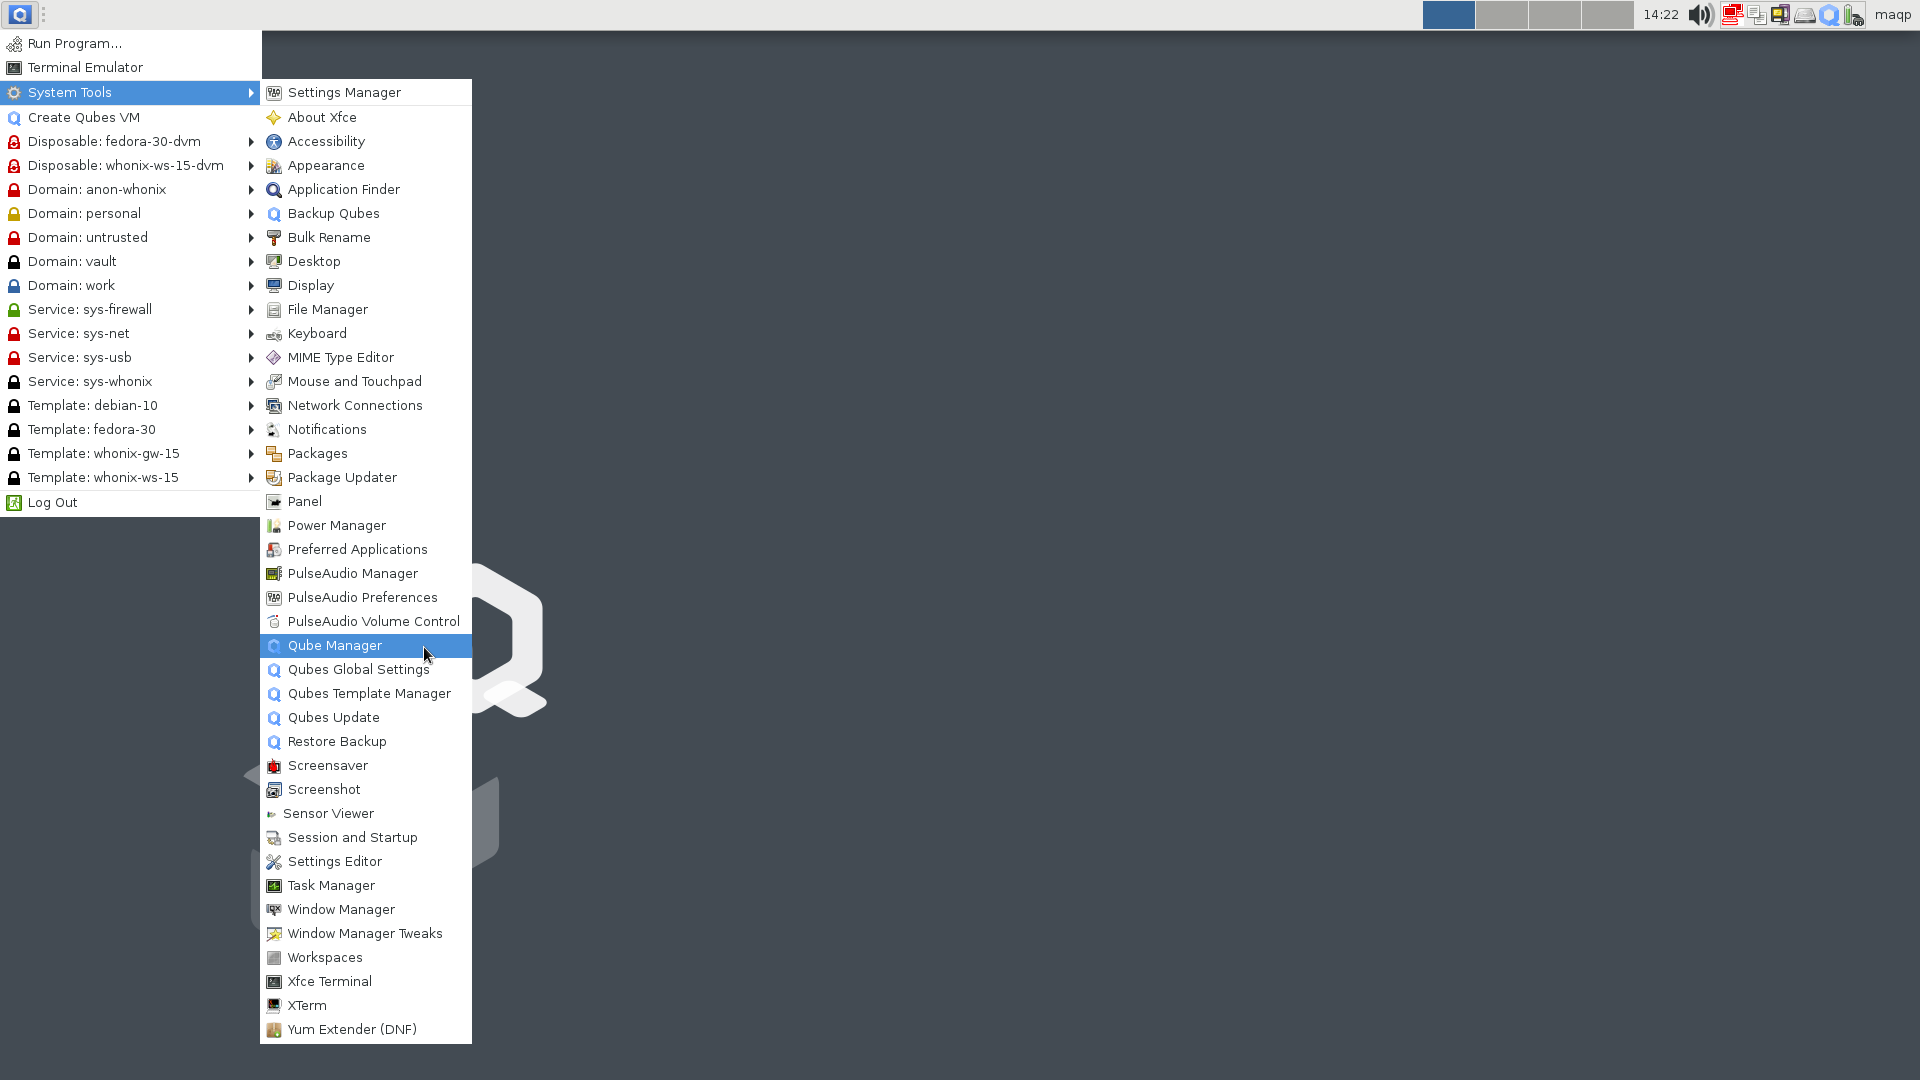
[Qube Manager location](https://www.cs.helsinki.fi/u/oottela/wiki/qubes/2_qube_manager_location.png)
...and by right-clicking the `dom0`, `debian-10` Template VM, and the `fedora-30` Template VM, and by selecting `Update qube` from the context menu:
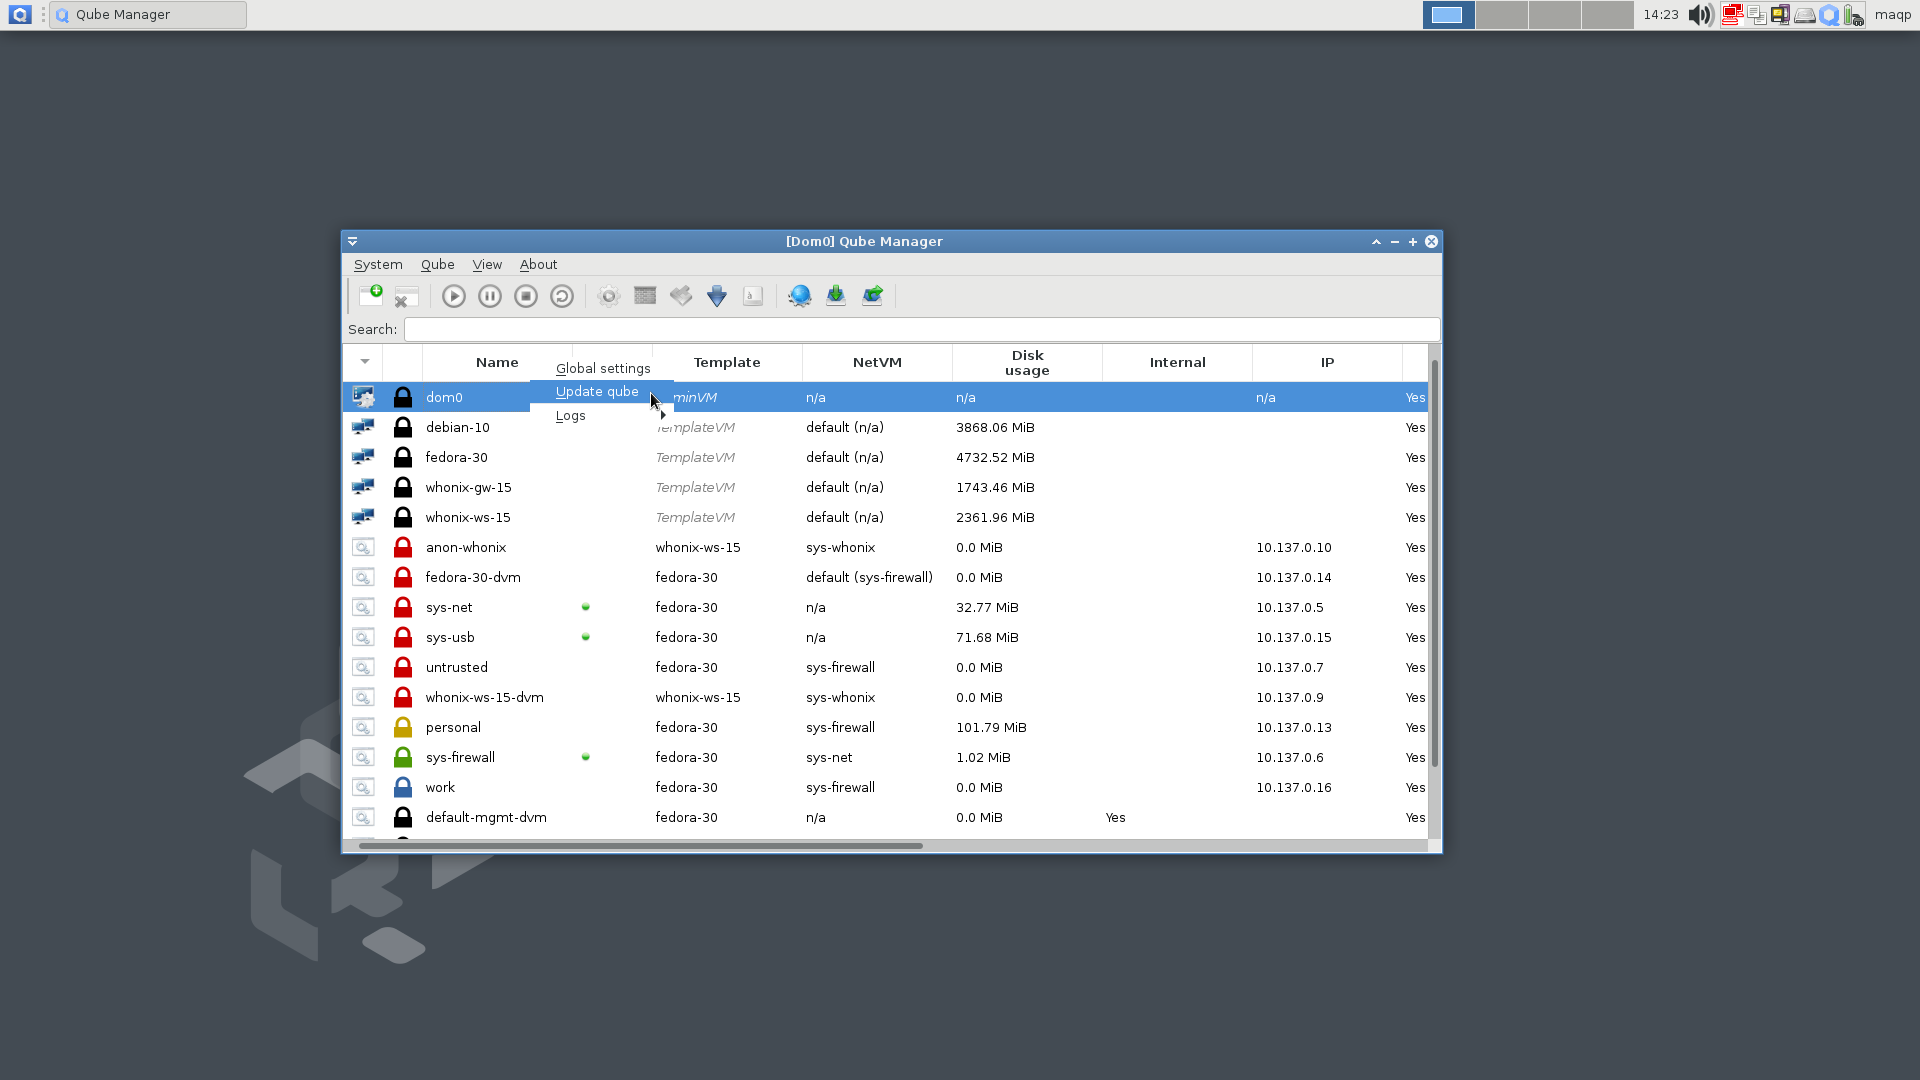
[Updating qube from context menu](https://www.cs.helsinki.fi/u/oottela/wiki/qubes/3_dom0_update_via_qube_manager.png)
### 4. Create TFC VMs
You can create the VMs by clicking on the `Applications` button (Qubes OS logo in the top-left corner of the screen), and by clicking the `Create Qubes VM` from the appearing drop-down menu.
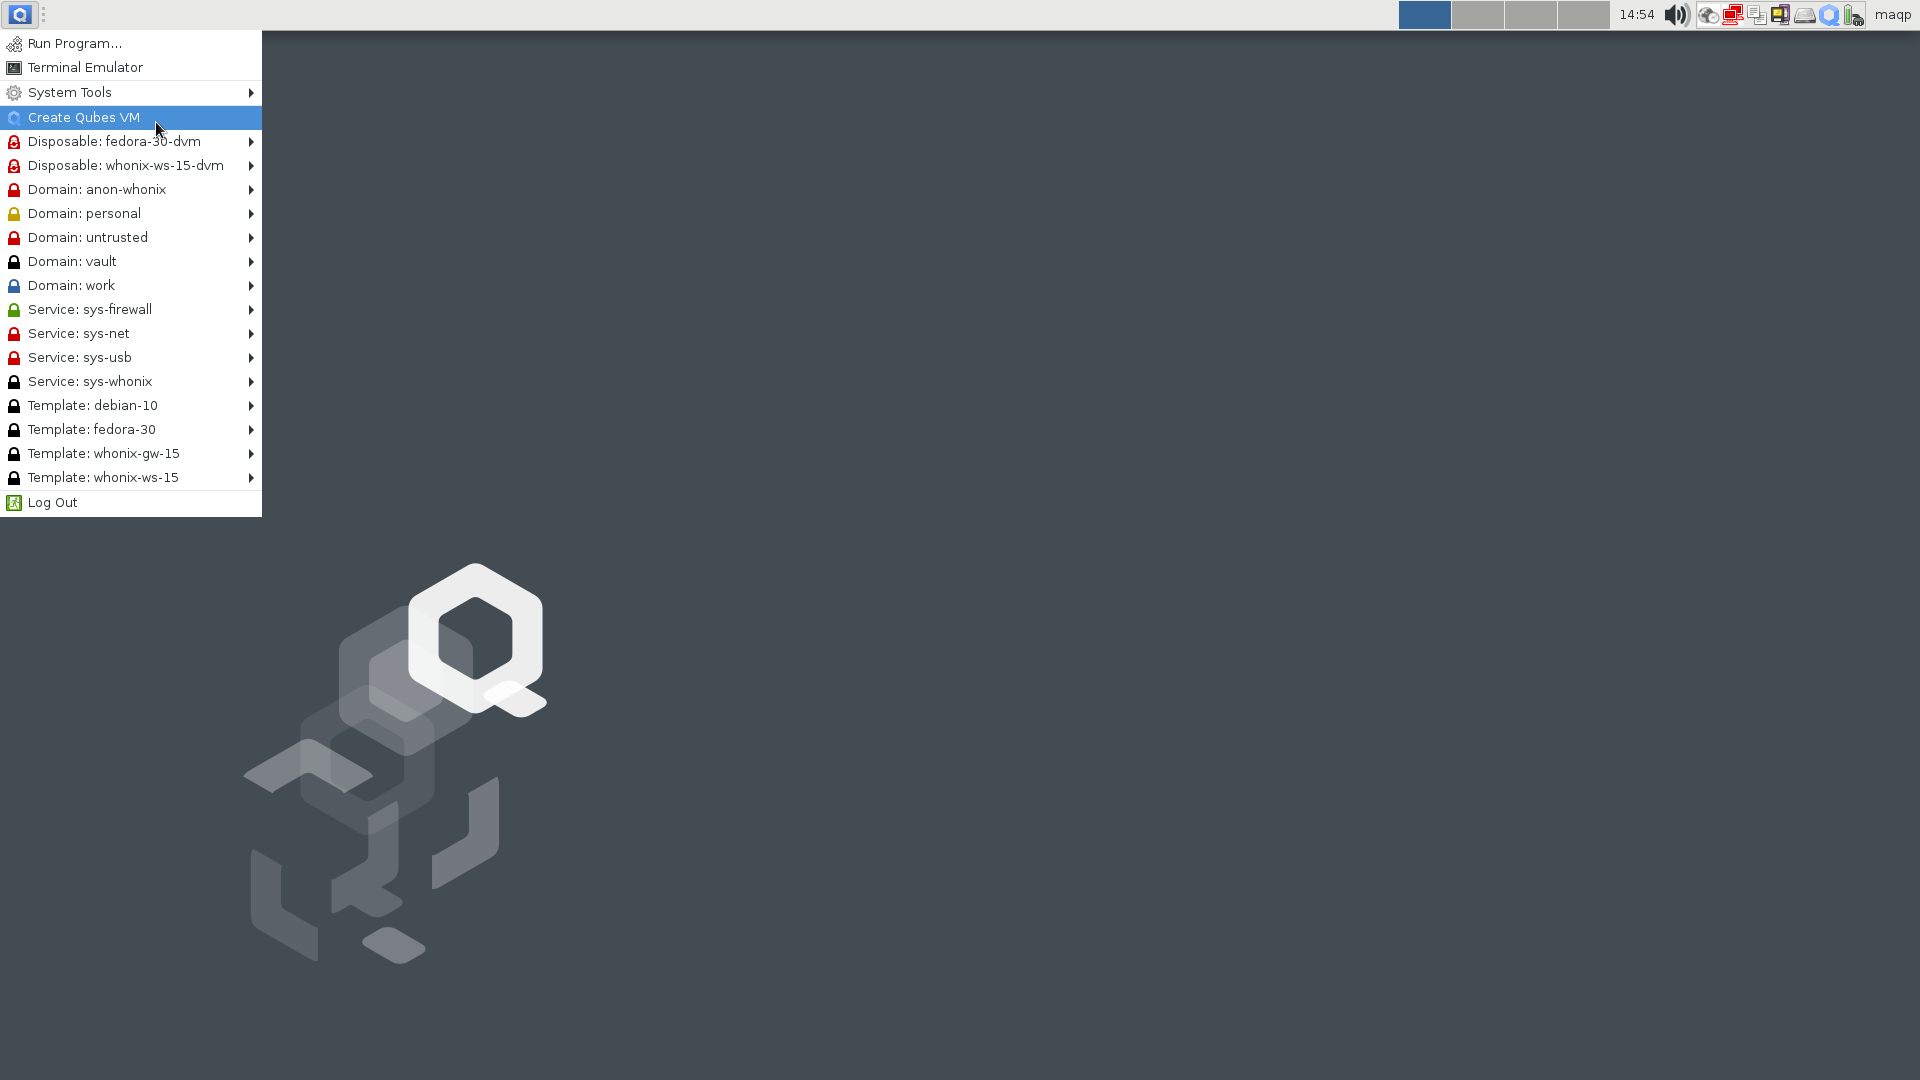
[Creating new Qubes VMs](https://www.cs.helsinki.fi/u/oottela/wiki/qubes/23_create_qubes_vm_location.png)
Create following VMs for TFC.
#### WARNING: The VM names are hard-coded into TFC. Use the exact same names for your TFC VMs.
Standalone Source Computer VM
1. **Name**: TFC-Source
2. **Label color**: blue
3. **Type**: Standalone qube copied from a template
4. **Template**: debian-11
5. **Networking**: sys-firewall
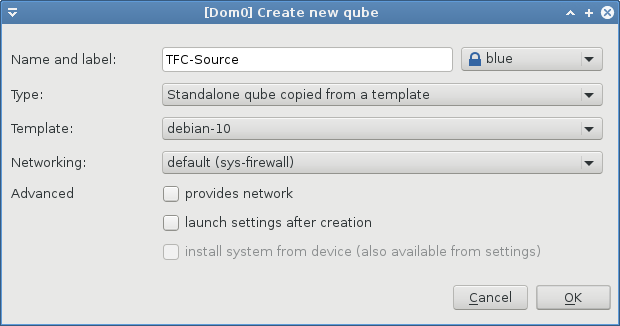
[TFC-Source VM creation](https://www.cs.helsinki.fi/u/oottela/wiki/qubes/24_vm_parameters_source.png)
Standalone Networked Computer VM
1. **Name**: TFC-Networker
2. **Label color**: red
3. **Type**: Standalone qube copied from a template
4. **Template**: debian-11
5. **Networking**: sys-firewall
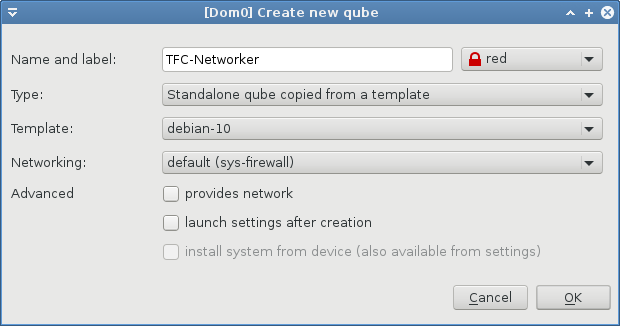
[TFC-Networker VM creation](https://www.cs.helsinki.fi/u/oottela/wiki/qubes/25_vm_parameters_networker.png)
Standalone Destination Computer VM
1. **Name**: TFC-Destination
2. **Label color**: yellow
3. **Type**: Standalone qube copied from a template
4. **Template**: debian-11
5. **Networking**: sys-firewall
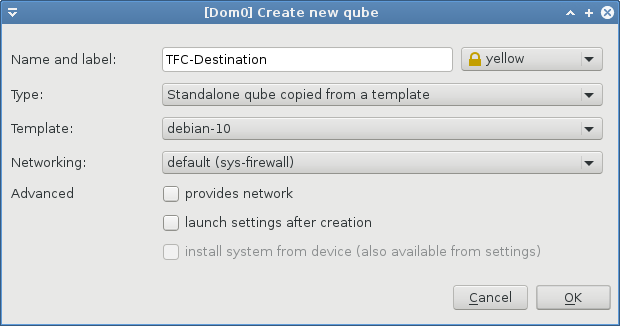
[TFC-Destination VM creation](https://www.cs.helsinki.fi/u/oottela/wiki/qubes/26_vm_parameters_destination.png)
If you're an advanced user, you should increase the amount of RAM and the number of available threads (`VCPUs no.`) for the Source and Destination VMs to allocate more resources for the Argon2 key derivation.

[VM Memory/CPU settings](https://www.cs.helsinki.fi/u/oottela/wiki/qubes/28_qube_memory_parameters.png)
### 5. Open the TFC wiki page anonymously
5.1. Launch the Tor Browser by navigating to `Applications` > `Domain: anon-whonix` > `anon-whonix: Tor Browser (AnonDist)`.
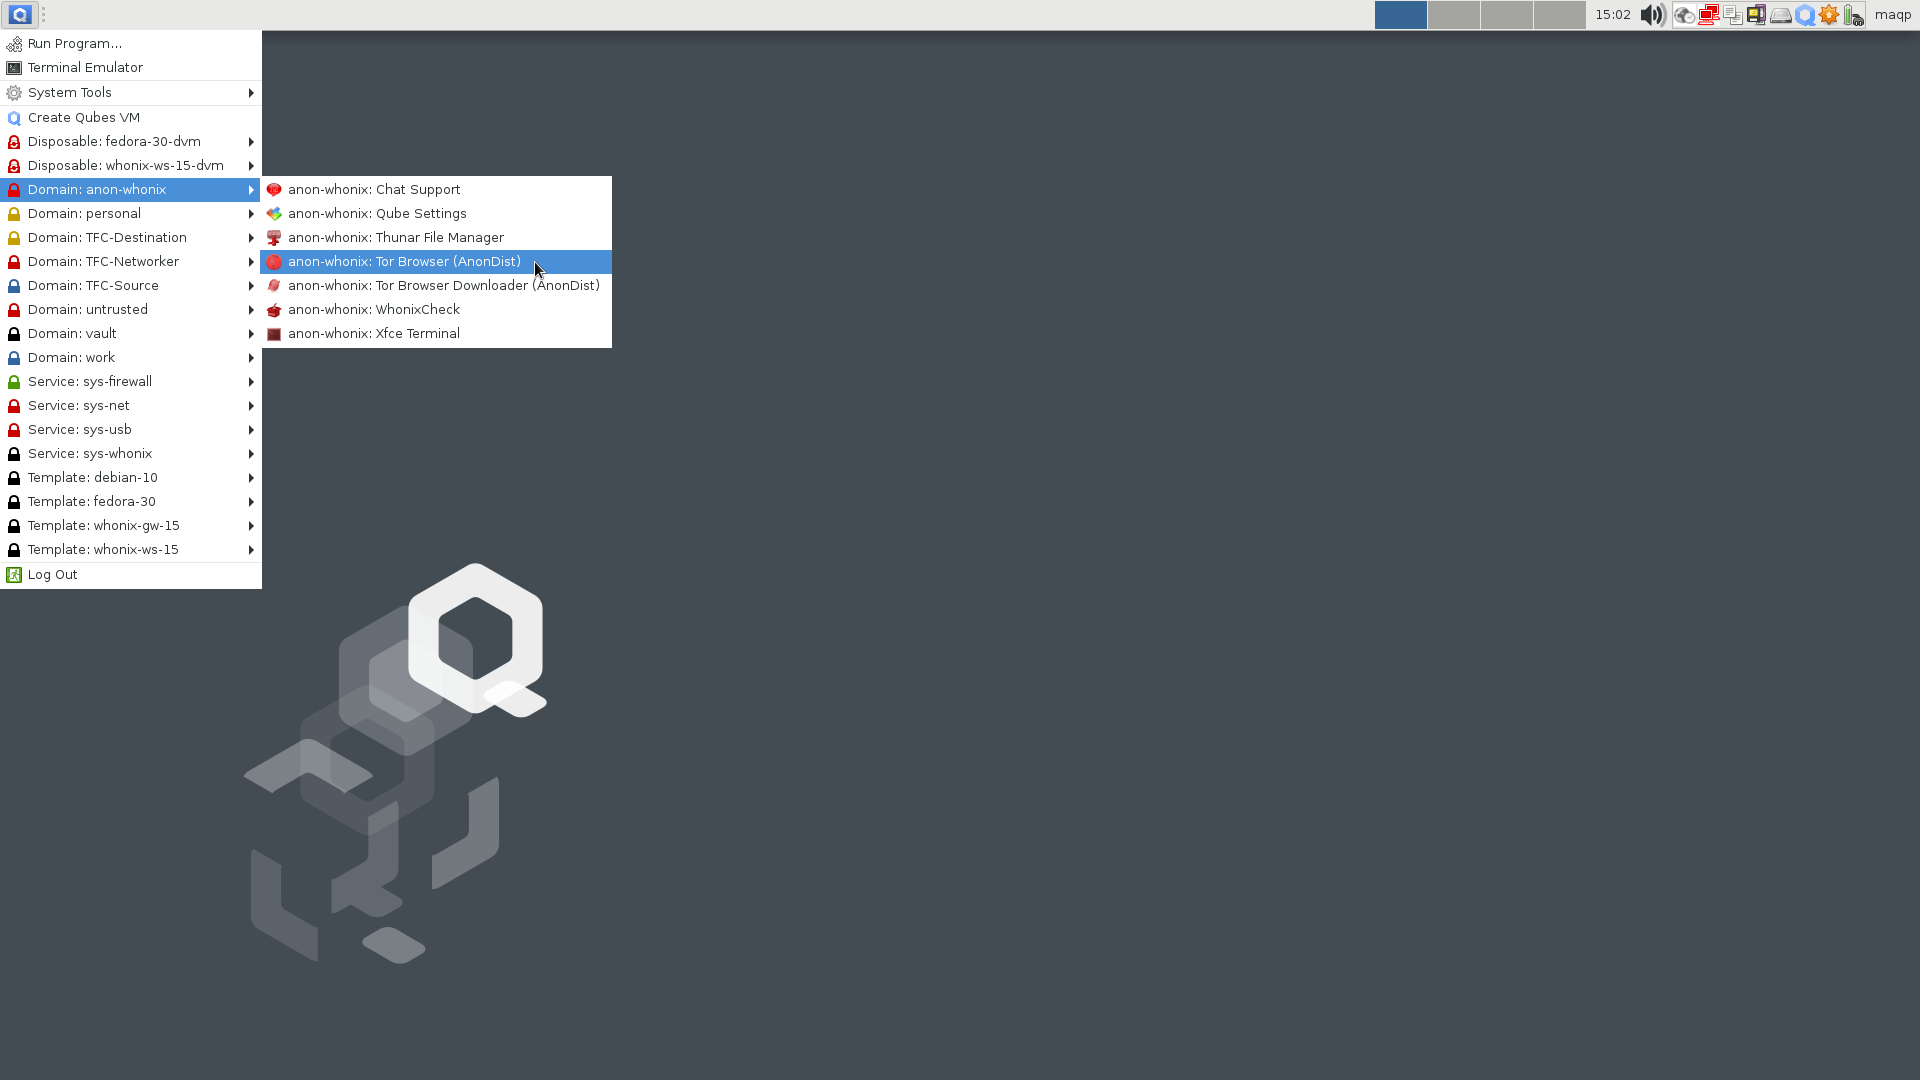
[Launching Tor Browser on Whonix domain](https://www.cs.helsinki.fi/u/oottela/wiki/qubes/29_launch_tor_browser.png)
5.2. Navigate to this very page (https://github.com/maqp/tfc/wiki/Installation) using the Tor Browser
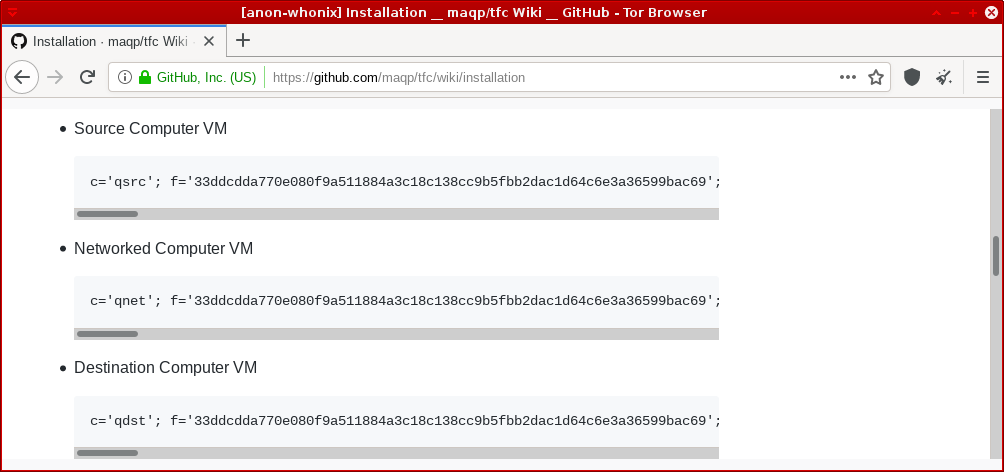
[TFC installer page open in Tor Browser](https://www.cs.helsinki.fi/u/oottela/wiki/qubes/30_navigate_to_tfc_wiki.png)
### 6. Run the TFC installer one-liner in the TFC VM terminals
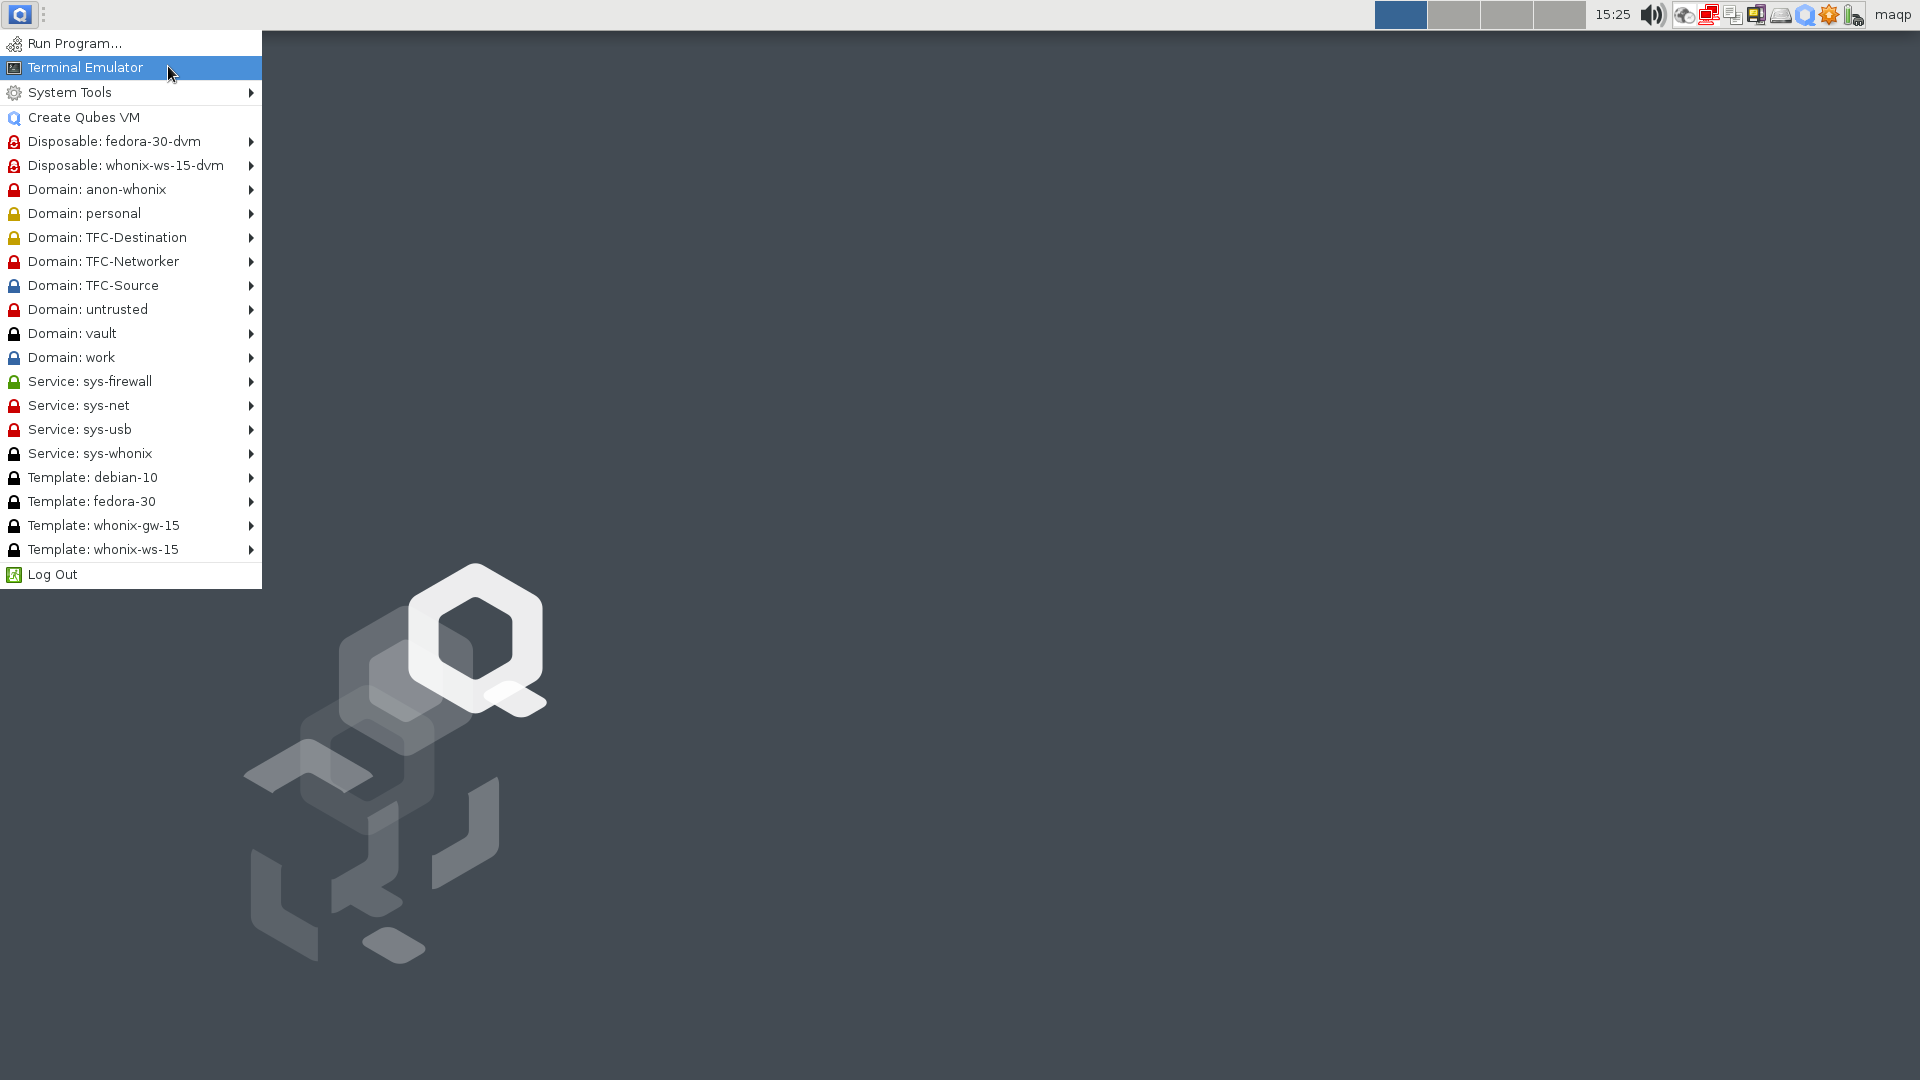
6.1. From the `Applications` menu, click on the `Terminal` under each TFC VM
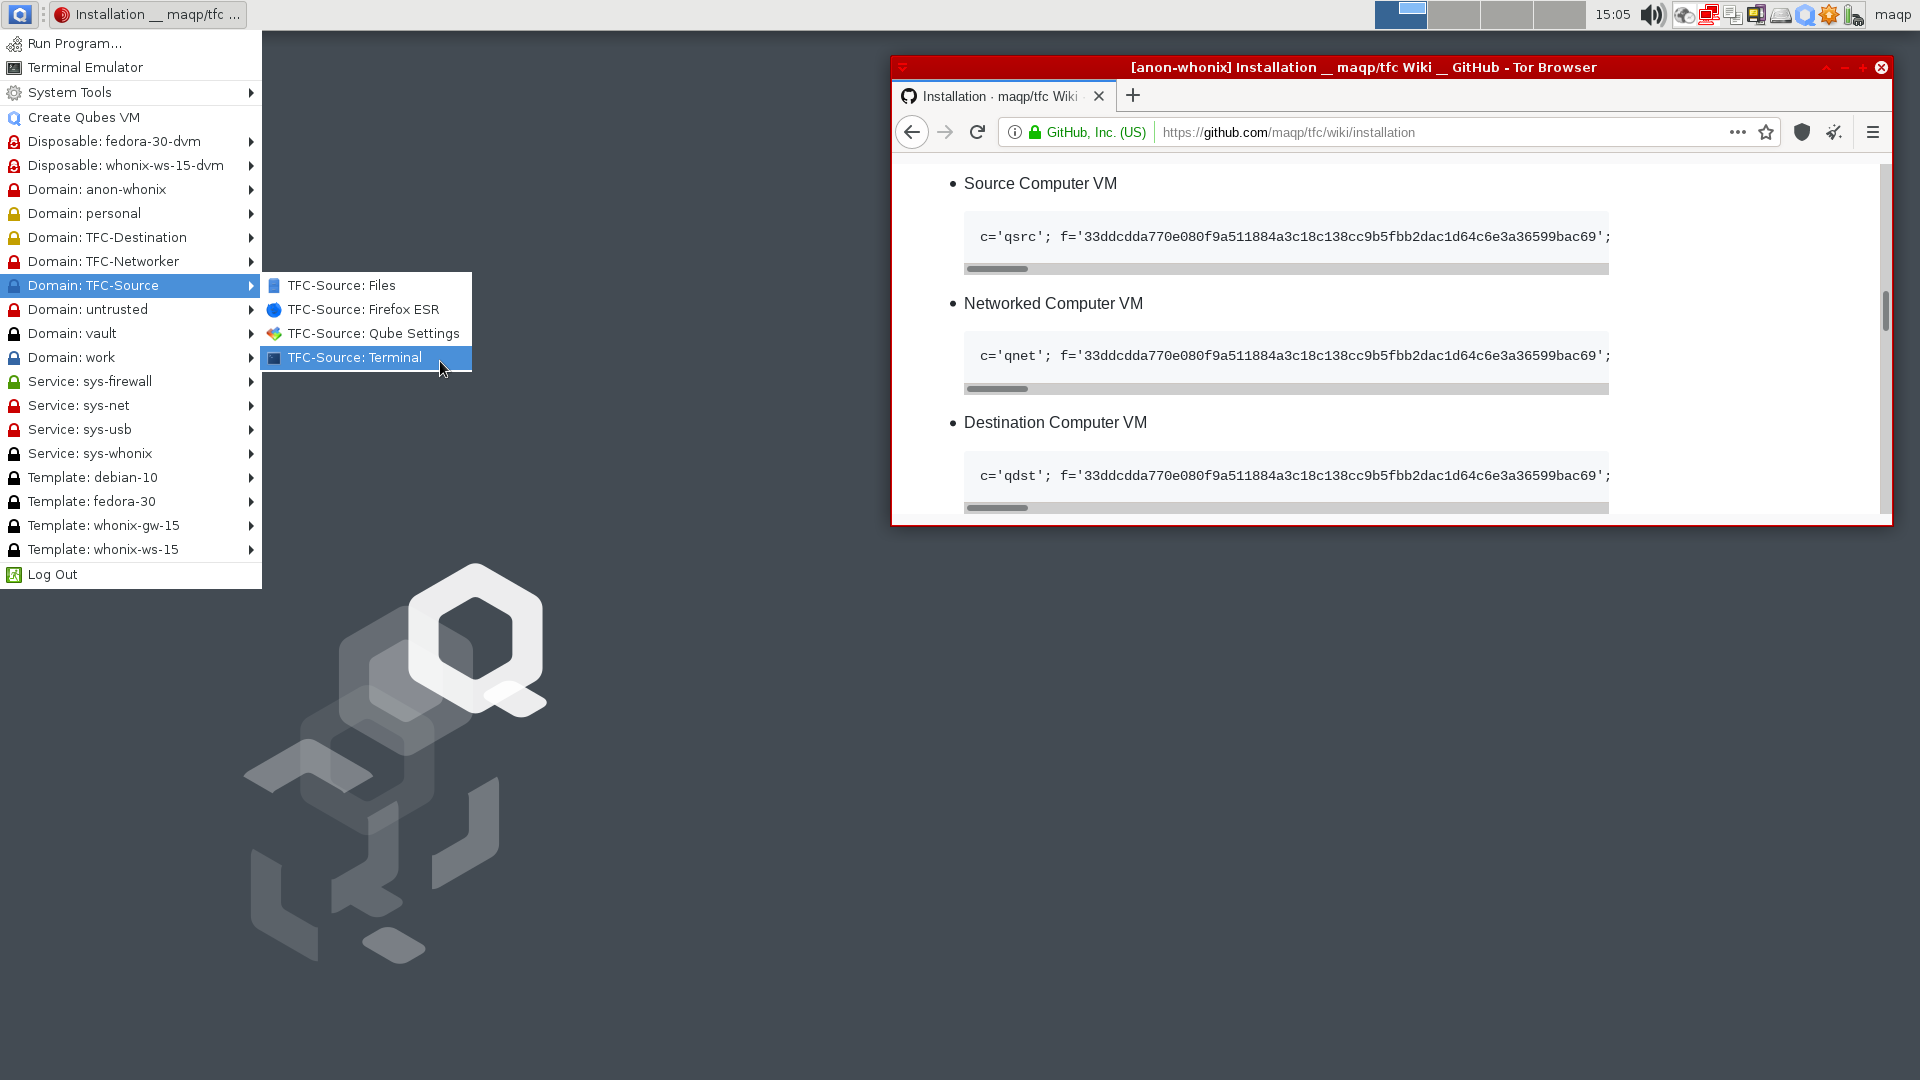
[Launching TFC VM's terminal](https://www.cs.helsinki.fi/u/oottela/wiki/qubes/31_tfc_source_terminal_location.png)
6.2. [Copy and paste](https://www.qubes-os.org/doc/copy-paste/) the correct one-liner (below) from the Tor Browser window into the Terminal of the correct VM.
* TFC-Source
c='qsrc'; f='4a0a8bac2001e629889e56bc7b12f20122e83101504e24f5dcf125675c9fb4ec6cd35cdd20418bccee8d739d613a07236a455a82476f5a2729d7395ebea325dc'; p='pubkey.asc'; i='install.sh'; s=$i.asc; while sudo fuser /var/lib/dpkg/lock >/dev/null 2>&1; do sleep .5; echo -ne "\rAPT is busy"; done && sudo apt update && sudo apt install apt-transport-https -y && sudo apt install tor wget -y && sudo systemctl start tor && cd $HOME && echo -e '\nLaunching Torsocks. Please wait...\n' && until torsocks wget -T 10 https://raw.githubusercontent.com/maqp/tfc/master/{$p,$i,$s} -q; do sleep 1; done && sudo mv -f {$p,$i,$s} /opt/ && cd /opt/ && sudo chmod 644 {$p,$i,$s} && sudo chown root {$p,$i,$s} && if b2sum $p | grep -Eo '^\w+' | cmp -s <(echo $f); then gpg --import $p && gpg --verify $s $i && bash $i $c; else echo "ERROR: $p has invalid BLAKE2b fingerprint"; fi;
* TFC-Networker
c='qnet'; f='4a0a8bac2001e629889e56bc7b12f20122e83101504e24f5dcf125675c9fb4ec6cd35cdd20418bccee8d739d613a07236a455a82476f5a2729d7395ebea325dc'; p='pubkey.asc'; i='install.sh'; s=$i.asc; while sudo fuser /var/lib/dpkg/lock >/dev/null 2>&1; do sleep .5; echo -ne "\rAPT is busy"; done && sudo apt update && sudo apt install apt-transport-https -y && sudo apt install tor wget -y && sudo systemctl start tor && cd $HOME && echo -e '\nLaunching Torsocks. Please wait...\n' && until torsocks wget -T 10 https://raw.githubusercontent.com/maqp/tfc/master/{$p,$i,$s} -q; do sleep 1; done && sudo mv -f {$p,$i,$s} /opt/ && cd /opt/ && sudo chmod 644 {$p,$i,$s} && sudo chown root {$p,$i,$s} && if b2sum $p | grep -Eo '^\w+' | cmp -s <(echo $f); then gpg --import $p && gpg --verify $s $i && bash $i $c; else echo "ERROR: $p has invalid BLAKE2b fingerprint"; fi;
* TFC-Destination
c='qdst'; f='4a0a8bac2001e629889e56bc7b12f20122e83101504e24f5dcf125675c9fb4ec6cd35cdd20418bccee8d739d613a07236a455a82476f5a2729d7395ebea325dc'; p='pubkey.asc'; i='install.sh'; s=$i.asc; while sudo fuser /var/lib/dpkg/lock >/dev/null 2>&1; do sleep .5; echo -ne "\rAPT is busy"; done && sudo apt update && sudo apt install apt-transport-https -y && sudo apt install tor wget -y && sudo systemctl start tor && cd $HOME && echo -e '\nLaunching Torsocks. Please wait...\n' && until torsocks wget -T 10 https://raw.githubusercontent.com/maqp/tfc/master/{$p,$i,$s} -q; do sleep 1; done && sudo mv -f {$p,$i,$s} /opt/ && cd /opt/ && sudo chmod 644 {$p,$i,$s} && sudo chown root {$p,$i,$s} && if b2sum $p | grep -Eo '^\w+' | cmp -s <(echo $f); then gpg --import $p && gpg --verify $s $i && bash $i $c; else echo "ERROR: $p has invalid BLAKE2b fingerprint"; fi;
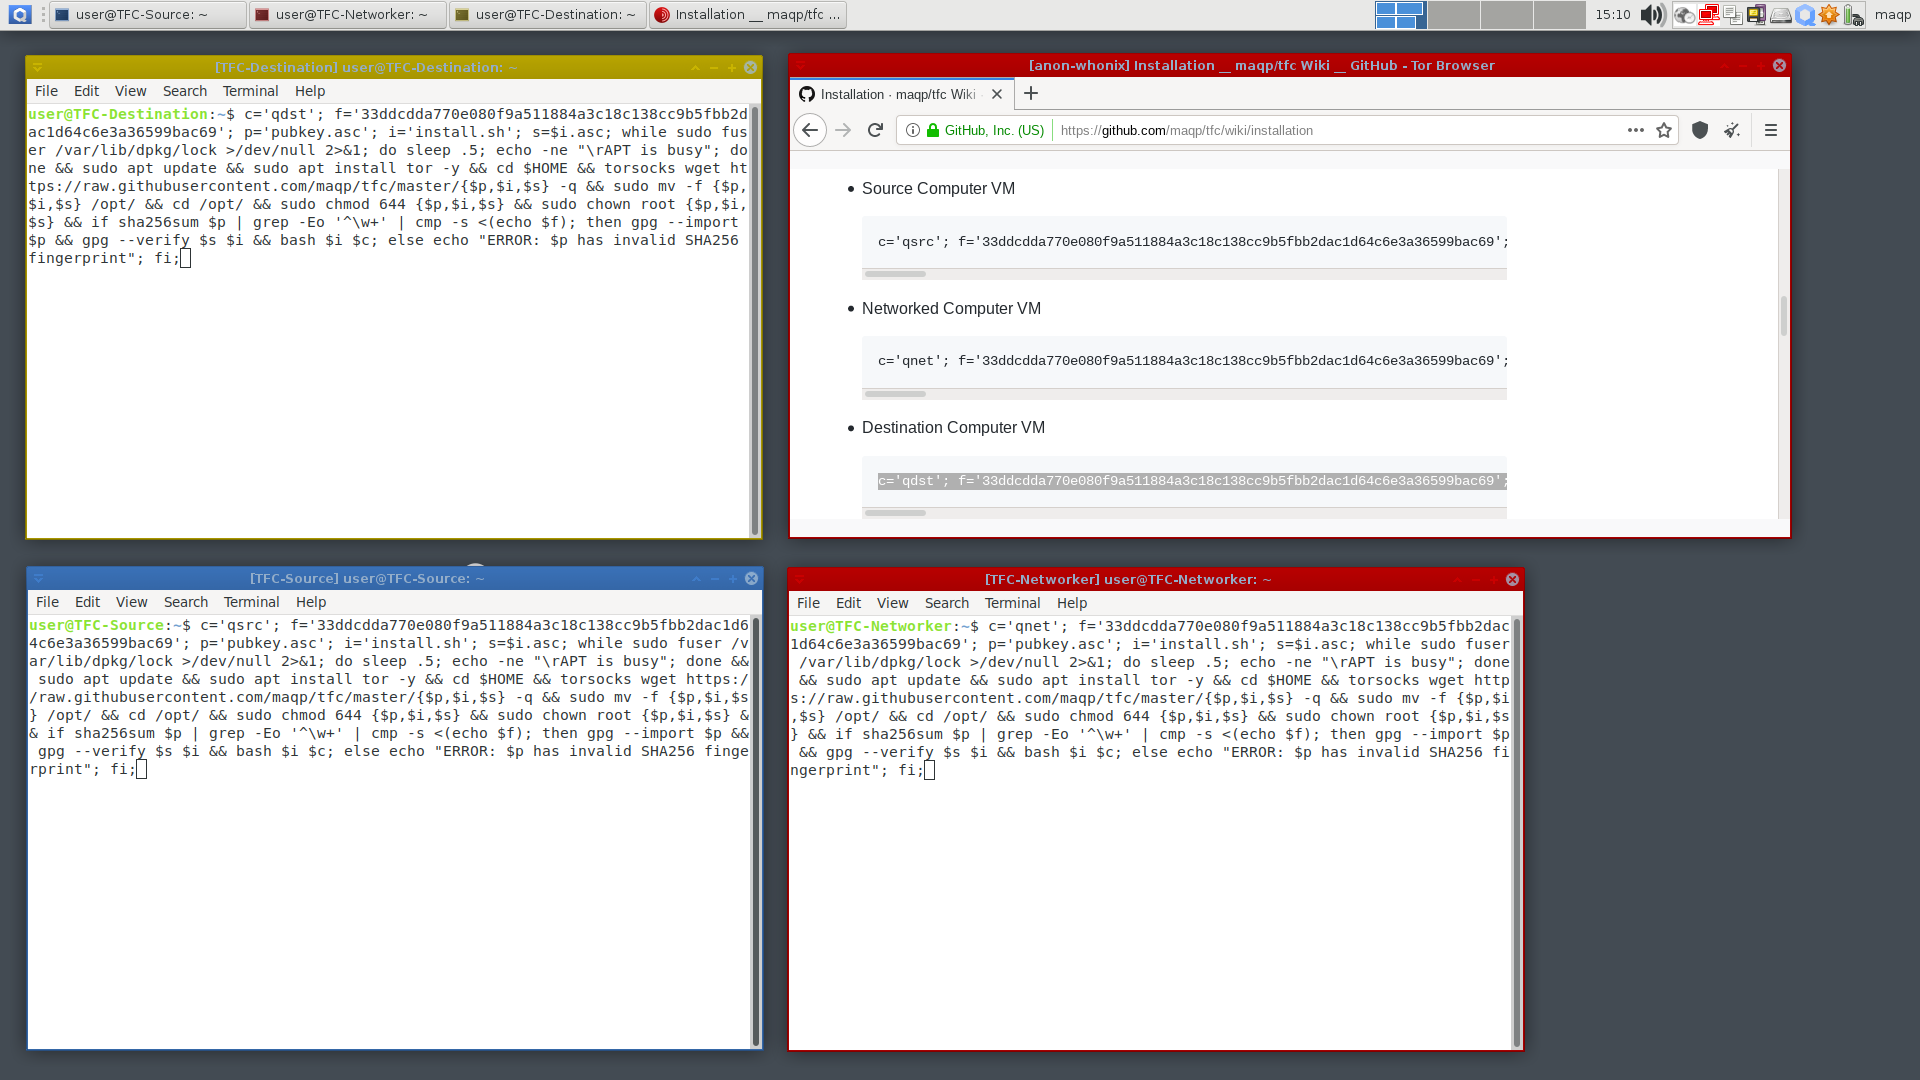
[Installer one-liners copied to TFC VMs](https://www.cs.helsinki.fi/u/oottela/wiki/qubes/36_copied_tfc_installation_commands.png)
Make sure to double-check that you copied the correct command into each terminal. Once you've verified the command, you can press Enter in each terminal to start the installation for that VM. The rest of the installation is fully automatic and the installer will notify you when the installation completes. You can then close the installer by focusing the VM and hitting any key.
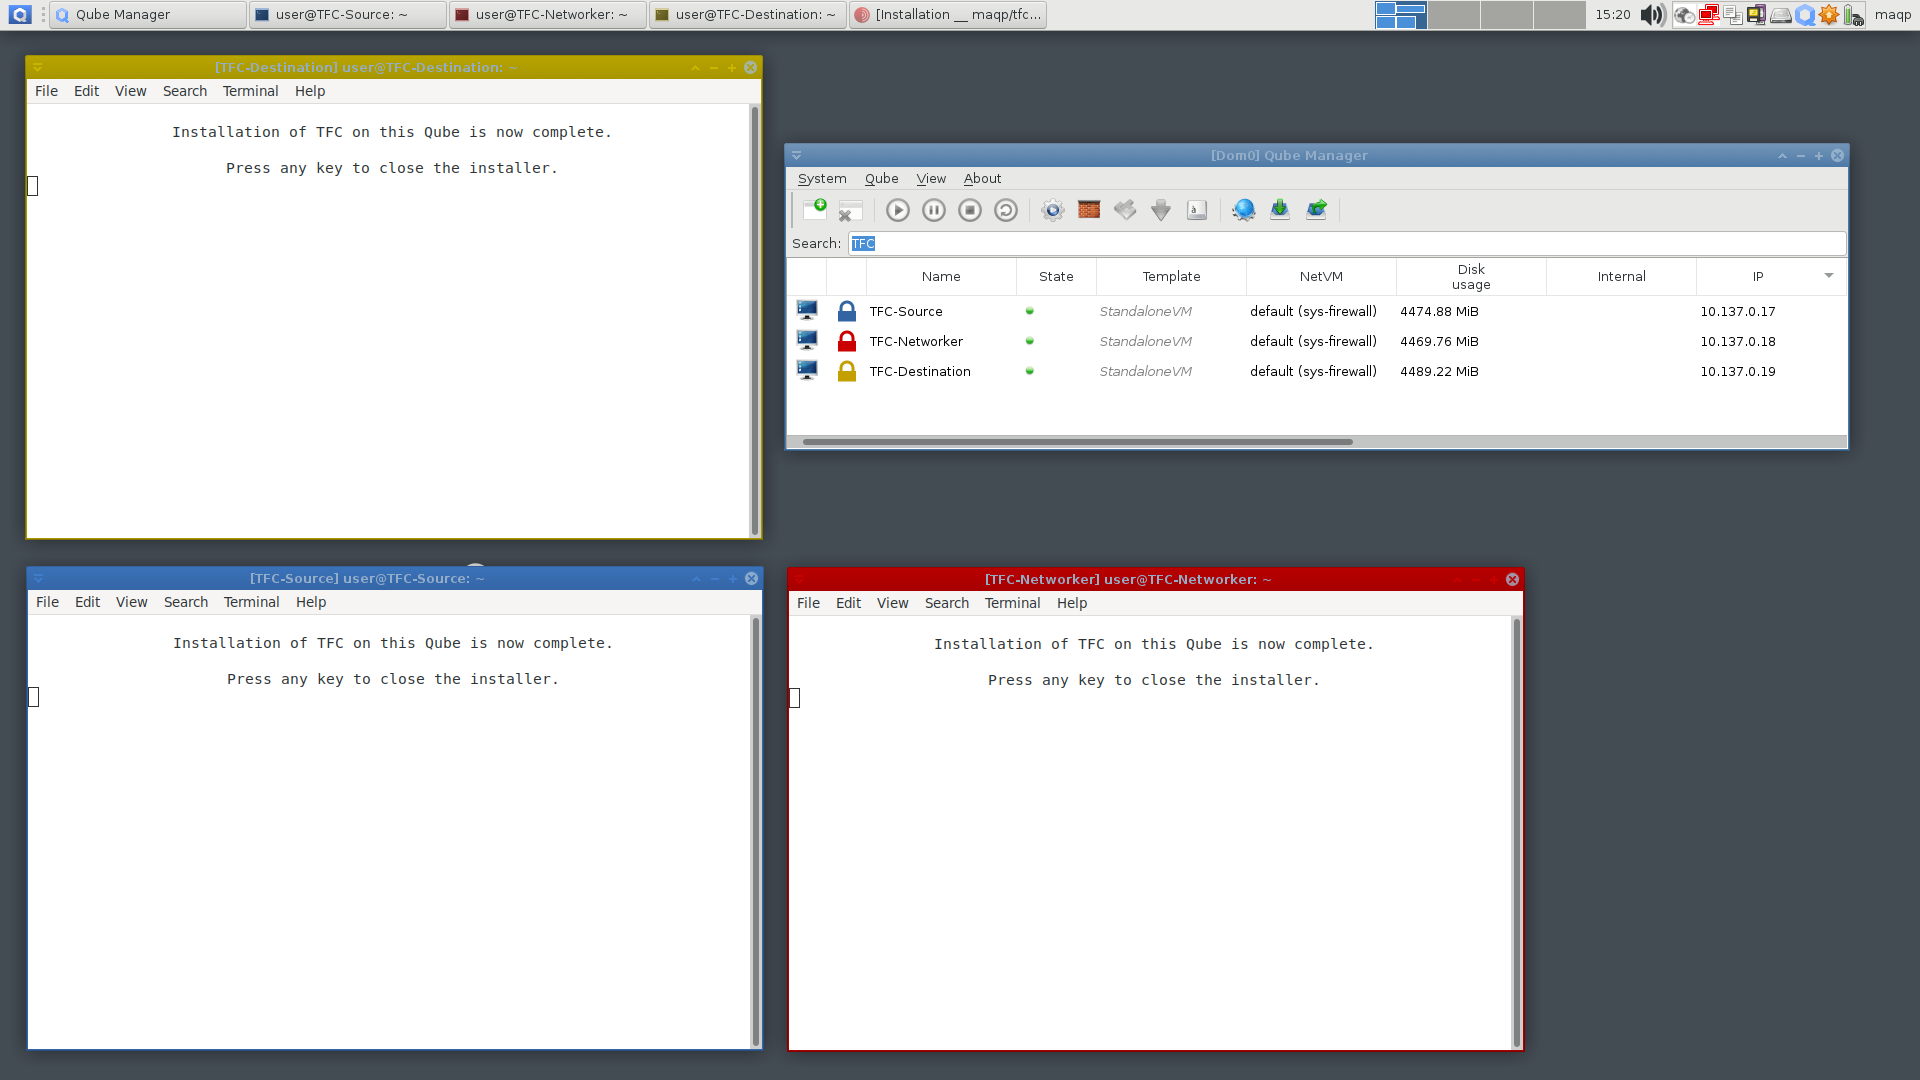
[Completed TFC installers](https://www.cs.helsinki.fi/u/oottela/wiki/qubes/43_completed_tfc_vm_installations.png)
### 7. Create dom0 policy files
The installation of TFC on the three VMs takes a few minutes. In the meantime, you should open the dom0 terminal
[Launching dom0 terminal](https://www.cs.helsinki.fi/u/oottela/wiki/qubes/44_dom0_launch_terminal.png)
and type these two commands into dom0's terminal. These commands set the policies that allow the VMs to talk to one another over qrexec.
echo "TFC-Source TFC-Networker allow" > /etc/qubes-rpc/policy/tfc.SourceNetworker
echo "TFC-Networker TFC-Destination allow" > /etc/qubes-rpc/policy/tfc.NetworkerDestination
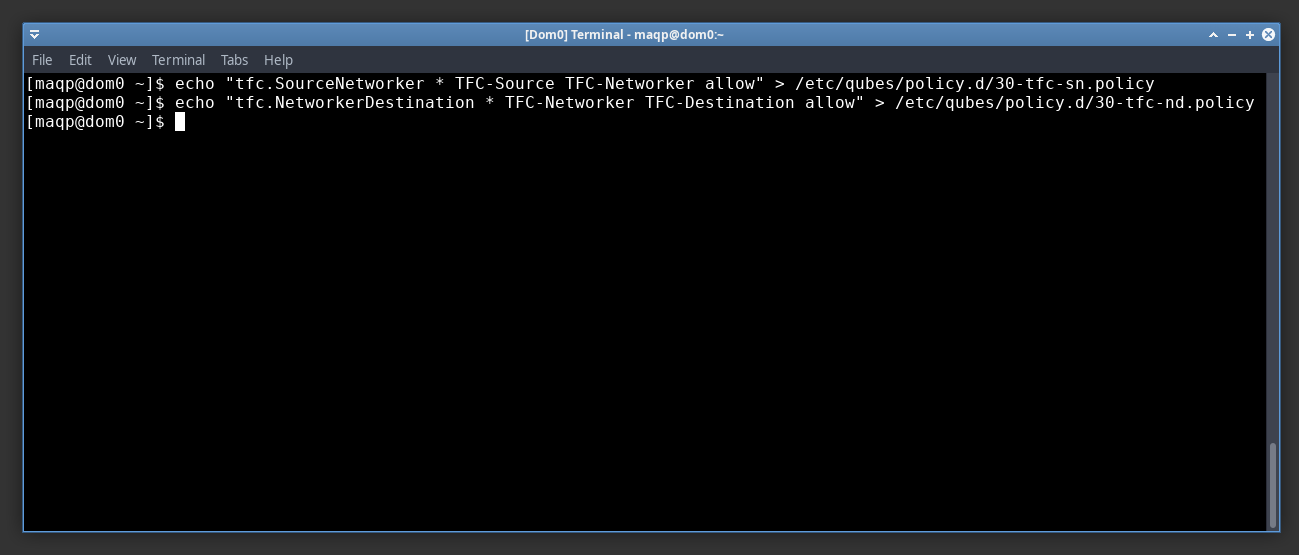
[Launching dom0 terminal](https://www.cs.helsinki.fi/u/oottela/wiki/qubes/45_dom0_commands2.png)
### 8. Disable network from Source and Destination VM
WARNING! Do not proceed to this step until installation has completed on `TFC-Source` and `TFC-Destination` VMs.
Repeat following steps for both `TFC-Source` and `TFC-Destination` VMs:
1. In the `Qube Manager`, right-click the VM name and select `Kill qube`, and click `Yes` in the confirmation dialogue
2. Right-click the VM name and select `Qube Settings`
3. In the `Qube Settings` panel, stay on the `Basic` tab and click the `Networking` drop-down menu.
4. Select `(none)` in the drop-down menu
5. Click `OK` in the bottom right corner.
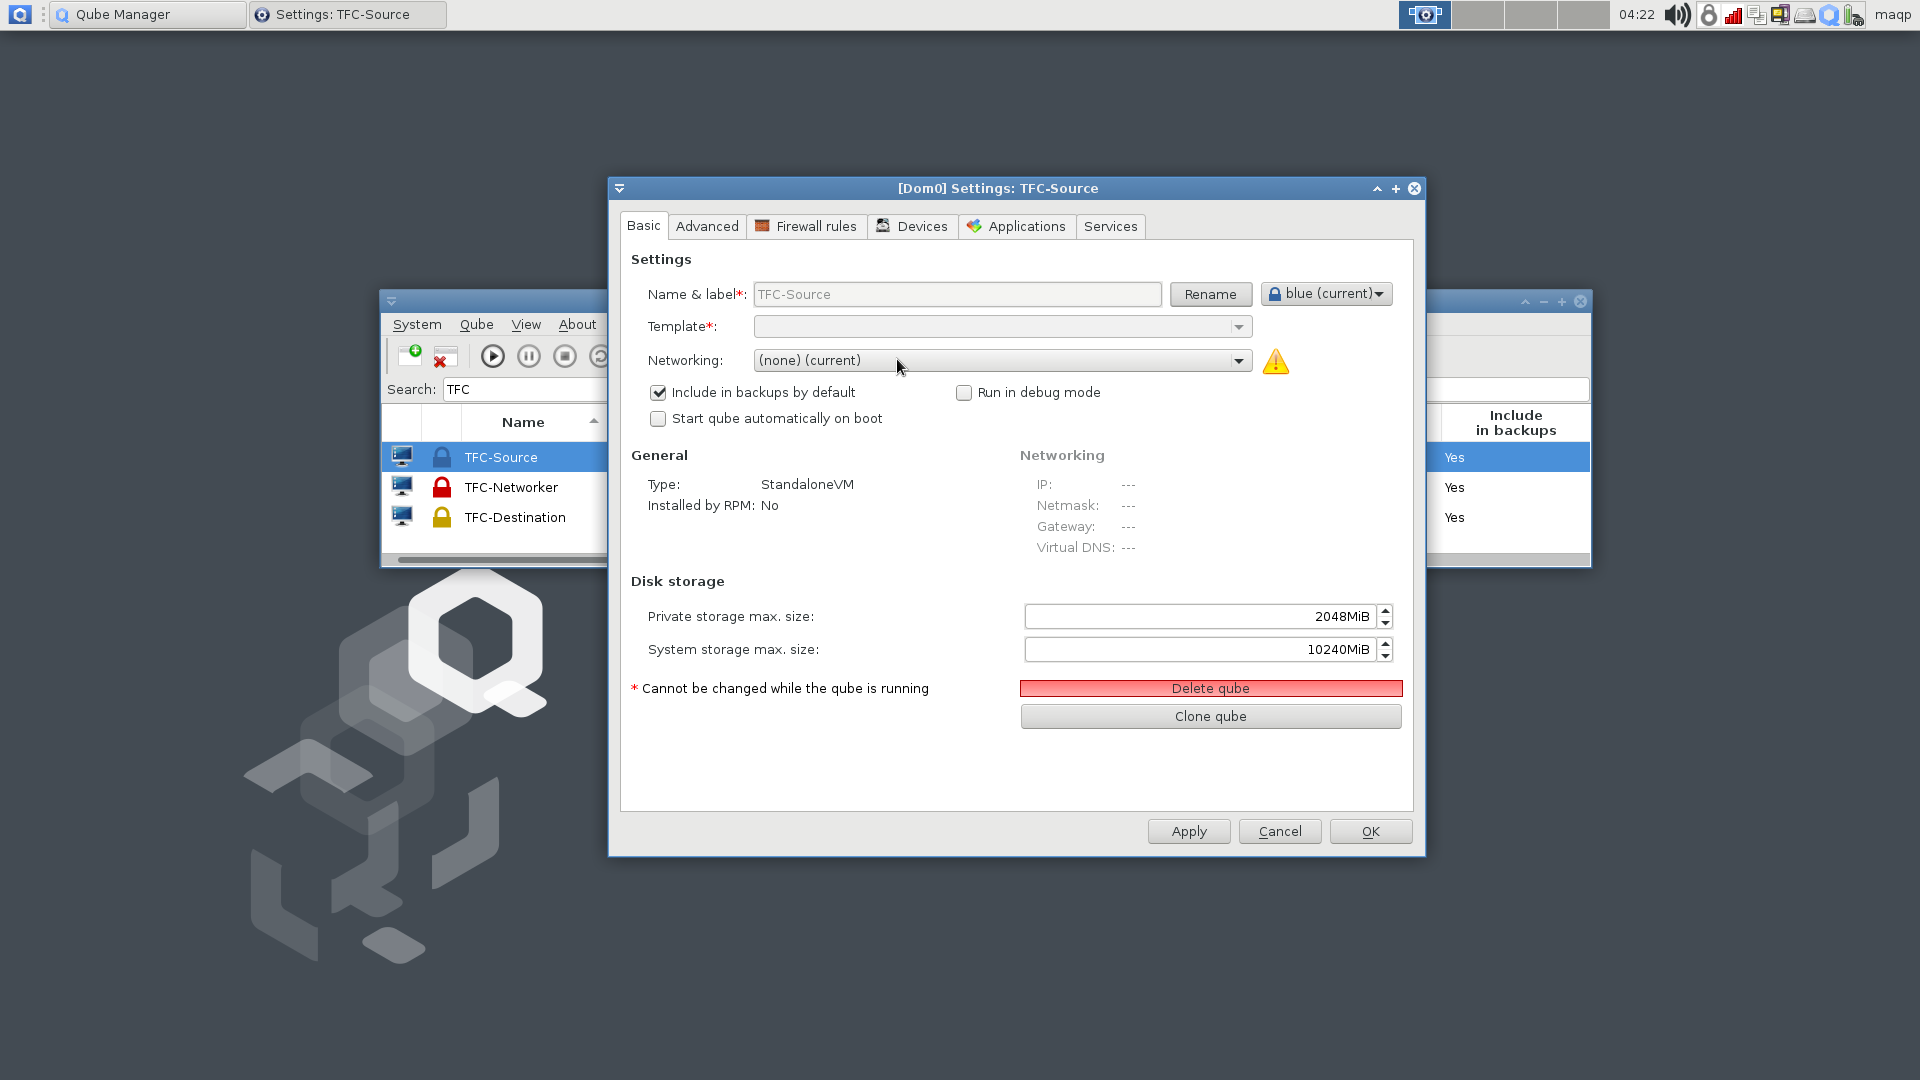
[Disable Source/Destination VM networking](https://www.cs.helsinki.fi/u/oottela/wiki/qubes/46_disable_networking.png)
Remember to repeat this for the `TFC-Destination` VM!
### 9. Setup TFC Launchers
9.1. In the `Qube Manager`, right-click each TFC VM and select `Qube Settings`
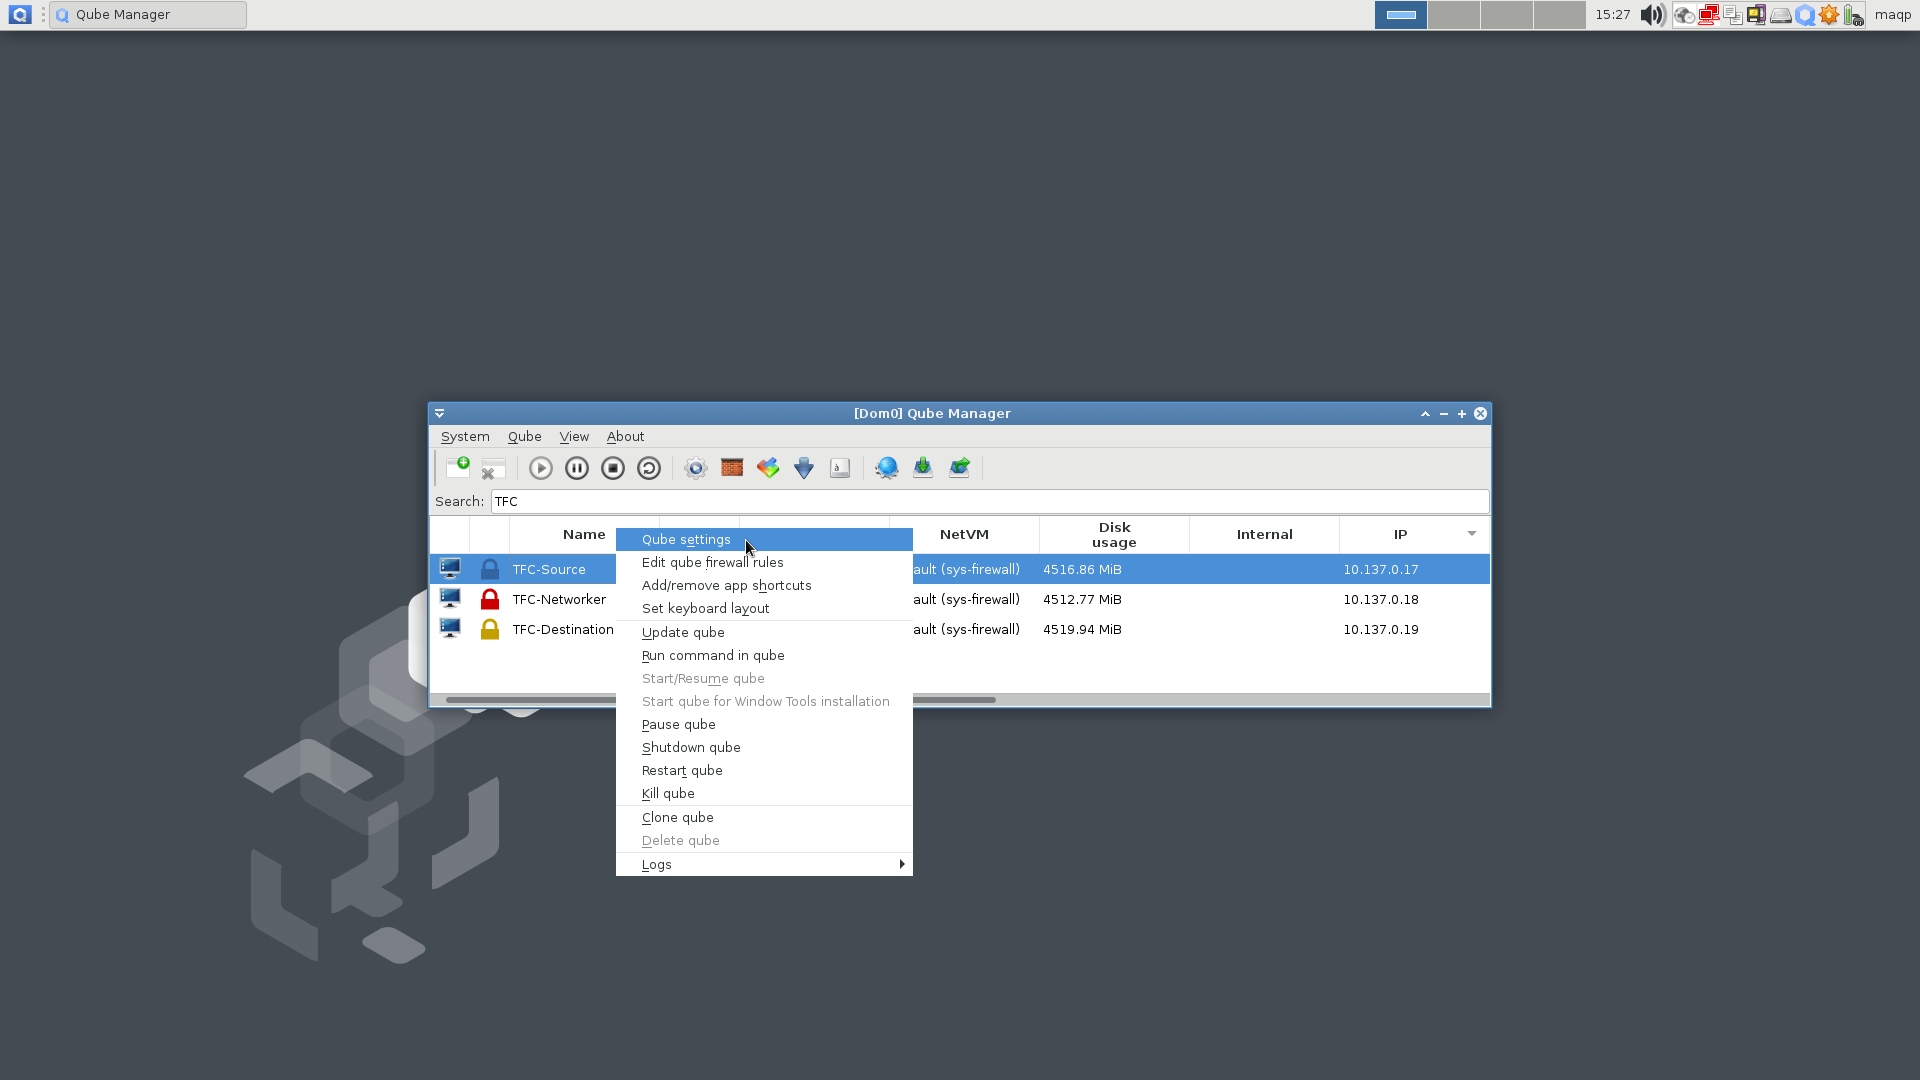
[Qube settings location](https://www.cs.helsinki.fi/u/oottela/wiki/qubes/52_qube_setting_location.png)
9.2. In the settings panel
1. go to the `Applications` tab
2. press the `Refresh Applications` button
3. select the TFC application
4. press the `>` button to add TFC to the `Selected` applications list.
5. Finally, press `OK` to close the AppVM settings.
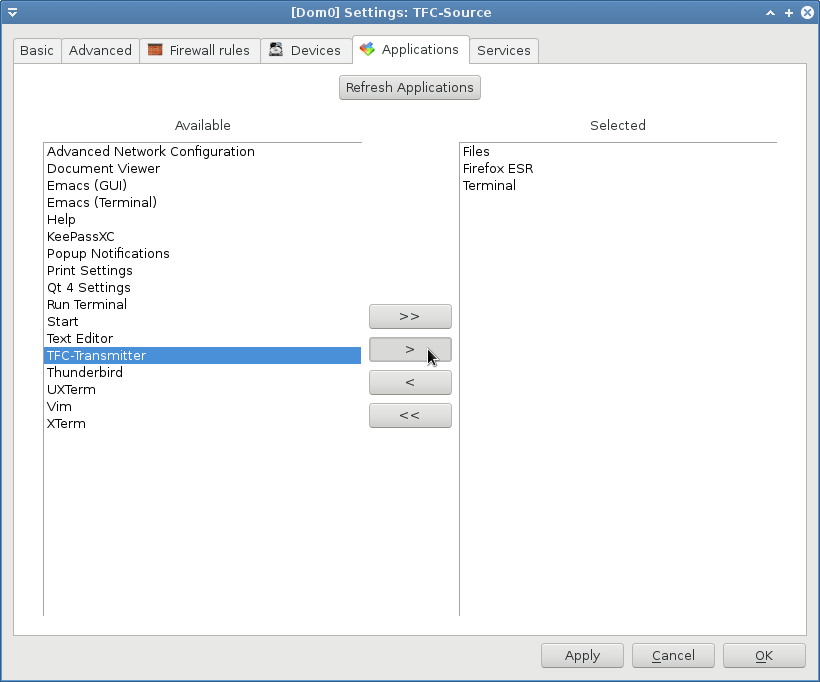
[Adding TFC to the application menu of its VM](https://www.cs.helsinki.fi/u/oottela/wiki/qubes/53_qube_settings_add_launcher.png)
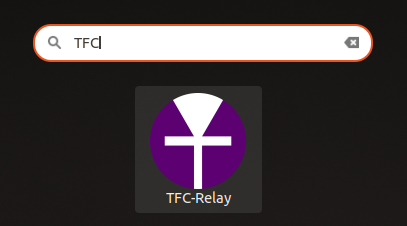
### 10. Launch TFC
You can now launch TFC from the dedicated launcher under each TFC VM in the Qubes' `Applications` menu.
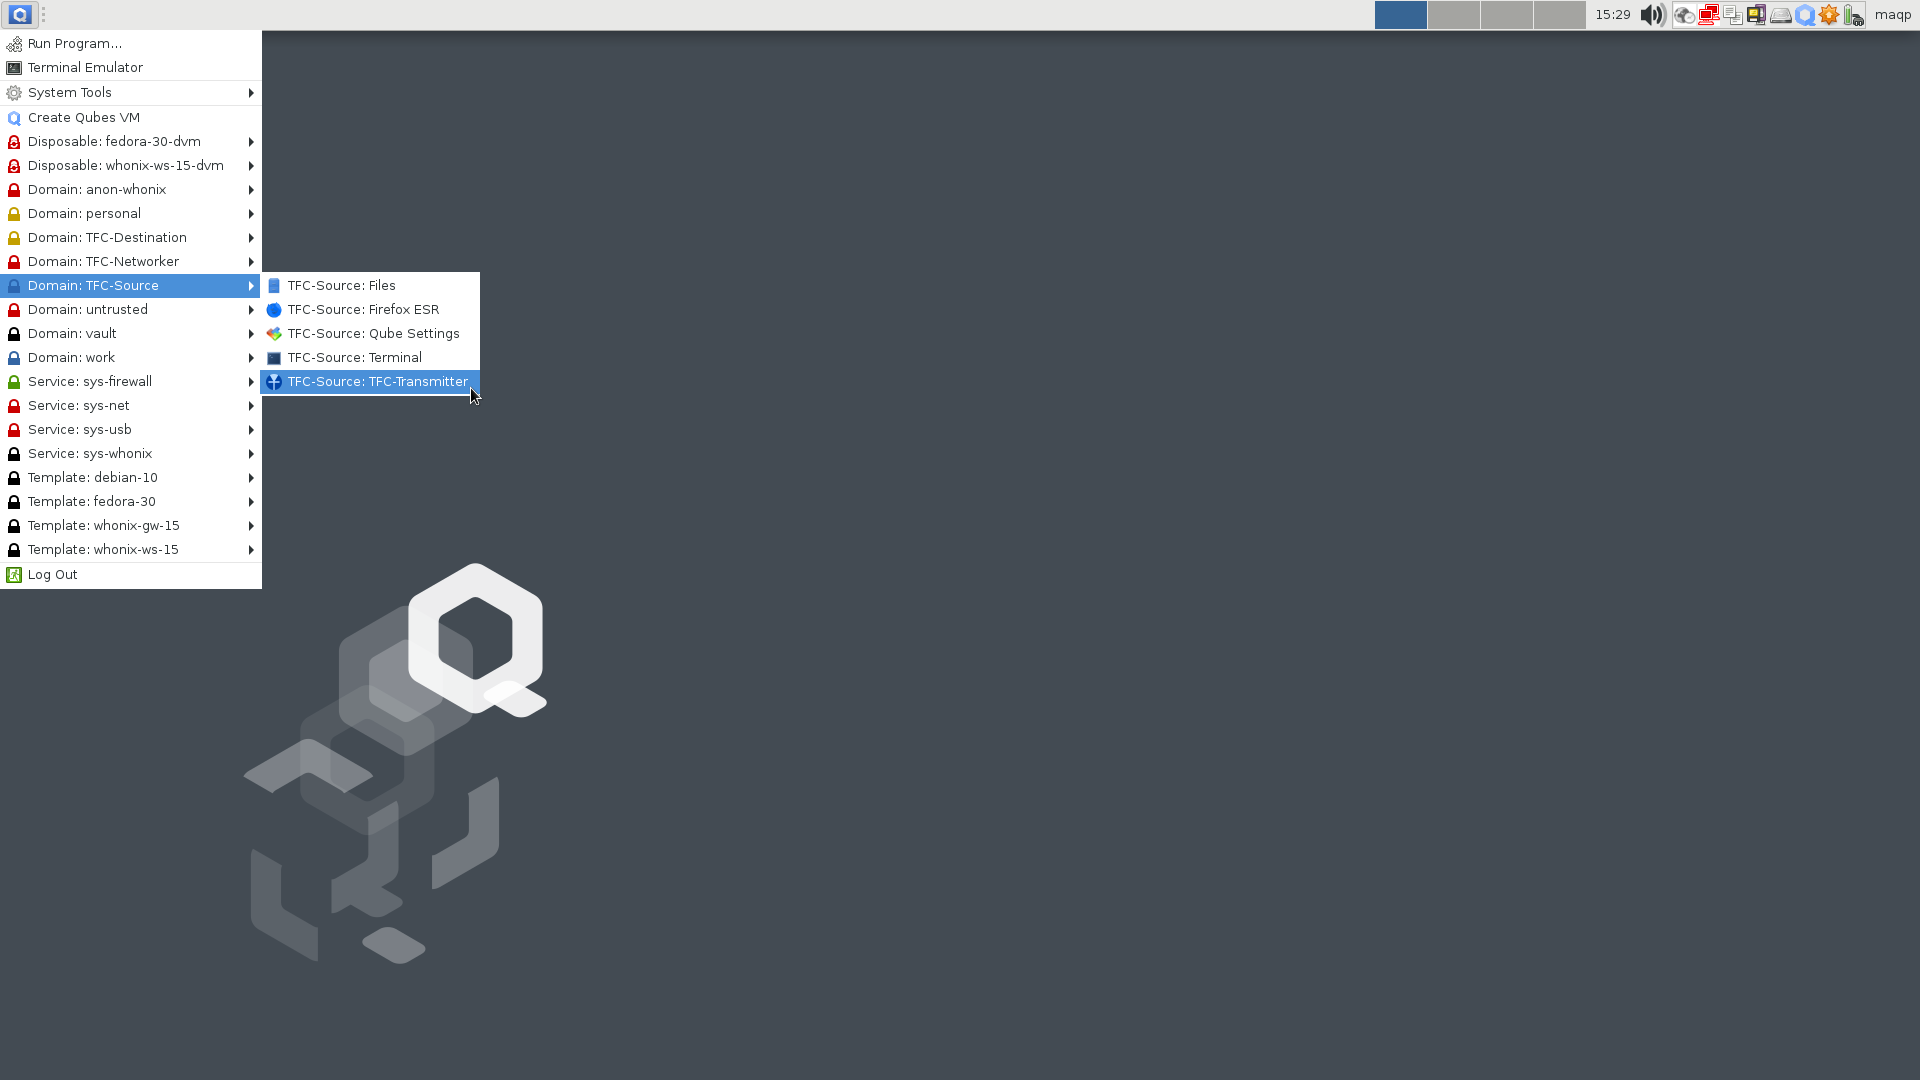
[TFC's VM specific launcher](https://www.cs.helsinki.fi/u/oottela/wiki/qubes/54_tfc_launcher_gui.png)
You can also launch TFC by entering
* `tfc-transmitter` into the `TFC-Source` VM's terminal
* `tfc-receiver` into the `TFC-Destination` VM's terminal
* `tfc-relay` into the `TFC-Networker` VM's terminal
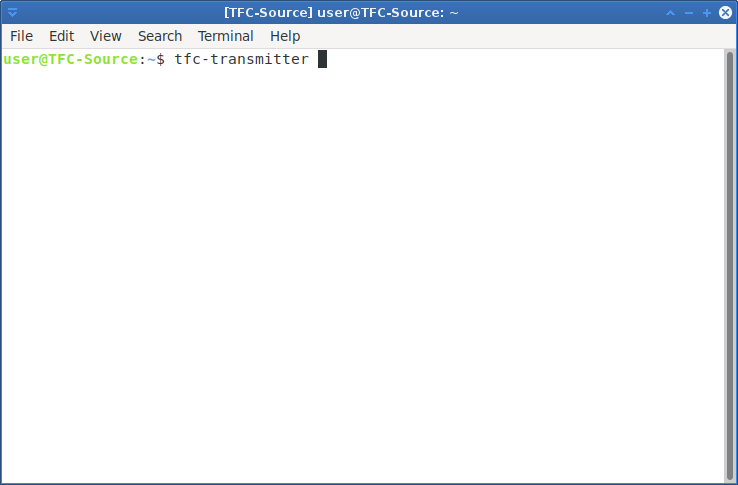
[Launching TFC application from VM's terminal](https://www.cs.helsinki.fi/u/oottela/wiki/qubes/55_tfc_launcher_terminal.png)
### 11. Create master passwords and proceed with the use
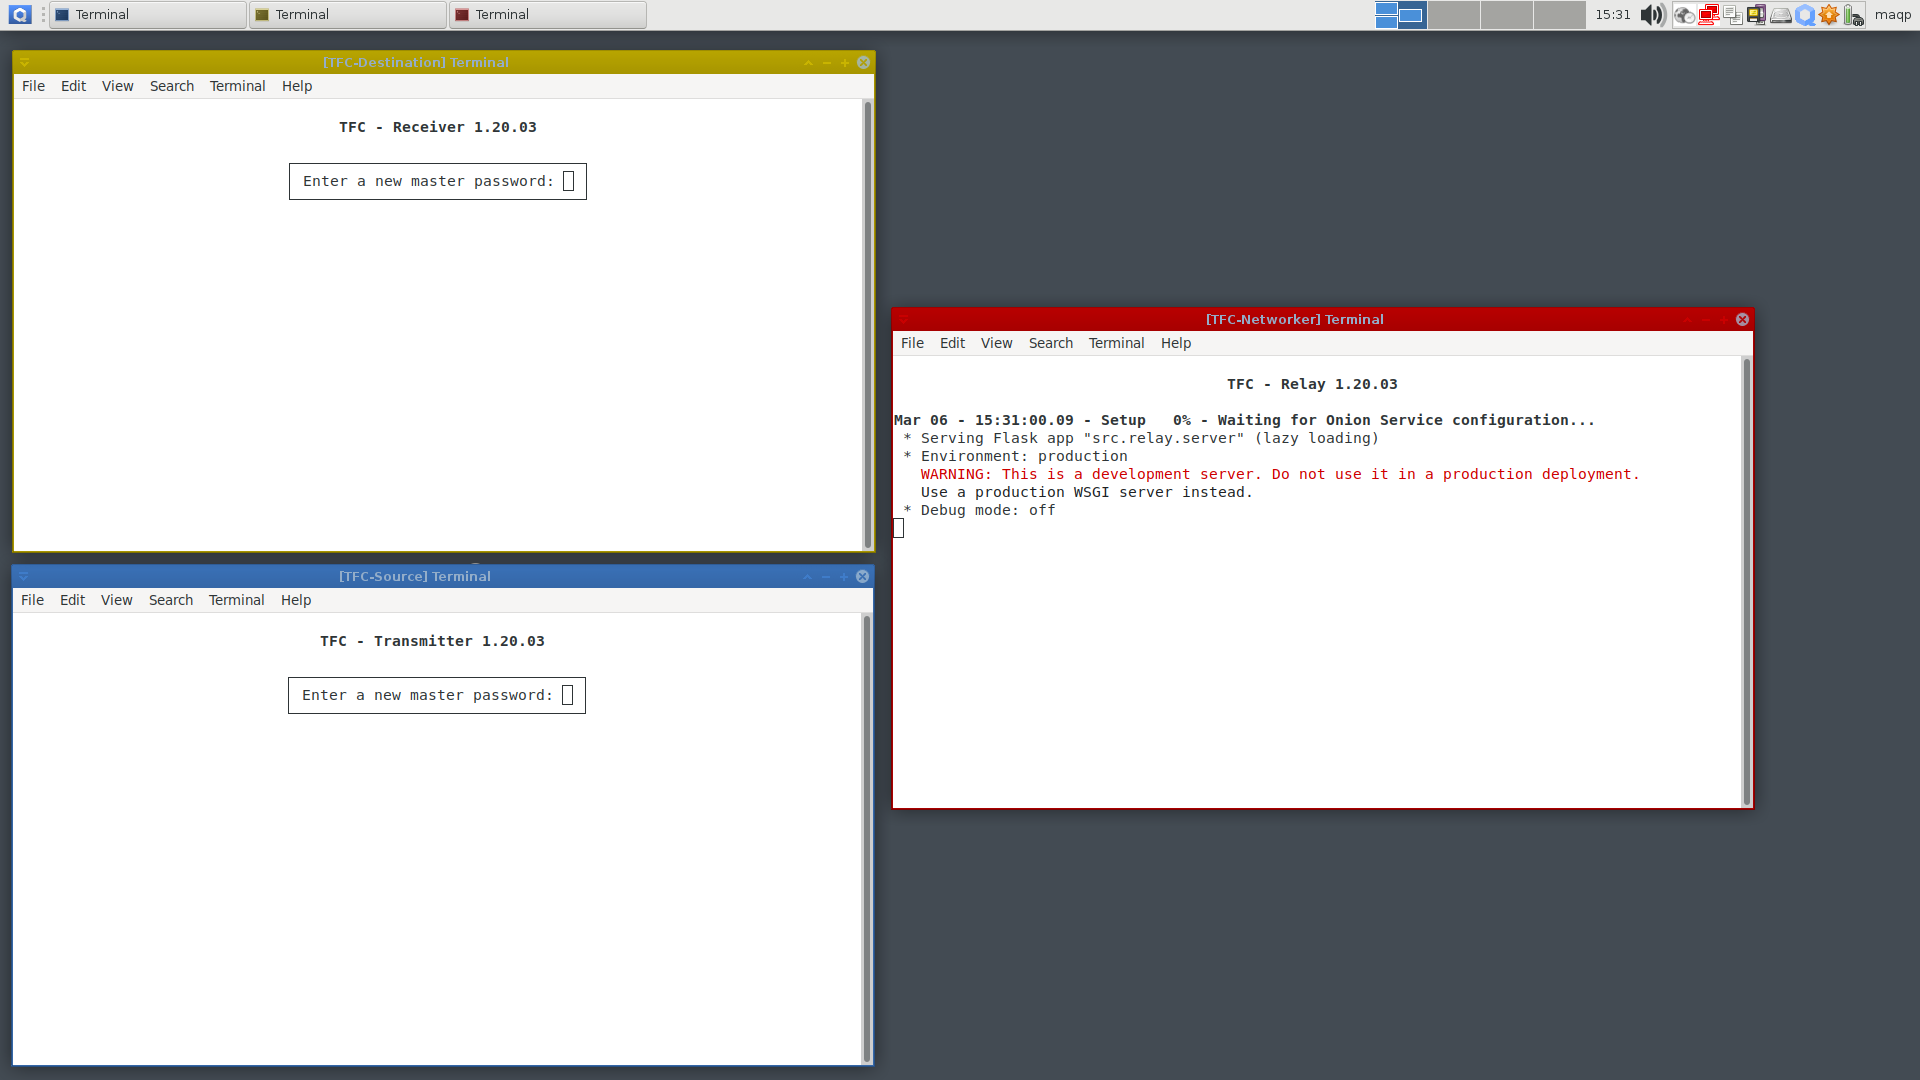
[TFC applications running on their dedicated VMs](https://www.cs.helsinki.fi/u/oottela/wiki/qubes/56_launched_tfc_applications.png)
**Tip**: During the use, you can save time and effort by using the Qubes'
[inter-VM clipboard](https://www.qubes-os.org/doc/copy-paste/)
feature to copy values -- that you'd normally need to type by hand -- across VMs in a reasonably secure way:
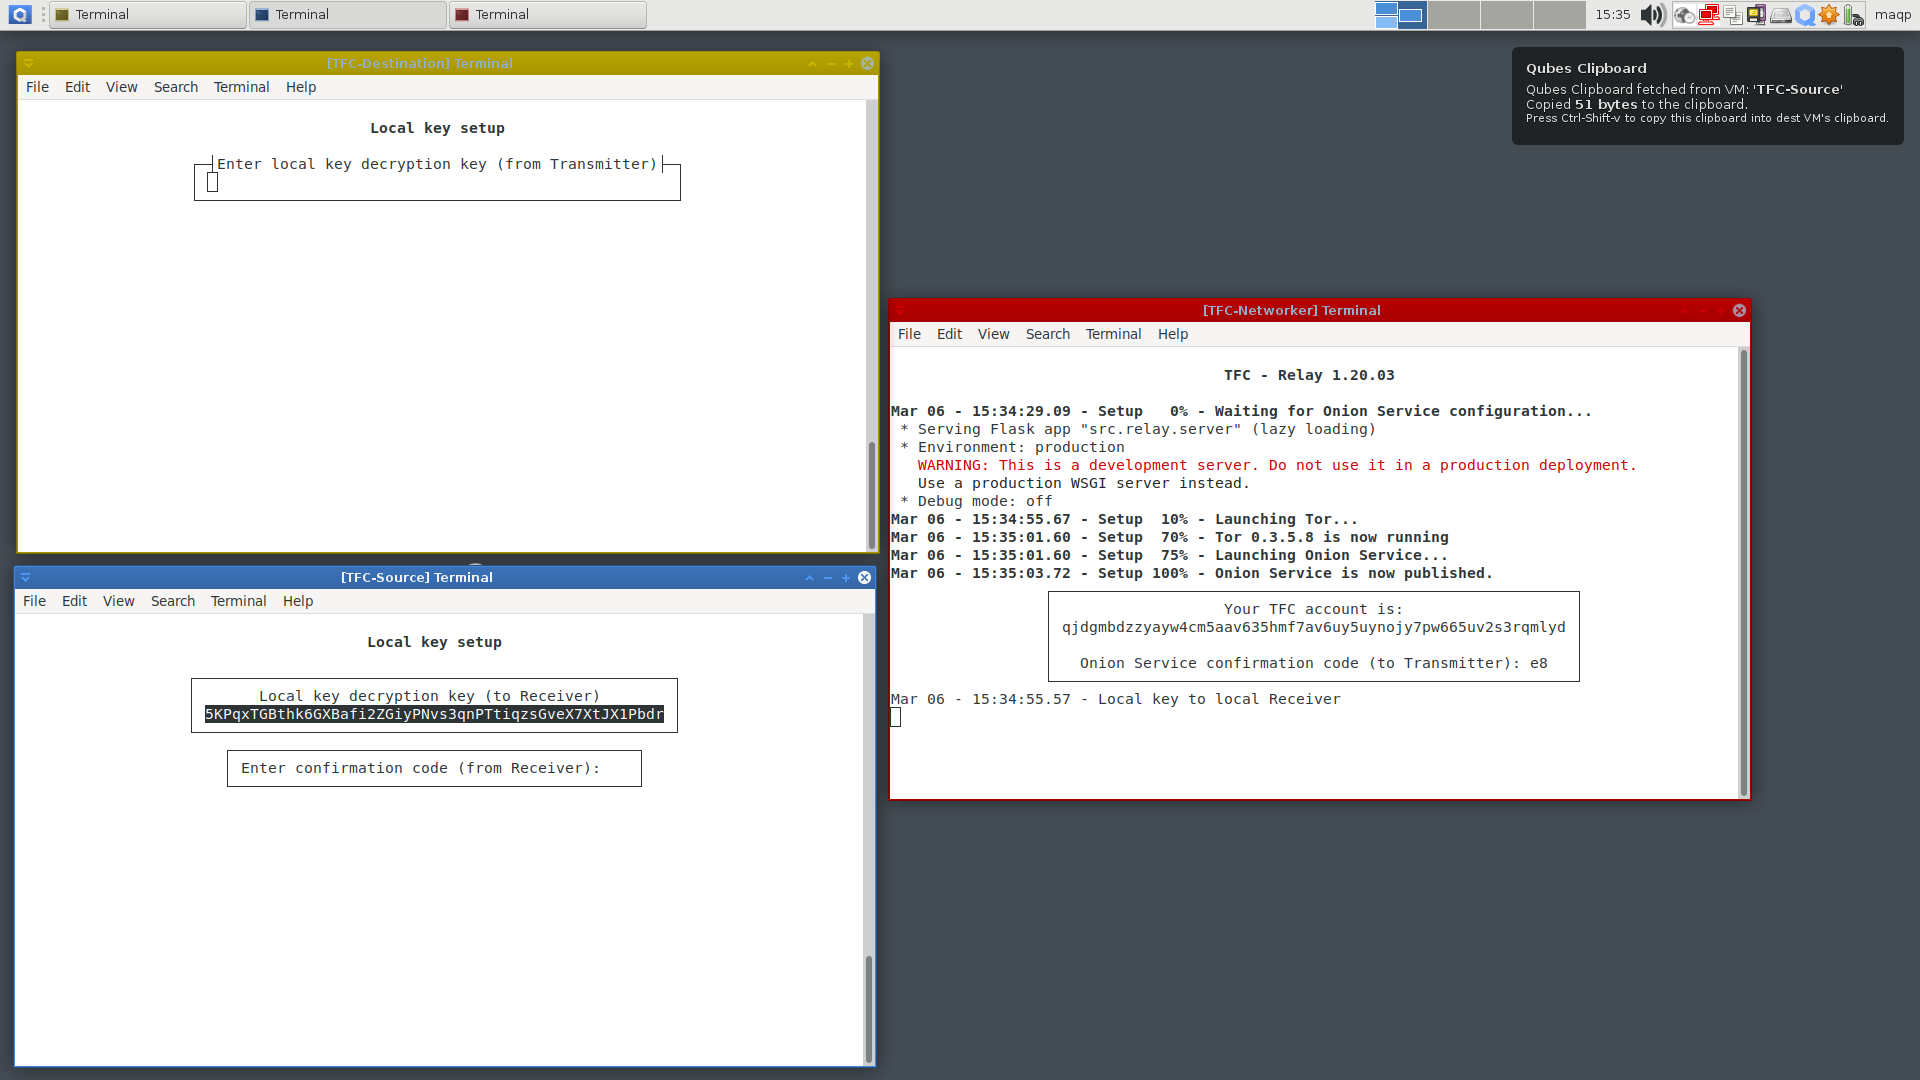
[Copied local key decryption key](https://www.cs.helsinki.fi/u/oottela/wiki/qubes/57_local_key_copied.png)

[Pasted local key decryption key](https://www.cs.helsinki.fi/u/oottela/wiki/qubes/58_local_key_pasted.png)
To stay safe, pay attention to the message on the amount of data copied to the clipboard. It should say
* 51 bytes for local key decryption key, or
* 56 bytes for TFC accounts, or
* 84 bytes for TFC X448 public keys
This is very important, because if malware would try to jump over the isolation, it is very likely the clipboard would contain different amount of data to fit some malicious payload.
---
Use of TFC is quite straightforward, but if you need further assistance, please refer to the `How to use` articles in the [TFC Wiki](https://github.com/maqp/tfc/wiki). Again, for the sake of privacy, it's best to access the wiki only using the Whonix VM's Tor Browser.
Local testing configuration
The `local testing configuration` is an easy way to emulate a complete TFC system (software and hardware) with just software, on a single Linux OS (Debian/PureOS/*buntu/PopOS/Mint/LMDE). It is mainly intended for users who want to try out the features and study the system before buying TCB-side computers and building the data diode (or before installing Qubes for the related TFC configuration).
**Warning! The local testing configuration does not provide endpoint security.**
If however, the threat model does not include a scenario where someone is going to try to remotely hack your endpoint, the `local testing configuration` still offers superior protection against adversaries in the network who would try to observe content and/or metadata of users' communication. The `local testing configuration` is thus an alternative to normal end-to-end encrypted apps like Signal (that does not anonymize the user with Tor by default) under similar threat model.
### 3. Execute the following one-liner in the terminal:
* `Local testing configuration` (Debian / PureOS / *buntu / Mint / LMDE)
c='local'; f='4a0a8bac2001e629889e56bc7b12f20122e83101504e24f5dcf125675c9fb4ec6cd35cdd20418bccee8d739d613a07236a455a82476f5a2729d7395ebea325dc'; p='pubkey.asc'; i='install.sh'; s=$i.asc; while sudo fuser /var/lib/dpkg/lock >/dev/null 2>&1; do sleep .5; echo -ne "\rAPT is busy"; done && sudo apt update && sudo apt install apt-transport-https -y && sudo apt install tor wget -y && sudo systemctl start tor && cd $HOME && echo -e '\nLaunching Torsocks. Please wait...\n' && until torsocks wget -T 10 https://raw.githubusercontent.com/maqp/tfc/master/{$p,$i,$s} -q; do sleep 1; done && sudo mv -f {$p,$i,$s} /opt/ && cd /opt/ && sudo chmod 644 {$p,$i,$s} && sudo chown root {$p,$i,$s} && if b2sum $p | grep -Eo '^\w+' | cmp -s <(echo $f); then gpg --import $p && gpg --verify $s $i && bash $i $c; else echo "ERROR: $p has invalid BLAKE2b fingerprint"; fi;
The installer is fully automatic and will notify you when the installation completes. You can then close the installer by hitting any key.

[Message about completed installation](https://www.cs.helsinki.fi/u/oottela/wiki/installation/2.png)
### 4. Launch the Local testing configuration
You can launch the `local testing configuration` with the `TFC-Local-Testing` launcher which you can find in the OS specific app search system, or under the `Internet`, `Messaging`, or `Security` submenu of the OS's Applications menu.
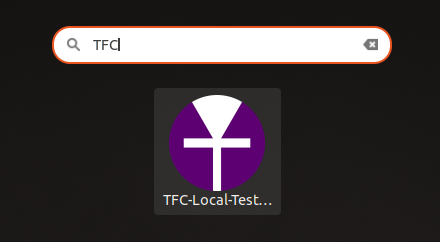
[Local Testing configuration launcher](https://www.cs.helsinki.fi/u/oottela/wiki/installation/launcher_local_test.png)
### Local testing launcher layouts
By right-clicking the local testing launcher, you can select different local testing layouts:
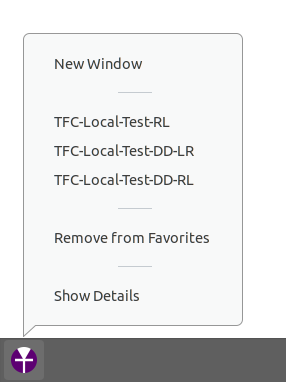
[Right-clicking the launcher allows layout selection](https://cs.helsinki.fi/u/oottela/wiki/how_to_use/launch/1_1.png)
#### The default layout
The default layout is `TFC-Local-Test-LR` that has the Transmitter and Receiver Programs on the left side of the Relay Program. The layout of `TFC-Local-Test-RL` is vice versa. These layouts can be used to simulate mirrored hardware setups similar to those in TFC's README rendering.
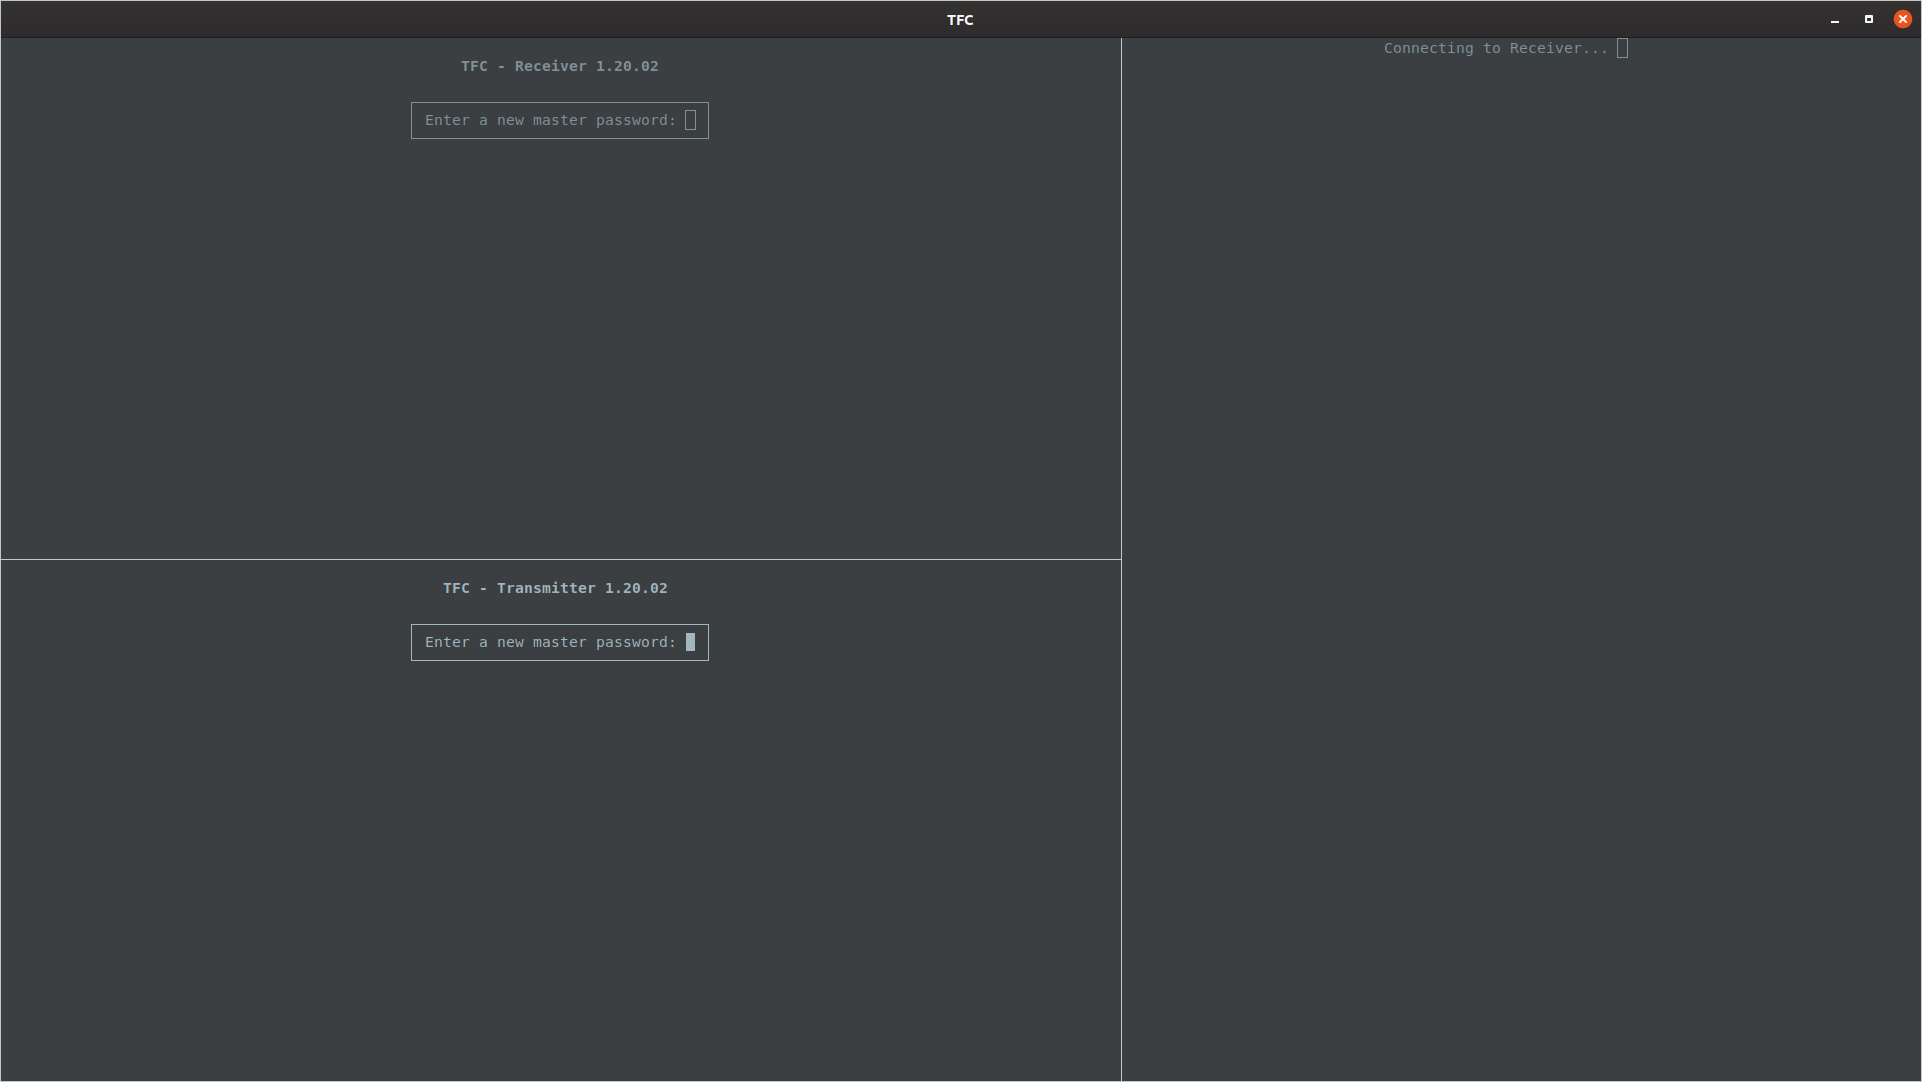
[Default layout for local testing](https://cs.helsinki.fi/u/oottela/wiki/how_to_use/launch/2_1.png)
The default local testing layout runs the three main programs that normally run on three separate computers, inside Terminator, a tiling terminal emulator.

[Comparison between normal operation and default local testing layout](https://cs.helsinki.fi/u/oottela/wiki/how_to_use/launch/2_2.png)
#### Data diode simulator layout
The `TFC-Local-Test-DD-LR` and `TFC-Local-Test-DD-RL` layouts run like the default layout, with the exception two additional programs called `data diode simulators` are launched. These two programs simulate and visualize data transmission through the data diode from the Source Computer to the Networked Computer, and from the Networked Computer to the Destination Computer. The tiling terminal emulator places the data diode simulators between Transmitter and Relay Program, and between Relay and Receiver Program. It automatically orients the direction of data diode simulator's Tx and Rx end depending on whether the user chooses the `LR` or `RL` configuration. Please note that the data diode simulators do not provide any of the endpoint security guarantees the hardware data diodes do.
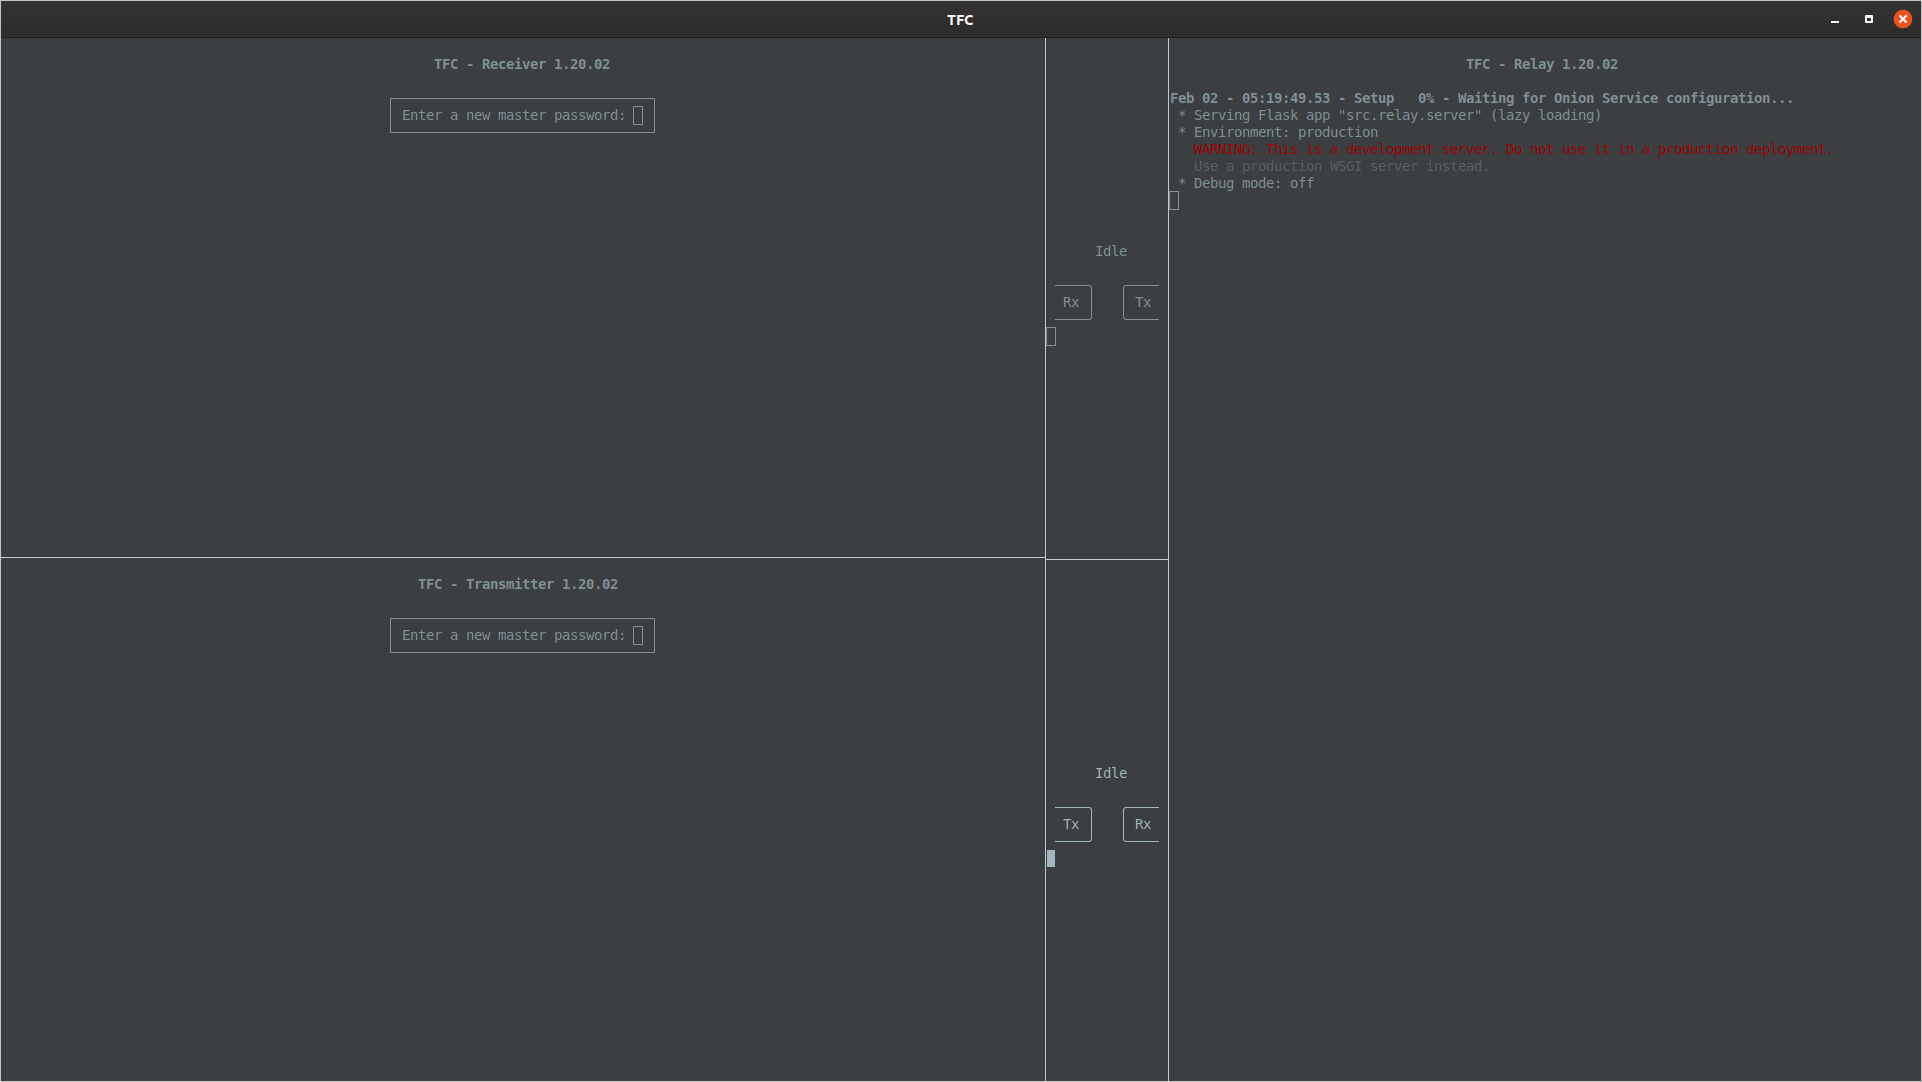
[Layout for local testing with data diode simulators](https://cs.helsinki.fi/u/oottela/wiki/how_to_use/launch/3_1.png)
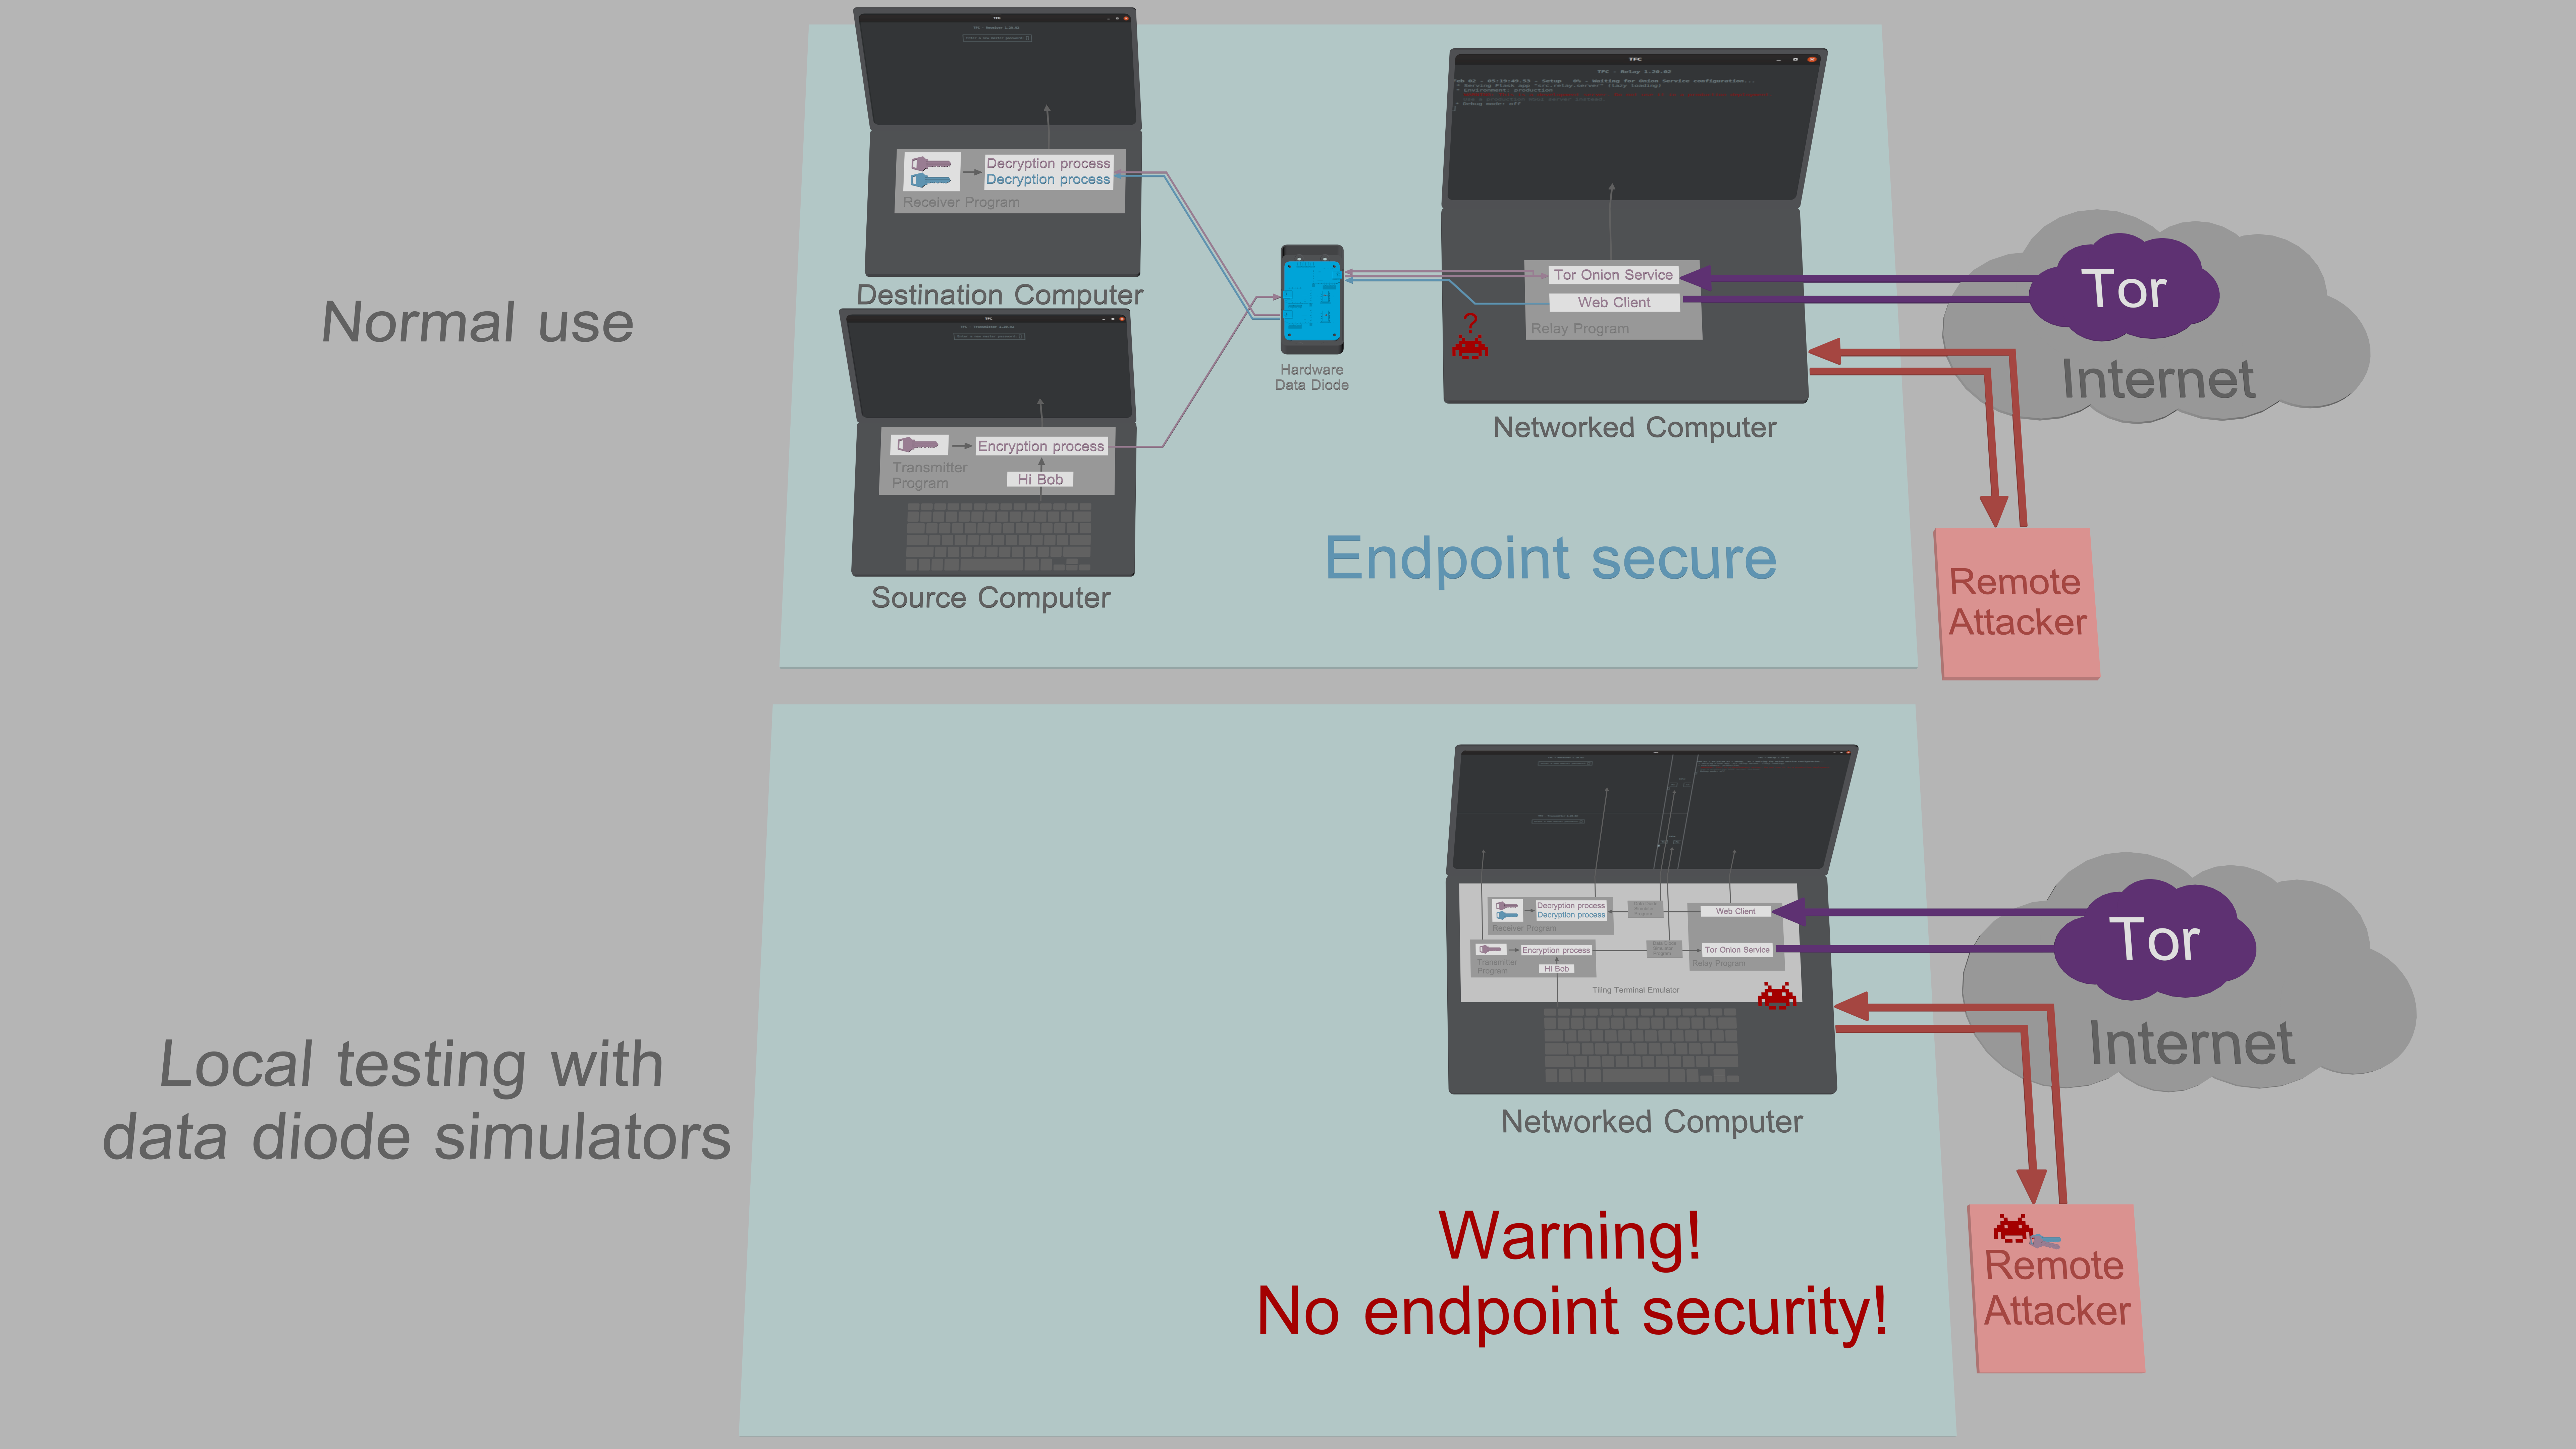
[Comparison between normal operation and local testing layout with data diode simulators](https://cs.helsinki.fi/u/oottela/wiki/how_to_use/launch/3_2.png)