# Fine-tune Whisper speech recognition models and speed up reasoning
[简体中文](./README.md) | English


**Disclaimer, this document was obtained through machine translation, please check the original document [here](./README.md).**
## Introduction
OpenAI open-sourced project Whisper, which claims to have human-level speech recognition in English, and it also supports automatic speech recognition in 98 other languages. Whisper provides automatic speech recognition and translation tasks. They can turn speech into text in various languages and translate that text into English. The main purpose of this project is to fine-tune the Whisper model using Lora. It supports training on non-timestamped data, with timestamped data, and without speech data. Currently open source for several models, specific can be [openai](https://huggingface.co/openai) to view, the following is a list of commonly used several models. In addition, the project also supports CTranslate2 accelerated reasoning and GGML accelerated reasoning. As a hint, accelerated reasoning supports direct use of Whisper original model transformation, and does not necessarily need to be fine-tuned. Supports Windows desktop applications, Android applications, and server deployments.
### please :star:
## Supporting models
- openai/whisper-tiny
- openai/whisper-base
- openai/whisper-small
- openai/whisper-medium
- openai/whisper-large
- openai/whisper-large-v2
- openai/whisper-large-v3
- openai/whisper-large-v3-turbo
**Environment:**
- Anaconda 3
- Python 3.11
- Pytorch 2.4.0
- Ubuntu 18.04
- GPU A100-PCIE-40GB*1
## Catalogue
- [Introduction of the main program of the project](#项目主要程序介绍)
- [Test table](#模型测试表)
- [Install](#安装环境)
- [Prepare data](#准备数据)
- [Fine-tuning](#微调模型)
- [Single-GPU](#单卡训练)
- [Multi-GPU](#多卡训练)
- [Merge model](#合并模型)
- [Evaluation](#评估模型)
- [Inference](#预测)
- [GUI inference](#GUI界面预测)
- [Web deploy](#Web部署)
- [API docs](#接口文档)
- [Ctranslate2 inference](#使用Ctranslate2格式模型预测)
- [Android](#Android部署)
- [Windows Desktop](#Windows桌面应用)
## Introduction of the main program of the project
1. `aishell.py`: Create AIShell training data.
2. `finetune.py`: Fine-tune the model.
3. `merge_lora.py`: Merge Whisper and Lora models.
4. `evaluation.py`: Evaluate the fine-tuned model or the original Whisper model.
5. `infer.py`: Call the fine-tuned model or Whisper model on transformers for prediction.
6. `infer_ct2.py`: Use the converted CTranslate2 model for prediction, primarily as a reference for program usage.
7. `infer_gui.py`: There is a GUI to make predictions using either the fine-tuned model or the Whisper model on transformers.
8. `infer_server.py`: Call the fine-tuned model or Whisper model on transformers and deploy it to the server for the client to call.
9. `convert-ggml.py`: Converts the model to GGML format for use in Android or Windows applications.
10. `AndroidDemo`: Contains the source code for deploying the model to Android.
11. `WhisperDesktop`: Contains the program for the Windows desktop application.
## Test table
1. Test table for cer of the original model.
| Model | Language | aishell_test | test_net | test_meeting | Cantonese |
|:----------------------:|:--------:|:------------:|:--------:|:------------:|:---------:|
| whisper-tiny | Chinese | 0.31898 | 0.40482 | 0.75332 | N/A |
| whisper-base | Chinese | 0.22196 | 0.30404 | 0.50378 | N/A |
| whisper-small | Chinese | 0.13897 | 0.18417 | 0.31154 | N/A |
| whisper-medium | Chinese | 0.09538 | 0.13591 | 0.26669 | N/A |
| whisper-large | Chinese | 0.08969 | 0.12933 | 0.23439 | N/A |
| whisper-large-v2 | Chinese | 0.08817 | 0.12332 | 0.26547 | N/A |
| whisper-large-v3 | Chinese | 0.08086 | 0.11452 | 0.19878 | 0.35301 |
| whisper-large-v3-turbo | Chinese | 0.08647 | 0.21225 | 0.20390 | 0.38069 |
2. Cer test table after fine-tuning the dataset.
| Model | Language | Dataset | aishell_test | test_net | test_meeting | Cantonese |
|:----------------------:|:---------:|:----------------------------------------------------------:|:------------:|:--------:|:------------:|:---------:|
| whisper-tiny | Chinese | [AIShell](https://openslr.magicdatatech.com/resources/33/) | 0.13043 | 0.4463 | 0.57728 | N/A |
| whisper-base | Chinese | [AIShell](https://openslr.magicdatatech.com/resources/33/) | 0.08999 | 0.33089 | 0.40713 | N/A |
| whisper-small | Chinese | [AIShell](https://openslr.magicdatatech.com/resources/33/) | 0.05452 | 0.19831 | 0.24229 | N/A |
| whisper-medium | Chinese | [AIShell](https://openslr.magicdatatech.com/resources/33/) | 0.03681 | 0.13073 | 0.16939 | N/A |
| whisper-large-v2 | Chinese | [AIShell](https://openslr.magicdatatech.com/resources/33/) | 0.03139 | 0.12201 | 0.15776 | N/A |
| whisper-large-v3 | Chinese | [AIShell](https://openslr.magicdatatech.com/resources/33/) | 0.03660 | 0.09835 | 0.13706 | 0.33464 |
| whisper-large-v3-turbo | Chinese | [AIShell](https://openslr.magicdatatech.com/resources/33/) | 0.03607 | 0.23038 | 0.35697 | 0.35697 |
| whisper-large-v3 | Cantonese | Cantonese | 0.12443 | 0.32365 | 0.35911 | 0.02106 |
| whisper-large-v3-turbo | Cantonese | Cantonese | 0.14028 | 0.34483 | 0.38682 | 0.03255 |
| whisper-tiny | Chinese | [WenetSpeech](./tools/create_wenetspeech_data.py) | 0.21009 | 0.29352 | 0.41506 | N/A |
| whisper-base | Chinese | [WenetSpeech](./tools/create_wenetspeech_data.py) | 0.14548 | 0.17747 | 0.30590 | N/A |
| whisper-small | Chinese | [WenetSpeech](./tools/create_wenetspeech_data.py) | 0.08484 | 0.11801 | 0.23471 | N/A |
| whisper-medium | Chinese | [WenetSpeech](./tools/create_wenetspeech_data.py) | 0.05861 | 0.08794 | 0.19486 | N/A |
| whisper-large-v2 | Chinese | [WenetSpeech](./tools/create_wenetspeech_data.py) | 0.05443 | 0.08367 | 0.19087 | N/A |
| whisper-large-v3 | Chinese | [WenetSpeech](./tools/create_wenetspeech_data.py) | 0.04947 | 0.10711 | 0.17429 | |
3. Test table for character error rate after fine-tuning other language datasets.
| Model | Actual language | Use language | Dataset | Test |
|:----------------------:|:---------------:|:------------:|:----------------------------:|:-------:|
| whisper-tiny | Uyghur | Chinese | CommonVoice-Uyghur + THUYG20 | 0.06798 |
| whisper-base | Uyghur | Chinese | CommonVoice-Uyghur + THUYG20 | 0.04690 |
| whisper-small | Uyghur | Chinese | CommonVoice-Uyghur + THUYG20 | 0.02594 |
| whisper-medium | Uyghur | Chinese | CommonVoice-Uyghur + THUYG20 | 0.01669 |
| whisper-large-v2 | Uyghur | Chinese | CommonVoice-Uyghur + THUYG20 | 0.01480 |
| whisper-large-v3-turbo | Uyghur | Chinese | CommonVoice-Uyghur + THUYG20 | 0.01744 |
**Important explanation**:
1. The character error rates of the tiny model when trained with the specified voices as `Chinese` and `uzbek` were 0.06798 and 0.0685 respectively. The difference between them is not significant. Therefore, in the above cases, the specified language was always `Chinese`.
2. Use the test set of `CommonVoice-Uyghur` as the test set for this project, while the rest (including THUYG20) are all used as the training set.
4. inference speed test table, using the GPU GTX3090 (24G), The audio is' test long.wav 'and is 3 minutes long. Test in `'tools/run_compute.sh`.
| Mode of acceleration | tiny | base | small | medium | large-v2 | large-v3 | large-v3-turbo |
|:-------------------------------------------------------------------------:|:------:|:------:|:------:|:-------:|:--------:|:--------:|:--------------:|
| Transformers (`fp16` + `batch_size=16`) | 1.458s | 1.671s | 2.331s | 11.071s | 4.779s | 12.826s | 1.594s |
| Transformers (`fp16` + `batch_size=16` + `Compile`) | 1.477s | 1.675s | 2.357s | 11.003s | 4.799s | 12.643s | 1.581s |
| Transformers (`fp16` + `batch_size=16` + `BetterTransformer`) | 1.461s | 1.676s | 2.301s | 11.062s | 4.608s | 12.505s | 1.809s |
| Transformers (`fp16` + `batch_size=16` + `Flash Attention 2`) | 1.436s | 1.630s | 2.258s | 10.533s | 4.344s | 11.651s | 1.651s |
| Transformers (`fp16` + `batch_size=16` + `Compile` + `BetterTransformer`) | 1.442s | 1.686s | 2.277s | 11.000s | 4.543s | 12.592s | 1.816s |
| Transformers (`fp16` + `batch_size=16` + `Compile` + `Flash Attention 2`) | 1.409s | 1.643s | 2.220s | 10.390s | 4.377s | 11.703s | 1.657s |
| Faster Whisper (`fp16` + `beam_size=1` ) | 2.179s | 1.492s | 2.327s | 3.752s | 5.677s | 31.541s | / |
| Faster Whisper (`8-bit` + `beam_size=1` ) | 2.609s | 1.728s | 2.744s | 4.688s | 6.571s | 29.307s | / |
**Important explanation**:
1. Remove the punctuation marks from the model output during evaluation, and convert traditional Chinese to simplified Chinese.
2. `aishell_test` is the test set of AIShell, while `test_net` and `test_meeting` are the test sets of WenetSpeech.
3. The audio for testing speed is `dataset/test_long.wav`, with a audio is' test long.wav 'and is 3 minutes long.
4. The training data uses data with punctuation marks, resulting in a slightly higher cer.
5. The AiShell data used for fine-tuning does not include timestamp information, while the WenetSpeech data used for fine-tuning includes timestamp information.
## 安装环境
1. The GPU version of Pytorch will be installed first. If you already have it, please skip it.
```shell
pip3 install torch torchvision --index-url https://download.pytorch.org/whl/cu128
```
2. Install the required libraries.
```shell
python -m pip install -r requirements.txt -i https://pypi.tuna.tsinghua.edu.cn/simple
```
## Prepare the data
The training dataset is a list of jsonlines, meaning that each line is a JSON data in the following format: This project provides a program to make the AIShell dataset, 'aishell.py'. Executing this program will automatically download and generate the training and test sets in the following format. This program can skip the download process by specifying the compressed file of AIShell. If the direct download would be very slow, you can use some downloader such as thunderbolt to download the dataset and then specify the compressed filepath through the '--filepath' parameter. Like `/home/test/data_aishell.tgz`.
**Note:**
1. If timestamp training is not used, the `sentences` field can be excluded from the data.
2. If data is only available for one language, the language field can be excluded from the data.
3. If training empty speech data, the `sentences` field should be `[]`, the `sentence` field should be `""`, and the language field can be absent.
4. Data may exclude punctuation marks, but the fine-tuned model may lose the ability to add punctuation marks.
```json
{
"audio": {
"path": "dataset/0.wav"
},
"sentence": "近几年,不但我用书给女儿压岁,也劝说亲朋不要给女儿压岁钱,而改送压岁书。",
"language": "Chinese",
"sentences": [
{
"start": 0,
"end": 1.4,
"text": "近几年,"
},
{
"start": 1.42,
"end": 8.4,
"text": "不但我用书给女儿压岁,也劝说亲朋不要给女儿压岁钱,而改送压岁书。"
}
],
"duration": 7.37
}
```
## Fine-tune
Once we have our data ready, we are ready to fine-tune our model. Training is the most important two parameters, respectively, `--base_model` specified fine-tuning the Whisper of model, the parameter values need to be in [HuggingFace](https://huggingface.co/openai), the don't need to download in advance, It can be downloaded automatically when starting training, or in advance, if `--base_model` is specified as the path and `--local_files_only`is set to True. The second `--output_path` is the Lora checkpoint path saved during training as we use Lora to fine-tune the model. If you want to save enough, it's best to set `--use_8bit` to False, which makes training much faster. See this program for more parameters.
### Single-GPU
The single card training command is as follows. Windows can do this without the `CUDA_VISIBLE_DEVICES` parameter.
```shell
CUDA_VISIBLE_DEVICES=0 python finetune.py --base_model=openai/whisper-tiny --output_dir=output/
```
### Multi-GPU
torchrun and accelerate are two different methods for multi-card training, which developers can use according to their preferences.
1. To start multi-card training with torchrun, use `--nproc_per_node` to specify the number of graphics cards to use.
```shell
torchrun --nproc_per_node=2 finetune.py --base_model=openai/whisper-tiny --output_dir=output/
```
2. Start multi-card training with accelerate, and if this is the first time you're using accelerate, configure the training parameters as follows:
The first step is to configure the training parameters. The process is to ask the developer to answer a few questions. Basically, the default is ok, but there are a few parameters that need to be set according to the actual situation.
```shell
accelerate config
```
Here's how it goes:
```
--------------------------------------------------------------------In which compute environment are you running?
This machine
--------------------------------------------------------------------Which type of machine are you using?
multi-GPU
How many different machines will you use (use more than 1 for multi-node training)? [1]:
Do you wish to optimize your script with torch dynamo?[yes/NO]:
Do you want to use DeepSpeed? [yes/NO]:
Do you want to use FullyShardedDataParallel? [yes/NO]:
Do you want to use Megatron-LM ? [yes/NO]:
How many GPU(s) should be used for distributed training? [1]:2
What GPU(s) (by id) should be used for training on this machine as a comma-seperated list? [all]:
--------------------------------------------------------------------Do you wish to use FP16 or BF16 (mixed precision)?
fp16
accelerate configuration saved at /home/test/.cache/huggingface/accelerate/default_config.yaml
```
Once the configuration is complete, you can view the configuration using the following command:
```shell
accelerate env
```
Start fine-tune:
```shell
accelerate launch finetune.py --base_model=openai/whisper-tiny --output_dir=output/
```
log:
```shell
{'loss': 0.9098, 'learning_rate': 0.000999046843662503, 'epoch': 0.01}
{'loss': 0.5898, 'learning_rate': 0.0009970611012927184, 'epoch': 0.01}
{'loss': 0.5583, 'learning_rate': 0.0009950753589229333, 'epoch': 0.02}
{'loss': 0.5469, 'learning_rate': 0.0009930896165531485, 'epoch': 0.02}
{'loss': 0.5959, 'learning_rate': 0.0009911038741833634, 'epoch': 0.03}
```
## Merge model
After fine-tuning, there will be two models, the first is the Whisper base model, and the second is the Lora model. These two models need to be merged before the next operation. This program only needs to pass two arguments, `--lora_model` is the path of the Lora model saved after training, which is the checkpoint folder, and the second `--output_dir` is the saved directory of the merged model.
```shell
python merge_lora.py --lora_model=output/whisper-tiny/checkpoint-best/ --output_dir=models/
```
## Evaluation
The following procedure is performed to evaluate the model, the most important two parameters are respectively. The first `--model_path` specifies the path of the merged model, but also supports direct use of the original whisper model, such as directly specifying `openai/Whisper-large-v2`, and the second `--metric` specifies the evaluation method. For example, there are word error rate `cer` and word error rate `wer`. Note: Models without fine-tuning may have punctuation in their output, affecting accuracy. See this program for more parameters.
```shell
python evaluation.py --model_path=models/whisper-tiny-finetune --metric=cer
```
## Inference
Execute the following program for speech recognition, this uses transformers to directly call the fine-tuned model or Whisper's original model prediction, only suitable for reasoning short audio, long speech or refer to the use of `infer_ct2.py`. The first `--audio_path` argument specifies the audio path to predict. The second `--model_path` specifies the path of the merged model. It also allows you to use the original whisper model directly, for example `openai/whisper-large-v2`. See this program for more parameters.
```shell
python infer_tfs.py --audio_path=dataset/test.wav --model_path=models/whisper-tiny-finetune
```
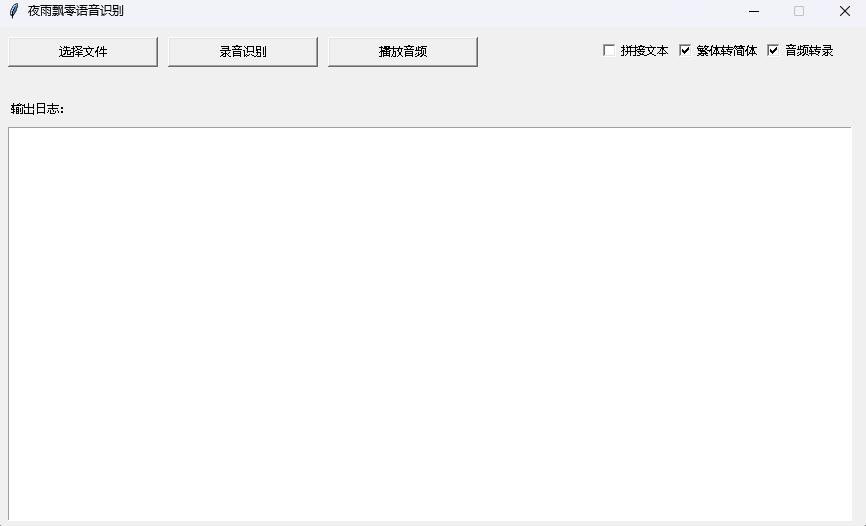
## GUI inference
`--model_path` specifies Transformers model. See this program for more parameters.
```shell
python infer_gui.py --model_path=models/whisper-tiny-finetune
```
After startup, the screen is as follows:
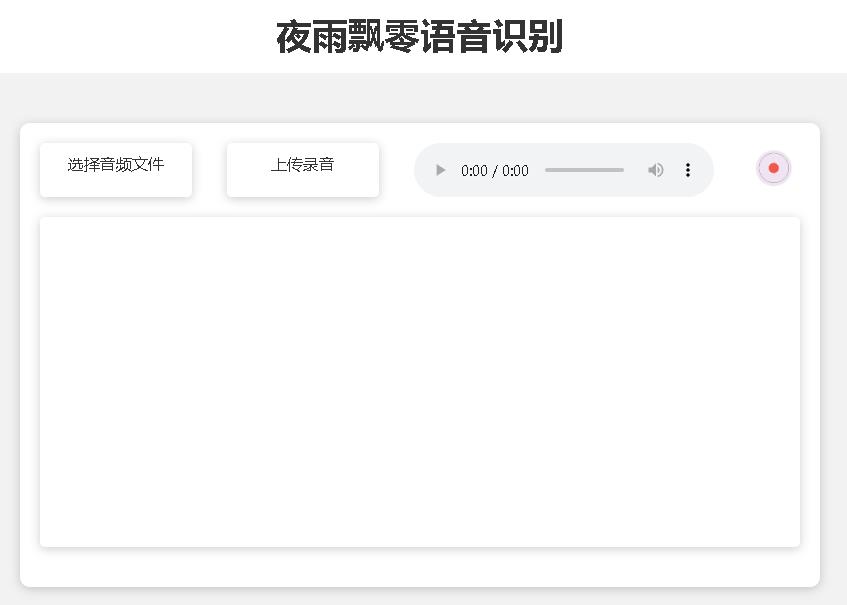
## Web deploy
`--host` specifies the address where the service will be started, here `0.0.0.0`, which means any address will be accessible. `--port`specifies the port number to use. `--model_path` specifies Transformers model. `--num_workers` specifies how many threads to use for concurrent inference, which is important in Web deployments where multiple concurrent accesses can be inferred at the same time. See this program for more parameters.
```shell
python infer_server.py --host=0.0.0.0 --port=5000 --model_path=models/whisper-tiny-finetune-ct2 --num_workers=2
```
### API docs
At present recognition interface `/recognition`, and the interface parameters are as follows.
| Field | Need | type | Default | Explain |
|:----------:|:----:|:------:|:----------:|:-------------------------------------------------------------------------:|
| audio | Yes | File | | Audio File |
| to_simple | No | int | 1 | Traditional Chinese to Simplified Chinese |
| remove_pun | No | int | 0 | Whether to remove punctuation |
| task | No | String | transcribe | Identify task types and support transcribe and translate |
| language | No | String | zh | Set the language, shorthand, to automatically detect the language if None |
Return result:
| Field | type | Explain |
|:-------:|:----:|:---------------------------------------------------:|
| results | list | Recognition results separated into individual parts |
| +result | str | Text recognition result for each separated part |
| +start | int | Start time in seconds for each separated part |
| +end | int | End time in seconds for each separated part |
| code | int | Error code, 0 indicates successful recognition |
Example:
```json
{
"results": [
{
"result": "近几年,不但我用书给女儿压碎,也全说亲朋不要给女儿压碎钱,而改送压碎书。",
"start": 0,
"end": 8
}
],
"code": 0
}
```
To make it easier to understand, here is the Python code to call the Web interface. Here is how to call `/recognition`.
```python
import requests
response = requests.post(url="http://127.0.0.1:5000/recognition",
files=[("audio", ("test.wav", open("dataset/test.wav", 'rb'), 'audio/wav'))],
json={"to_simple": 1, "remove_pun": 0, "language": "zh", "task": "transcribe"}, timeout=20)
print(response.text)
```
The provided test page is as follows:
The home page `http://127.0.0.1:5000/` looks like this:
Document page `http://127.0.0.1:5000/docs` page is as follows:
## Ctranslate2 inference
As we all know, directly using the Whisper model reasoning is relatively slow, so here provides a way to accelerate, mainly using CTranslate2 for acceleration, first to transform the model, transform the combined model into CTranslate2 model. In the following command, the `--model` parameter is the path of the merged model, but it is also possible to use the original whisper model directly, such as `openai/whisper-large-v2`. The `--output_dir` parameter specifies the path of the transformed CTranslate2 model, and the `--quantization` parameter quantizes the model size. If you don't want to quantize the model, you can drop this parameter.
```shell
ct2-transformers-converter --model models/whisper-tiny-finetune --output_dir models/whisper-tiny-finetune-ct2 --copy_files tokenizer.json preprocessor_config.json --quantization float16
```
Execute the following program to accelerate speech recognition, where the `--audio_path` argument specifies the audio path to predict. `--model_path` specifies the transformed CTranslate2 model. See this program for more parameters.
```shell
python infer_ct2.py --audio_path=dataset/test.wav --model_path=models/whisper-tiny-finetune-ct2
```
Output:
```shell
----------- Configuration Arguments -----------
audio_path: dataset/test.wav
model_path: models/whisper-tiny-finetune-ct2
language: zh
use_gpu: True
use_int8: False
beam_size: 10
num_workers: 1
vad_filter: False
local_files_only: True
------------------------------------------------
[0.0 - 8.0]:近几年,不但我用书给女儿压碎,也全说亲朋不要给女儿压碎钱,而改送压碎书。
```
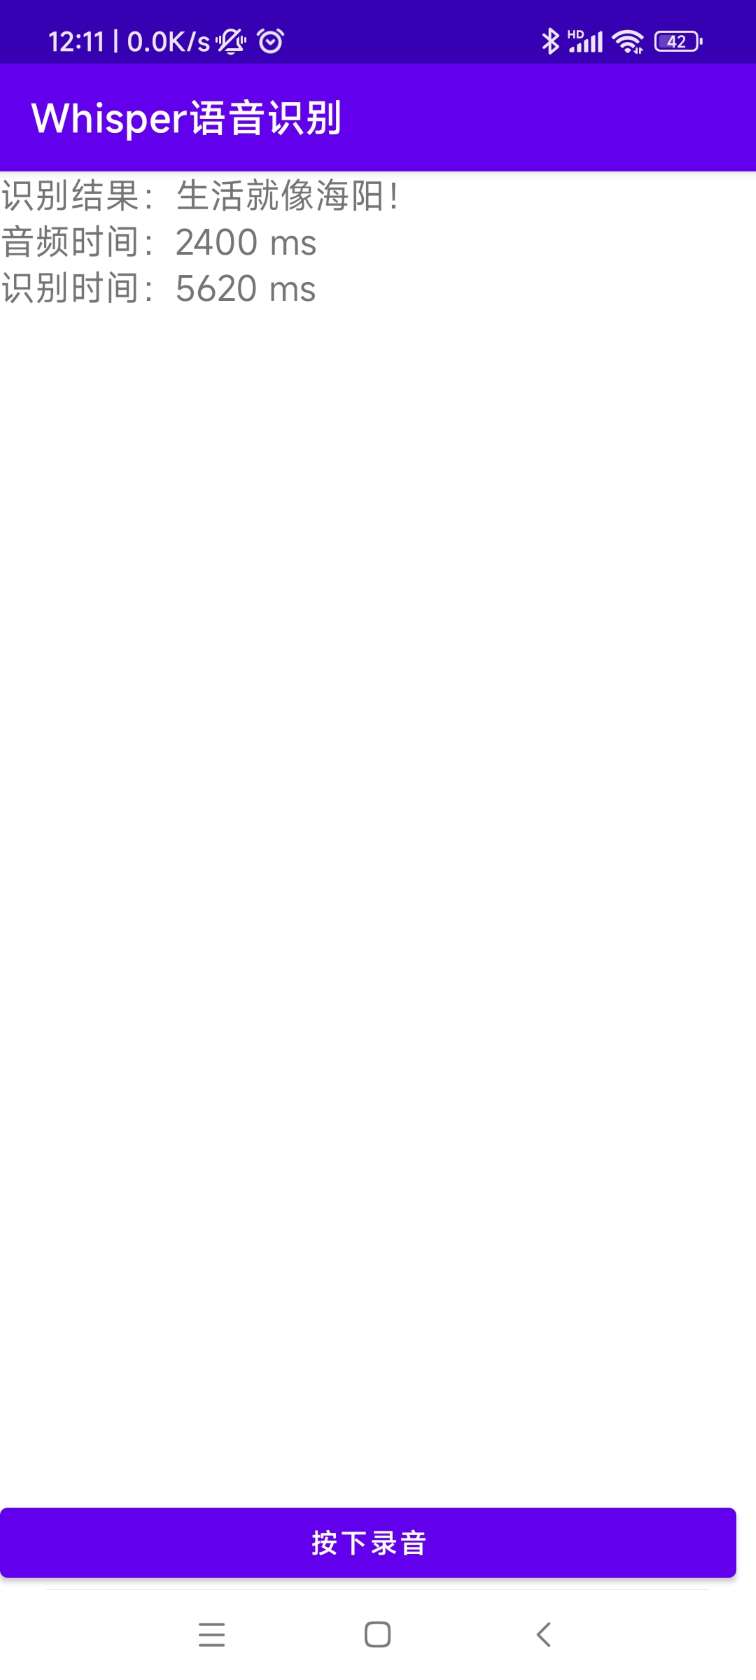
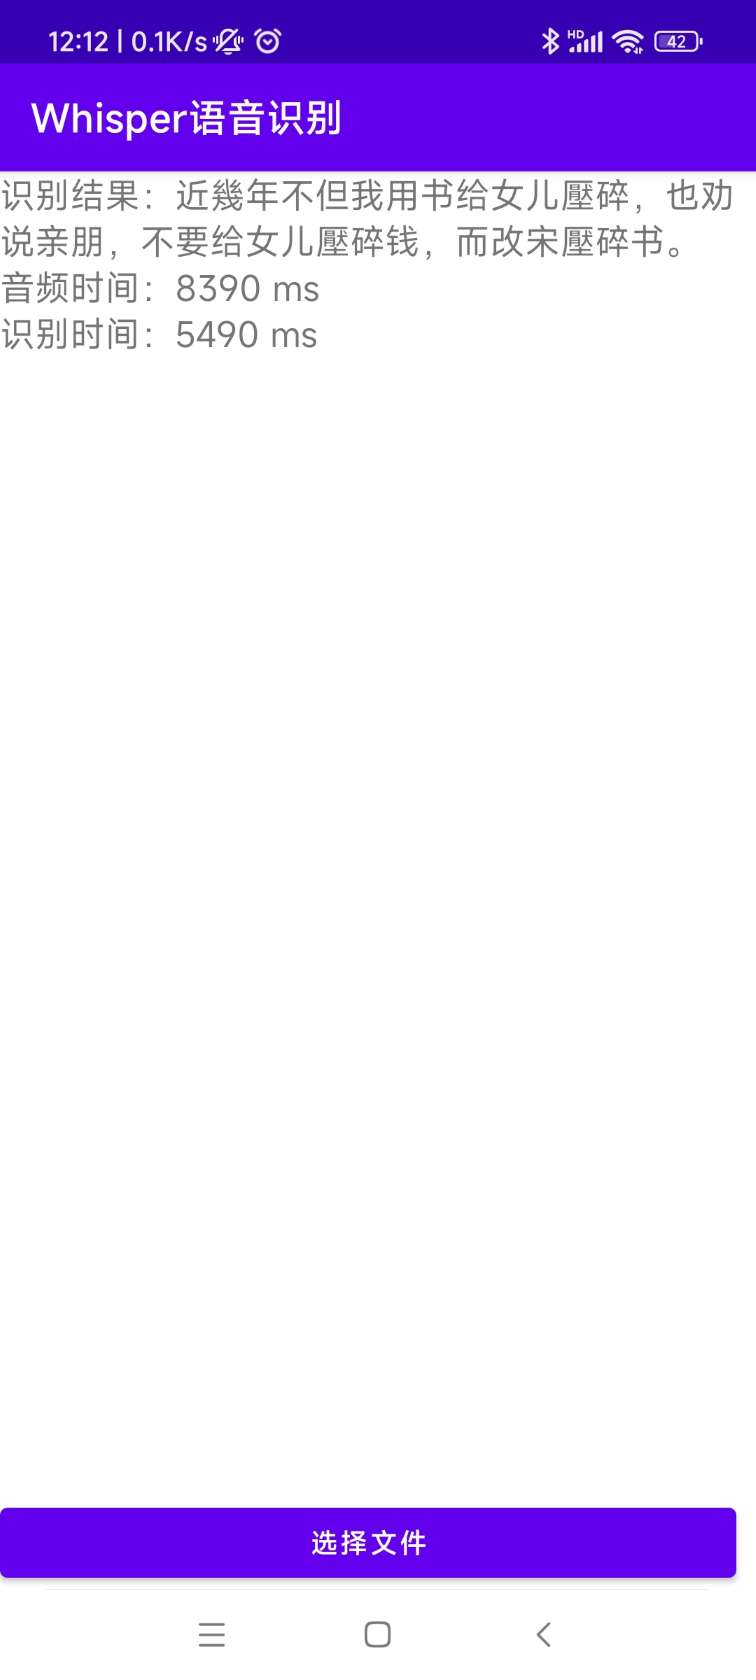
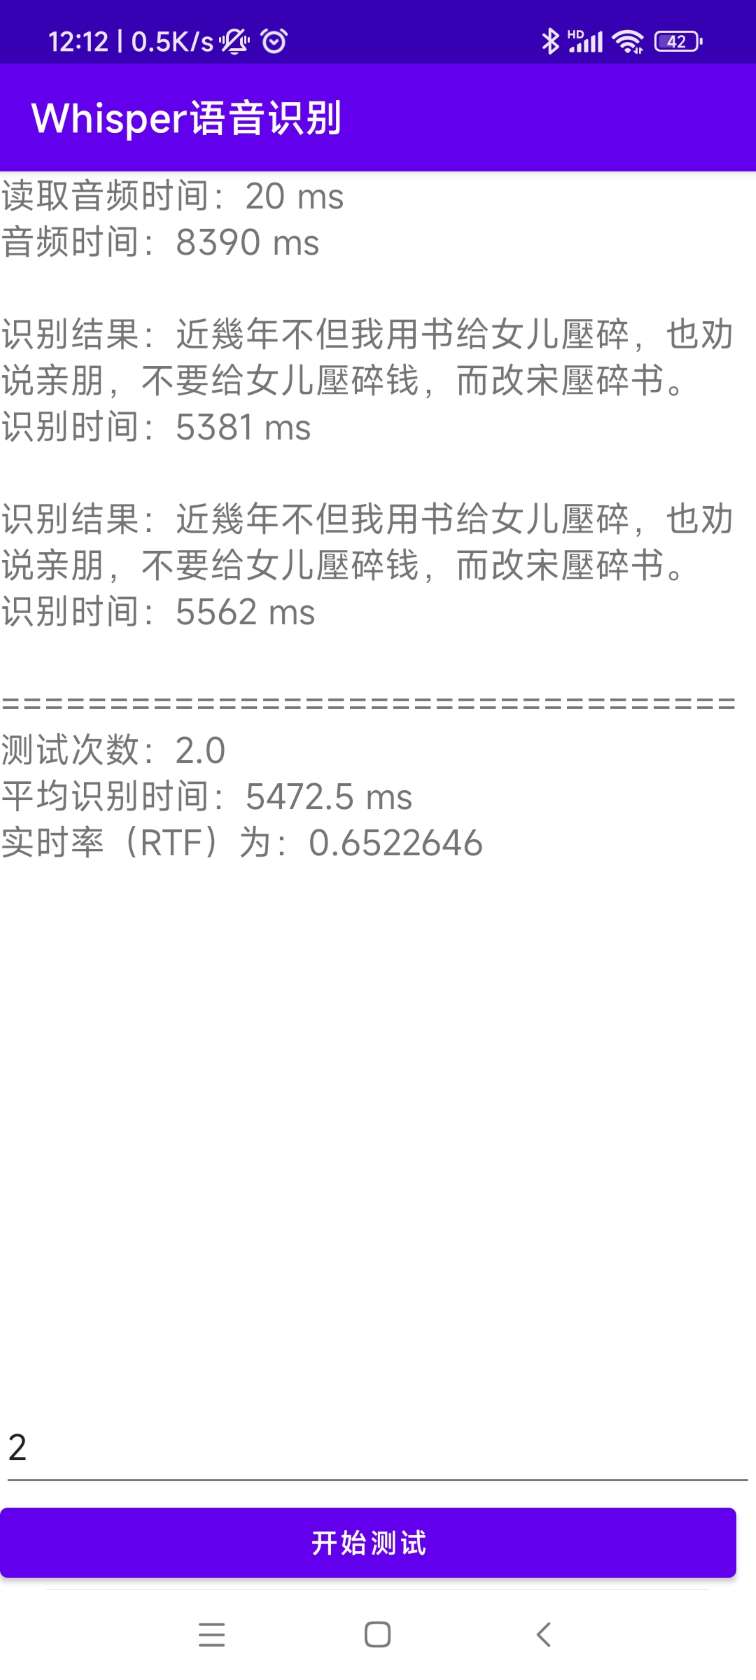
## Android
The source code for the installation and deployment can be found in [AndroidDemo](./AndroidDemo) and the documentation can be found in [README.md](AndroidDemo/README.md).
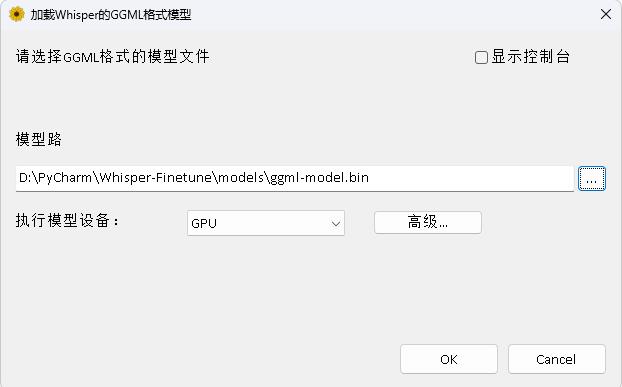
## Windows Desktop
The program is in the [WhisperDesktop](./WhisperDesktop) directory, and the documentation can be found in [README.md](WhisperDesktop/README.md).
## Reference
1. https://huggingface.co/blog/fine-tune-whisper
2. https://github.com/huggingface/peft
3. https://github.com/guillaumekln/faster-whisper
4. https://github.com/ggerganov/whisper.cpp
5. https://github.com/Const-me/Whisper