[English](README.md)
# 音乐灯带
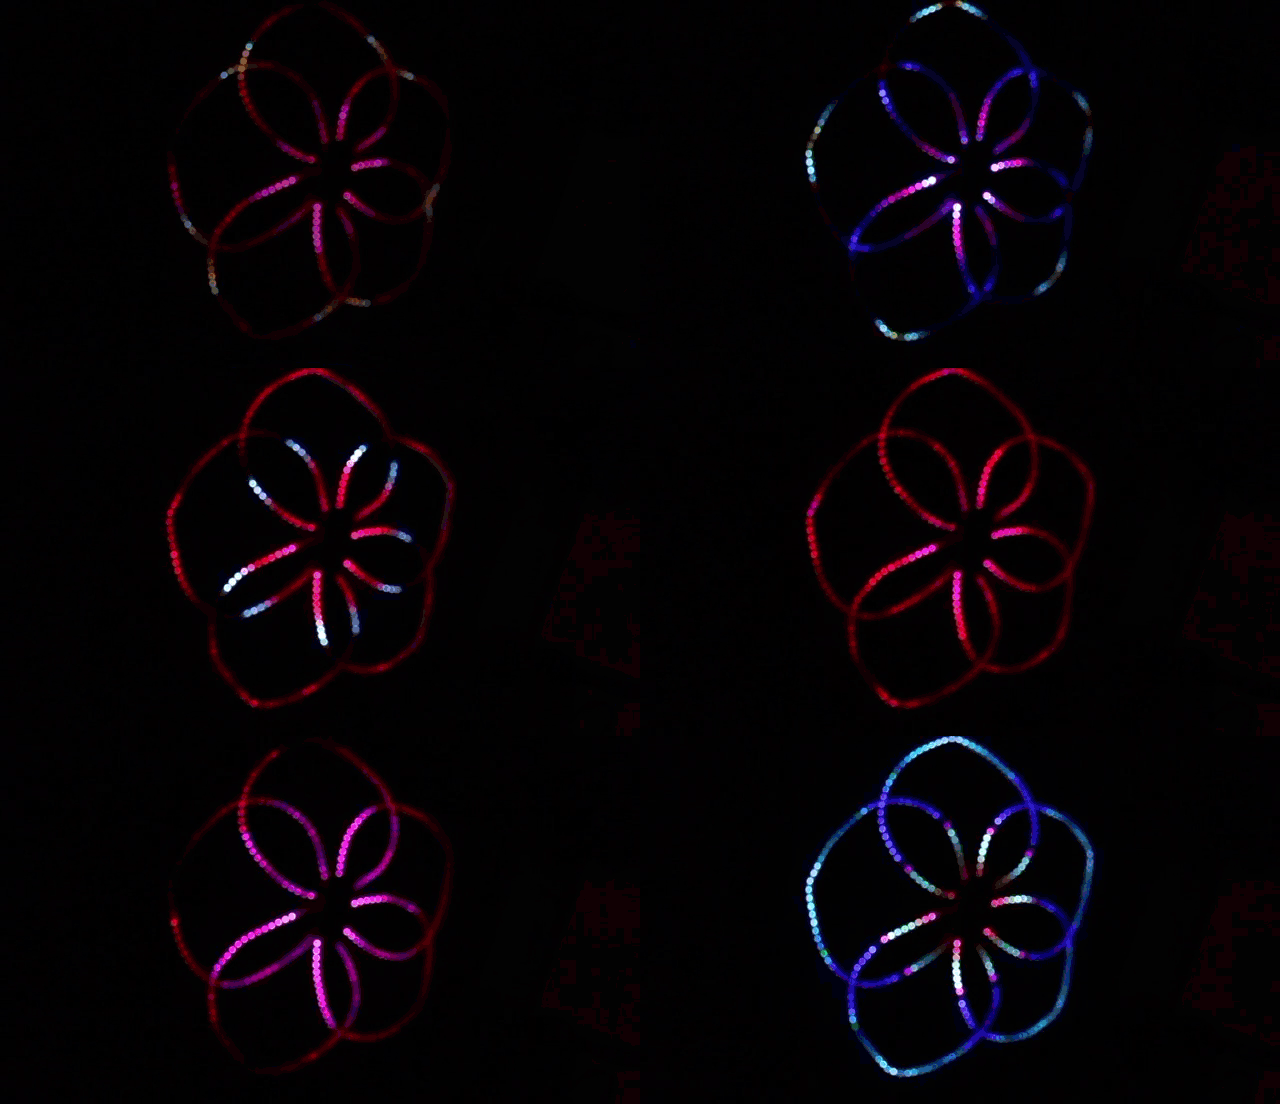
音乐灯带实时跟随当前环境声音,在led灯带上展现不同的虚拟效果。
程序基于ESP32模块,在Arduino或者[ESPHome](https://esphome.io/)平台上运行(ESPHome平台可方便接入[HomeAssistant](https://www.home-assistant.io))。
Real-time LED strip music visualization running on ESP32 based on Arduino or [ESPHome](https://esphome.io/) platform(ESPHome can connect to [HomeAssistant](https://www.home-assistant.io) easily).
注:本项目中的麦克风扩展版+Nodemcu32S,也可以作为智能音箱的远程麦克风使用。具体项目,请参见:
- [Home Assistant Add-on: voice_assistant](https://github.com/zhujisheng/hassio-addons/tree/master/voice_assistant)
- [远程麦克风](https://github.com/zhujisheng/Home-Assistant-DIY/tree/master/12.%E6%99%BA%E8%83%BD%E9%9F%B3%E7%AE%B1DIY)
## 效果展现
 ## 硬件与连接
#### 需要的硬件
- Nodemcu 32S
- [HAChina的麦克风扩展板](https://item.taobao.com/item.htm?spm=2013.1.0.0.79a151cb3dCJf5&id=592861974901&scm=1007.12144.95220.42296_0_0&pvid=66038172-197b-4d87-a5ee-a8d90ff6b8a0&utparam=%7B%22x_hestia_source%22%3A%2242296%22%2C%22x_object_type%22%3A%22item%22%2C%22x_hestia_subsource%22%3A%22default%22%2C%22x_mt%22%3A0%2C%22x_src%22%3A%2242296%22%2C%22x_pos%22%3A1%2C%22wh_pid%22%3A-1%2C%22x_pvid%22%3A%2266038172-197b-4d87-a5ee-a8d90ff6b8a0%22%2C%22scm%22%3A%221007.12144.95220.42296_0_0%22%2C%22x_object_id%22%3A592861974901%7D)
- 可控灯带
注:
1. HAChina的麦克风扩展板能与Nodemcu 32s直接进行物理对接。[产品购买地址](https://item.taobao.com/item.htm?spm=2013.1.0.0.79a151cb3dCJf5&id=592861974901&scm=1007.12144.95220.42296_0_0&pvid=66038172-197b-4d87-a5ee-a8d90ff6b8a0&utparam=%7B%22x_hestia_source%22%3A%2242296%22%2C%22x_object_type%22%3A%22item%22%2C%22x_hestia_subsource%22%3A%22default%22%2C%22x_mt%22%3A0%2C%22x_src%22%3A%2242296%22%2C%22x_pos%22%3A1%2C%22wh_pid%22%3A-1%2C%22x_pvid%22%3A%2266038172-197b-4d87-a5ee-a8d90ff6b8a0%22%2C%22scm%22%3A%221007.12144.95220.42296_0_0%22%2C%22x_object_id%22%3A592861974901%7D)
2. 如果不使用HAChina的麦克风扩展板,需要自己连接麦克风(PDM型,如果采用I2S麦克风,需要修改程序)。
3. 灯带控制使用FastLED库,它支持的可控灯带类型:
https://github.com/FastLED/FastLED#supported-led-chipsets
#### 麦克风扩展板与连接
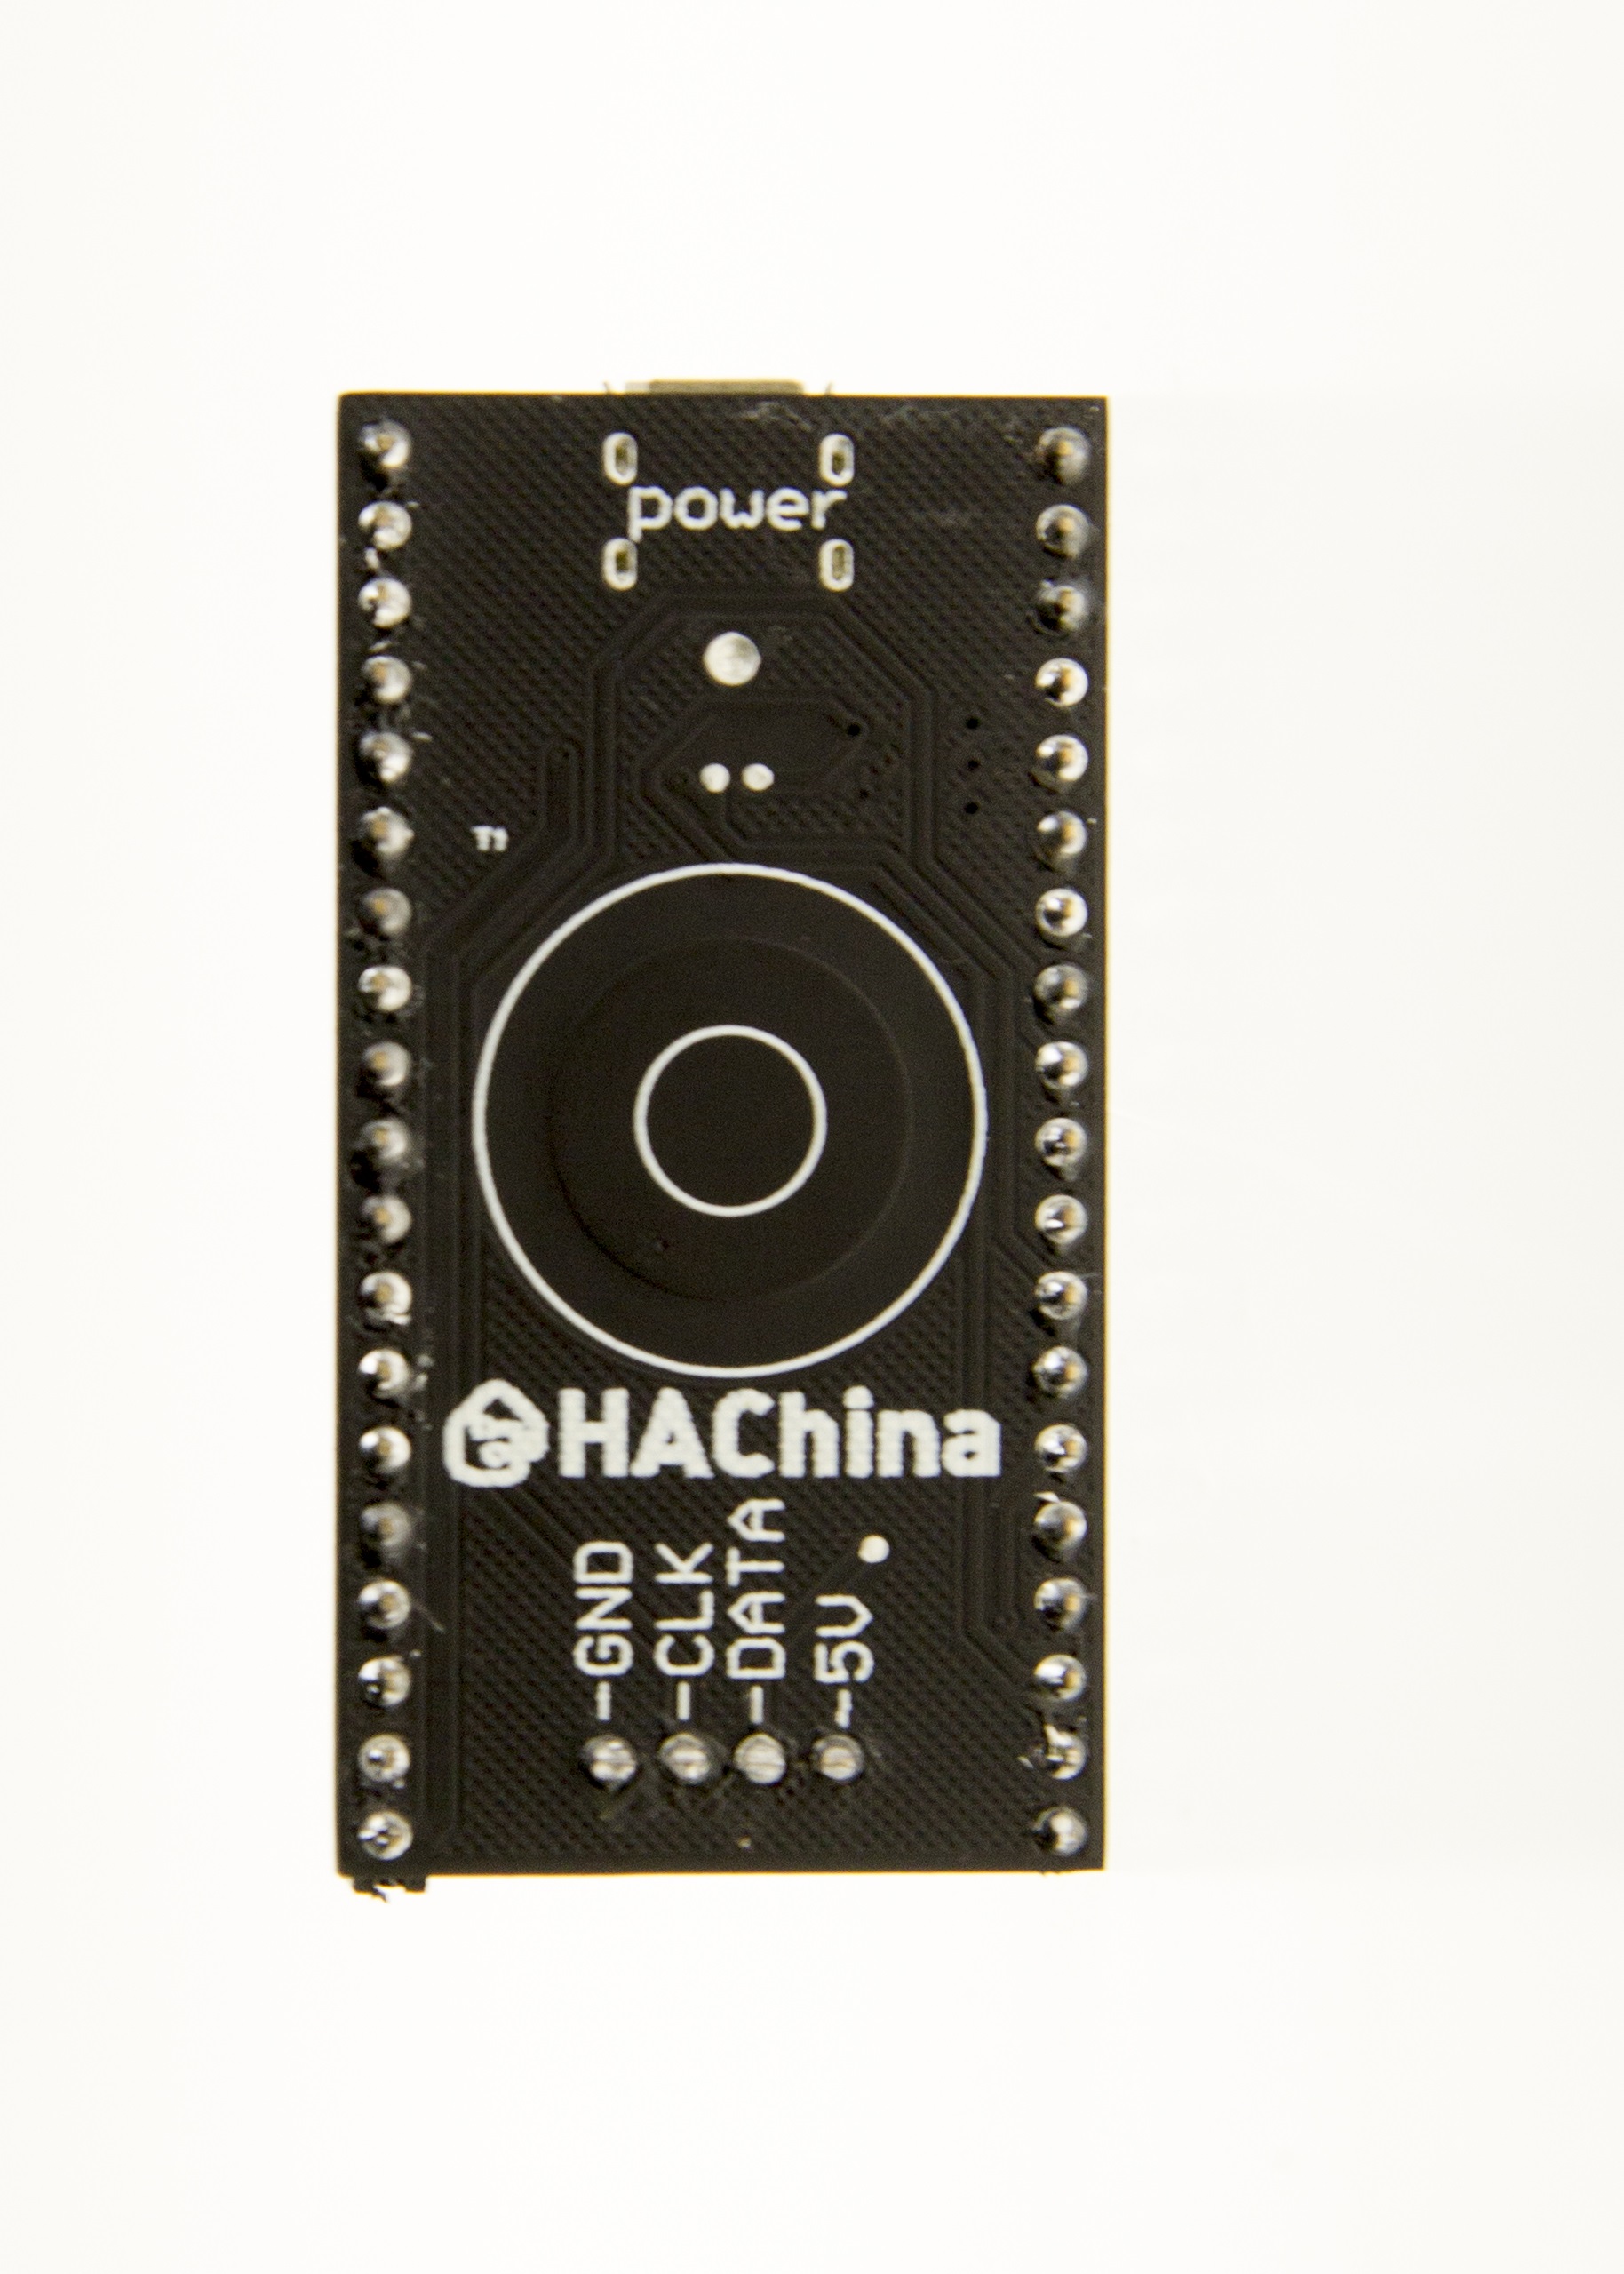
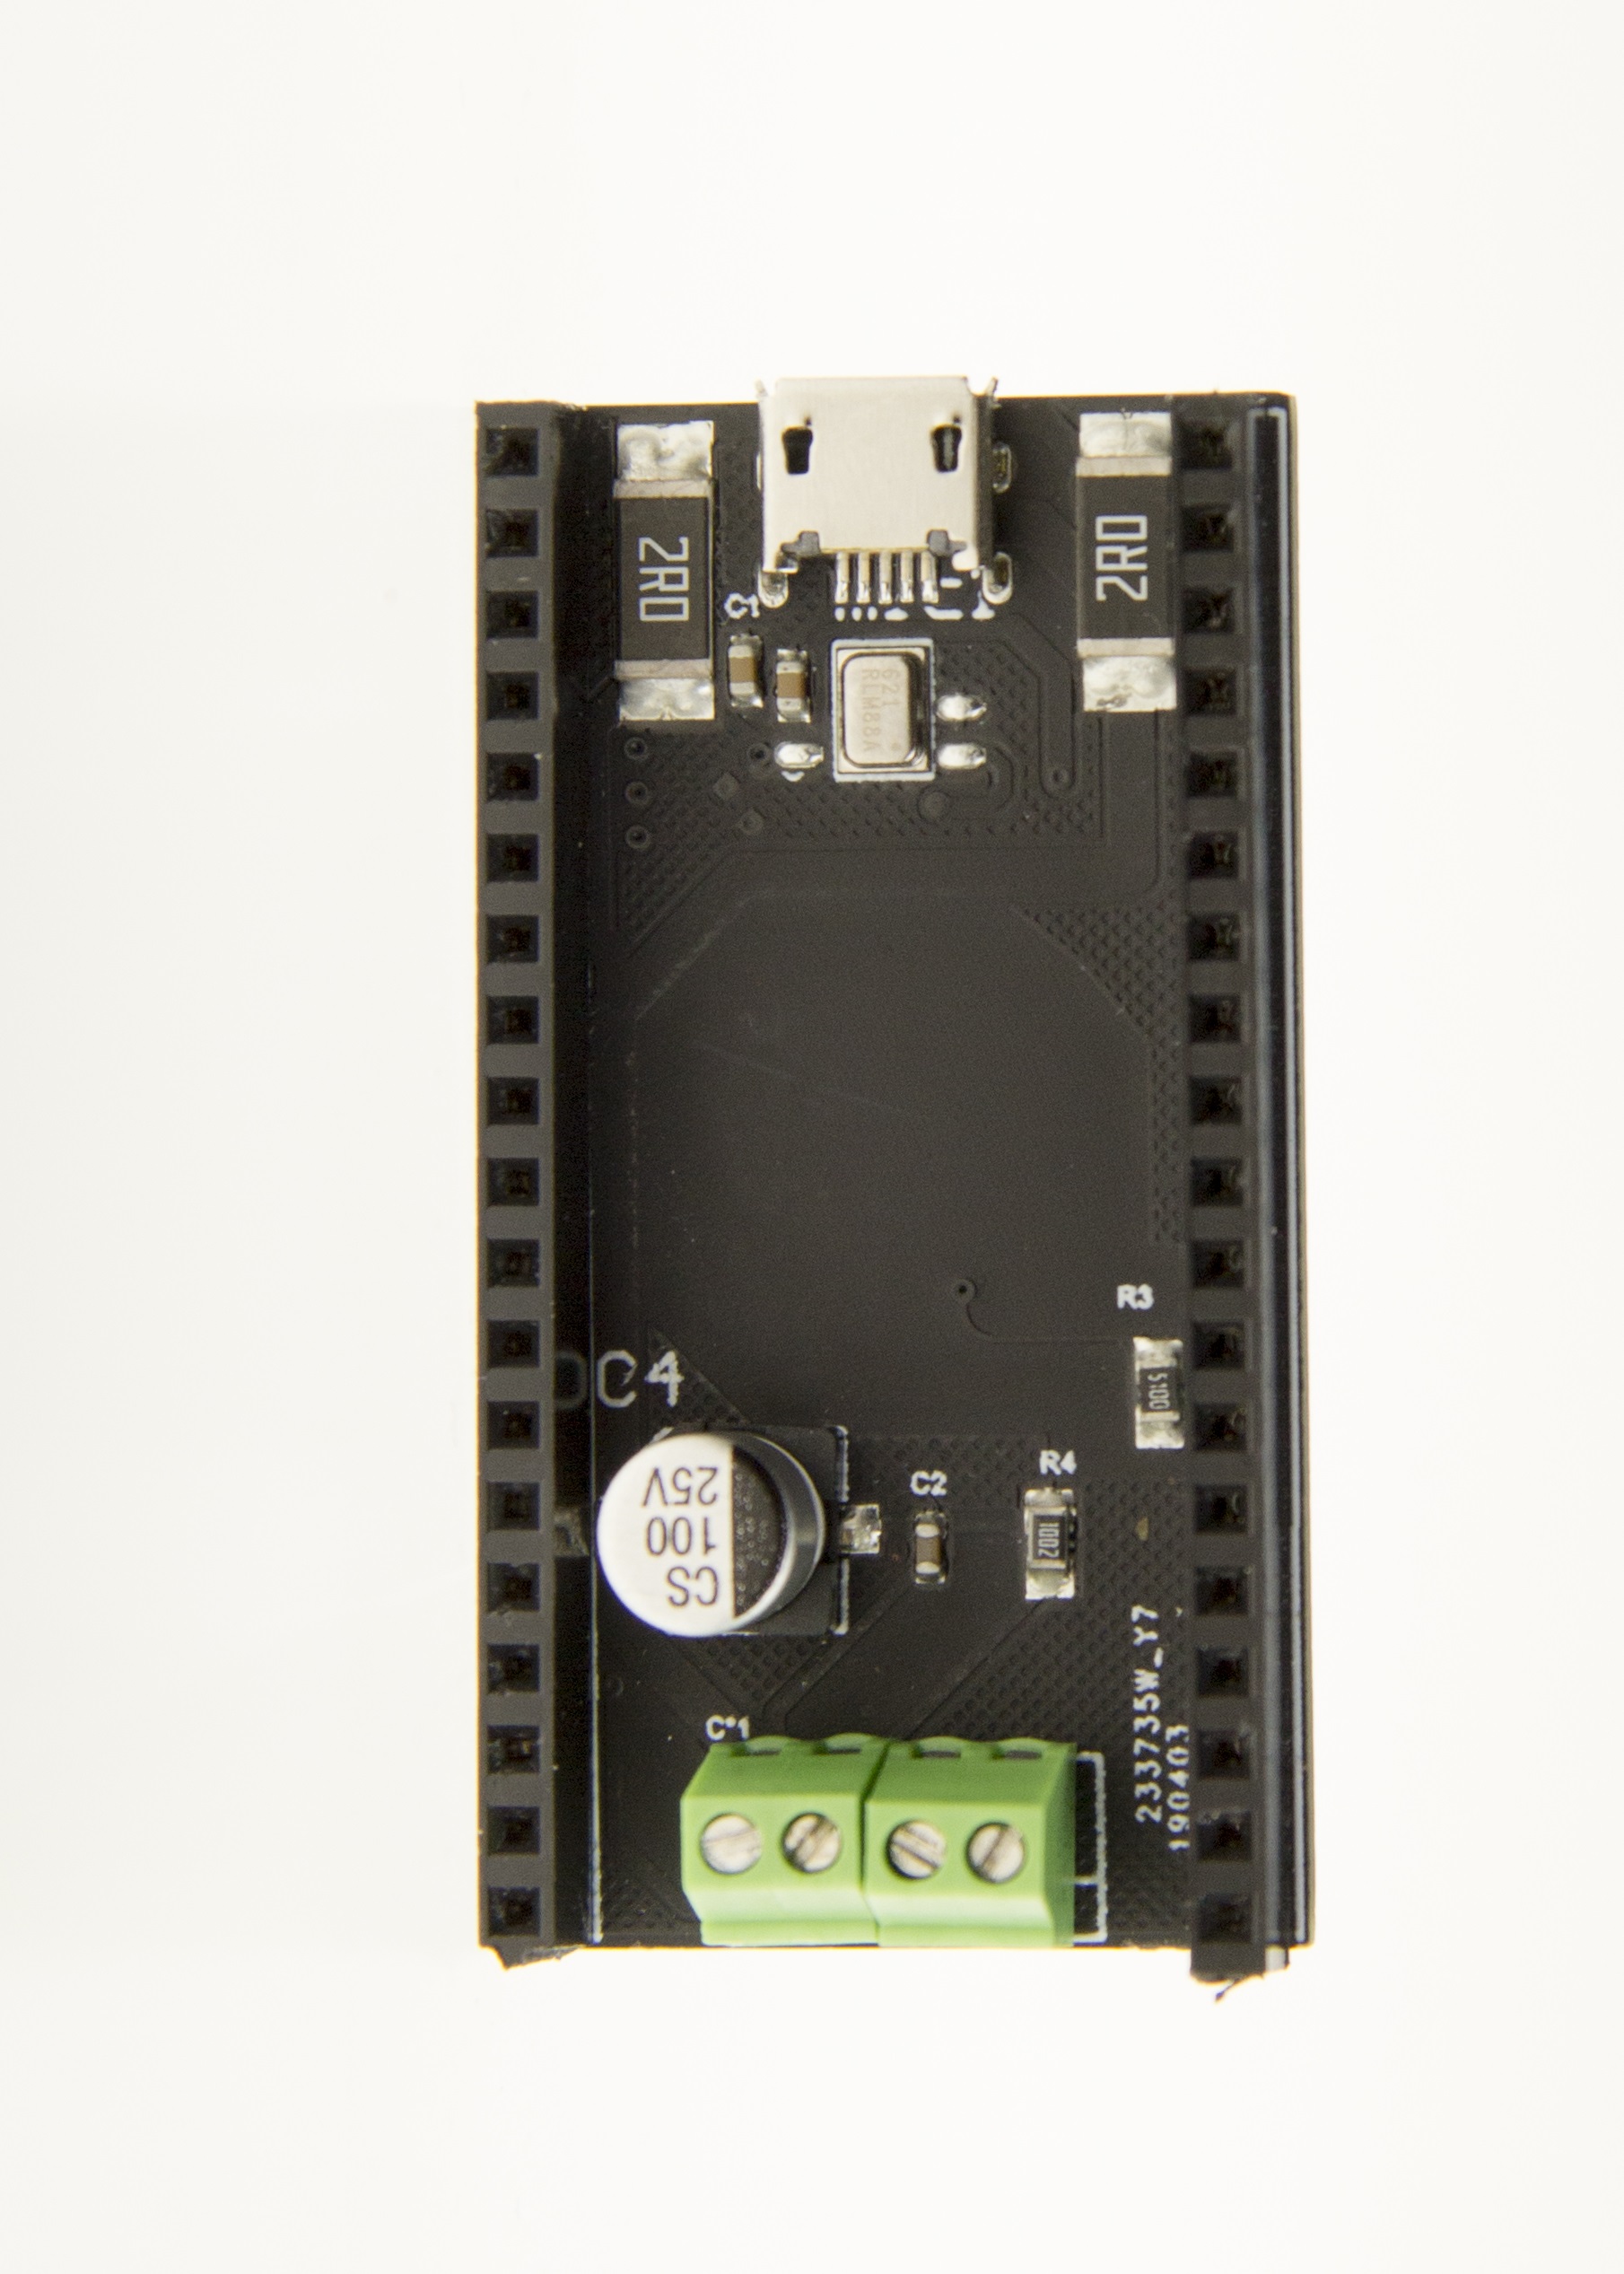
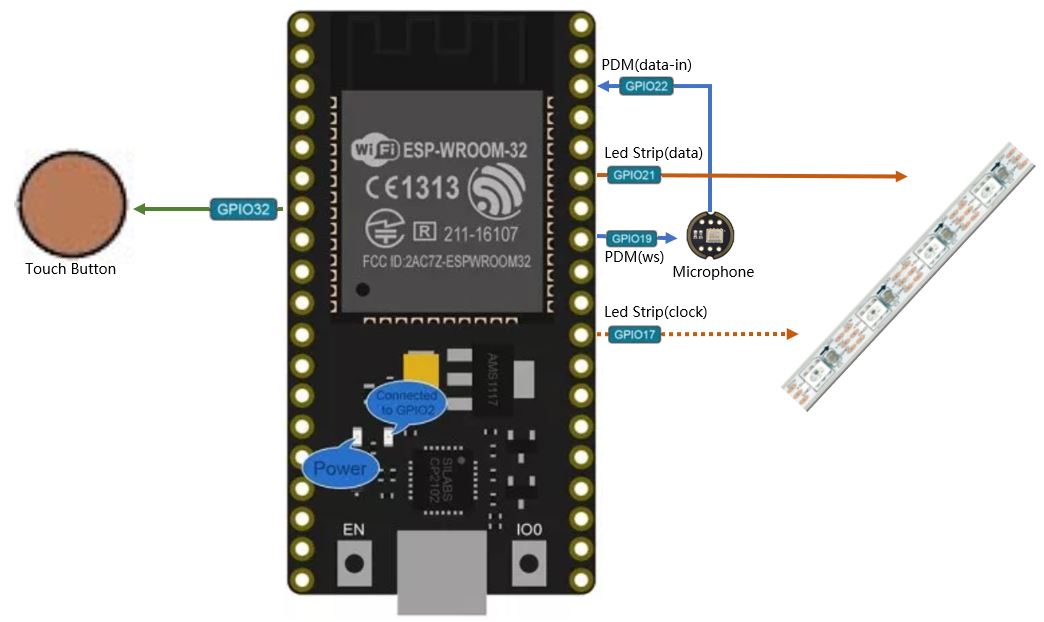
可以直接购买使用HAChina的麦克风扩展板,其中包含:一个PDM数字麦克风,一个触摸按钮,方便连接灯带的接线柱。
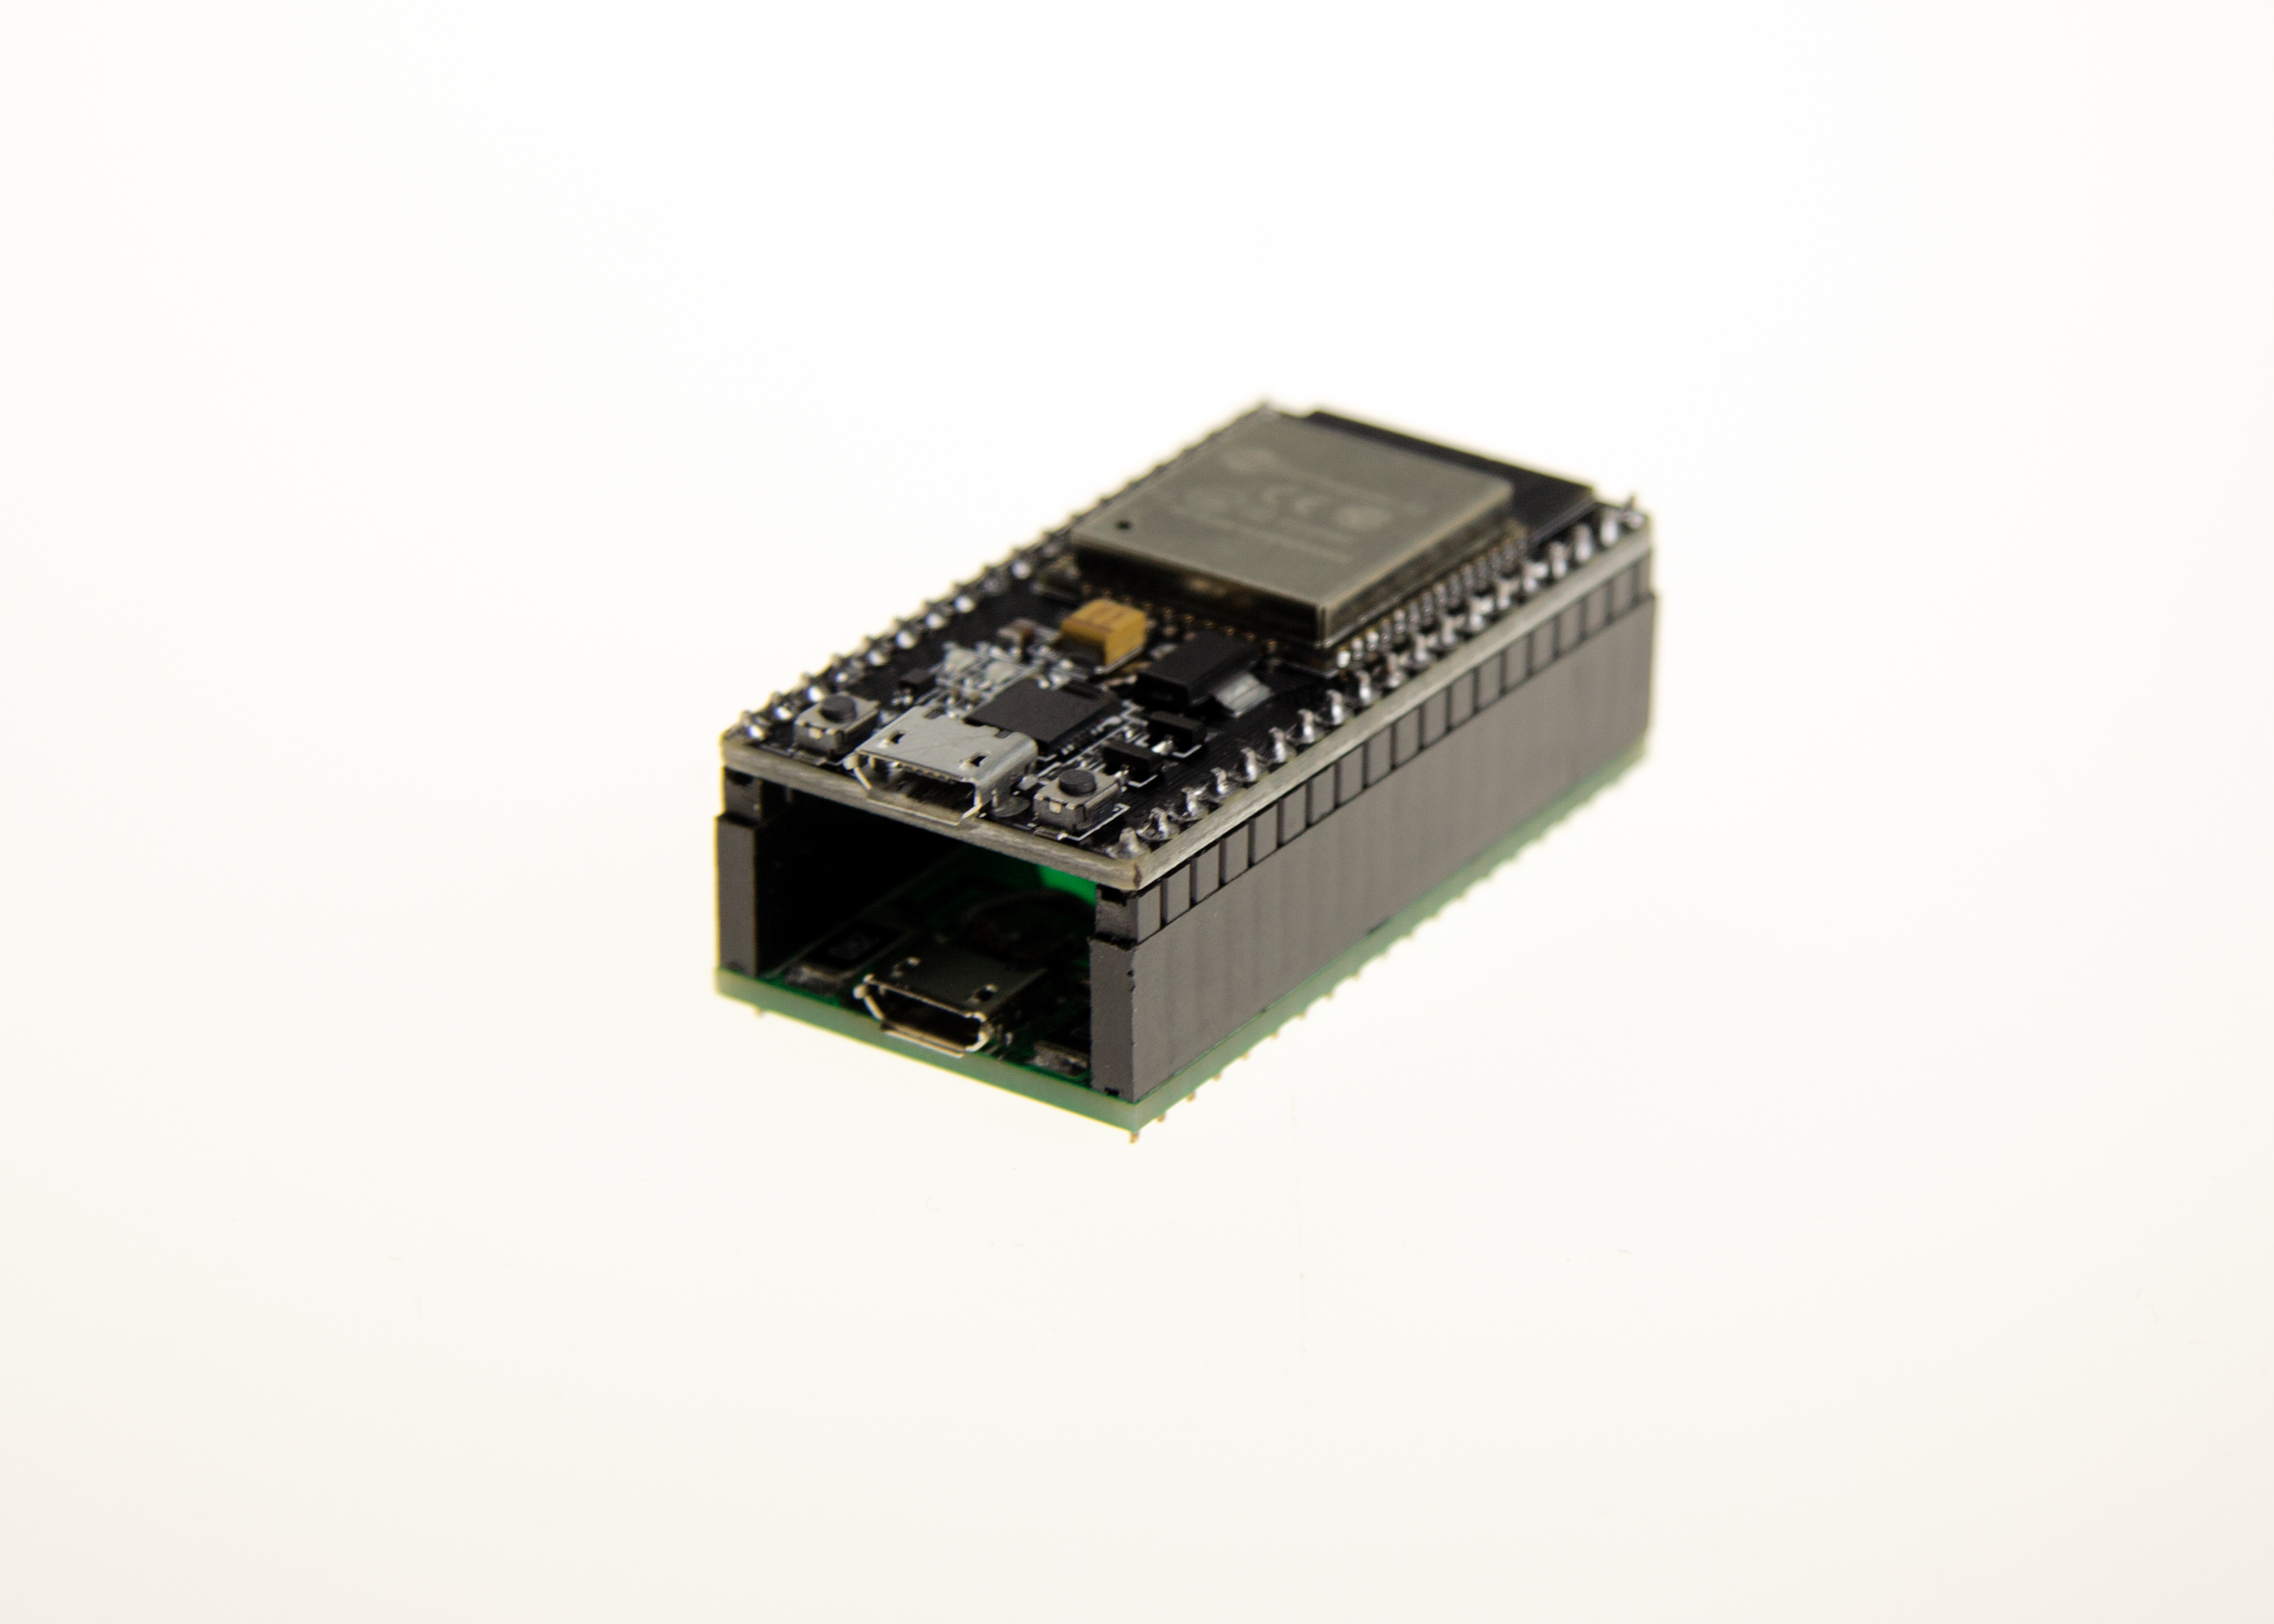
它能与nodemcu-32s方便对接。
## 硬件与连接
#### 需要的硬件
- Nodemcu 32S
- [HAChina的麦克风扩展板](https://item.taobao.com/item.htm?spm=2013.1.0.0.79a151cb3dCJf5&id=592861974901&scm=1007.12144.95220.42296_0_0&pvid=66038172-197b-4d87-a5ee-a8d90ff6b8a0&utparam=%7B%22x_hestia_source%22%3A%2242296%22%2C%22x_object_type%22%3A%22item%22%2C%22x_hestia_subsource%22%3A%22default%22%2C%22x_mt%22%3A0%2C%22x_src%22%3A%2242296%22%2C%22x_pos%22%3A1%2C%22wh_pid%22%3A-1%2C%22x_pvid%22%3A%2266038172-197b-4d87-a5ee-a8d90ff6b8a0%22%2C%22scm%22%3A%221007.12144.95220.42296_0_0%22%2C%22x_object_id%22%3A592861974901%7D)
- 可控灯带
注:
1. HAChina的麦克风扩展板能与Nodemcu 32s直接进行物理对接。[产品购买地址](https://item.taobao.com/item.htm?spm=2013.1.0.0.79a151cb3dCJf5&id=592861974901&scm=1007.12144.95220.42296_0_0&pvid=66038172-197b-4d87-a5ee-a8d90ff6b8a0&utparam=%7B%22x_hestia_source%22%3A%2242296%22%2C%22x_object_type%22%3A%22item%22%2C%22x_hestia_subsource%22%3A%22default%22%2C%22x_mt%22%3A0%2C%22x_src%22%3A%2242296%22%2C%22x_pos%22%3A1%2C%22wh_pid%22%3A-1%2C%22x_pvid%22%3A%2266038172-197b-4d87-a5ee-a8d90ff6b8a0%22%2C%22scm%22%3A%221007.12144.95220.42296_0_0%22%2C%22x_object_id%22%3A592861974901%7D)
2. 如果不使用HAChina的麦克风扩展板,需要自己连接麦克风(PDM型,如果采用I2S麦克风,需要修改程序)。
3. 灯带控制使用FastLED库,它支持的可控灯带类型:
https://github.com/FastLED/FastLED#supported-led-chipsets
#### 麦克风扩展板与连接
可以直接购买使用HAChina的麦克风扩展板,其中包含:一个PDM数字麦克风,一个触摸按钮,方便连接灯带的接线柱。
它能与nodemcu-32s方便对接。
 #### 物理连接图
实际物理连接图如下
#### 物理连接图
实际物理连接图如下
 ## ESPHome平台
##### 拷贝`music_leds_esphome.h`与`include`目录到ESPHome的配置目录中
`git clone https://github.com/zhujisheng/audio-reactive-led-strip`
`cp -r audio-reactive-led-strip/includes/ ~/esphome_config/`
`cp audio-reactive-led-strip/music_leds_esphome.h ~/esphome_config/`
注:以上命令供参考。你只要将`includes`目录(目录中4个文件)和`music_leds_esphome.h`文件放置在ESPhome的配置目录即可。
##### ESPHome Yaml配置
【配置灯带】
0. 在ESPHome中应用向导生成基础yaml配置文件
1. 在yaml配置文件的`esphome`域中增加包含`music_leds_esphome.h`文件(如下面样例)
2. 按照常规[fastled](https://esphome.io/components/light/fastled.html)灯带配置(支持3线与4线的各种灯带)
3. 在正常配置基础上,增加随音乐而动的`addressable_lambda`效果(如下面样例)
4. 编译固件,上传。启动后,在HomeAssistant配置中接入。
注:
- 上传固件到ESP32开发板时,需要按住板上IO0按钮(或者boot按钮)。
- 在供电不足时,上传后ESP32无法正常工作,增加电力供应即可。
- 如果灯带上led的数量不是60个,请同时修改配置文件中的`num_leds`,与`music_leds_esphome.h`文件中的`N_PIXELS`
```yaml
esphome:
name: ......
platform: ESP32
board: ......
includes:
- music_leds_esphome.h
- includes/FFT.h
- includes/ExpFilter.h
- includes/VisualEffect.h
- includes/gaussian_filter1d.h
.......
light:
- platform: fastled_clockless
# - platform: fastled_spi
id: LedsStrip
chipset: NEOPIXEL
#chipset: APA102
pin: GPIO21
#data_pin: GPIO21
#clock_pin: GPIO17
num_leds: 60
#rgb_order: BGR
name: "MUSIC LEDS"
effects:
- addressable_rainbow:
- addressable_lambda:
name: Scroll with Music
update_interval: 0s
lambda: |-
music_leds.ShowFrame(MODE_SCROLL, &it);
- addressable_lambda:
name: Energy with Music
update_interval: 0s
lambda: |-
music_leds.ShowFrame(MODE_ENERGY, &it);
- addressable_lambda:
name: Spectrum with Music
update_interval: 0s
lambda: |-
music_leds.ShowFrame(MODE_SPECTRUM, &it);
```
【配置触摸按钮】
以下配置实现Touch Pad开关灯的效果。
进一步的Touch Pad配置,参考:[https://esphome.io/components/binary_sensor/esp32_touch.html](https://esphome.io/components/binary_sensor/esp32_touch.html)
```yaml
esp32_touch:
# setup_mode: True
binary_sensor:
- platform: esp32_touch
name: "Touch Pad on ESP32"
pin: GPIO32
threshold: 1000
on_press:
then:
- light.toggle: LedsStrip
```
## Arduino平台
##### 在arduino IDE中安装ESP32开发库
启动arduino IDE ,在首选项中添加ESP32开发板网址:`https://dl.espressif.com/dl/package_esp32_index.json`
## ESPHome平台
##### 拷贝`music_leds_esphome.h`与`include`目录到ESPHome的配置目录中
`git clone https://github.com/zhujisheng/audio-reactive-led-strip`
`cp -r audio-reactive-led-strip/includes/ ~/esphome_config/`
`cp audio-reactive-led-strip/music_leds_esphome.h ~/esphome_config/`
注:以上命令供参考。你只要将`includes`目录(目录中4个文件)和`music_leds_esphome.h`文件放置在ESPhome的配置目录即可。
##### ESPHome Yaml配置
【配置灯带】
0. 在ESPHome中应用向导生成基础yaml配置文件
1. 在yaml配置文件的`esphome`域中增加包含`music_leds_esphome.h`文件(如下面样例)
2. 按照常规[fastled](https://esphome.io/components/light/fastled.html)灯带配置(支持3线与4线的各种灯带)
3. 在正常配置基础上,增加随音乐而动的`addressable_lambda`效果(如下面样例)
4. 编译固件,上传。启动后,在HomeAssistant配置中接入。
注:
- 上传固件到ESP32开发板时,需要按住板上IO0按钮(或者boot按钮)。
- 在供电不足时,上传后ESP32无法正常工作,增加电力供应即可。
- 如果灯带上led的数量不是60个,请同时修改配置文件中的`num_leds`,与`music_leds_esphome.h`文件中的`N_PIXELS`
```yaml
esphome:
name: ......
platform: ESP32
board: ......
includes:
- music_leds_esphome.h
- includes/FFT.h
- includes/ExpFilter.h
- includes/VisualEffect.h
- includes/gaussian_filter1d.h
.......
light:
- platform: fastled_clockless
# - platform: fastled_spi
id: LedsStrip
chipset: NEOPIXEL
#chipset: APA102
pin: GPIO21
#data_pin: GPIO21
#clock_pin: GPIO17
num_leds: 60
#rgb_order: BGR
name: "MUSIC LEDS"
effects:
- addressable_rainbow:
- addressable_lambda:
name: Scroll with Music
update_interval: 0s
lambda: |-
music_leds.ShowFrame(MODE_SCROLL, &it);
- addressable_lambda:
name: Energy with Music
update_interval: 0s
lambda: |-
music_leds.ShowFrame(MODE_ENERGY, &it);
- addressable_lambda:
name: Spectrum with Music
update_interval: 0s
lambda: |-
music_leds.ShowFrame(MODE_SPECTRUM, &it);
```
【配置触摸按钮】
以下配置实现Touch Pad开关灯的效果。
进一步的Touch Pad配置,参考:[https://esphome.io/components/binary_sensor/esp32_touch.html](https://esphome.io/components/binary_sensor/esp32_touch.html)
```yaml
esp32_touch:
# setup_mode: True
binary_sensor:
- platform: esp32_touch
name: "Touch Pad on ESP32"
pin: GPIO32
threshold: 1000
on_press:
then:
- light.toggle: LedsStrip
```
## Arduino平台
##### 在arduino IDE中安装ESP32开发库
启动arduino IDE ,在首选项中添加ESP32开发板网址:`https://dl.espressif.com/dl/package_esp32_index.json`
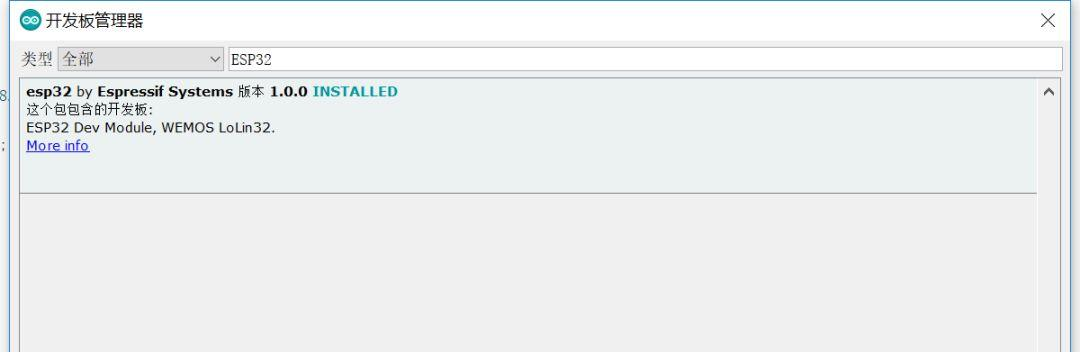
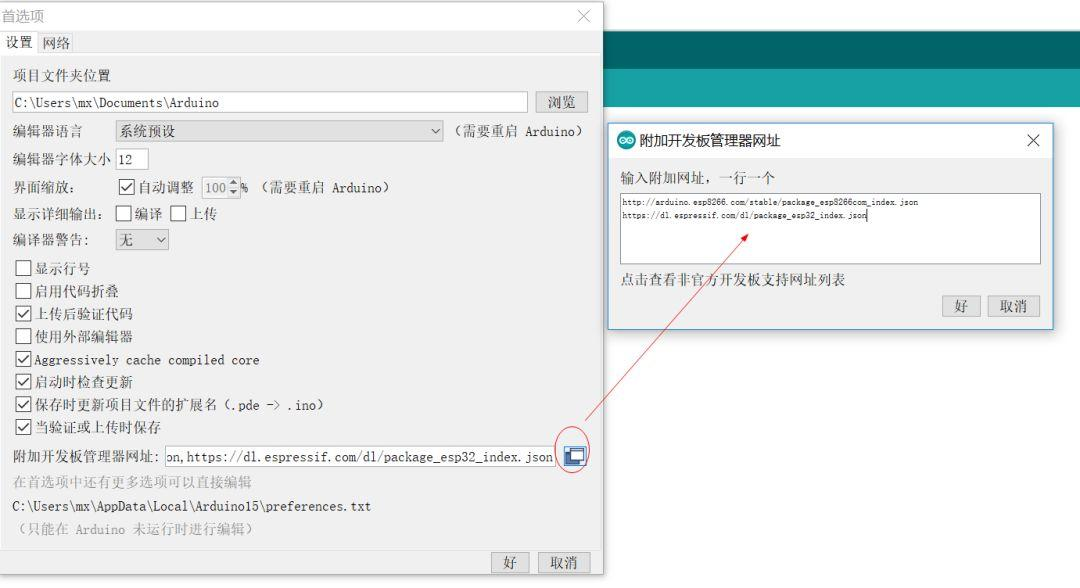 添加完成之后,打开开发板管理器,搜索ESP32,安装即可,由于网络原因,可能需要多安装几次才能成功。
 ##### 在arduino IDE中安装fastled库
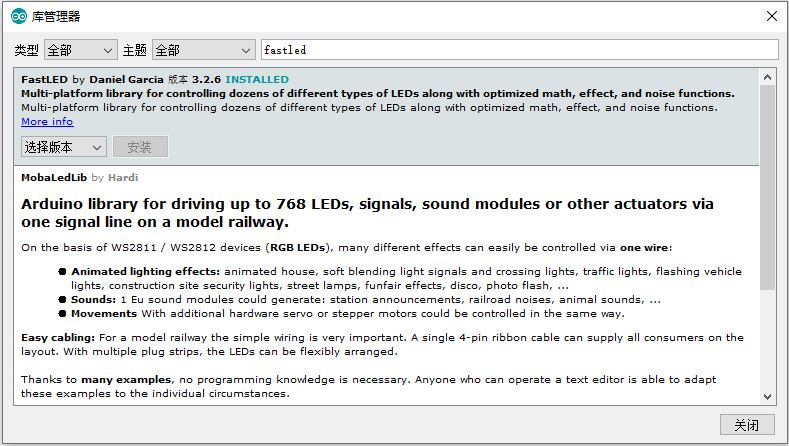
在菜单`项目` `加载库` `管理库……`中查找并安装最新版本的`fastled`。
##### 在arduino IDE中安装fastled库
在菜单`项目` `加载库` `管理库……`中查找并安装最新版本的`fastled`。
 ##### 克隆项目
`git clone https://github.com/zhujisheng/audio-reactive-led-strip`
##### 编译上传
1. 在Arduino中打开`audio-reactive-led-strip.ino`
2. 电脑USB口连接ESP32模块
3. 在菜单`工具`中选择正确的开发板与端口(串口)
##### 克隆项目
`git clone https://github.com/zhujisheng/audio-reactive-led-strip`
##### 编译上传
1. 在Arduino中打开`audio-reactive-led-strip.ino`
2. 电脑USB口连接ESP32模块
3. 在菜单`工具`中选择正确的开发板与端口(串口)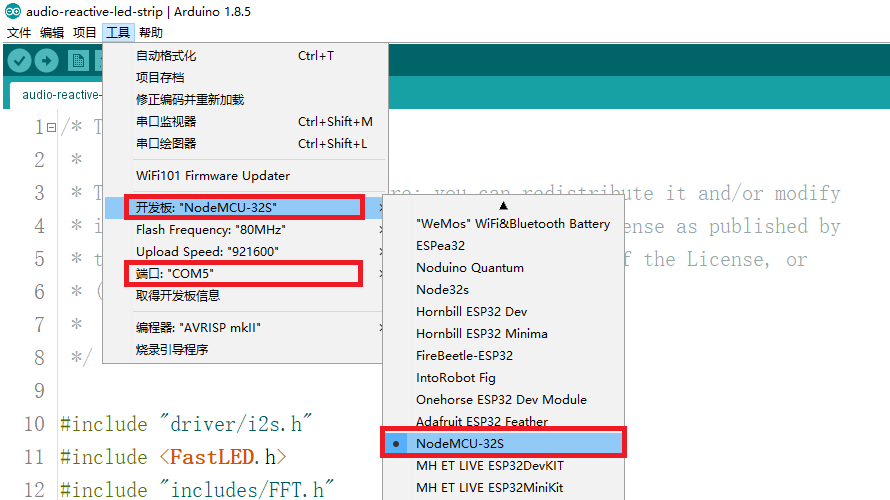 4. 编译上传即可
5. 如果连接非三线60led的灯带,可以修改`audio-reactive-led-strip.ino`文件中的一些定义:`N_PIXELS`以及`FastLED.addLeds`调用
## 致谢
本项目的实现参考项目[https://github.com/scottlawsonbc/audio-reactive-led-strip](https://github.com/scottlawsonbc/audio-reactive-led-strip)。但完全使用C++实现,运行硬件架构也更简洁(不需要带声音输入设备的PC或树莓派),并且能与HomeAssistant快速集成。
本项目中应用的PCB板的设计与生产,由[Zack-Xu](https://github.com/Zack-Xu)同学完成。
4. 编译上传即可
5. 如果连接非三线60led的灯带,可以修改`audio-reactive-led-strip.ino`文件中的一些定义:`N_PIXELS`以及`FastLED.addLeds`调用
## 致谢
本项目的实现参考项目[https://github.com/scottlawsonbc/audio-reactive-led-strip](https://github.com/scottlawsonbc/audio-reactive-led-strip)。但完全使用C++实现,运行硬件架构也更简洁(不需要带声音输入设备的PC或树莓派),并且能与HomeAssistant快速集成。
本项目中应用的PCB板的设计与生产,由[Zack-Xu](https://github.com/Zack-Xu)同学完成。