In this article:
To get started with Unidesk in Azure, you will need:
Note: If you have not already set up a connection to an Azure Virtual Network, see https://azure.microsoft.com/en-us/documentation/articles/?service=vpn-gateway for more information.
To deploy Unidesk for Azure, create a Virtual Machine in the Azure Marketplace using the Unidesk offering. This installs the Unidesk ELM with local storage for Unidesk Layers, Templates, and temporary files.
Using this procedure, you will do a basic Unidesk ELM installation in Azure. Once you complete these steps, use the following sections to change the administrator password (strongly recommended), and configure more advanced options, such as Static IP.
Open a web browser, navigate to the Microsoft Azure portal, sign in with your Azure credentials, and click New.
Fill out the Basics, Size, and Settings options for creating a new VM.
Notes:
To complete the process, view the Summary of the options you selected and, when you are satisfied with your selections, click OK, and click Purchase.
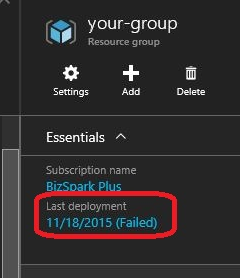
Note: If you experience a failed deployment of a Virtual Machine in Azure, you can obtain more detail regarding the nature of the failure by browsing to the relevant resource group and clicking the related "(Failed)" link.

Once you've completed the ELM installation, you should immediately log into the ELM and:
The Unidesk Appliance Configuration utility lets you configure these settings. For details, click Manage the Unidesk ELM (virtual appliance) .
If you need to expand the ELM's local storage, see Manage system storage.
Once you're satisfied that the ELM is correctly configured and has the required storage space, you can log into the Unidesk Management Console, and begin creating your layers.
Log into the Unidesk Management Console (UMC)