winget install FabioColor.FadedBalancerDCTL
Preferred on Windows: install via winget. For macOS (or fallback), use the installer ZIPs from
Latest Release.
Background & Science • Presets Companion • FAQ • Discussions
A DaVinci Resolve DCTL for balancing RGB channels and correcting faded film scans. It provides accessible and flexible tools for channel adjustment, mixing, and restoration preparation. --- ### Version **Current: v1.6.0** #### What's New in v1.6.0 - **Enhanced Channel Mixing**: Added shadow/highlight targeting for all channel mixing operations (matrix and darken/lighten) - **🎭 Mixing Shadows**: Control how much mixing affects shadow areas (0-1) - **🎭 Mixing Highlights**: Control how much mixing affects highlight areas (0-1) - **🎭 Donor Luminance**: Adjust brightness of source channel before mixing (0.1-3.0) - All three controls now affect both matrix mixing (e.g. Red from Green) and darken/lighten mixing (e.g. Red darken with Green) - Perfect for selective film restoration (e.g., repair blue damage only in shadows, or boost highlights with controlled donor brightness) - **👁️ Channel Preview**: Toggle between Normal, Red Only, Green Only, Blue Only isolation modes - Essential for film restoration workflow - inspect individual channels without keybindings - **Improved Pipeline**: Streamlined processing with better tonal masking algorithms #### What's New in v1.5.0 - **New Channel Mixer**: RGB matrix mixing for advanced highlight recovery and channel reconstruction - Cross-channel boost controls enable rebuilding clipped channels using data from other channels #### What's New in v1.4.0 - Added non-destructive preset system (10 starter corrective presets; toggling back to None restores baseline UI state). - Internal pipeline clarified (see Pipeline section) – ordering unchanged from spec; presets occur before global stage. - Minor doc clarifications; no processing math changes versus v1.3.0. #### What's New in v1.3.0 - Added `Preserve Luminance` (⚖) – normalizes luma after per-channel stage only (global adjustments still shift exposure). - Renamed channel "Copy" operations to clearer **Replace** (e.g. "Replace Red → With Green"). - Locked processing order: Global → Fade Correction → Per-Channel → Mixing → Replace → Removal → Output. - Consolidated UI/label/icon overhaul (option text simplification, Darken/Lighten composite combos, consistent icon set, duplicate definitions removed). #### What's New in v1.2.0 - Removed final hard clamp to preserve full floating-point range during grading. - Added `Output to Cineon Log` checkbox to inspect and balance channels safely without clipping. - Added per-channel Offset controls (Red/Green/Blue) for finer pre-lift channel alignment. --- ### Features - **Film Fade Correction:** A dedicated tool to correct faded footage by adaptively enhancing contrast and saturation. - **Global & Per-Channel Balance:** Adjust Lift, Gamma, and Gain for all channels together or individually. - **Preserve Luminance (⚖):** Optional re-normalization of luma after per-channel adjustments. - **Channel Mixer & Highlight Boost:** RGB matrix mixing for highlight recovery (e.g., boost clipped red channel using green/blue data) plus Min/Max composites. - **Donor Luminance, Mixing Shadows, and Mixing Highlights** affect both matrix mixing and darken/lighten mixing. This means you can control where and how strongly donor channels contribute to repairs, for all types of mixing. - Use these controls to target only shadows, only highlights, or adjust donor brightness for precise restoration. - **Enhanced Channel Mixing (v1.6.0):** Shadow/highlight targeting for precise tonal control of darken/lighten operations and matrix mixing. - **Channel Preview (v1.6.0):** Individual channel isolation (Red/Green/Blue Only) for inspection without keybindings. - **Channel Replace & Removal:** Replace a channel's data with another or remove a channel entirely. - **Optional Cineon Output:** Linear → Cineon-like log inspection mode. - **Presets (v1.4.0):** Non-destructive internal presets. See `docs/presets_companion.md` for details. --- ### Practical Usage Guidance - **When to use Donor Luminance:** - If the donor channel is too bright and over-corrects, lower Donor Luminance (e.g. 0.7-0.9). - If the donor is too dark, increase Donor Luminance (e.g. 1.1-1.5). - This works for both matrix mixing and darken/lighten mixing. - **When to use Mixing Shadows/Highlights:** - Set Mixing Shadows to 1.0 and Highlights to 0.0 to restrict repairs to shadow regions. - Set Mixing Highlights to 1.0 and Shadows to 0.0 to target only highlights. - Use both at intermediate values for smooth transitions. - **All mixing controls (matrix and min/max) are affected by these settings.** - **Channel Preview:** Use to inspect individual channels for damage before and after repairs. --- ### Pipeline (Processing Order) The image is processed through the following steps in a fixed order: 1. **🎨 Preset Application** (Internal temporary variables only) 2. **🌍 Global Adjust** (Offset / Shadows / Midtones / Highlights) 3. **✨ Fade Correction** (Contrast + Saturation nudge) 4. **🎨 Per-Channel Adjust** (R/G/B) 5. **⚖️ Optional Preserve Luminance** (Post per-channel only) 6. **📈 Channel Mixer** (RGB matrix for highlight boost) 7. **🎭 Enhanced Mixing** (Darken / Lighten with shadow/highlight targeting) 8. **➡️ Replace** (Explicit channel copy) 9. **❌ Removal** (Zero out channels) 10. **👁️ Channel Preview** (Isolation for inspection) 11. **📜 Optional Output to Cineon Log** --- ### Before & After Here are a few examples showcasing the plugin's effectiveness in correcting faded film scans. **Example 1: Night Scene** | Before | After | | :---: | :---: | | 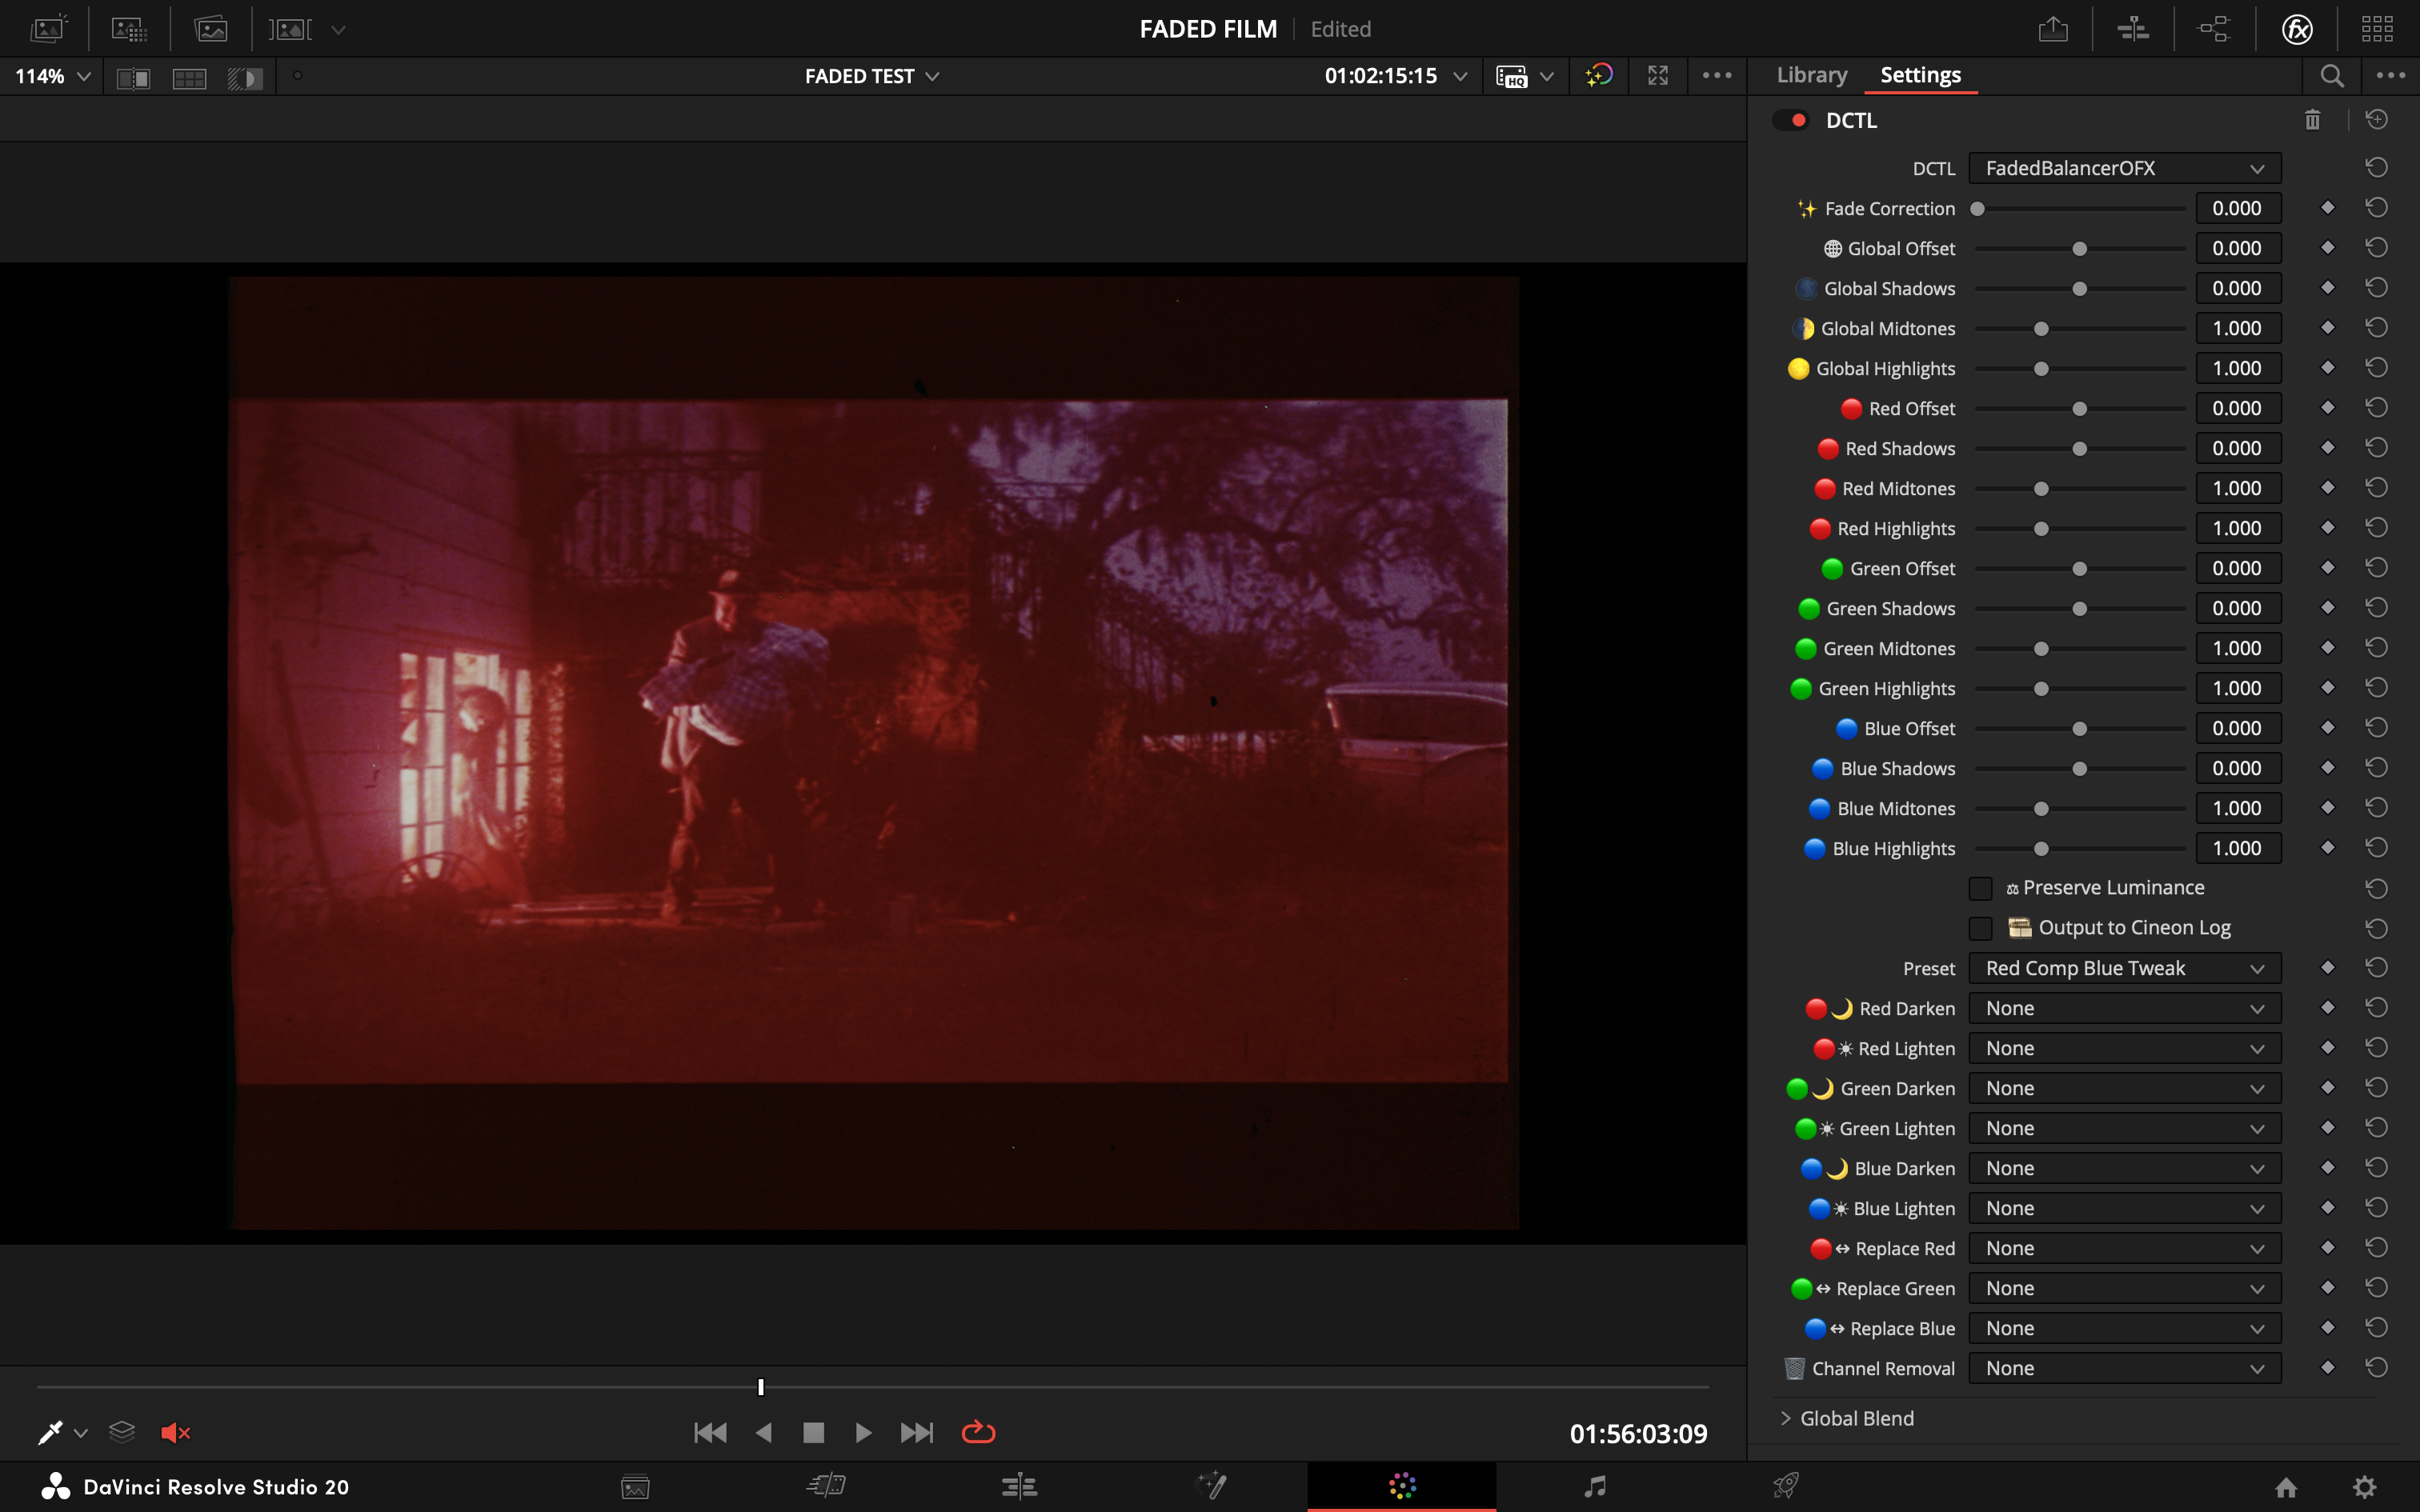 | 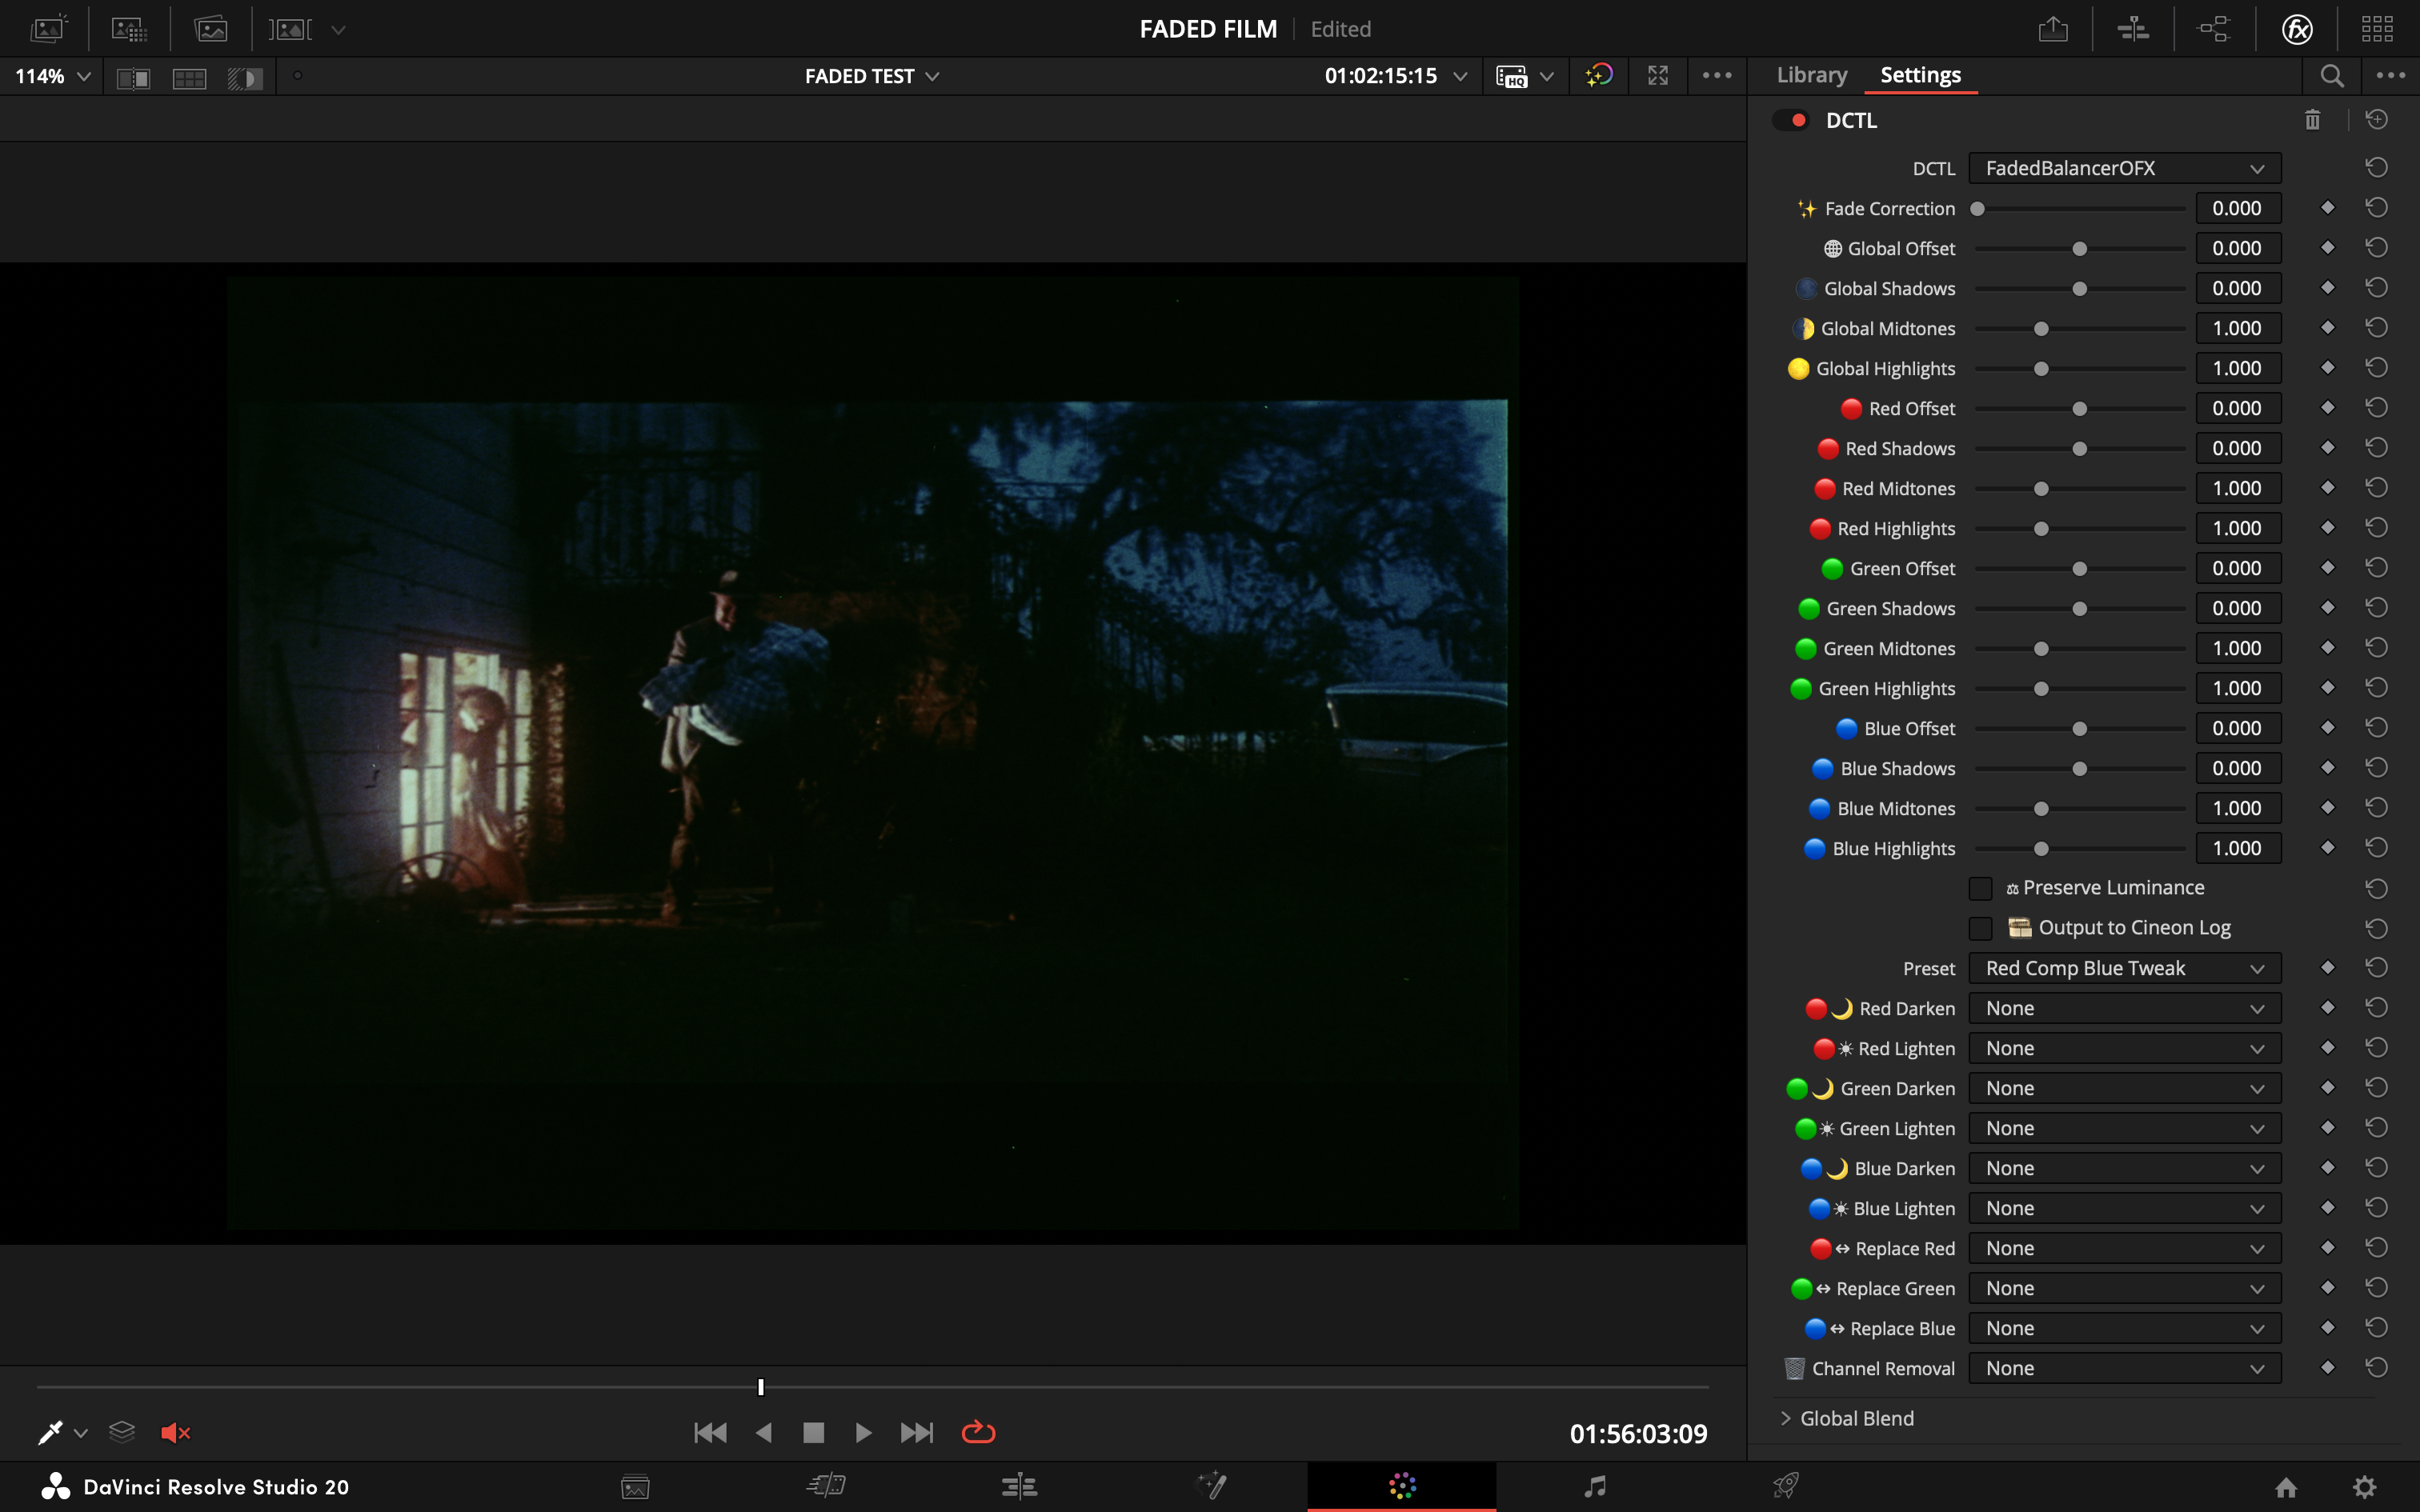 | **Example 2: Boy Scene** | Before | After | | :---: | :---: | | 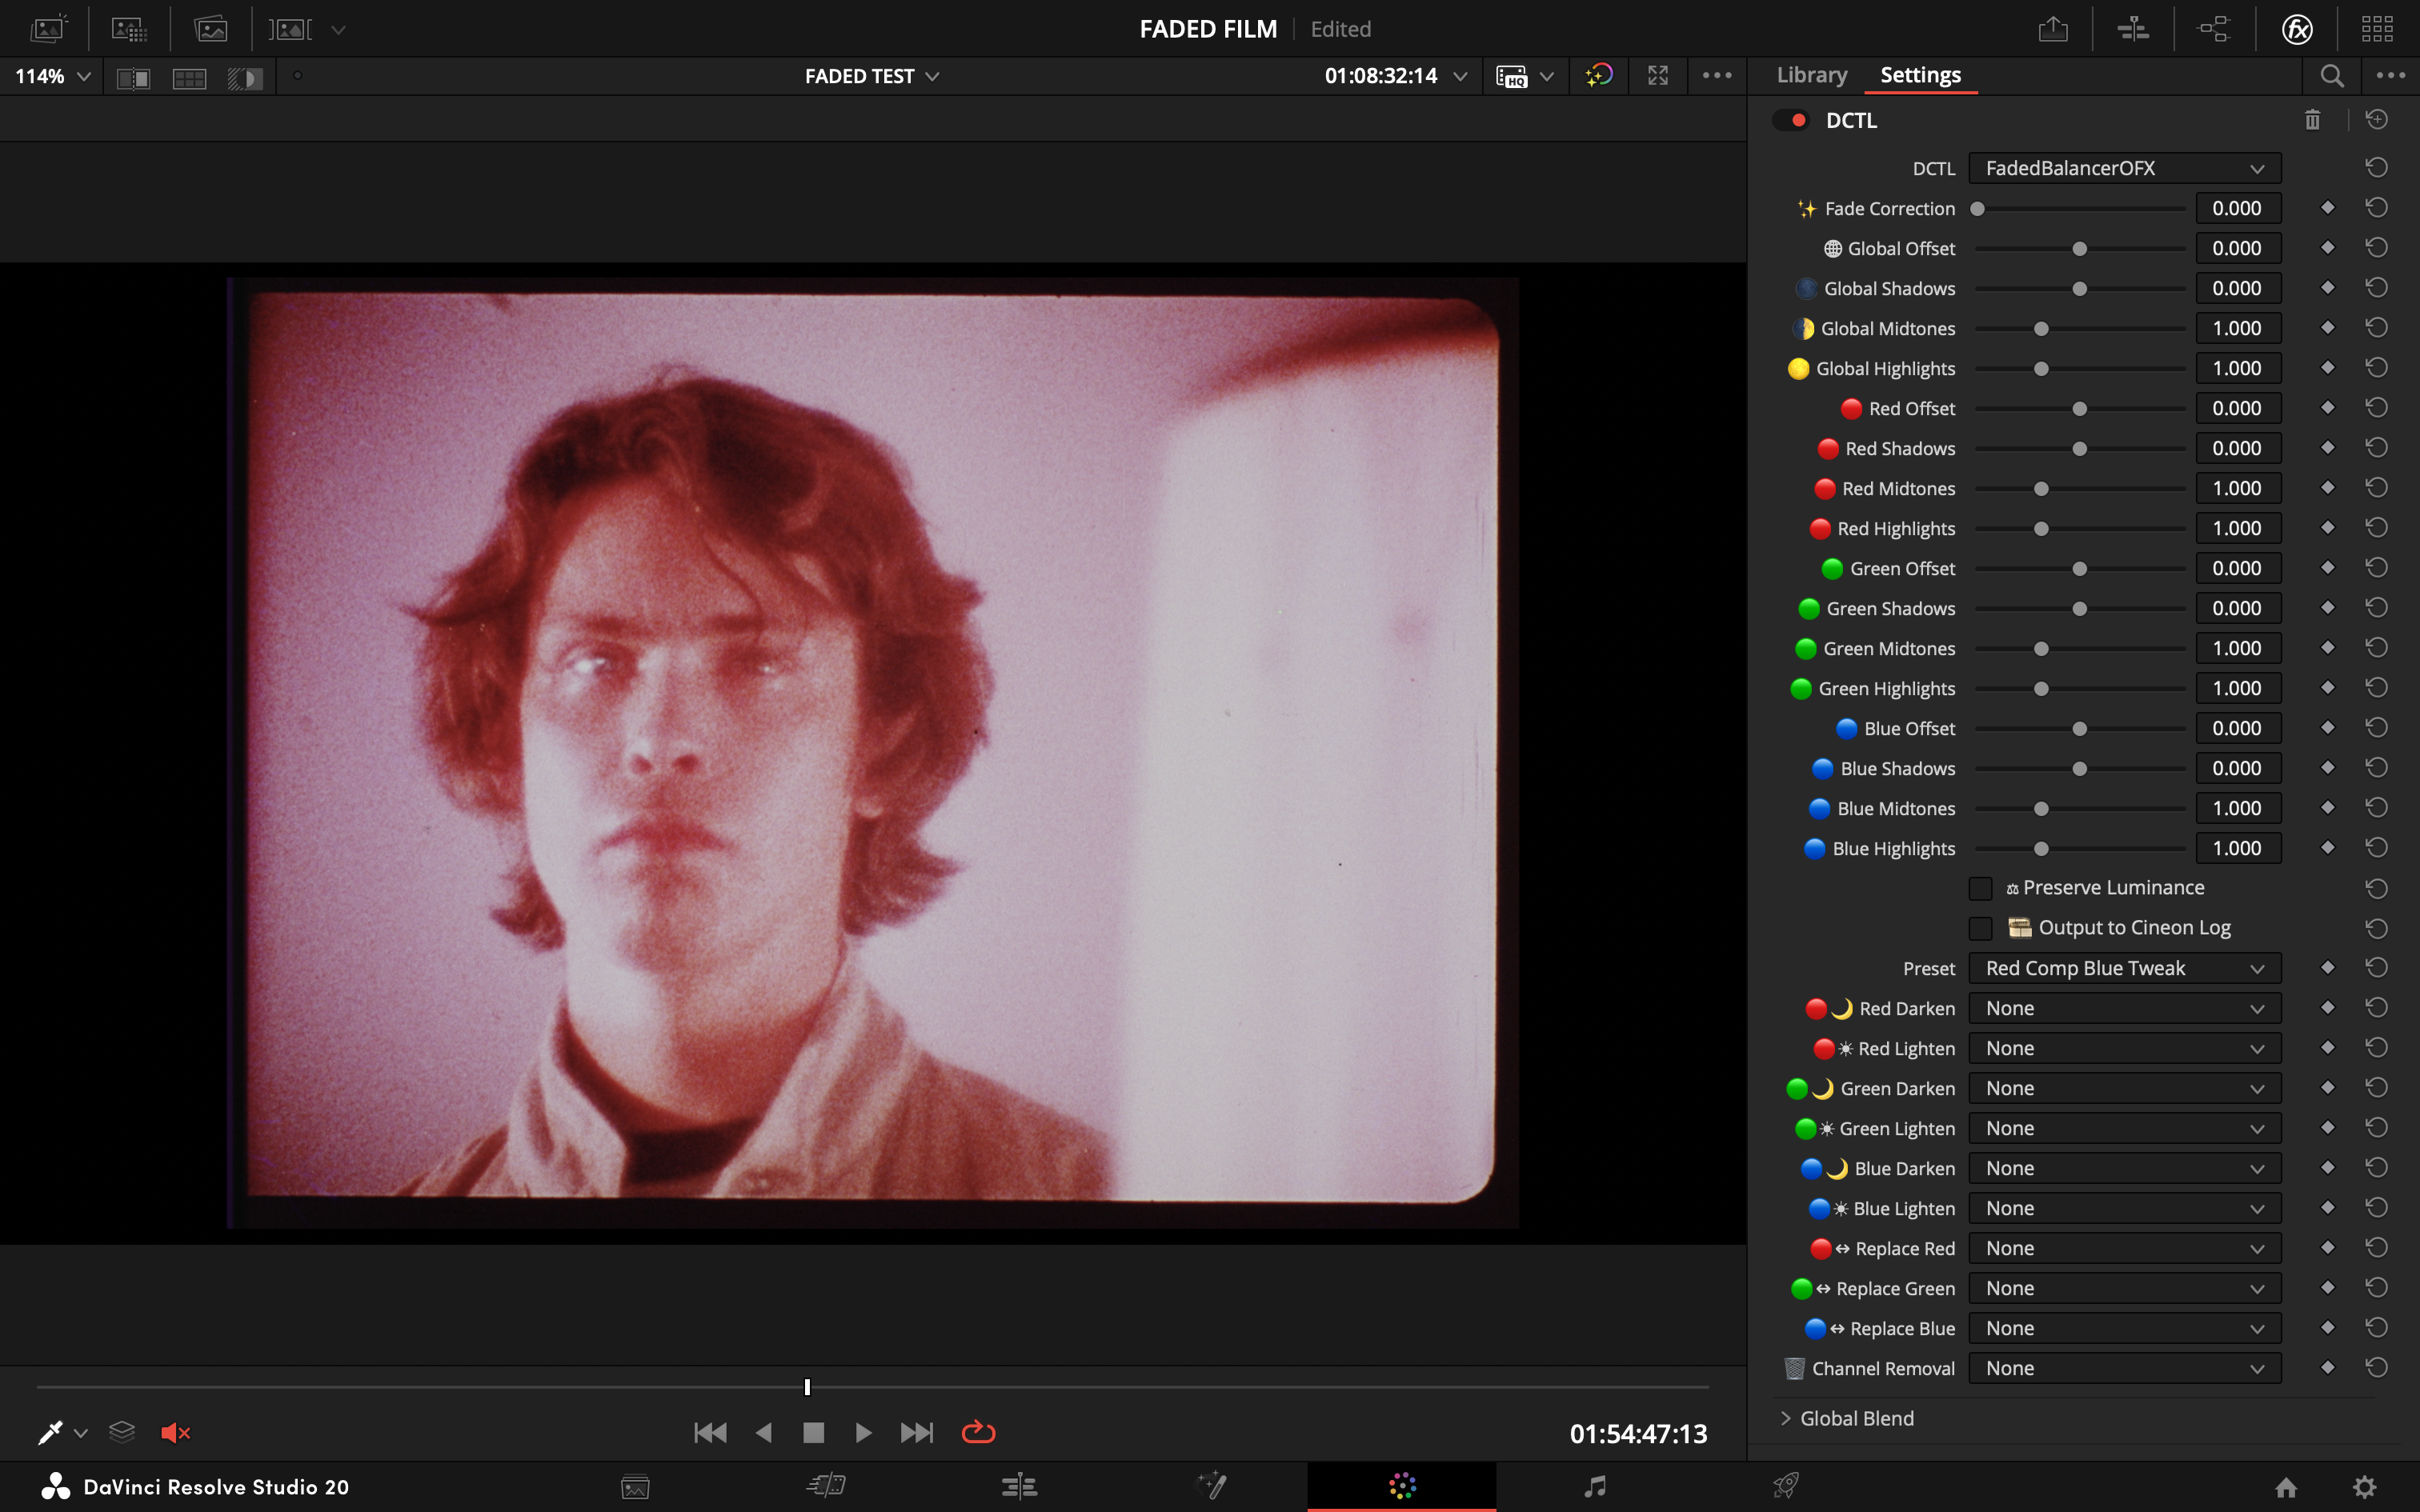 | 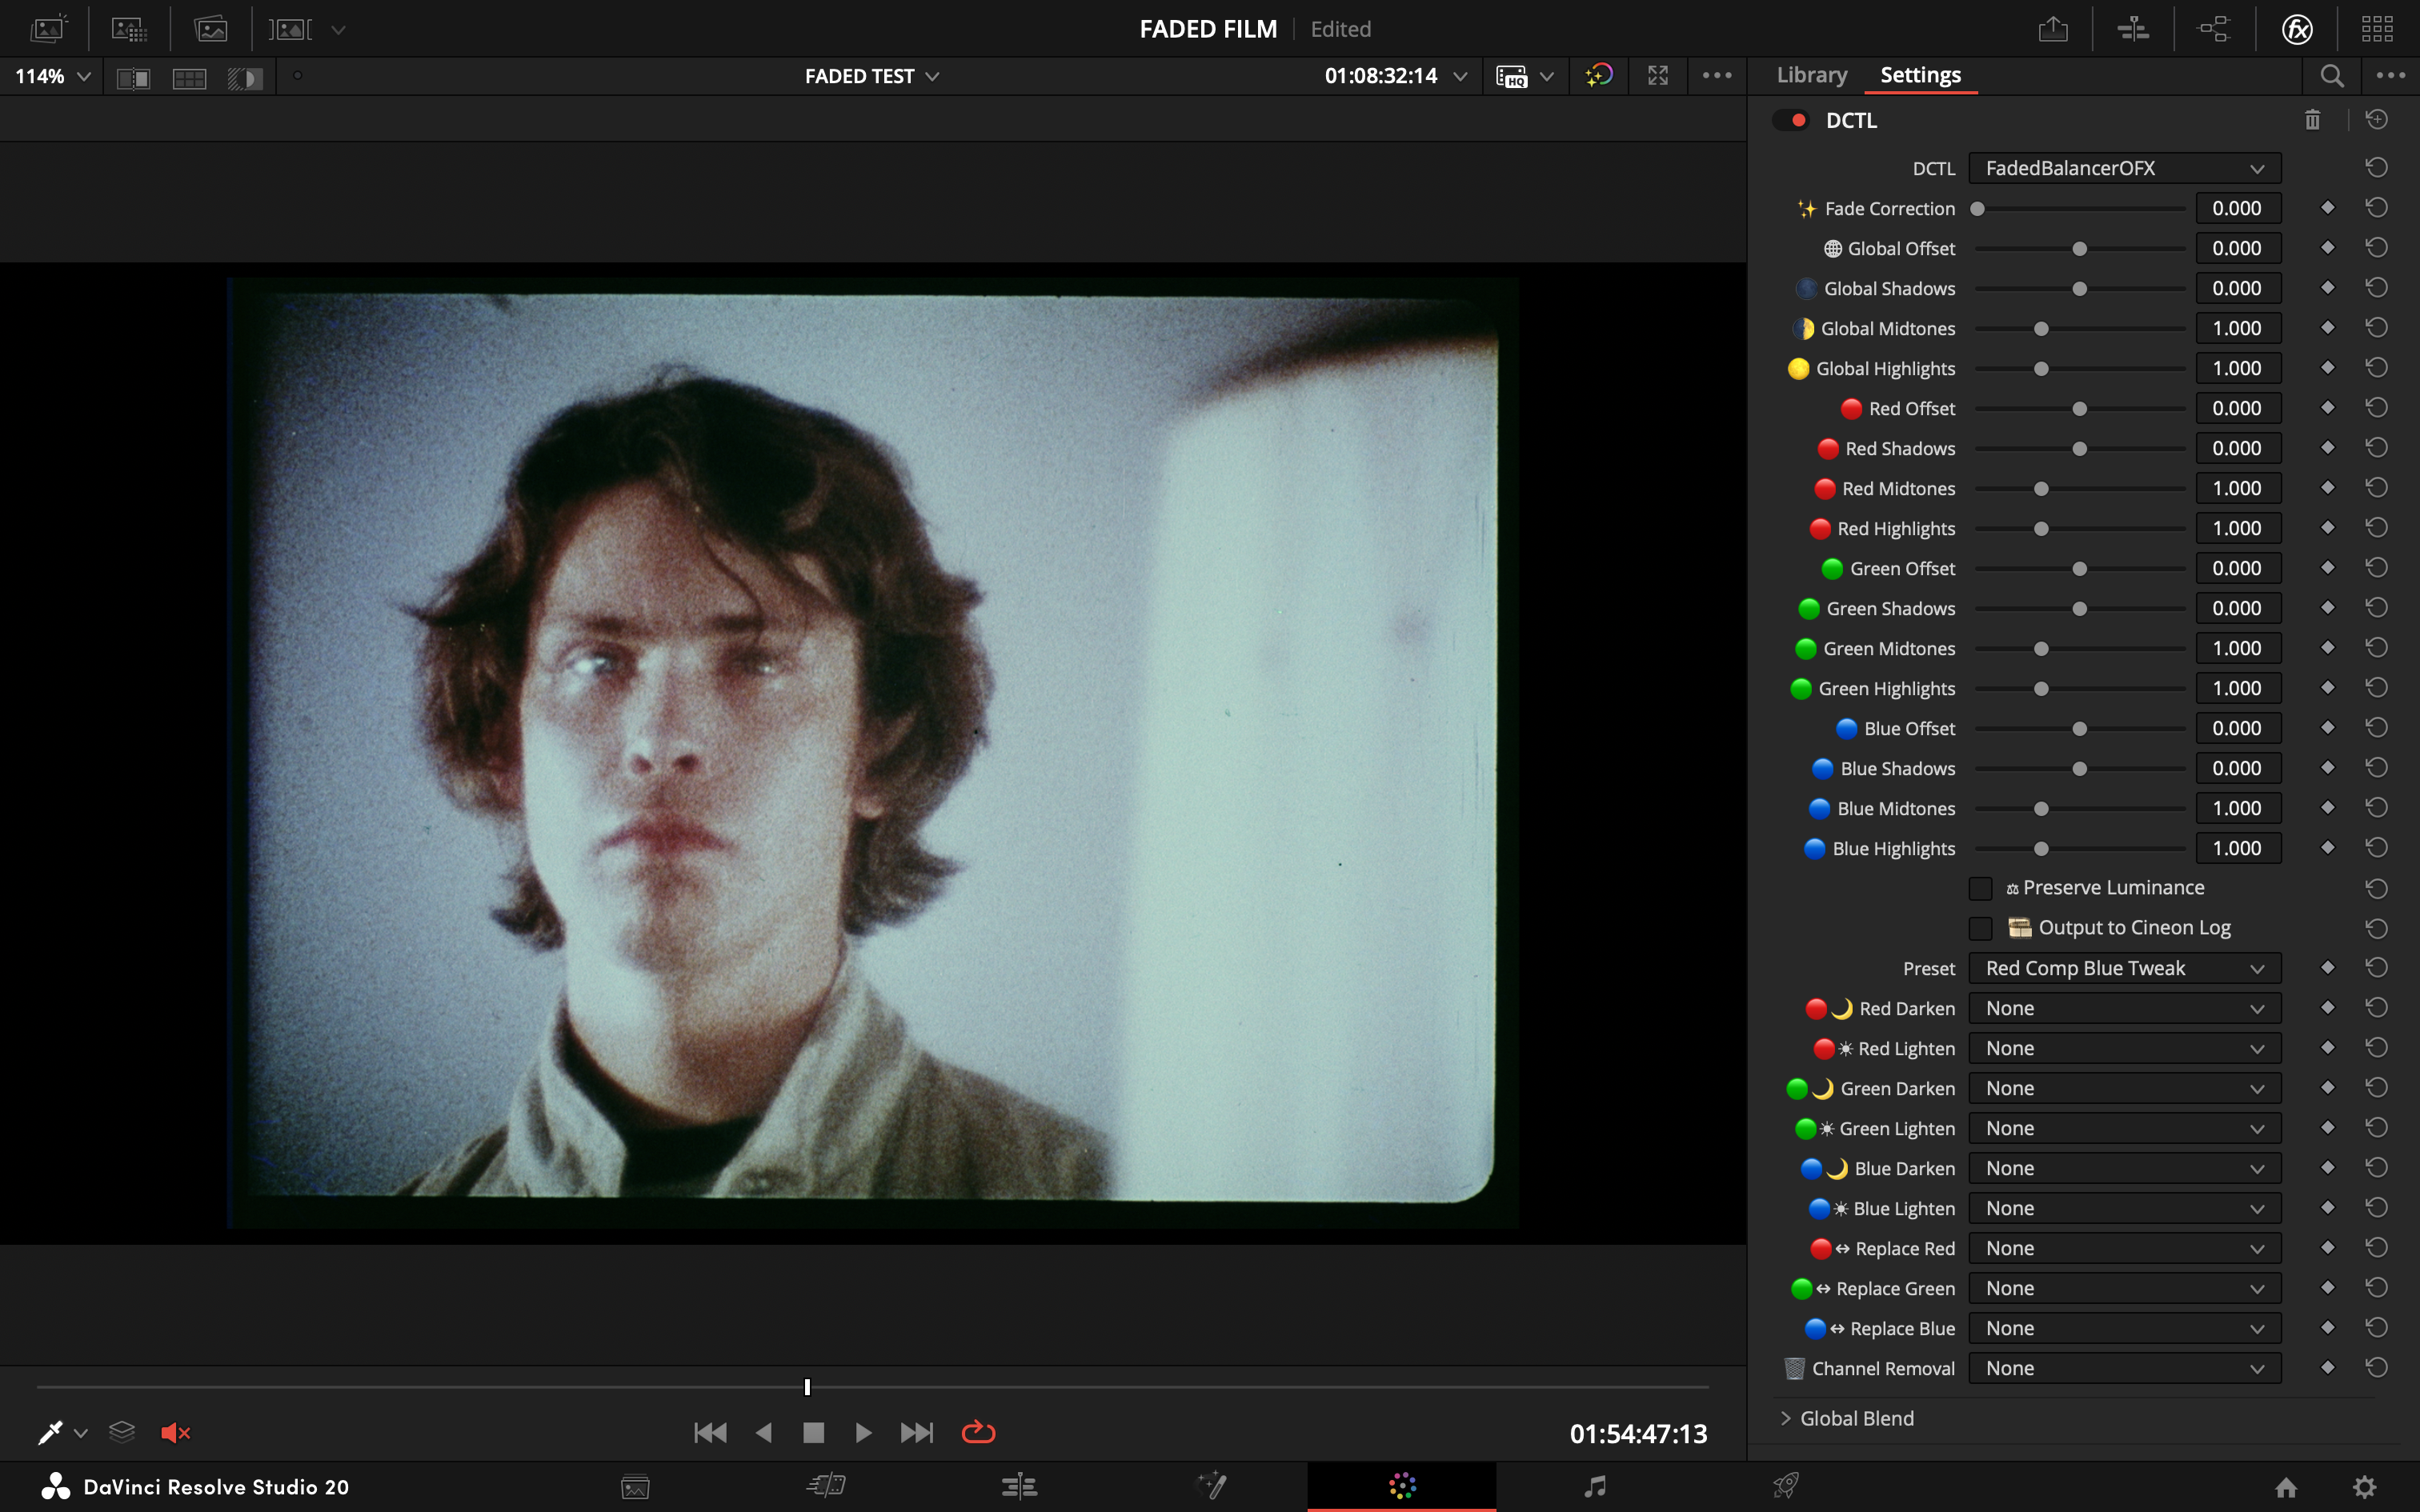 | **Example 3: Captain Scene** | Before | After | | :---: | :---: | | 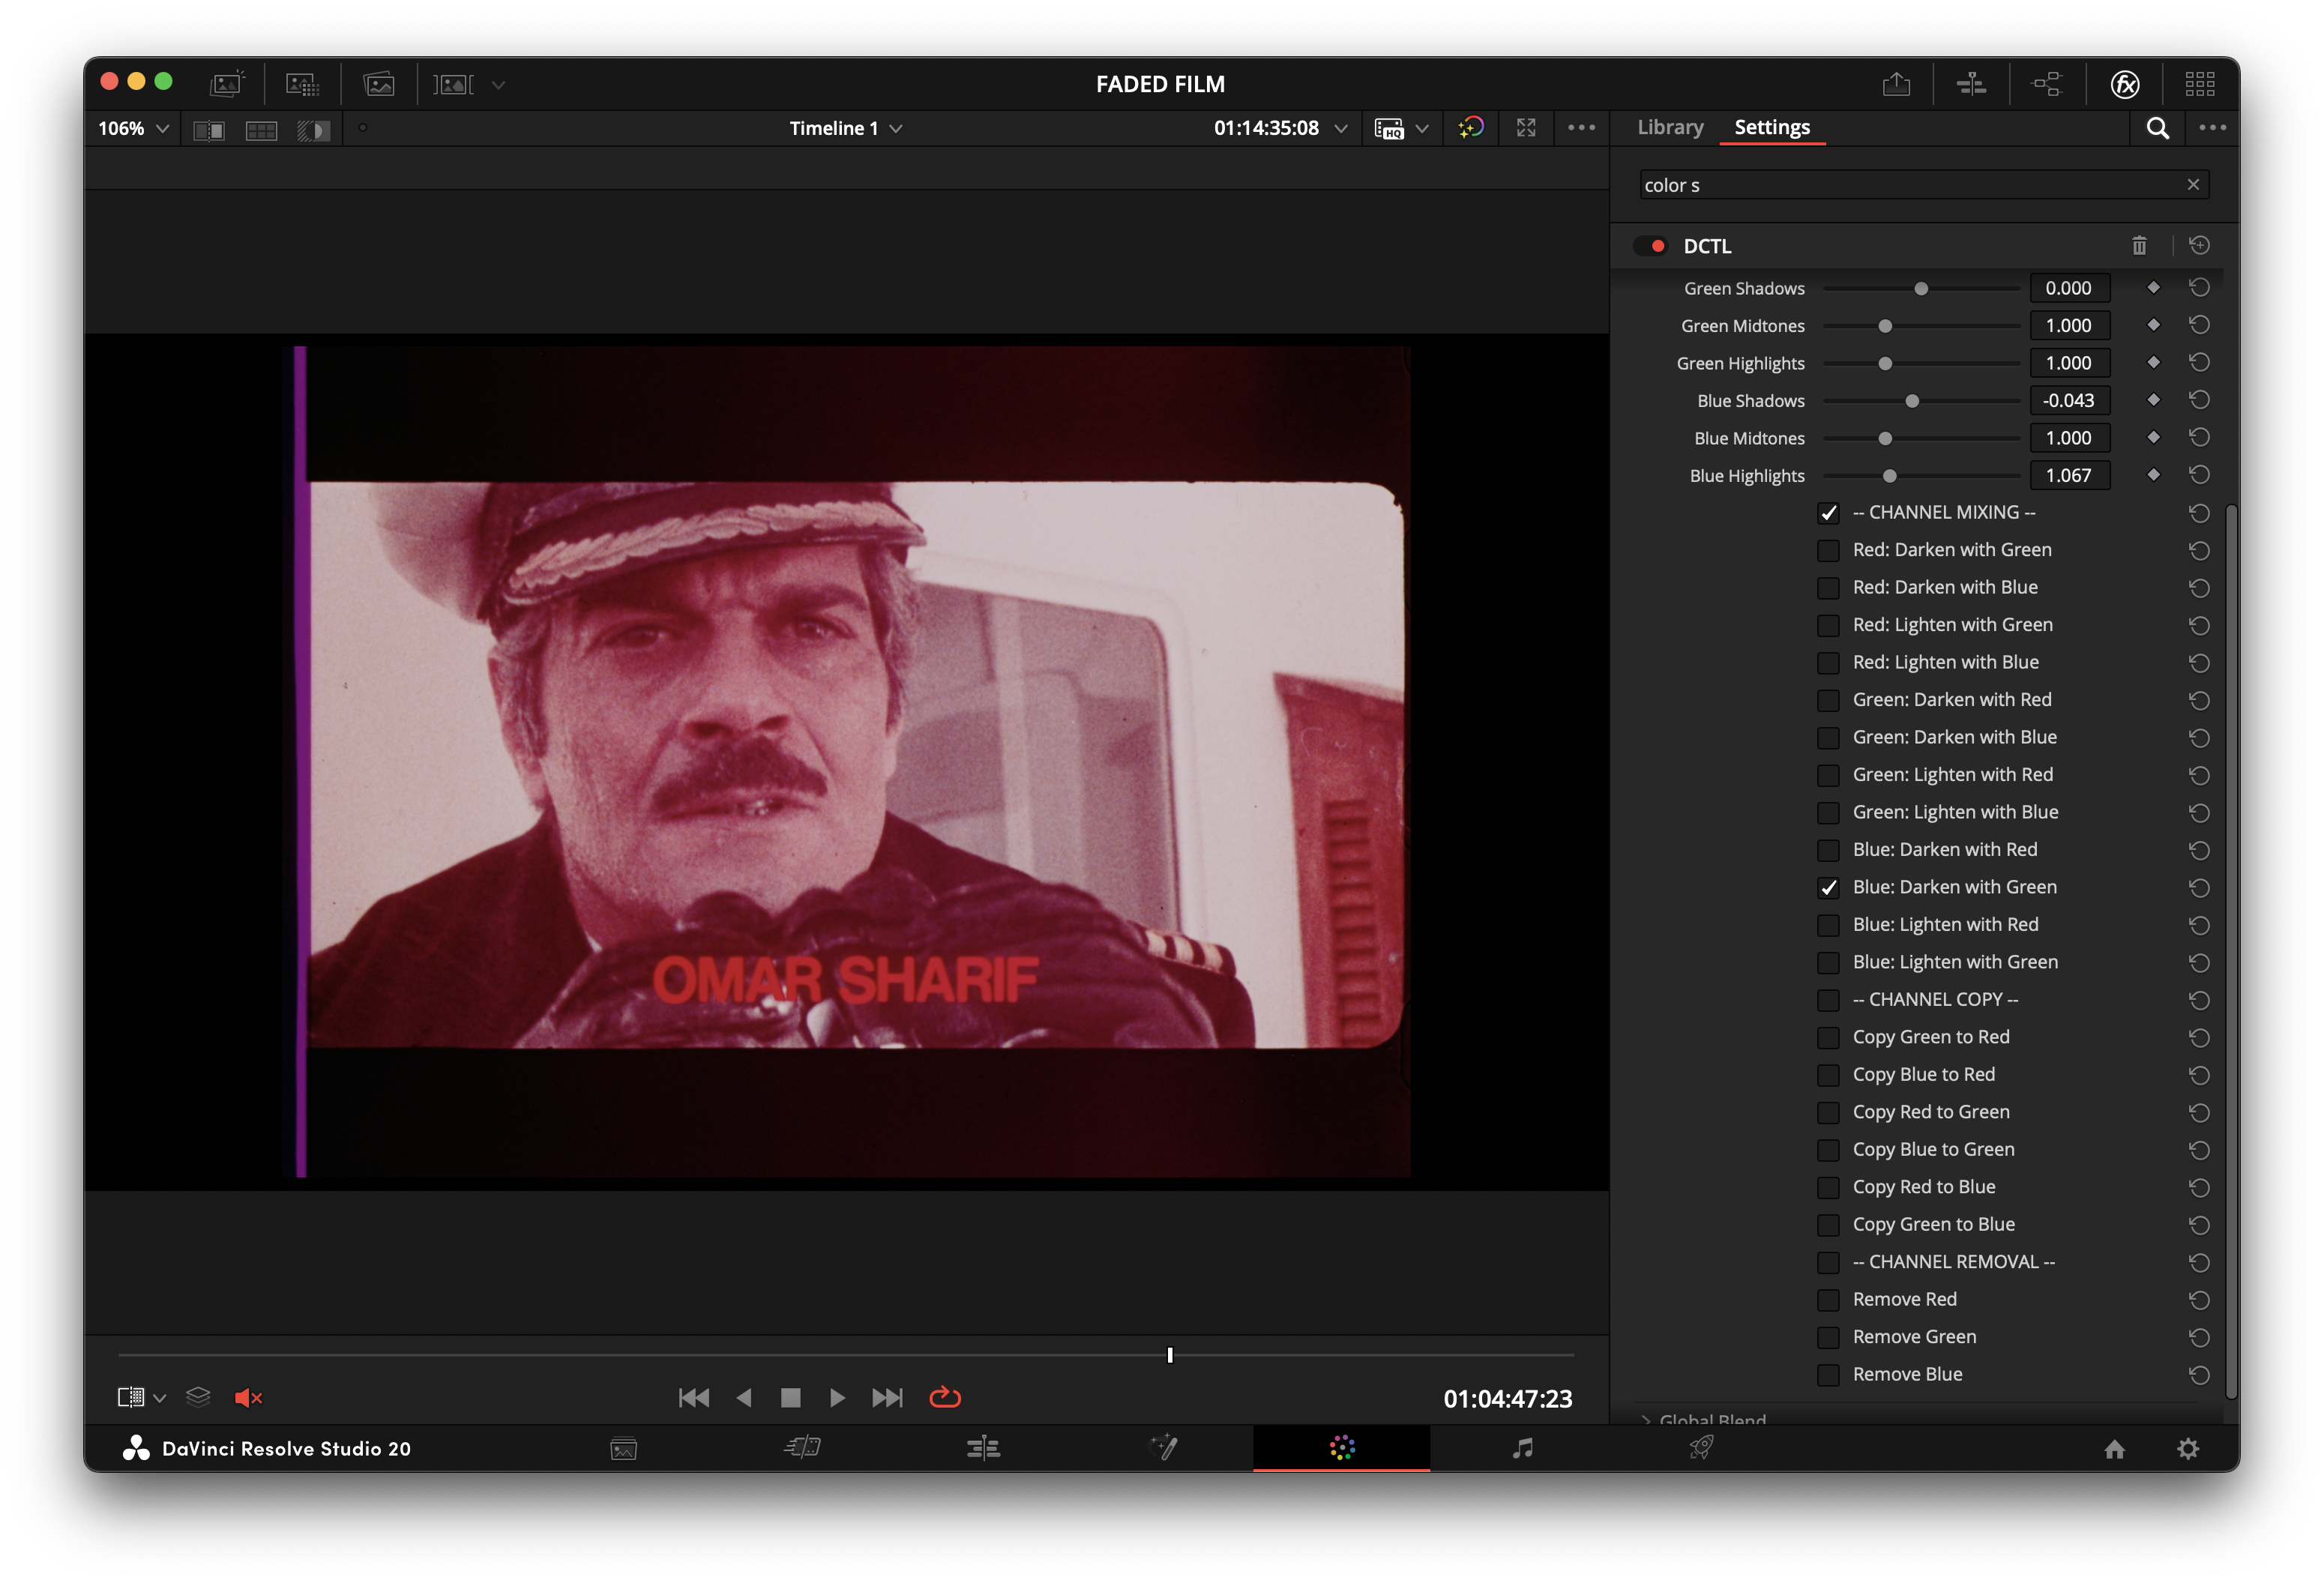 | 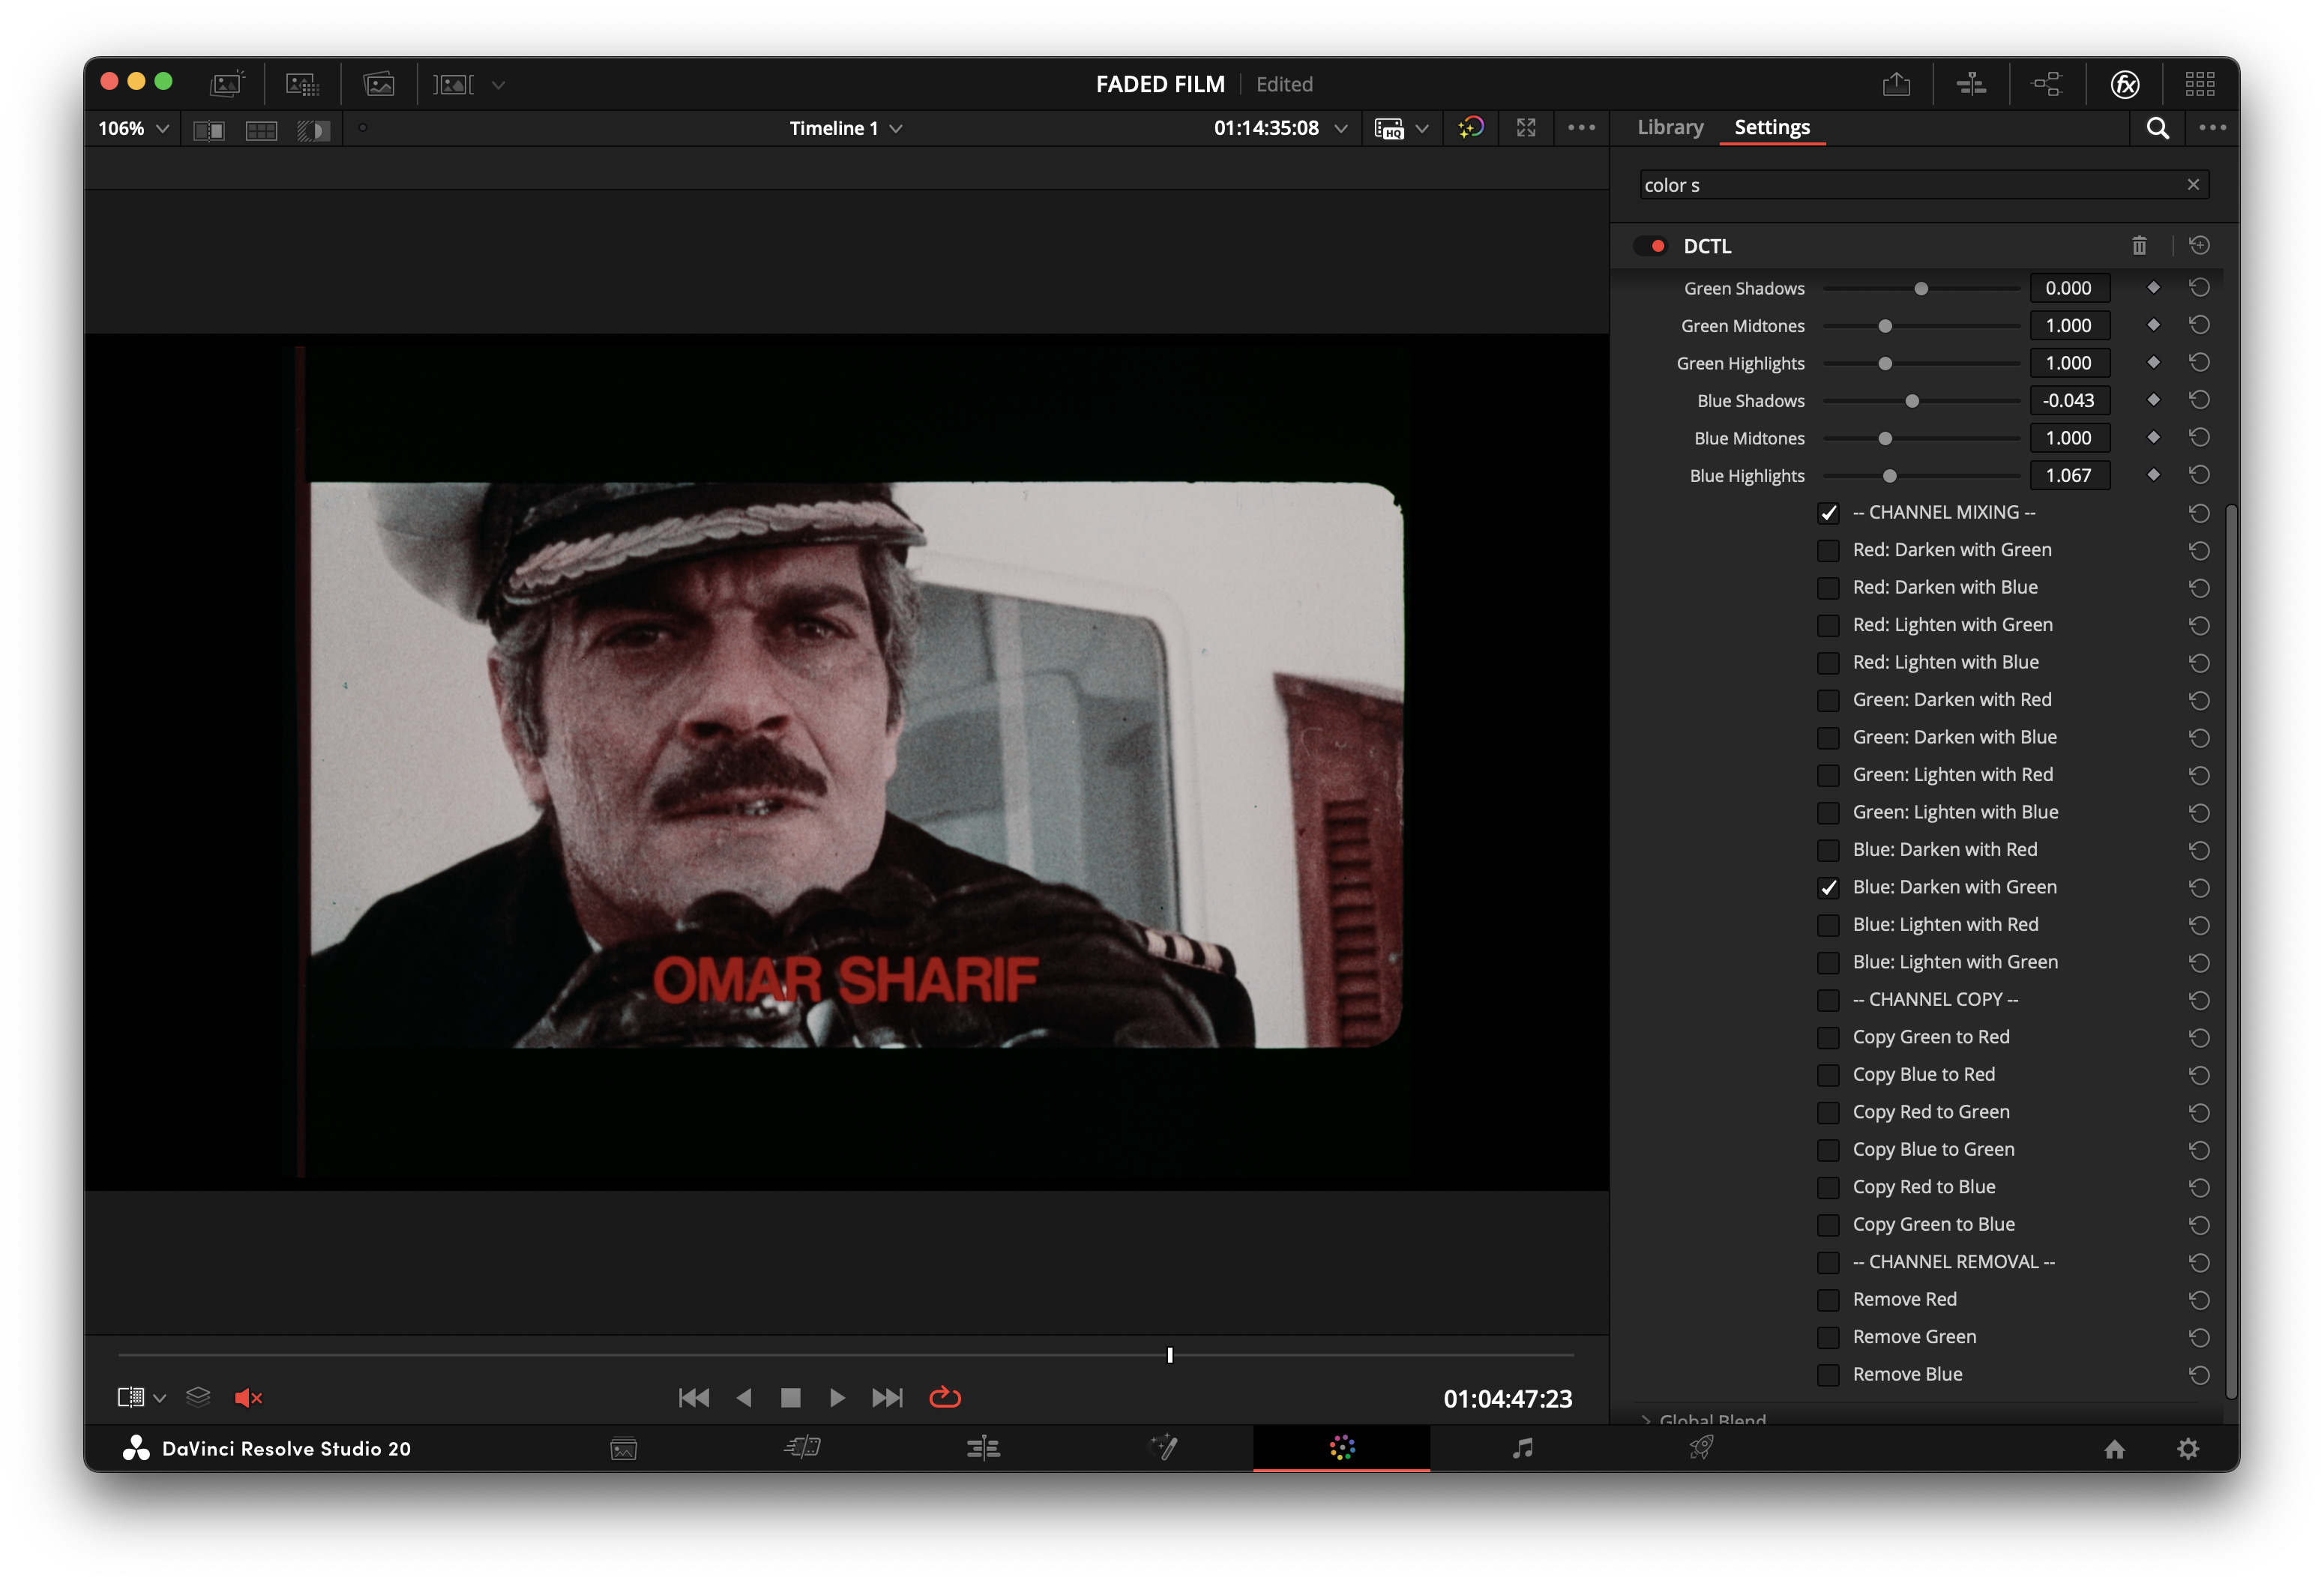 | **Example 4: Beach Scene** | Before | After | | :---: | :---: | | 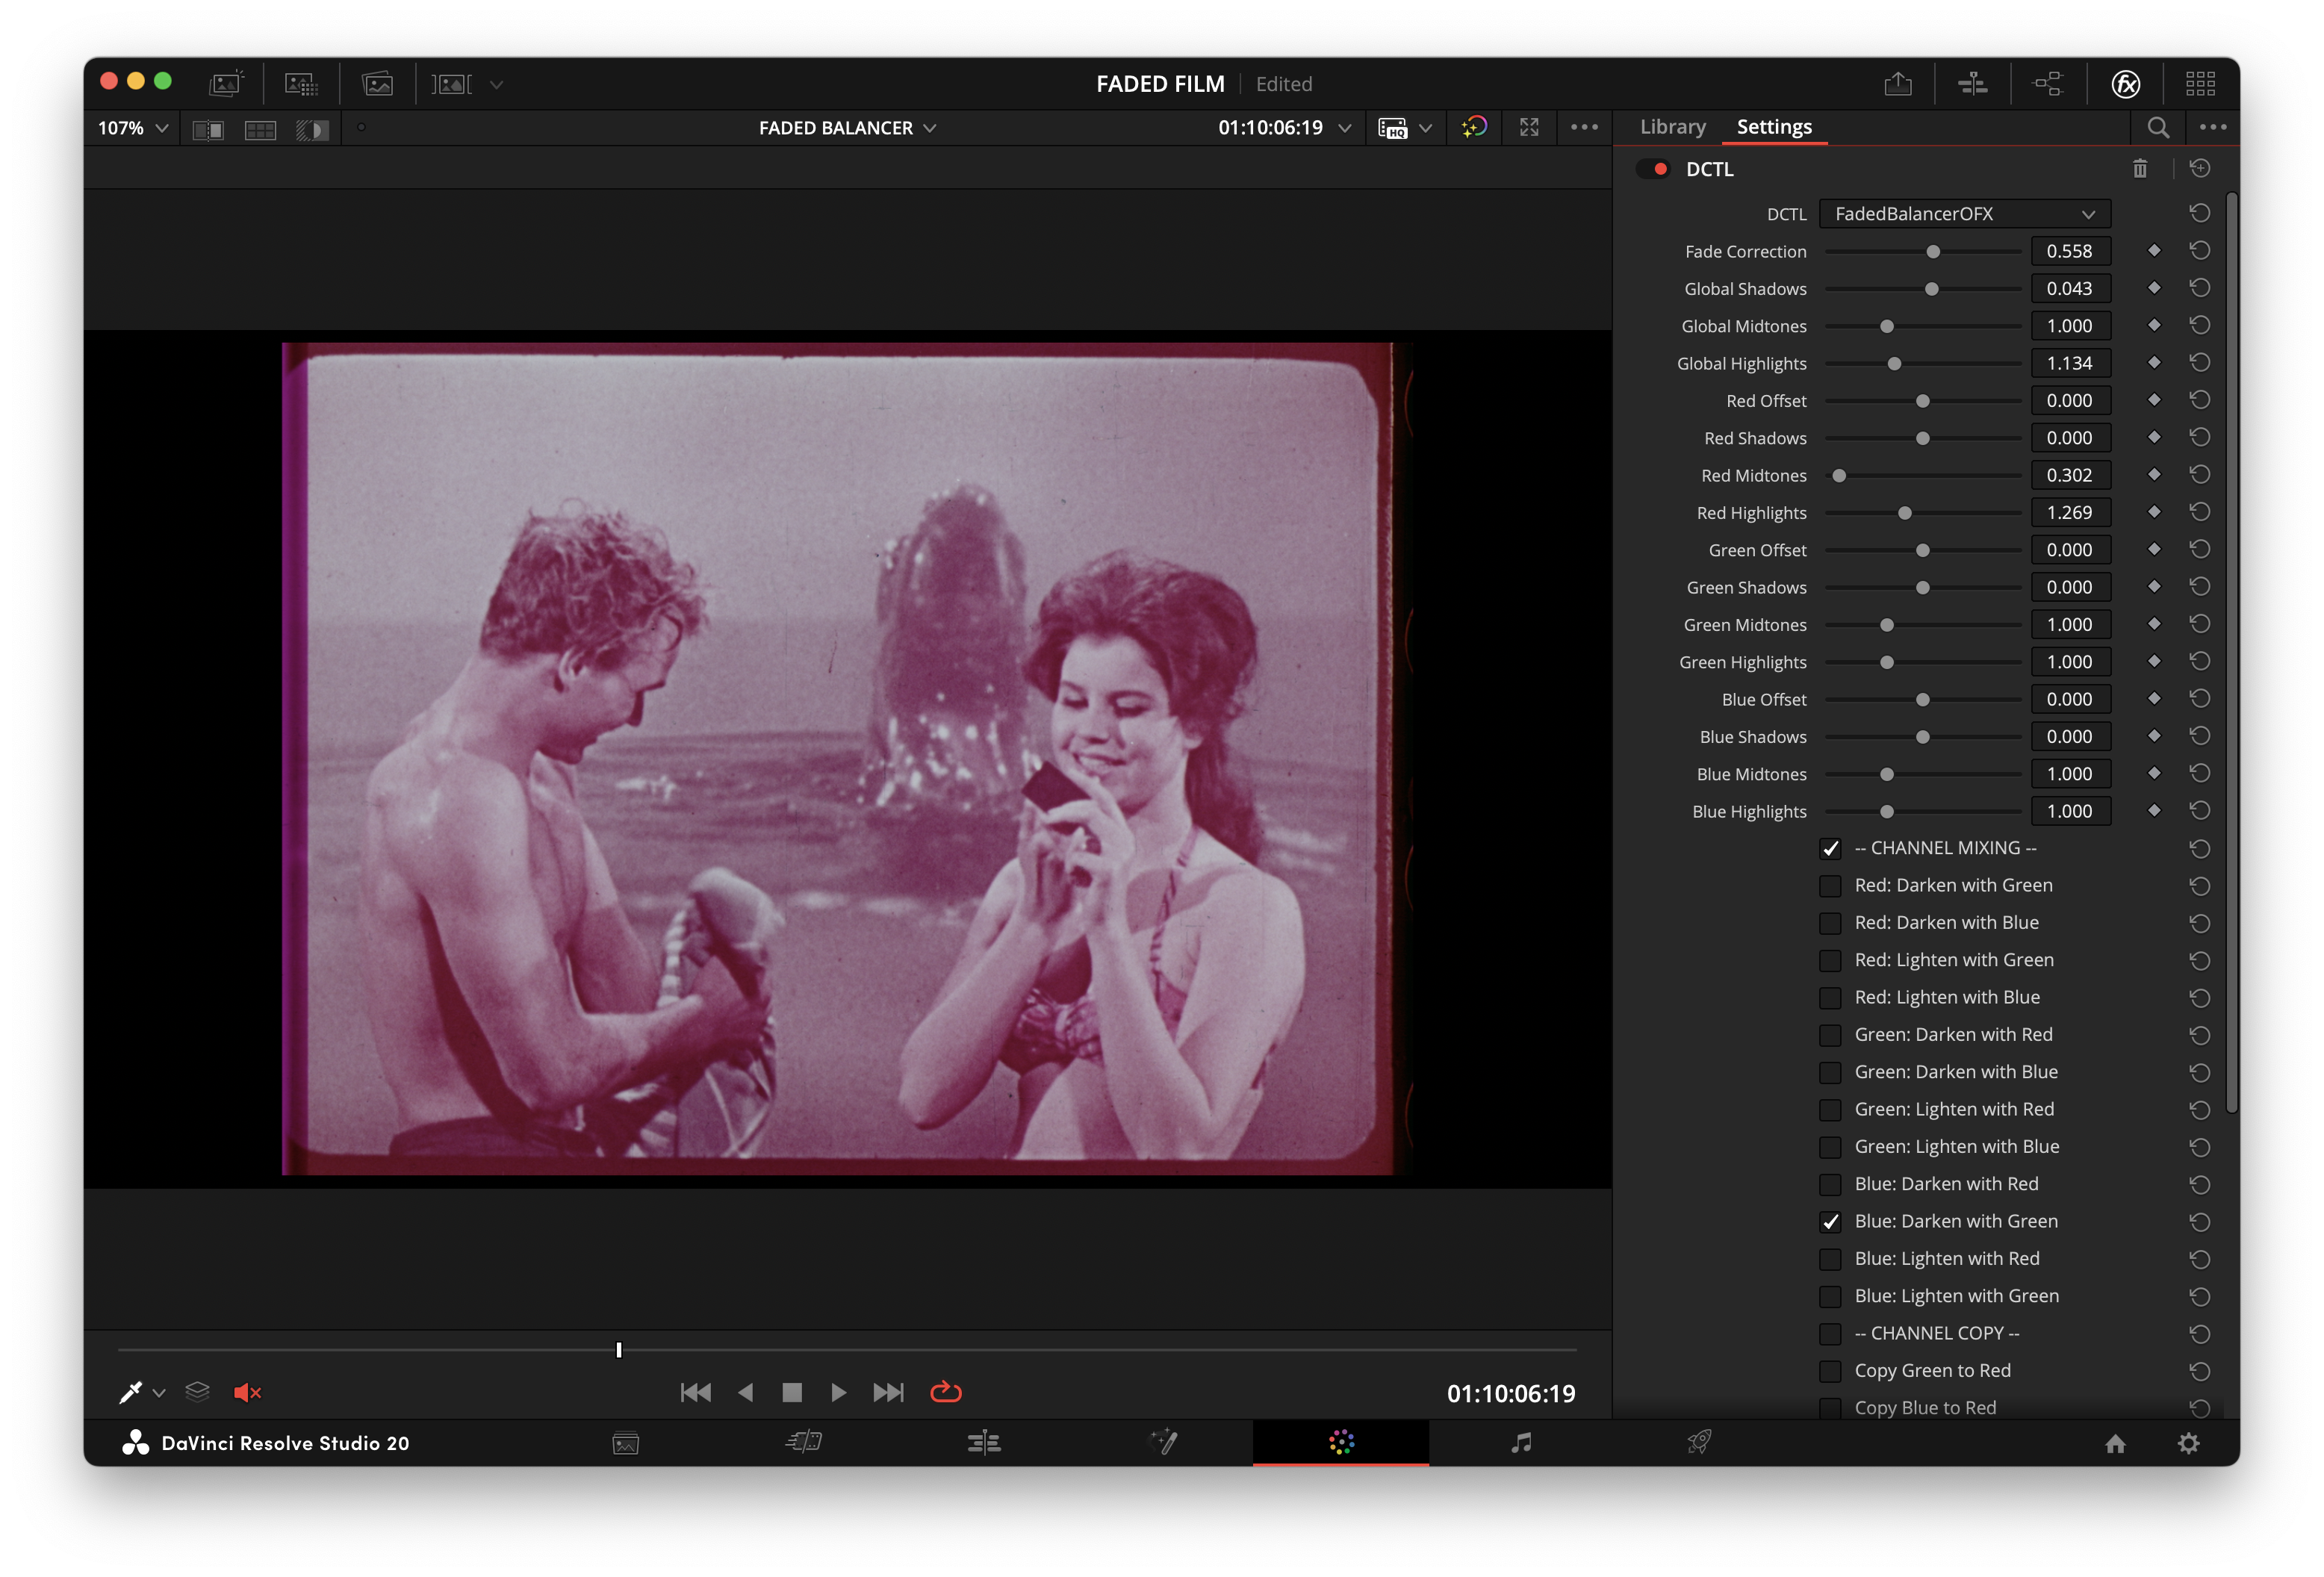 | 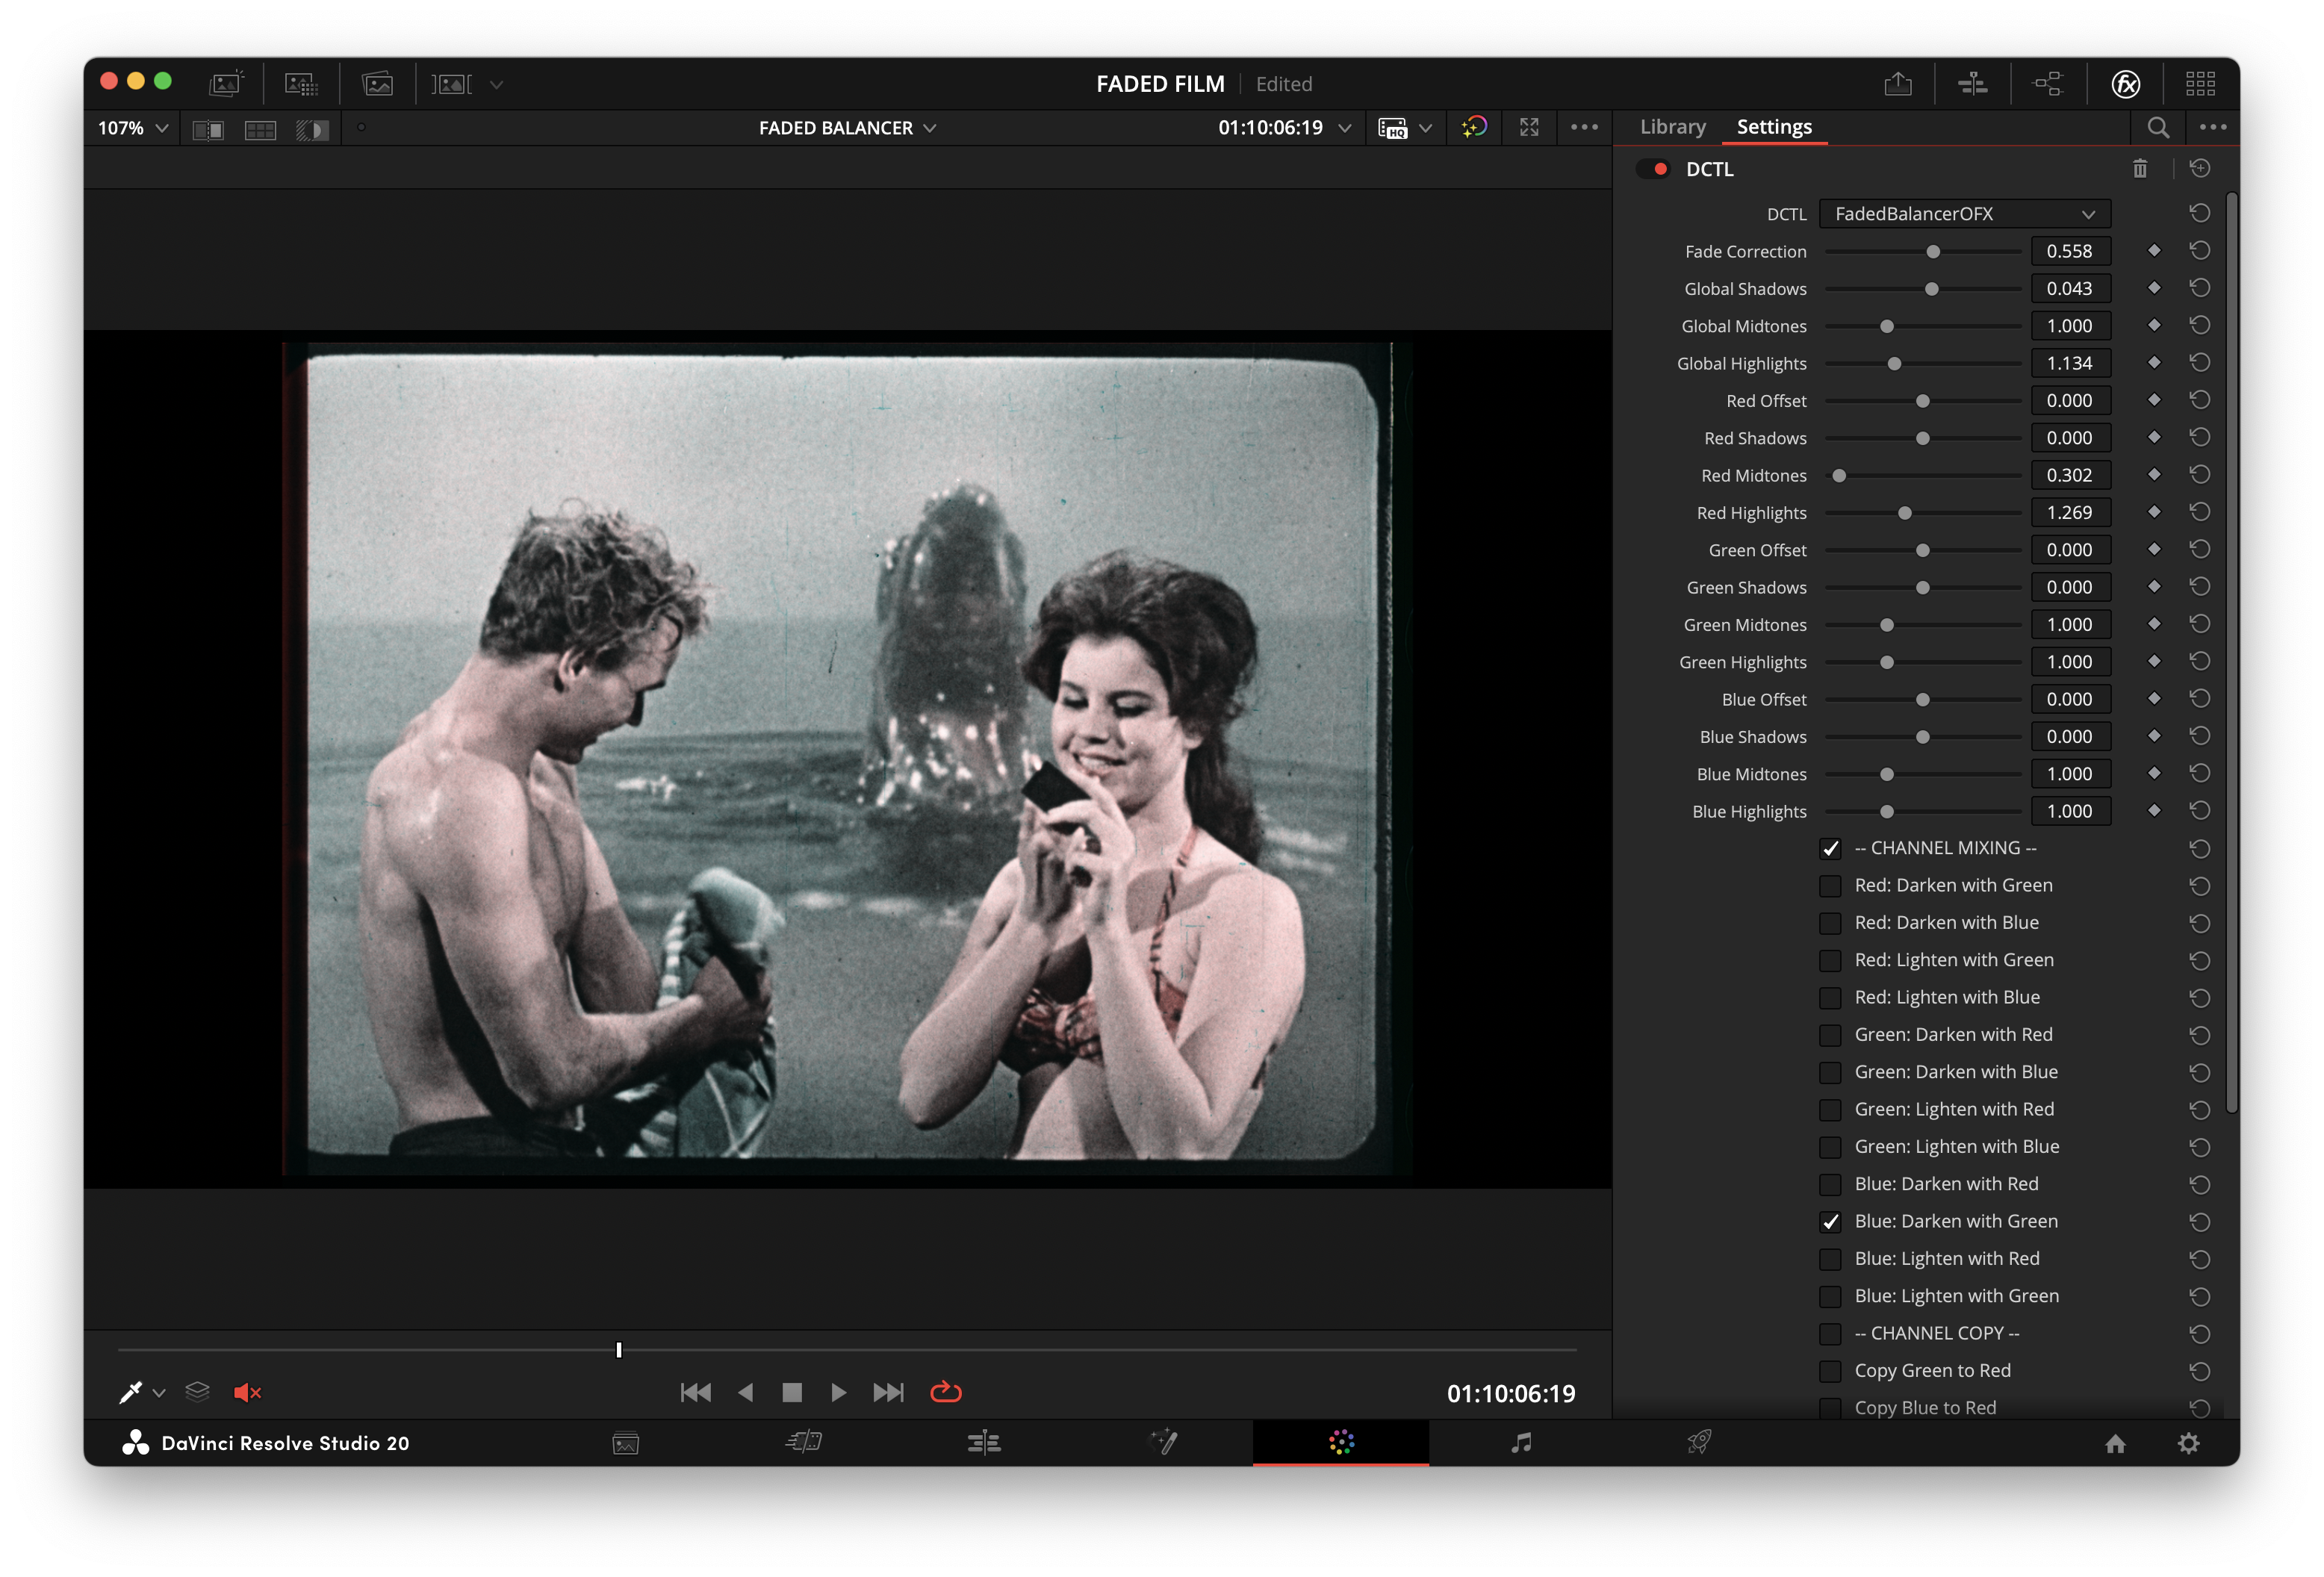 | **Example 5: Table Scene** | Before | After | | :---: | :---: | | 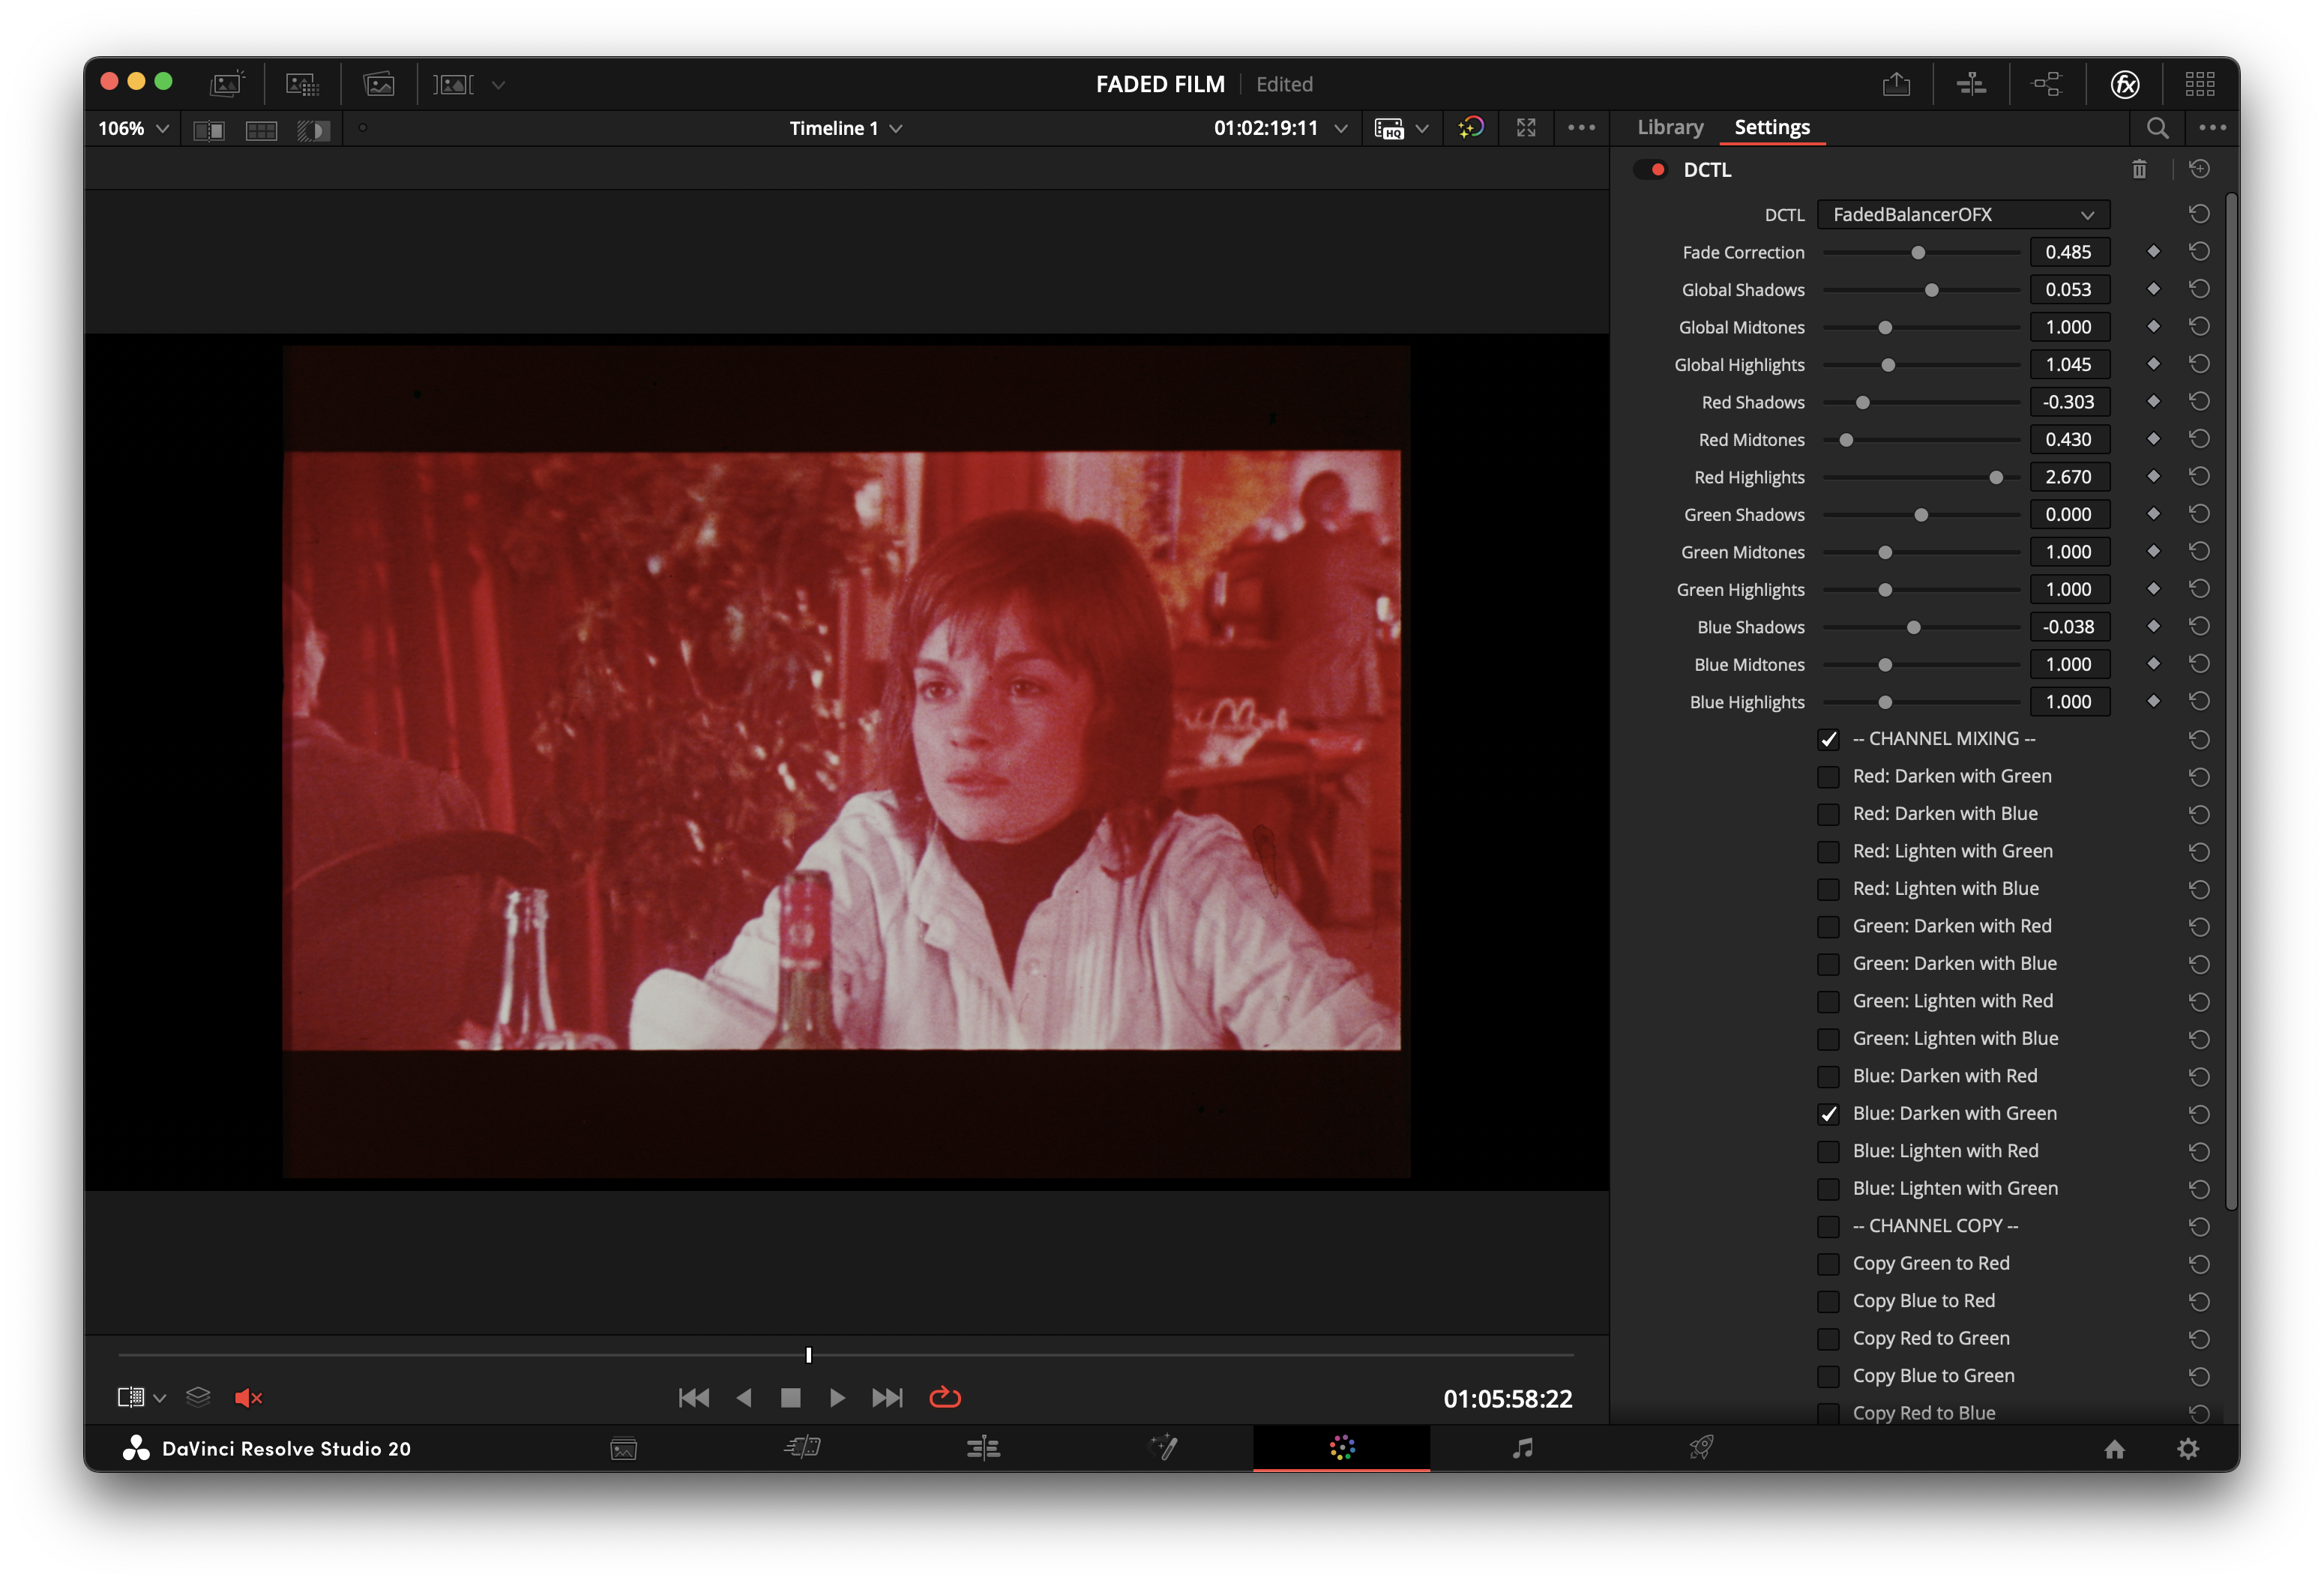 | 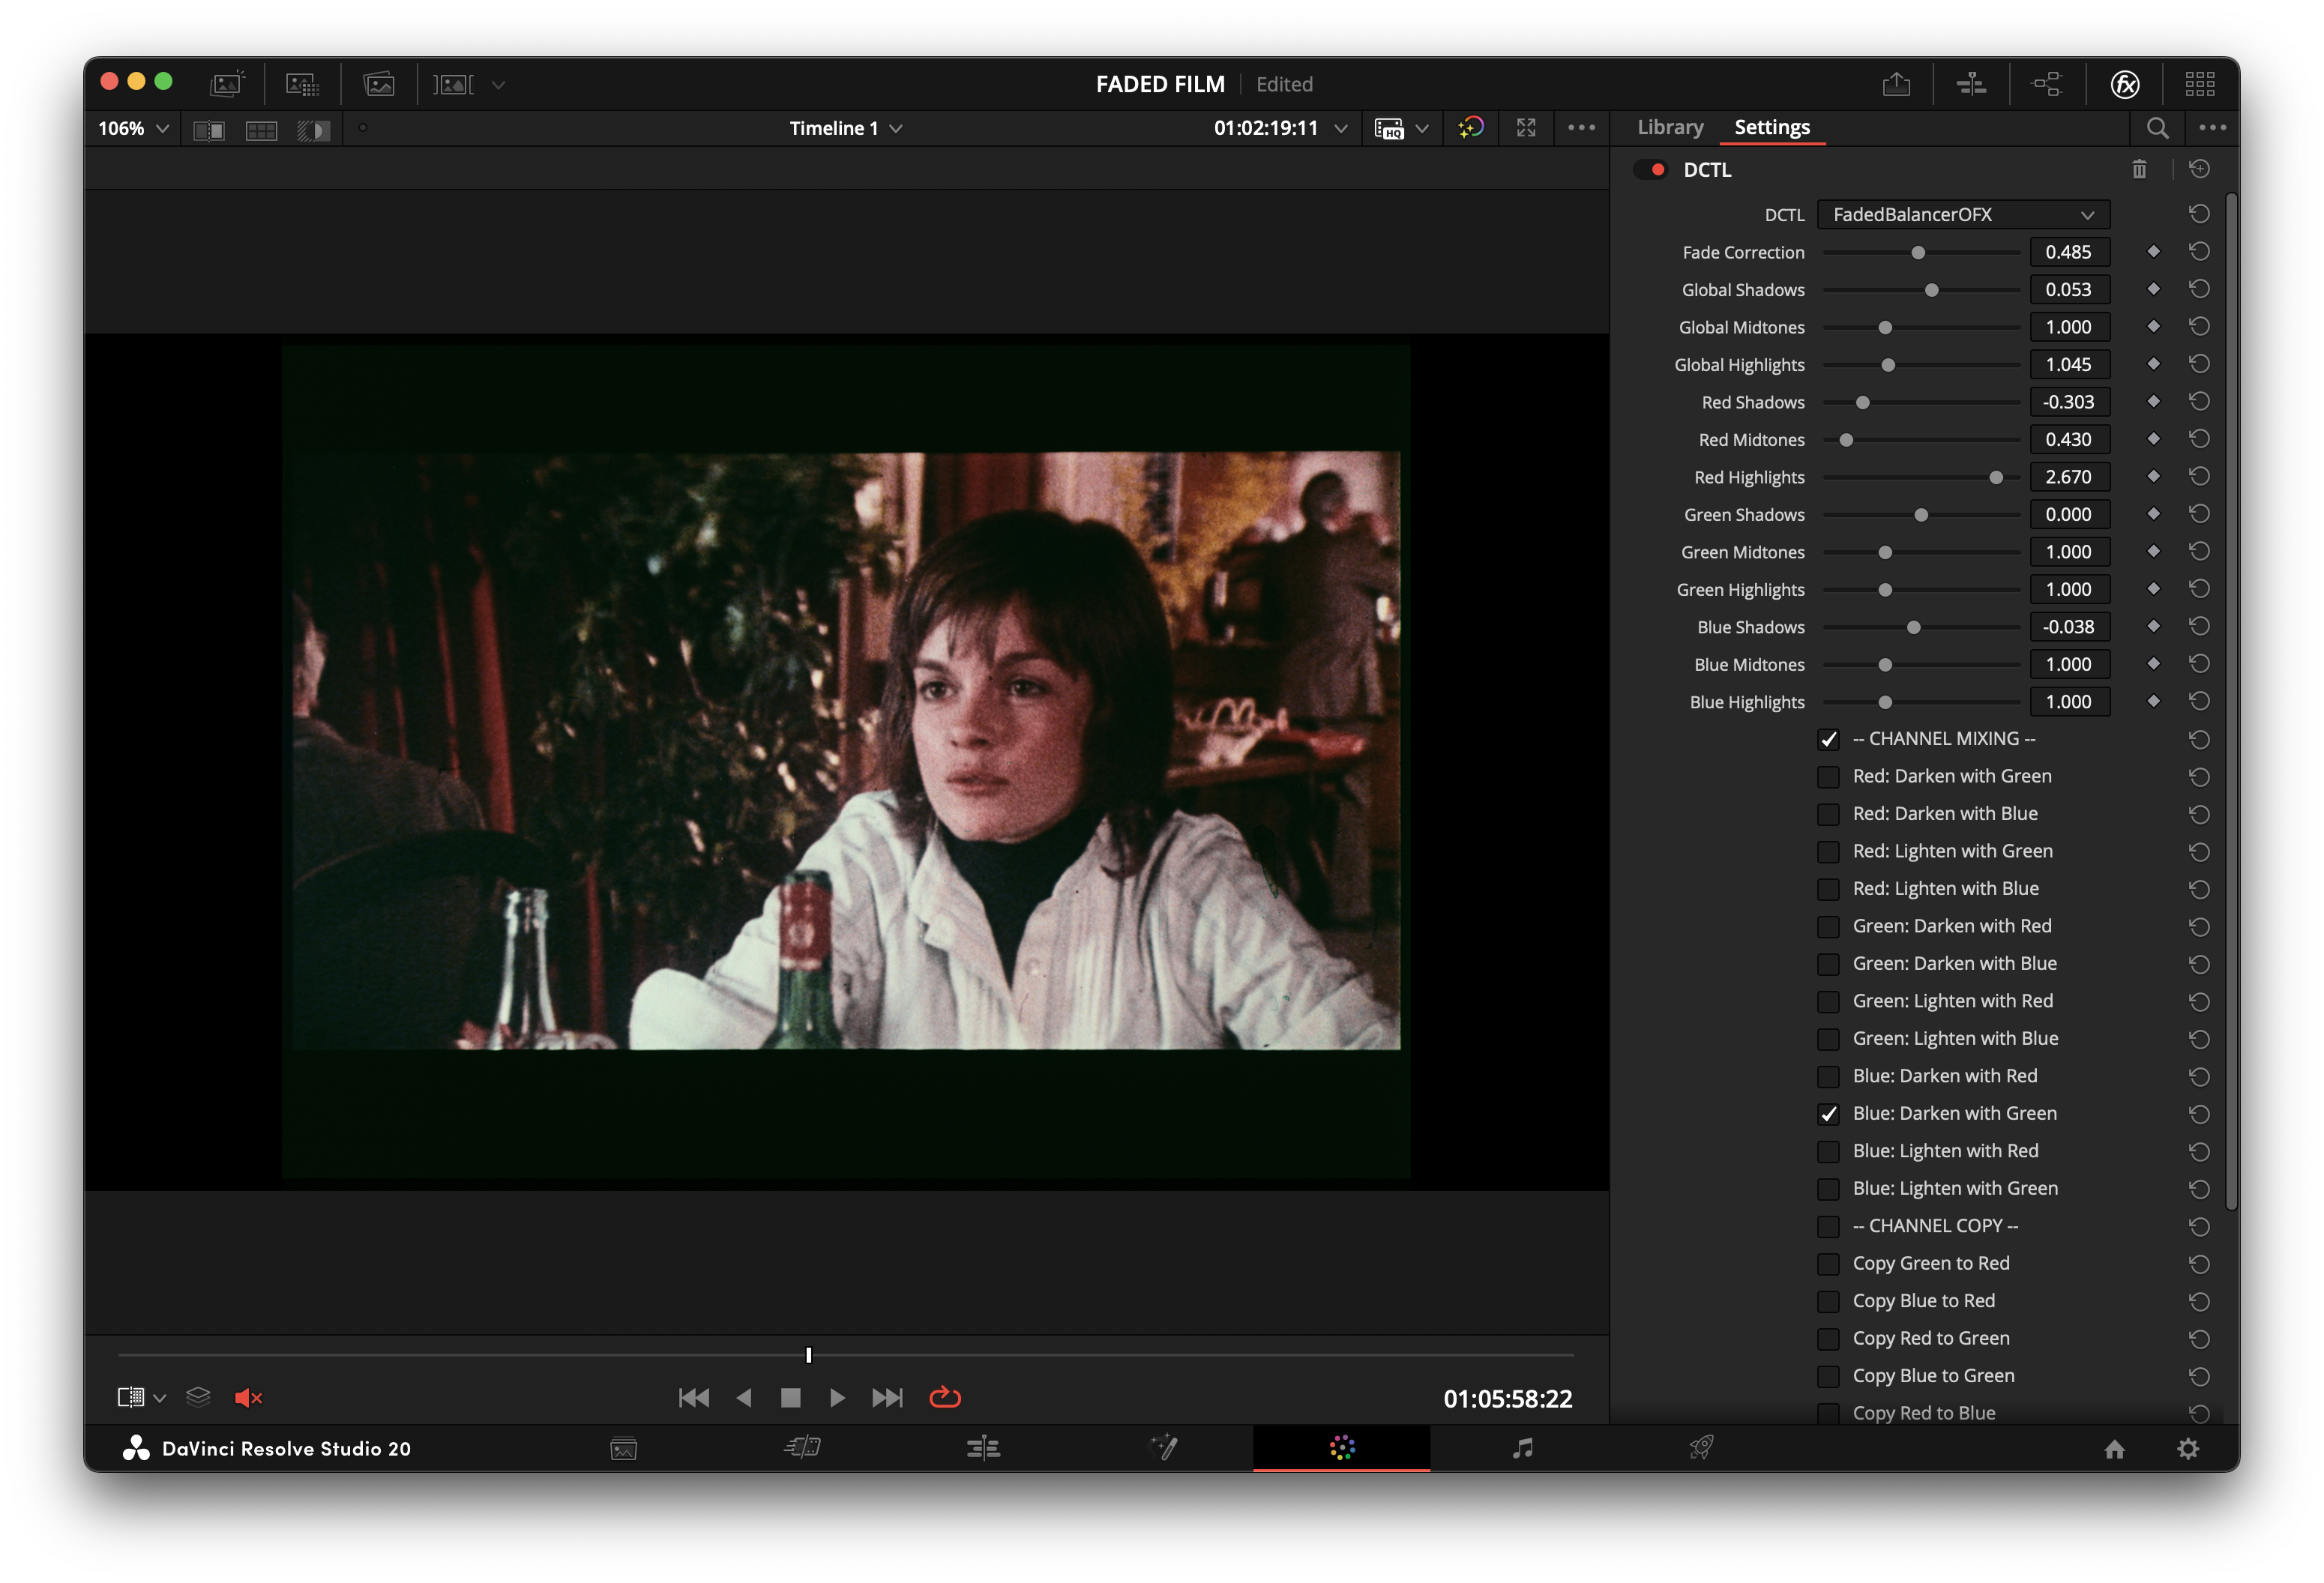 | --- ### Installation 1. **Windows (preferred):** install with winget: - `winget install FabioColor.FadedBalancerDCTL` 2. **Installer ZIP fallback (Windows/macOS):** - **Windows:** Download `FadedBalancerDCTL-Setup-x.x.x-win64.zip` from [Latest Release](https://github.com/fabiocolor/Faded-Balancer-DCTL/releases/latest), extract it, then run the contained `.exe`. - **macOS:** Download `FadedBalancerDCTL-x.x.x-macos.zip` from [Latest Release](https://github.com/fabiocolor/Faded-Balancer-DCTL/releases/latest), extract it, then run the contained `.pkg`. 3. **Manual `.dctl` fallback:** - Download `FadedBalancerDCTL.dctl` from [Latest `.dctl` download](https://github.com/fabiocolor/Faded-Balancer-DCTL/releases/latest/download/FadedBalancerDCTL.dctl). - Place it in your DaVinci Resolve LUT folder: - **Windows:** `C:\ProgramData\Blackmagic Design\DaVinci Resolve\Support\LUT\` - **macOS:** `/Library/Application Support/Blackmagic Design/DaVinci Resolve/LUT/` 4. Restart DaVinci Resolve. 5. In the Color page, add a `DCTL` effect and select `FadedBalancerDCTL`. Simple install guide: [docs/INSTALL.md](docs/INSTALL.md) Maintainer release notes: [docs/MAINTAINERS_RELEASE.md](docs/MAINTAINERS_RELEASE.md) --- ### Sample Footage - Download test footage to try the DCTL quickly: [Archive.org — Film BAR: 70 Trailers Reel (1440x1080, 24fps)](https://archive.org/details/film-bar-70-trailers-reel-1440x-1080-24fps) --- ### Video Demonstration For a visual guide on how to use the plugin, check out the video tutorial below: [](https://youtu.be/ATPkq5BHs-A) --- ### Community & Support - **Discussions:** Share ideas, ask questions, or suggest features in the [GitHub Discussions](https://github.com/fabiocolor/Faded-Balancer-DCTL/discussions). - **Contact:** For direct inquiries, you can reach out via [Email](mailto:info@fabiocolor.com) or connect on [Instagram](https://www.instagram.com/fabiocolor), [LinkedIn](https://www.linkedin.com/in/fabiobedoya/), or [YouTube](https://www.youtube.com/@fabiocolor). If you find this plugin useful and would like to support its ongoing development, please consider making a donation. Your support is greatly appreciated!