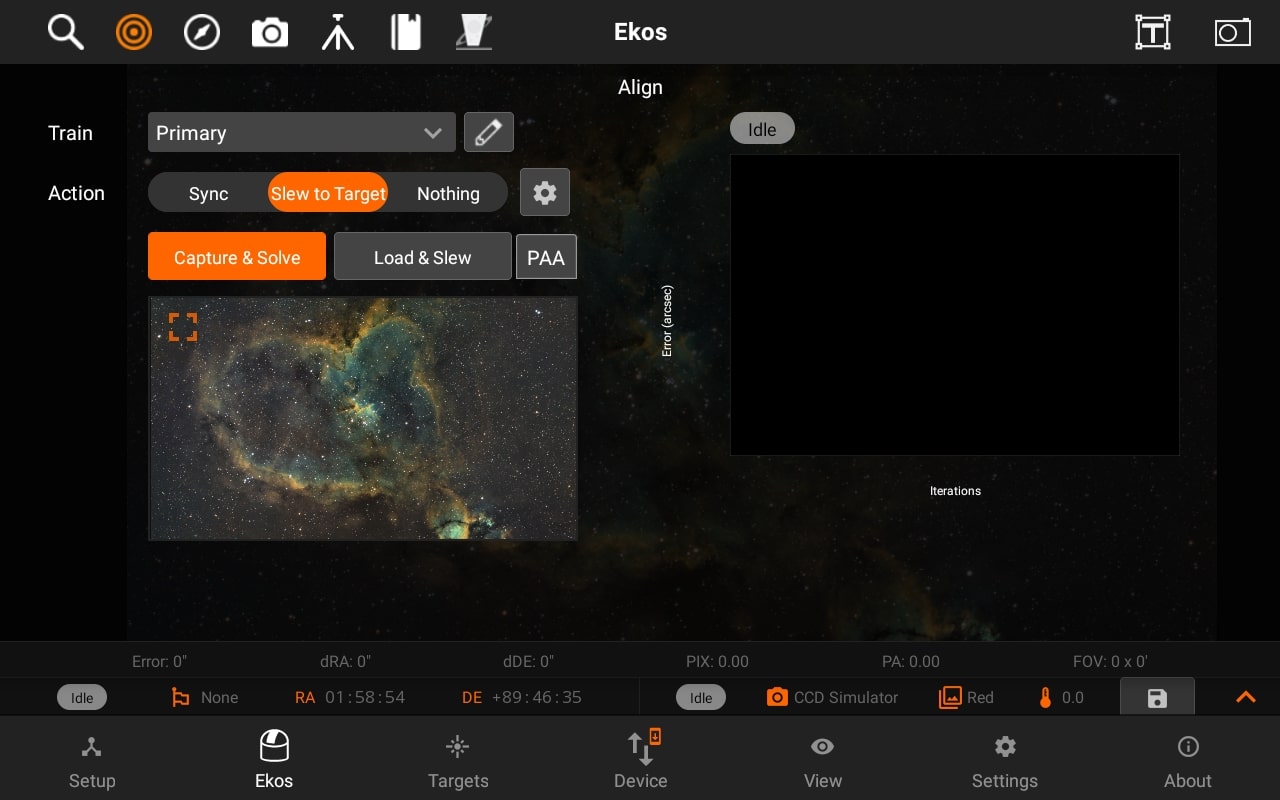
Align
The Align module enables highly accurate GOTOs and dead-center target images by utilizing plate-solving. The process starts with capturing an image and plate-solving it to get the exact sky coordinates. Once the coordinates are obtained, the mount is synchronized and then commanded to slew to the correct target position. This cycle repeats until the mount is within a few arcsecs from the target.
It has the following features:
- Manage / Select Optical trains.
- Three Actions: sync, slew to target or do nothing.
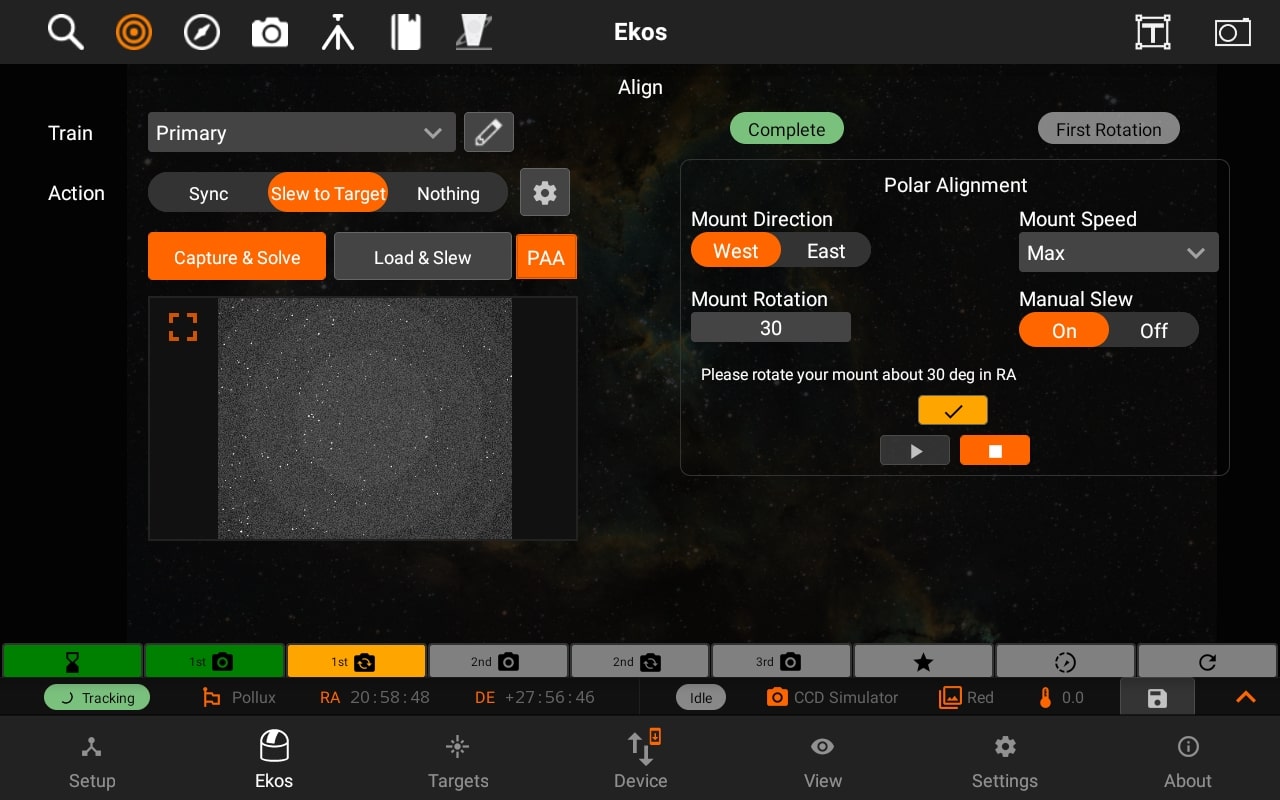
- Polar Alignment Assistance
- Capture & Solve
- Load and Slew
- Image Viewer
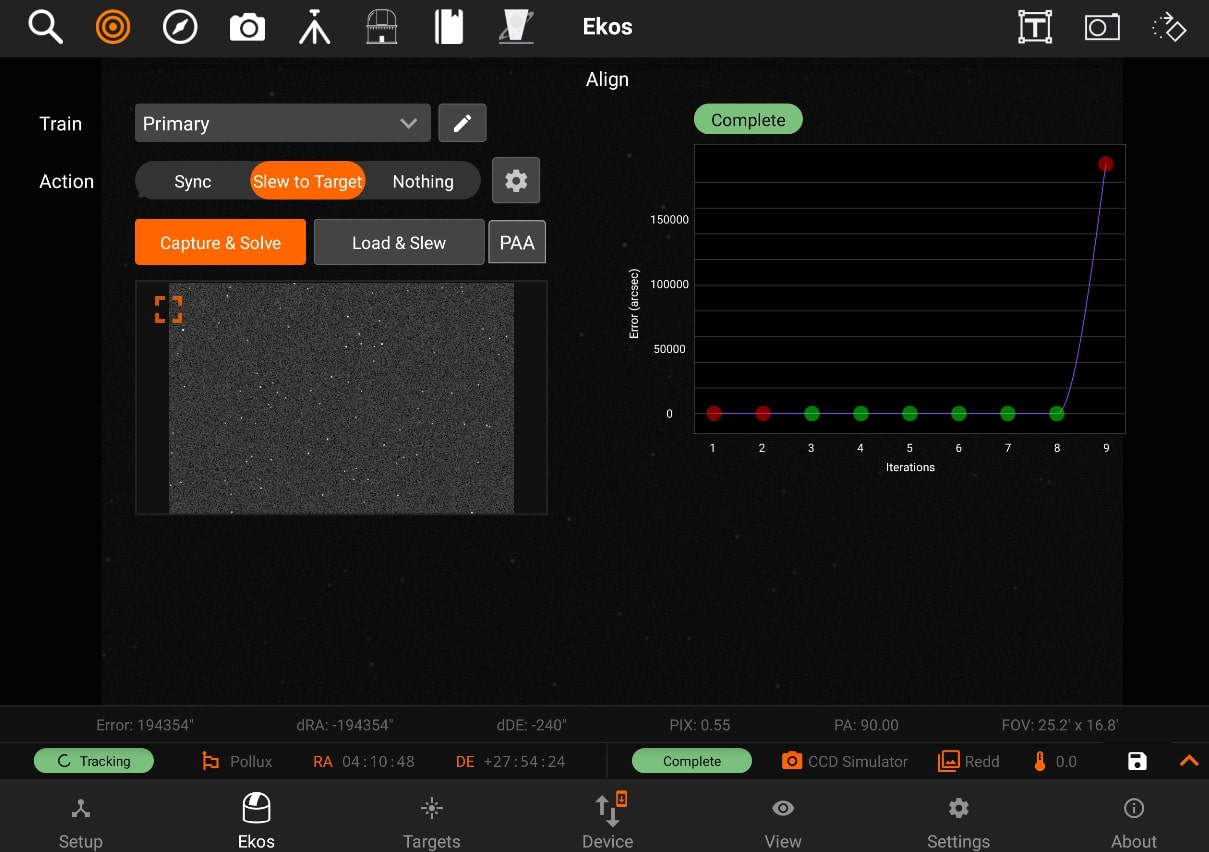
- Alignment Plot
Train
You can Select / Edit a train specifically for Align module. Each module has it's own train. Visit Optical trains topic for more.
Preset Settings
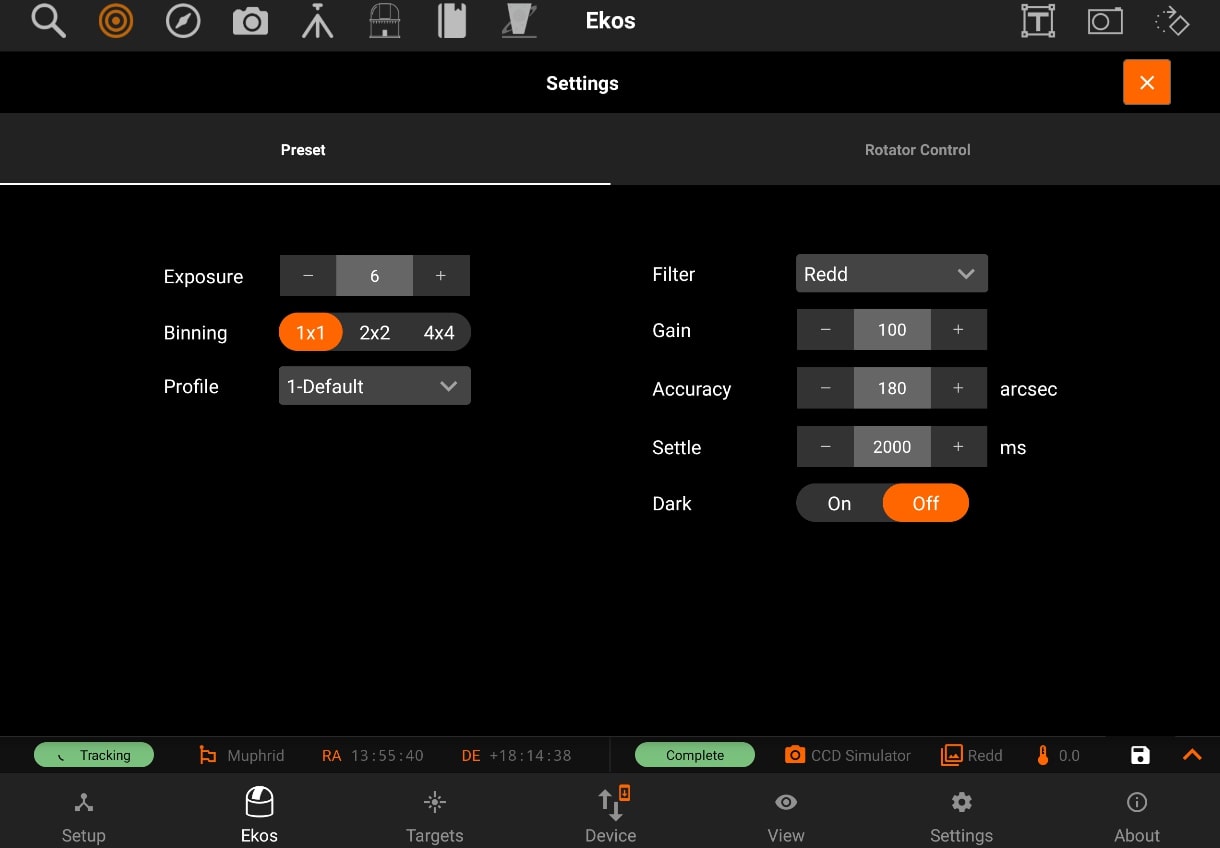
Preset settings has the following structure:
- Exposure
- Binning
- Filter
- Gain/ISO
- Accuracy: Acceptable difference between reported telescope coordinate and actual solved coordinates
- Settle: amount of time to allow mount to settle (in milliseconds)
- Dark Frame
Rotator control
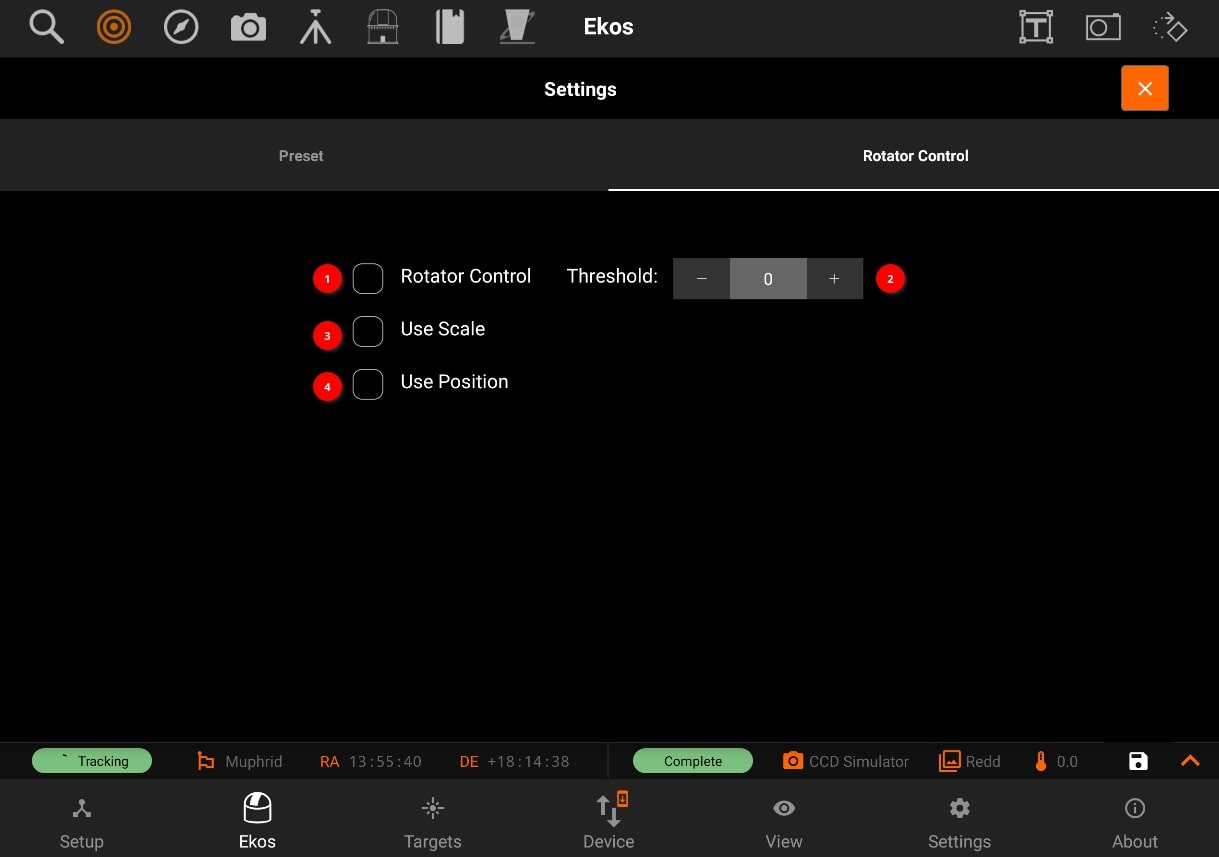
- Rotator Control: Use automatic or manual rotation control when using Load & Slew. For automatic control, the mechanized rotator is commanded to rotate to match the desired position angle. For manual control, the user is asked to manually rotate the camera until the desired position angle is reached.
- Threshold: Rotator threshold in arc-minutes when using Load & Slew. If the difference between measured position angle and FITS position angle is below this value, the load & slew operation is considered successful.
- Use Scale: Set image scale to speed up solver as it does not have to search index files of different images scales.
- Use Position: Set estimated speed to speed up astrometry solver as it does not have to search in other areas of the sky.
Manual Slew
If the option is enabled, after each capture, the you have to rotate the mount apporixmately by the specified amount as shown. Once done, press the yellow check button to continue.
Capture & Solve
To start capturing and solving, just tap on the Capture & Solve button and the StellarMate will take care of the rest. When it's done, you will be able to see the current Alignment capture preview, alignment info on the solution bar on the bottom, and the points on the Alignment plot. The points on the alignment plot have 3 different colors: Red, Yellow and Green. If a point is red, that means that the error is 1.5 times or more above the accuracy value, if it's yellow, that means that the error is between 1 times to 1.5 times above the accuracy value, and finally, if it's green, that means that the error is within the accuracy value. The accuracy value can be changed in the preset settings.
Load and Slew
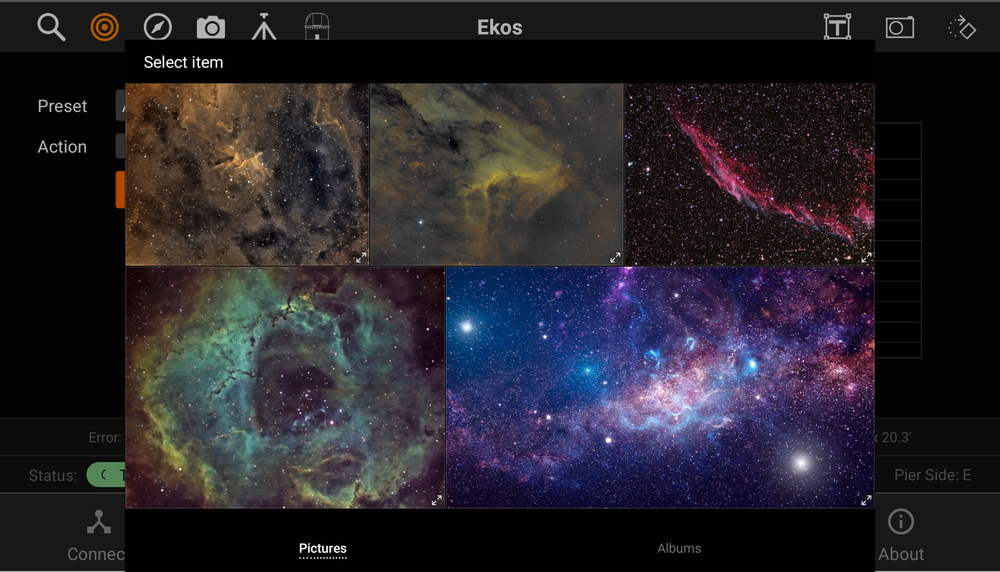
You can start a load and slew action by tapping on Load & Slew and selecting an image to slew to. StellarSolver is very accurate at this and will be able to slew to object in the image.