Ekos
When an equipment profile is not started, only the Ekos Scheduler module is available for use. From the scheduler, you may select targets and sequences to create jobs. You may specify job constraints and observatory startup and shutdown procedures. Once the scheduler is running, it will select the best targets to image and would automate the rest of the workflow without any human intervention.

When an equipment profile is started, the Ekos modules becomes active. In the Ekos screen, you can capture images, stream video, and create image sequences. Furthermore, it provides the following facilities:
Canvas on Main Image:
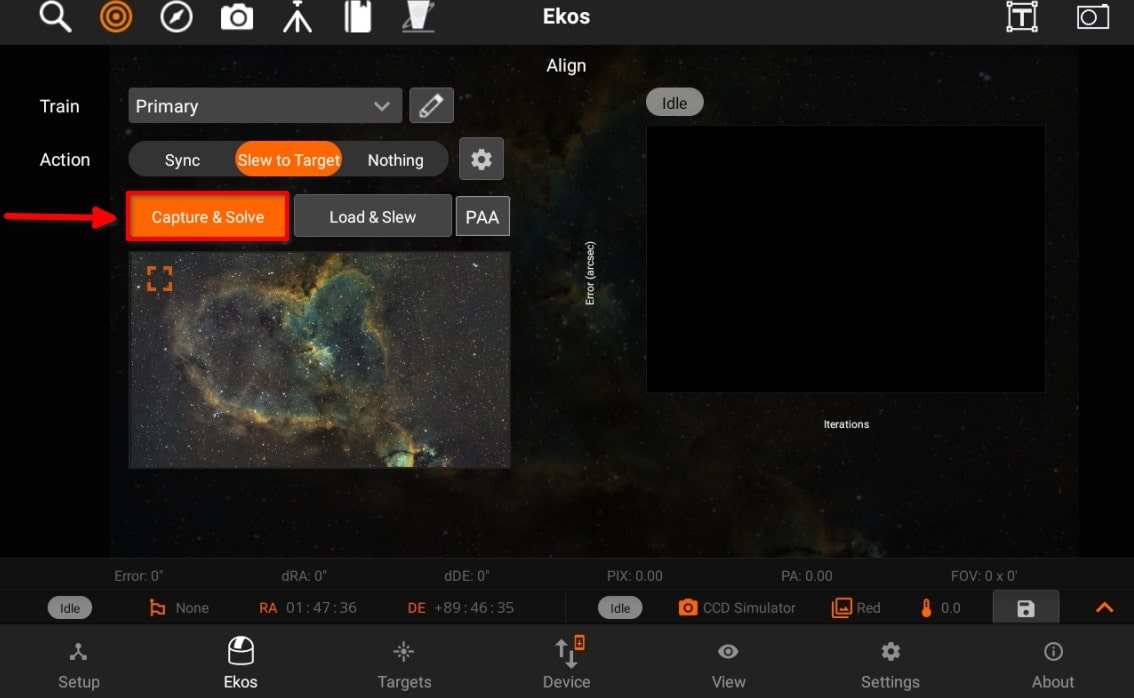
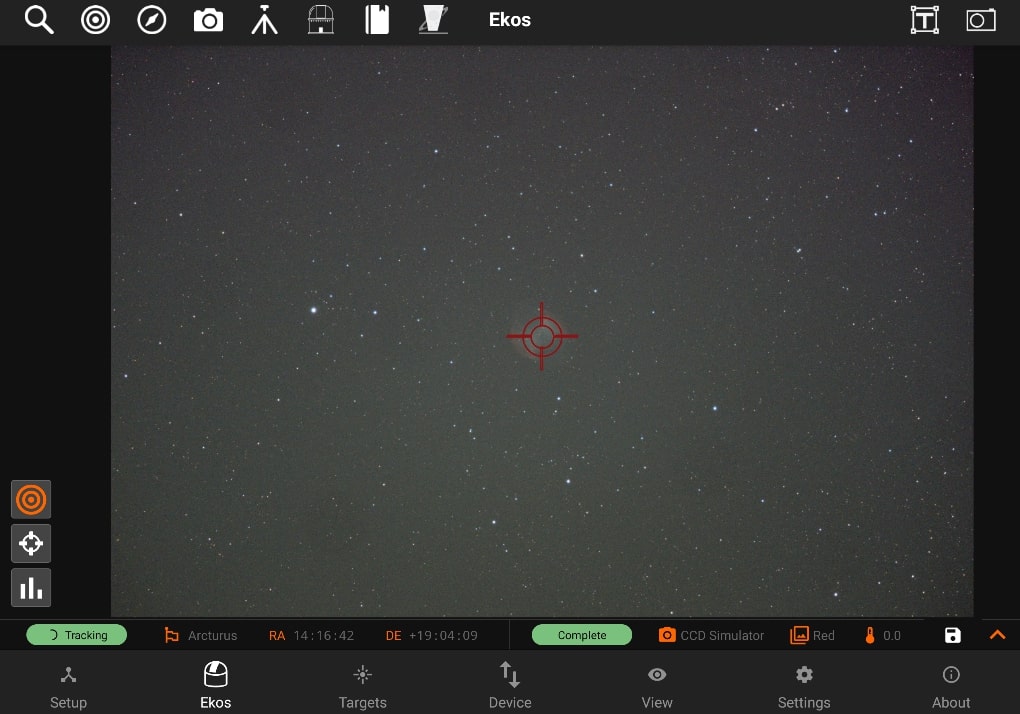
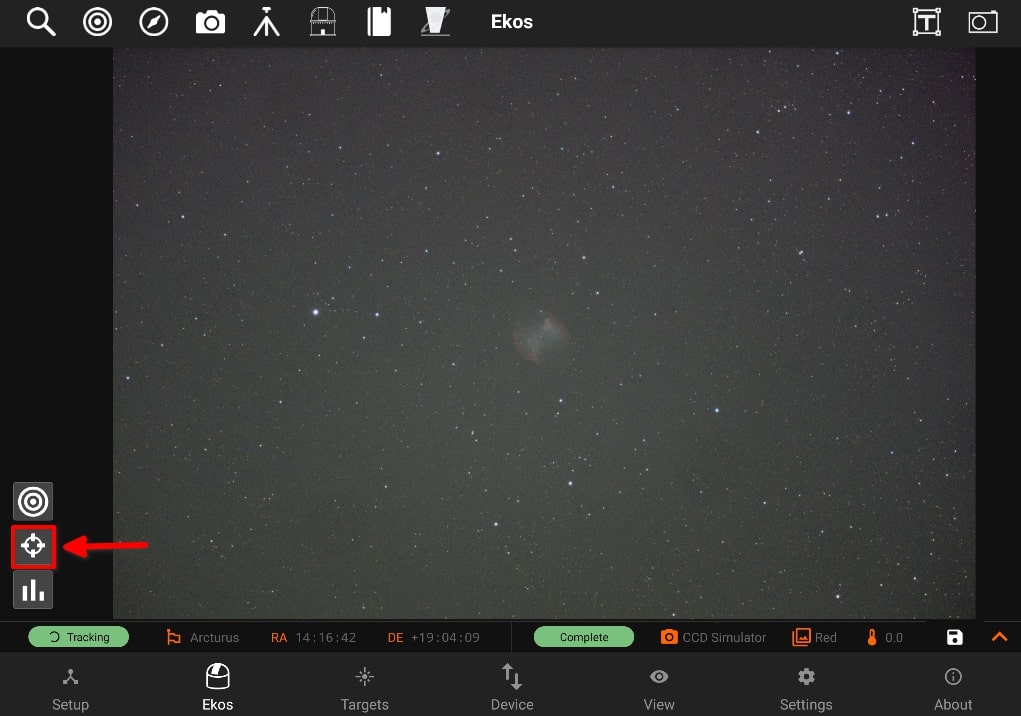
You can center the mount to a specific target in the main image if plate-solving was successful. From Ekos Align module, Capture and Solve an image. If successful, an orange align icon is displayed in the Main Image View indicating that solving is successful. For any subsequent images captured and displayed in the Main Image View, you may now select the target by tapping on it. A red bullseye animation designates the target.
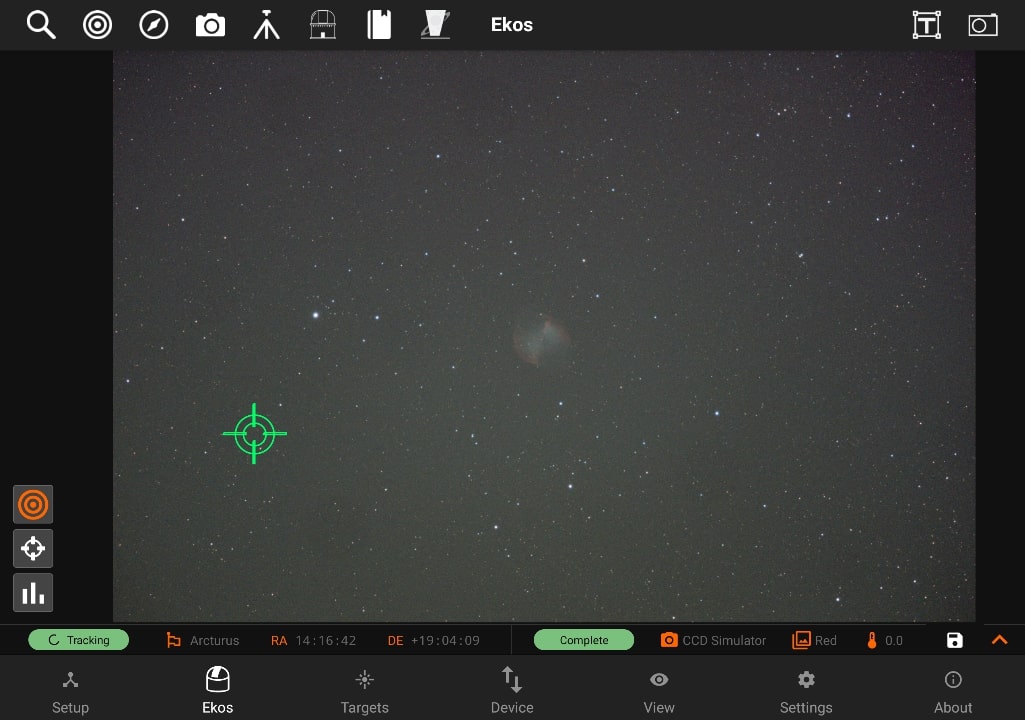
Tap and hold the target for approximately one second to command the mount to slew. If successful, the indicator icon changes to yellow and once motion is complete, it switches to green. Capture a preview to verify the mount indeed centered the target as desired. Repeat if necessary. Can also be seen in the below images.
Hold on your desired target, mount will star moving to that specifc target. Yellow animation will be appeared while it in in process.

On success, the animation will turn to green.
On capture new image, the target lock animation will be reset to default.
- Modules
- Focus: Focus your camera either automatically via an electronic focuser, or manually by adjusting the focus while framing, or by using Bahtinov Mask Assistant. Create presets for different configurations and set advanced settings to control the star detection and focusing algorithms.
- Align: Align your mount to get highly accurate GOTOs and to ensure you target is always in the center. You can also load an existing image to plate solve and then command the mount to go to the exact center in the sky.
- Guide: Guiding enables long-exposure astrophotography by ensuring your mount tracks accurately with time. It can automatically select and lock a guide star and send correction pulses to the mount to keep it always centered.
- Capture: create, edit, and delete presets, job sequencing, Filter Settings, Limit Settings, Calibration Settings, File Settings.
- Mount: tracking on/off, park/unpark, Meridian Flip, Limit Settings (Alt and HA Limits), and Pier Side.
- Observatory: park/unpark cap, park/unpark dome, dome goto absolute position and current angle representation.
- Scheduler: Schedule your session depending to the targets and on different timings.
- INDI Control Panel: INDI Control Panel provides an interface to interact with the drivers of the devices connected to Stellarmate.
- Quick Controls: Quick Controls are simplified quick-access settings for the camera, mount, and rotator located on the top-right panel. They can be toggled at any time. Once toggled, the corresponding control is overlayed on the top of your existing view where you can quickly and efficiently control your devices.
- Mount Status Bar
- Shows the status of the mount if it is parking/unparking, slewing, tracking, etc. as well as the target. Moreover, the Right Ascension, Declination, Azimuth, Alt-Azimuth, and Pier Side are also shown in the status bar.
- Also, Shows the camera information, temperature.
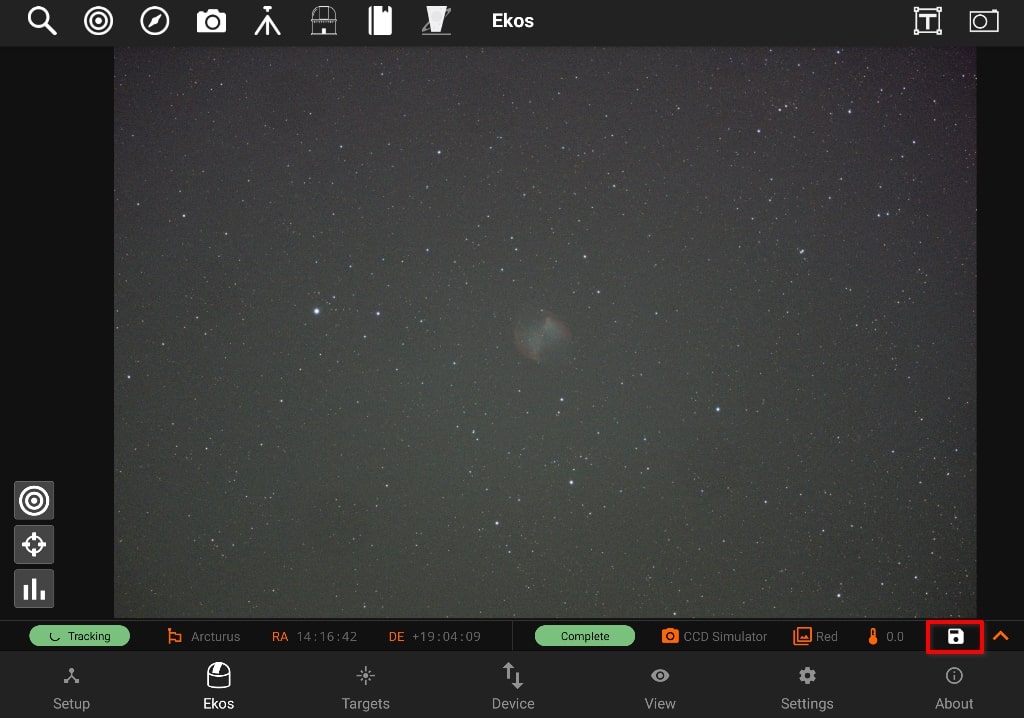
- Save image icon is also added in status bar. You can now save your captured images to tablet/Ipad by clicking the Save Icon Button. It will save
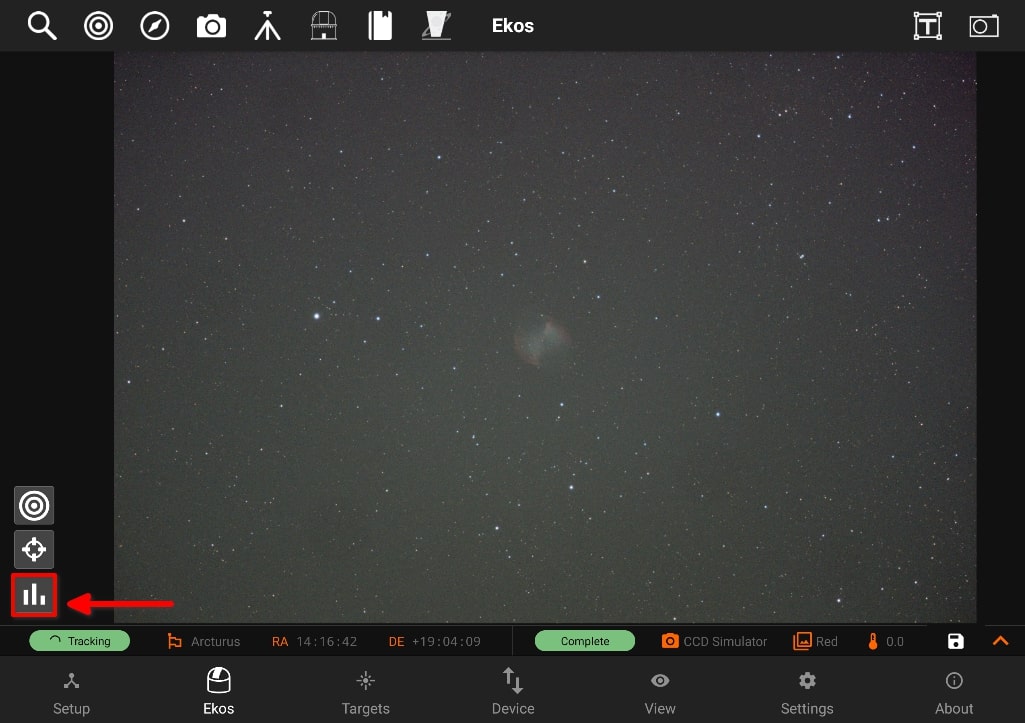
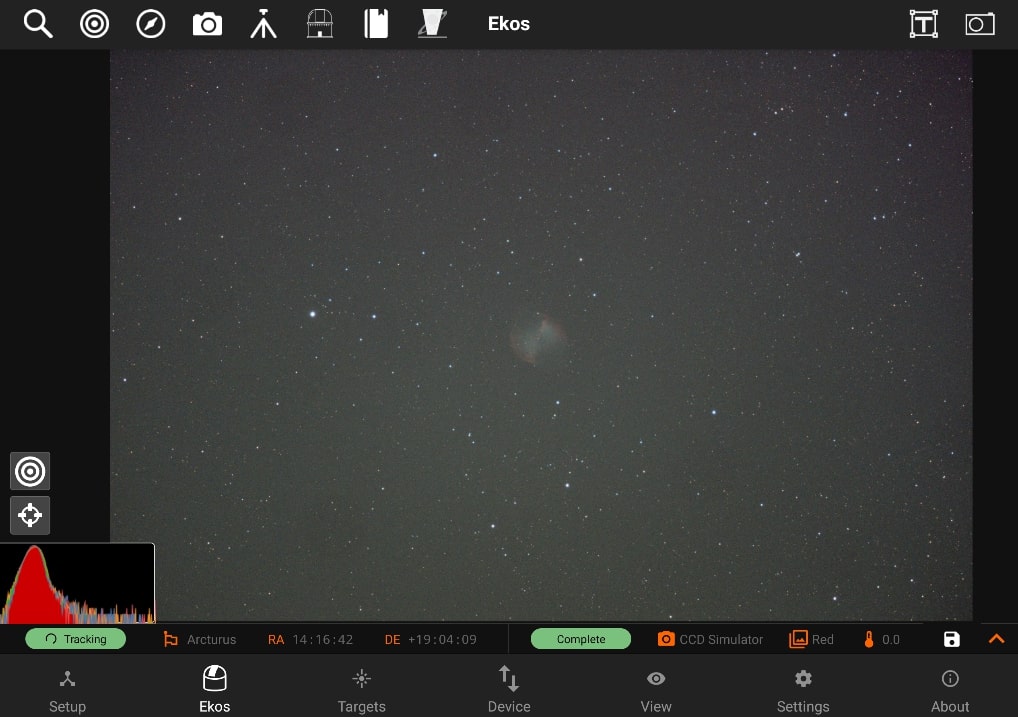
- Histogram
When available, clicking the histogram button in the main image view toggles the non-linear histogram. The histogram is generated for both mono and rgb images.
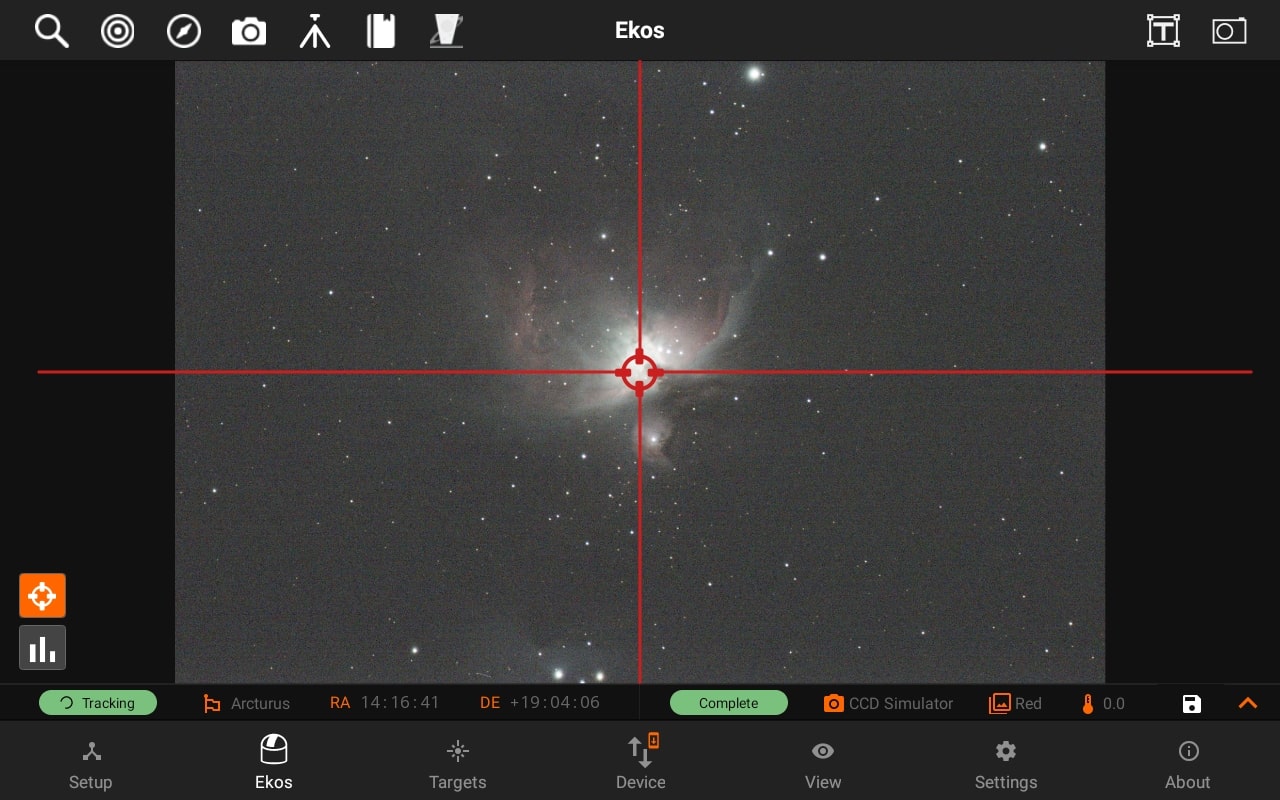
Crosshair:
Use crosshair on captured image, which is appeared on the center of captured image.
Once it is toggled, you can see the crosshair on the image.
Summary
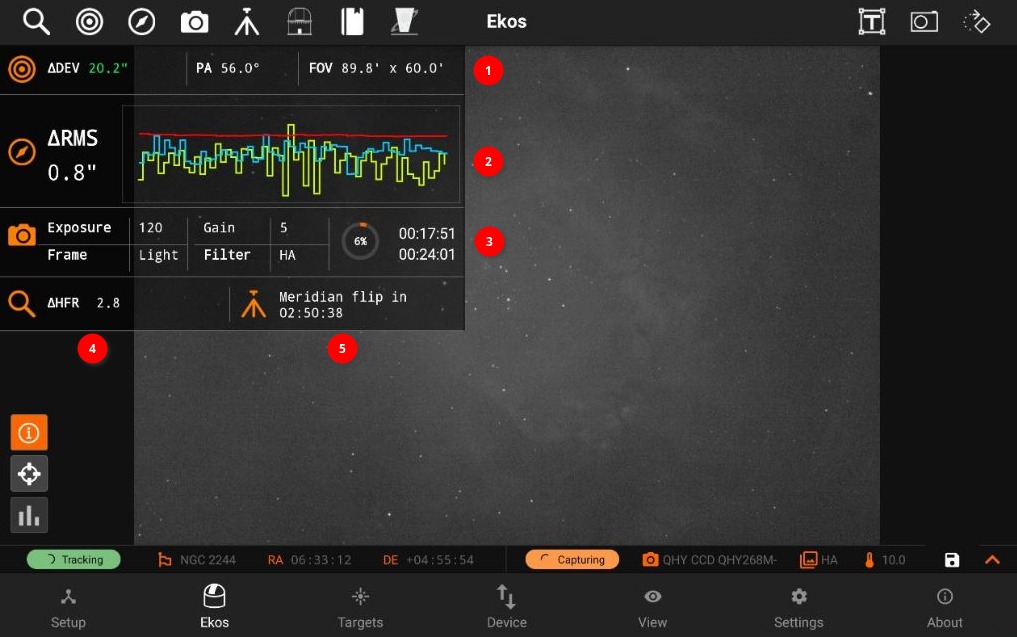
The summary view includes the gist of your astrophotography workflow so you can always take a quick look at the most important parameters without navigating to other screens. Depending on which Ekos modules are active, the information may include the following:
- Alignment
- Total deviation error in arcsecs. The deviation is updated when you perform a capture and solve operation.
- Position Angle (PA) in degrees East of North.
- Field of View (FOV) in arcminutes.
- Guide: Total RMS error in addition to the guide deviation chart.
- Capture: Current sequence settings and a progress indicator. Two timers are displayed to the right of the progress indicator when a sequence is running:
- Top timer: Sequence job timer countdown. This is the countdown until the current active sequence is complete.
- Bottom timer: Overall timer countdown. If you have multiple sequences, the timer indicates the estimated time until all sequences are complete.
- Focus: Half-flux-radius (HFR) measurement.
- Mount: Current meridian flip status.