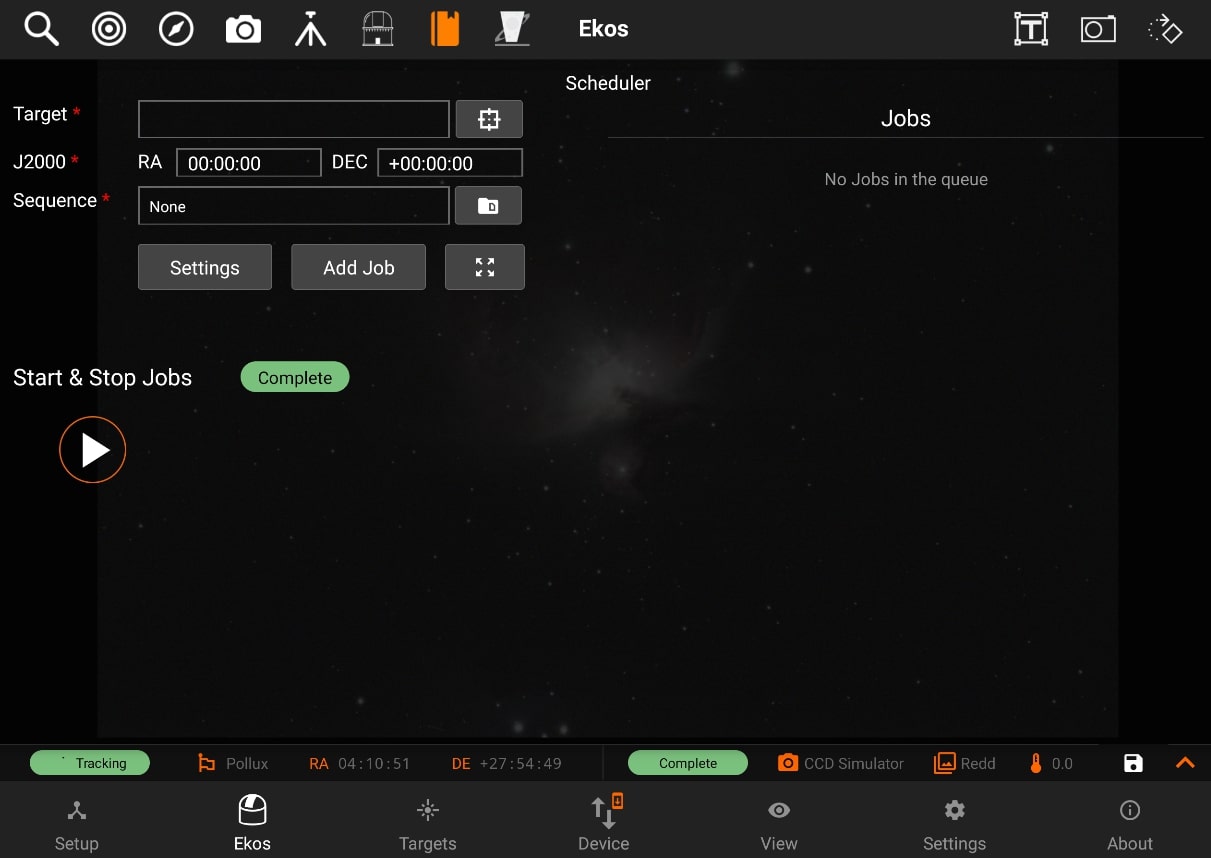
Scheduler
Ekos Scheduler is an indispensable arsenal in building your robotic observatory. A Robotic observatory is an observatory composed of several subsystems that are orchestrated together to achieve a set of scientific objectives without direct human intervention.
It’s recommended to use Ekos Scheduler after you are familiar with using all the Ekos modules manually first. Fine-tune the settings for each module to suit your particular equipment setup.

Ekos Scheduler provides a simple interface to aid the user in setting the conditions and constraints required for an observation job.
To add a new scheduler task, or job as it is called in Ekos, you need to select the following:
To add a new scheduler task, or job as it is called in Ekos, you need to select the following:
- Target: Target can be selected directly by tapping on the Select Target button or by finding a target in the Targets module and then tapping Schedule while Ekos is in offline mode.
- Sequence: A sequence file describes the required settings for each batch of images. Create a sequence file in the Capture module and save it for later.
- Steps: Each job goes through a sequence of discrete steps. Each step or stage can be toggled on or off as desired:
- Track: Mount is commanded to slew to target.
- Focus: Camera autofocus (if applicable) is started.
- Align: Plate-solving is performed to ensure the correct location, framing and orientation of the target is met. If a FITS file is specified in General Settings, then this file is first plate-solved and then mount is commanded to to slew to target solution coordinates. This is followed by another plate-solving process to ensure we are within tolerance at the target solution coordinates. If the position angle of the FITS image is different from the current camera orientation, the camera orientation can be automatically adjusted if a mechanized rotator is detected. Otherwise, a manual camera rotation is required until the image position angle is satisfied.
- Guide: Using a guide camera, the mount tracking is locked to a guide star to enable long-exposure astrophotography
After the first 4 stages are complete, the sequence file is loaded in the capture module and batch capture commences. All images are saved to storage and can be accessed in the View tab. For EkosLive Pro subscribers, all images are also uploaded to the cloud storage if StellarMate is connected to the internet.
