You can create a custom filter project:
Create a Filter Project Using the Eclipse Rhapsody Project Wizard
Create the Template Project Using Wizard
To create the template project using the wizard:
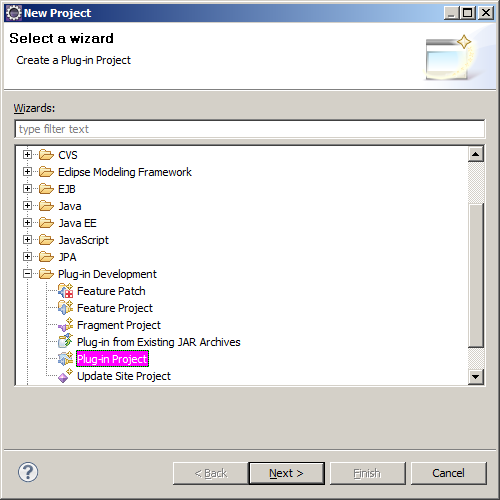
- In Eclipse, create a new plug-in project by navigating to File>New>Other>PluginProject:
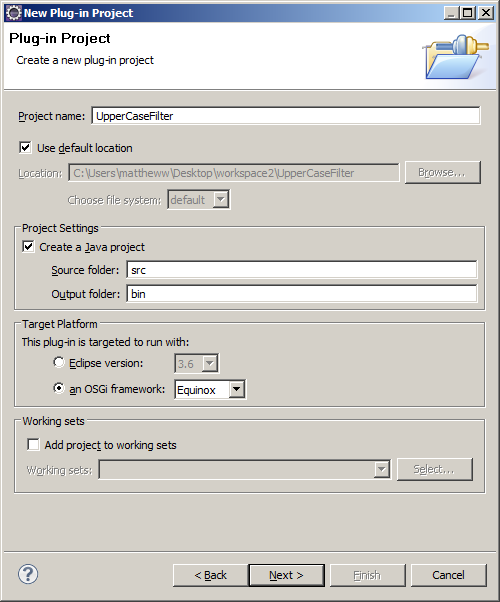
- Name your project, for example: "UpperCaseFilter".
- Use the default Project Settings options to create the
srcandbinfolders (srcis your source folder where all your Java code resides andbinis the build folder where compiled class files are written to). For the Target Platform, select an OSGi framework with
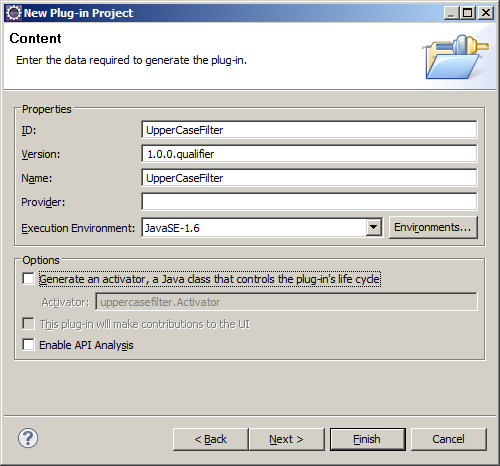
equinox.In the Content dialog, deselect the Generate an activator checkbox (as you will create one):
Versioning
On this dialog, you can also set the Version for your project. By default, the version will be
1.0.0.qualifier, but you may want to edit the qualifier part to be a number or text. For example, Rhapsody projects typically use a qualifier such asbetaorfinal. You may also want to give some consideration to increasing the version number of your project when you make changes to it. Correct versioning of your project can avoid confusion and incompatibility issues, as you can easily tell what version of the JAR file you have.
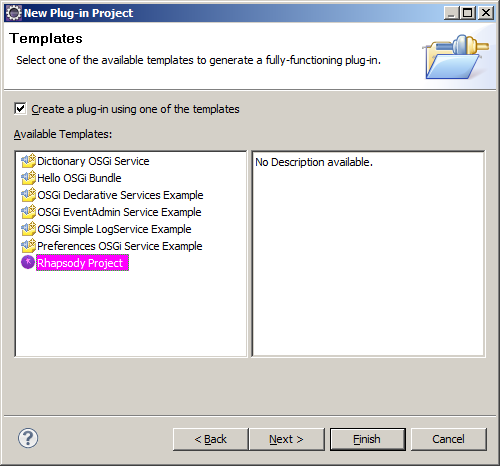
Create a plug-in using the template
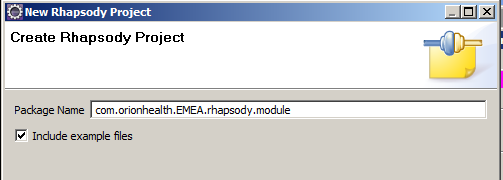
Rhapsody Project:- Change the package name to your desired package name. The examples here use
com.orionhealth.EMEA.rhapsody.module. Optionally deselect the Include example files checkbox, and select the Finish button:
- Right-click on
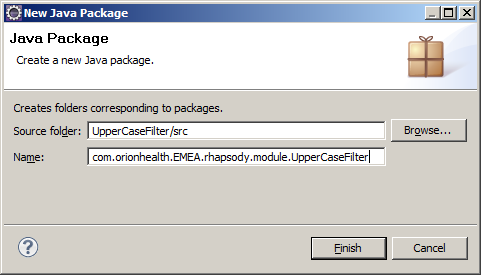
srcand select New>Package to create a package calledUpperCaseFilterin thecom.orionhealth.EMEA.rhapsody.modulepackage folder.
Tidy Up the Project
These steps may not be required, depending on which version of Eclipse you are using. In older version of Eclipse, the OSGi service may be generated in the wrong location. If your Service.xml file is located under the META-INF folder, perform the following steps to fix your project set-up:
- If the folder
OSGI-INFdoes not exist in your project, create a new folder in your project calledOSGI-INF(right-click on the project and select New>Folder). - If the
OSGI-INFfolder does not contain a file Service.xml, move the file fromMETA-INFintoOSGI-INF. - Double-click
MANIFEST.MFinMETA-INFand select the MANIFEST.MF tab. - Ensure the Service-Component references
OSGI-INF/Service.xml, for example:Service-Component: OSGI-INF/Service.xml. If desired, you may delete the
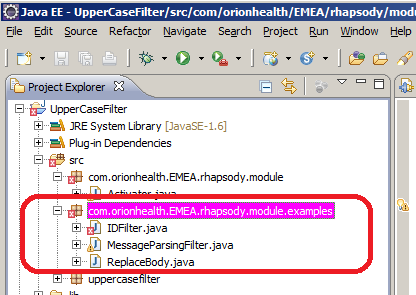
examplespackage. Note that if you do this, you will then have to remove references to them from the Activator to remove errors in Eclipse.
Rhapsody has the following filter bootstrap sequence: Rhapsody opens the custom filter JAR file, reads MANIFEST.MF which points to OSGI-INF/Service.xml, which in turn points to the Activator. The Activator registers the filter that you will create.
Your Activator does not have to be named Activator. You can use any class name as long as the Service.xml points to the correct file. If you have multiple projects and want them all to have an Activator named Activator, ensure your Activator.java files all have different package names to avoid confusion. In this example, we could have called the package com.orionhealth.EMEA.rhapsody.module.uppercasefilter.
Create a Filter Project from Scratch
This section covers how to create a filter project from scratch. Once you have worked through this process, you can then customize the procedure to fit your own style of programming :
To create a filter project from scratch:
- Follow steps 1 through 5 in Create the Template Project Using Wizard.
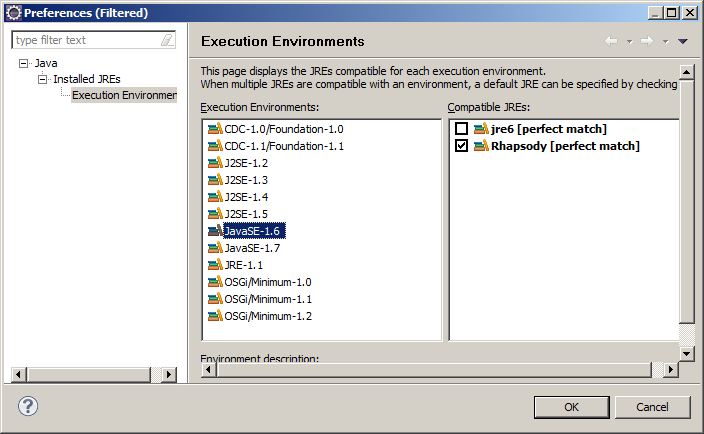
In the Content dialog, select the Environments... button and ensure the Rhapsody JRE is selected:
- Now select the Finish button, or if you select Next then on the Templates dialog, just go with defaults and select Next.
- Right-click on the project folder and select Properties and navigate to Java Build Path>Libraries.
- If the
Plug-in Dependencieslibrary is missing, then add it by selecting Add Library.... - Select
Plug-in Dependencies. and select the Next button. - Select the Finish button.
- Select the OK button to close the Project Properties dialog.
- Now open the
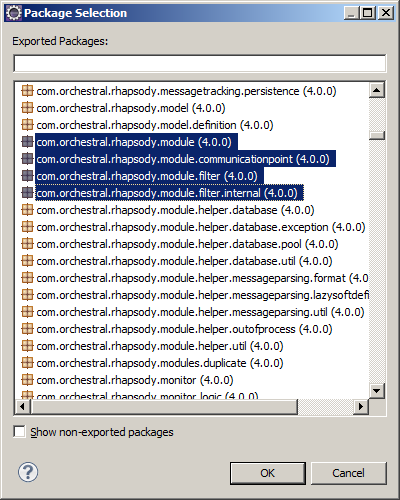
META-INF/MANIFEST.MFfile and select the Dependencies tab. - Add the required JAR files by selecting the Add... button in the Imported Packages panel:
-
com.orchestral.rhapsody.module.communicationpointcom.orchestral.rhapsody.module.filtercom.orchestral.rhapsody.module.helper.outofprocesscom.orchestral.rhapsody.modulecom.orchestral.rhapsody.messagecom.orchestral.rhapsody.message.parsing.definitioncom.orchestral.rhapsody.rhapsody.message.parsing.formatcom.orchestral.rhapsody.rhapsody.message.parsing.xpathcom.orchestral.rhapsody.configuration.auxiliaryfilescom.orchestral.rhapsody.configuration.definitioncom.orchestral.rhapsody.configuration.repositorycom.orchestral.rhapsody.configuration.securitycom.orchestral.rhapsody.configuration.variablescom.orchestral.rhapsody.idgeneratorcom.orchestral.rhapsody.initialisationcom.orchestral.rhapsody.model.definitioncom.orchestral.rhapsody.persistentmapcom.orchestral.rhapsody.securityorg.apache.log4jorg.openrdf.utilorg.osgi.framework
org.osgi.service.component
- Save the
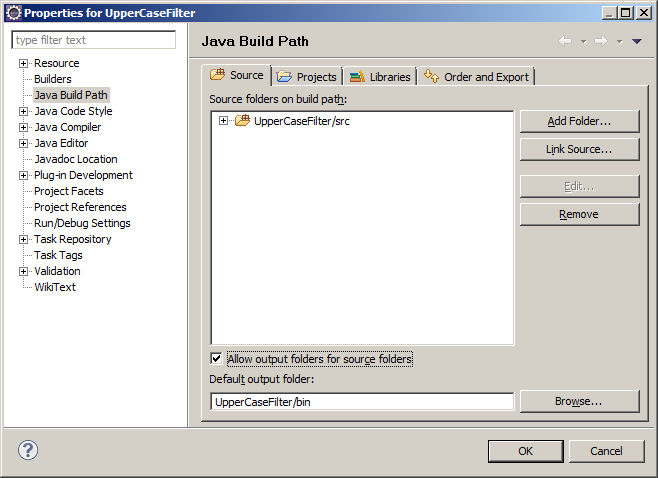
MANIFEST.MFfile. - Right-click on the project folder and select Properties and navigate to Java Build Path> Source and check the Allow output folders for source folders checkbox.
- Ensure the Default output folder is set to
UpperCaseFilter/bin. Select the OK button to close the Project Properties dialog.
- While the project is selected, navigate to the menu Project and ensure
Build Automaticallyis selected. - Right-click on
srcand select New>Package to create a package calledUpperCaseFilterin thecom.orionhealth.EMEA.rhapsody.modulepackage folder.
The Rhapsody packages contain the various Rhapsody classes required for building custom components:
- The plug-in mechanism used in Rhapsody is based on OSGi (Eclipse's plug-in framework) and hence the necessary OSGi pre-requisites are requ.
Also included is log4j as that is the logging mechanism used in Rhapsody:
Create a Filter Project by Copying an Existing Project
You can use the provided sample or stub projects, or copy existing projects to develop custom filters. When copying an existing project, you must modify it to your purposes, taking care not to leave any residue from the original project.
Importing Sample and Stub Projects
The Rhapsody sample and stub projects are the easiest way to begin writing custom components for Rhapsody. The projects can be loaded and then used as the basis for new components using Eclipse's refactoring tools. To import a sample or stub project:
Download the sample and stub project zip file.
From the Eclipse File menu, select Import....
- From the General Folder, select Existing Projects into Workspace and press Next.
- Select the folder that contains the StubFilterAndCommunicationPoints and SampleFilterAndCommunicationPoints projects.
- Select only the StubFilterAndCommunicationPoints and SampleFilterAndCommunicationPoints projects and press Finish.
- Check that two projects called
StubFilterAndCommunicationPointsandSampleFilterAndCommunicationPointshave been added to the Package Explorer.
Configuring the Sample Project
The SampleFilterAndCommnuicationPoints project contains three packages:
com.orionhealth.rhapsody.samplecom.orionhealth.rhapsody.sample.samplecommunicationpointcom.orionhealth.rhapsody.sample.samplefilter
You may need to follow the instructions to tidy up the project.
com.orionhealth.rhapsody.sample
The com.orionhealth.rhapsody.sample package contains one class, called Activator, that contains one method, called activate. The purpose of this Activator class is to register any custom communication points or filters with the Rhapsody engine. This is done via the activate method, which is called immediately upon loading the project.
The registration of the custom components includes the following information for the Rhapsody engine:
- The unique internal ID of the communication point or filter (for example,
MyCP). - The display type of the communication point or filter (for example,
Date Communication Point). - The Java class to be created when creating a new instance of this communication point or filter (for example,
DateCommunicationPoint.class). - The full-size 32x32 bitmap representing the image to be displayed in Rhapsody IDE when displaying this communication point or filter.
- The small-size 16x16 bitmap representing the image to be displayed in Rhapsody IDE when displaying this communication point or filter.
- Filters also require the name of the filter toolbox folder in which the filter is displayed in the Rhapsody IDE (for example,
Sample Filter).
com.orionhealth.rhapsody.sample.samplecommunicationpoint
The com.orionhealth.rhapsody.sample.samplecommunicationpoint package contains example classes for a communication point. There are two abstract classes that must be sub-classed to create a communication point:
AbstractCommunicationPointindicates the communication point object itself and is the base class for the object that is created when Rhapsody needs to create a new instance of the communication point.CommunicationPointConnectionindicates an instance of a connection on the communication point. Some communication points can have multiple connections to external systems (for example the TCP Server communication point) while others may only allow one connection.
The two classes in this package implement these abstract classes. This sample communication point simply writes the current date/time into the message body.
com.orionhealth.rhapsody.sample.samplefilter
The com.orionhealth.rhapsody.sample.samplefilter package contains an example class for a Rhapsody filter. There is one abstract class that must be sub-classed to create a new filter:
AbstractFilterindicates the filter object itself and is the base class for the object that is created when Rhapsody needs to create a new instance of the filter.
The class UpperCaseFilter in this package implements the AbstractFilter class to define a new filter which converts the message body to uppercase.
Configuring the Stub Project
The StubFilterAndCommnuicationPoints project contains three packages:
hospitalnamehospitalname.samplecommunicationpointhospitalname.samplefilter
The stub project has the same layout as the sample project except that all the classes are stubs. The Eclipse refactoring tools can be used to rename these classes.
Refactoring the Stub Project
You may need to follow the instructions to Tidy up the project.
To use the stub project to create a new communication point or filter, modify the following items:
- The
MANIFEST.MFfile must be updated with a new ID. The ID of the component must be unique within Rhapsody's OSGi framework. - The project name should be renamed to an appropriate name.
- The package names should be renamed to appropriate names.
- The Communication Point and Filter class names should be renamed to indicate their purpose.
- The new component names and image file names in the activator class should be updated to appropriate names.
- Open the
MANIFEST.MFfile from theMETA-INFfolder and open the Overview tab. The ID given to each Rhapsody component must be unique within the Rhapsody engine.- Rename the ID from
StubProjectto a project-specific value.
- Rename the ID from
- Most renaming can be performed using the Eclipse refactoring tools, which enable items and their references to be renamed quickly.
- To change the project name, right click on the project in the Package Explorer and select Refactor>Rename....
- To change the package name of the
Activator- Right-click on the package name in the Package Explorer and select Refactor>Rename....
- Open the
stubproject.xmlfile in theMETA-INFfolder and change the two instances of the old package name with the new package name.- The replaced names indicate the component name and the implementation class name.
- To change the package names for the stub communication point and stub filter, right click on the package names in the Package Explorer and select Refactor>Rename....
To change the class names, right click on the java file name in the Package Explorer and select Refactor>Rename....
If you change the name of the Activator class, you will need to modify the
stubproject.xmlfile as well.
- The
Activatorclass'sactivatemethod now needs to be modified to register the correct information for the new communication point or filter.- If you are creating a new filter:
- Comment out or remove the code that registers the stub communication point. If you do not do this, the stub communication point will also be available in the Rhapsody IDE.
- In the call to the
FilterRegistrationconstructor, modify the information required for this new filter:- Unique ID for this filter.
- Display name for this filter.
- Name of the folder in the filter toolbox into which this filter will be added.
- Implementation class of the filter.
- Path and name of the 32x32 bitmap for the image to be used for this filter. If this image is not given (you should write
nullin this case), or cannot be found, the default filter image is used. Path and name of the 16x16 bitmap for the image to be used for this filter. If this image is not given (you should write
nullfinal BundleContext context = componentContext.getBundleContext(); final String fr = FilterRegistration.class.getName(); context.registerService(fr, new FilterRegistration( "StubF", "Stub Filter", "", StubFilter.class, "/selection.bmp", null), null);
- If you are creating a new communication point:
- Comment out or remove the code that registers the stub filter. If you do not do this, the stub filter will also be available in the Rhapsody IDE.
- In the call to the
CommunicationPointRegistrationconstructor, modify the information required for this new communication point:- Unique ID for this communication point.
- Display name for this communication point.
- Implementation class of the communication point.
- Path and name of the 32x32 bitmap for the image to be used for this communication point. If this image is not given (you should write
nullin this case), or cannot be found, the default communication point image is used. Path and name of the 16x16 bitmap for the image to be used for this communication point. If this image is not given (you should write
nullin this case), or cannot be found, the default communication point image is used.final BundleContext context = componentContext.getBundleContext(); final String cr = CommunicationPointRegistration.class.getName(); context.registerService(cr, new CommunicationPointRegistration( "StubCP", "Stub Communication Point", StubCommunicationPoint.class, "/selection.bmp", null, null), null);
- If you are creating a new filter:
The new communication point or filter is now ready to be run through Rhapsody via Eclipse. The Rhapsody engine must be restarted to pick up the new components:
- If Rhapsody is running through Eclipse, stop debugging using the terminate button (this will result in an unclean shutdown), or type
closein the Console window and wait for the engine to stop. - Run Rhapsody from the Run menu.
It is now possible to modify the new communication point or filter code from within the Eclipse environment. Eclipse will attempt to update the code while Rhapsody is running. Some changes cannot be added on the fly and will require Rhapsody to be restarted to recognize the new changes. Eclipse will notify you of these changes and will ask if Rhapsody should be restarted.
