This scenario involves taking HL7 messages and storing some information from the message into an SQL database. Specifically, the patient identifier, name, address, next of kin, and next of kin's address are inserted into appropriate database tables. The scenario handles the case where the patient may have multiple addresses, or multiple designated people as their next of kin. In addition, each next of kin can have multiple addresses.
The patient information can be found in the HL7 PID segment and the Next of Kin information can be found in the NK1 segment.
This scenario is for SQL Server, but can be adapted to Oracle® with minor changes. Both the SQL Server and Oracle® versions of this scenario can be loaded as samples into the Rhapsody Database Configuration Editor from the Samples menu.
As there are four sets of data and four tables to insert into, four statements are required. As all tables require the patient identifier, either directly or indirectly (the NextOfKinAddress table requires a value from the NextOfKin table, which in turn requires the PatientID, the insert into the patient table must occur first, and the identifier retrieved.
As the requirement is to insert all patient addresses, all next of kins, and all of the next of kins' addresses, some statement iteration is required to loop over the repeating elements in the message. Two levels of iteration are required for the next of kin address in order to get all addresses for all next of kins.
This gives a configuration outline as follows:
- Statement One: Insert the patient name information into the Patient table, and retrieve the new identifier generated by the database so it can be used in subsequent statements.
- Statement Two: Iterate over all repeats of the patient address, and insert each address into the Address table.
- Statement Three: Iterate over all repeats of the patient's next of kins, and insert each next of kin into the NextOfKin table.
- Statement Four: This is a child statement of statement three (so it implicitly repeats over all next of kins), and also iterates over each next of kin address. These are each inserted into the NextOfKinAddress table.
Inserting Into the Patient Table
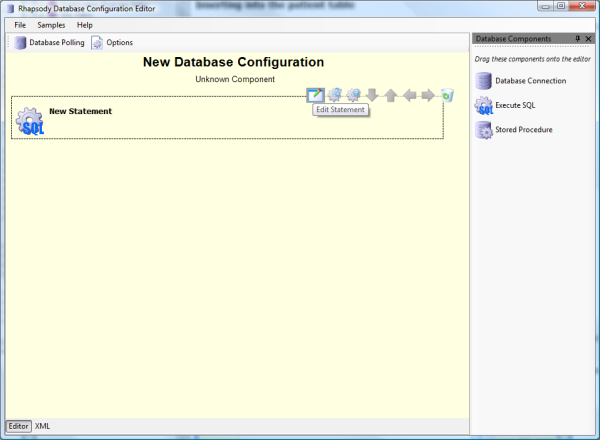
Start with a new configuration in the Rhapsody Database Configuration Editor, and drag a new statement onto the editor, as shown in the following diagram.
Edit the statement by double-clicking on it or by clicking the Edit Statement icon. Rename the statement to Insert Patient by clicking the Rename link at the top of the dialog.
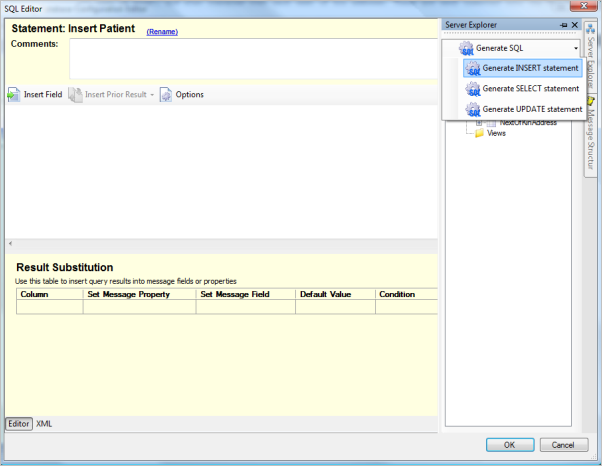
Generate an INSERT statement by selecting the Patient table from the Server Explorer, and choosing to generate an SQL statement as shown in the following diagram:
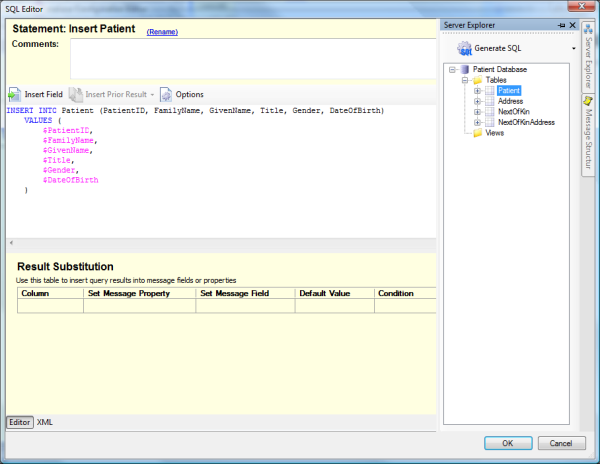
The generated SQL INSERT statement looks like this:
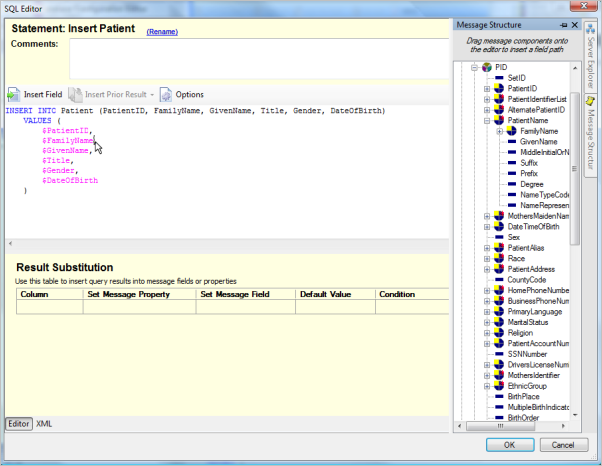
This generates the outline of the SQL statement, but needs some modification to use the values from the input message. Modify the statement by removing the PatientID column (as this is automatically generated by SQL Server), and dragging the appropriate fields from the PID segment in the ADTA01 message from the Message Structure toolbox.
Drag the PID/PatientName/FamilyName, PID/PatientName/GivenName, PID/PatientName/Prefix, and PID/Sex fields onto the text editor, replacing the appropriate message properties that were automatically generated. The SQL should now look like this:
Now the automatically generated identifier needs to be retrieved from the database so it can be used in subsequent queries. This is done by retrieving the special @@IDENTITY value from SQL Server and calling it PatientID. Subsequent queries can refer to it as if it were a column returned from a normal query.
Finally enter a short summary for the statement so it is easy to refer to later. This has no effect on how the configuration works, but makes it much simpler to refer to the configuration later and remember how it works.
Inserting Into the Address Table
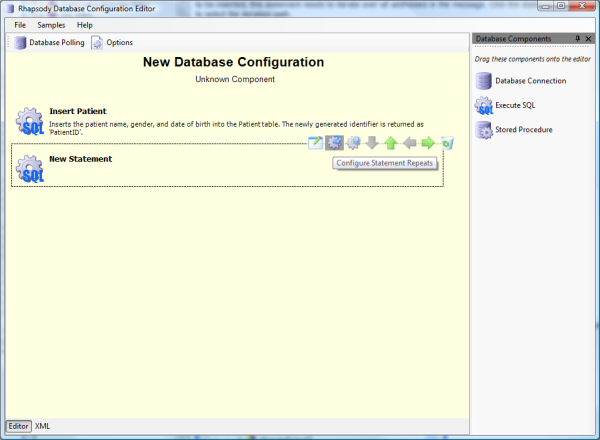
In the Overview Editor, create a new statement by dragging it underneath the Insert Patient statement. As all addresses need to be inserted, this statement needs to iterate over all addresses in the message. Click the Statement Iteration icon as shown below to select the iteration path.
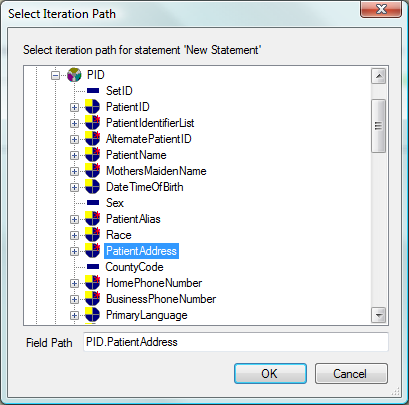
This shows the field path selector dialog. Browse to the ADTA01 message, and select the PID/PatientAddress repeating field, and click the OK button. This is shown below:
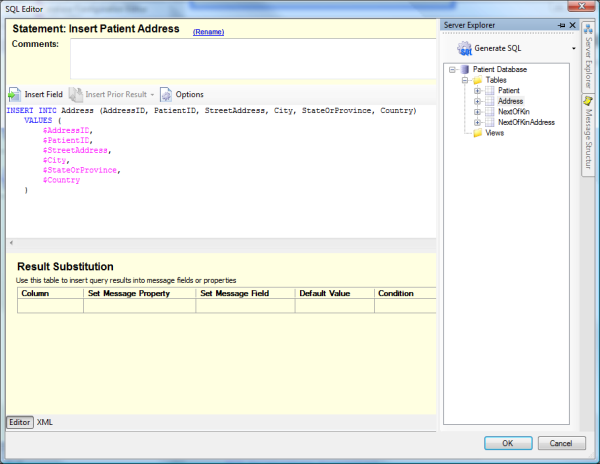
Open the new statement, rename it to Insert Patient Address, then generate an INSERT statement selecting the Address table from the Server Explorer and pressing the Generate button. The result of this is shown below:
Modify the SQL by removing the reference to AddressID (as it is automatically generated by the database), change the value to be inserted into the PatientId column to @PatientID to use the identifier generated by the previous statement, and then update all the remaining values to the appropriate values in the PID/PatientAddress composite. These can be dragged into the text editor from the Message Structure toolbox. Ultimately the SQL should look like this:
Finally, give the statement a summary to describe its behavior, and close the SQL Editor.
Inserting Into the NextOfKin Table
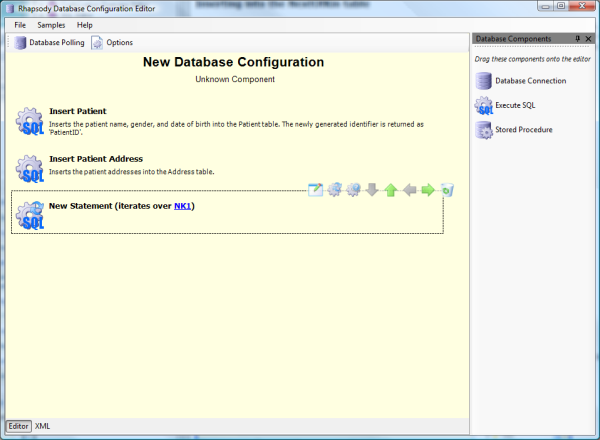
In the overview editor, create a new statement by dragging it underneath the Insert Patient Address statement. As all next of kins need to be inserted, this statement needs to iterate over all the next of kins in the message. Click the Statement Iteration icon and select the repeating NK1 segment within the ADTA01 message. Click the OK button to close the dialog. The result of this is shown in the following diagram:
Open the new statement, rename it to Insert Next Of Kin, then generate an INSERT statement by selecting the NextOfKin table in the Server Explorer and then click the Generate SQL button. The result of this is shown in the following diagram:
Modify the SQL by removing the reference to NextOfKinID (as it is automatically generated by the database), and change the value to be inserted into the PatientId column to @PatientID to use the identifier generated by the first statement. Then update all remaining values to the appropriate values in the NK1 segment (NK1/NextOfKinName/FamilyName, NK1/NextOfKinName/GivenName, NK1/Sex, NK1/Relationship, and NK1/PhoneNumber). The result of this is shown in the following diagram.
Now the automatically generated identifier needs to be retrieved from the database so it can be used in subsequent queries. This is done by retrieving the special @@IDENTITY value from SQL Server and calling it NextOfKinID. Subsequent queries can refer to it as if it were a column returned from a normal query.
Finally, give the statement a summary to describe its behavior, and close the SQL Editor.
Inserting into the NextOfKinAddress table
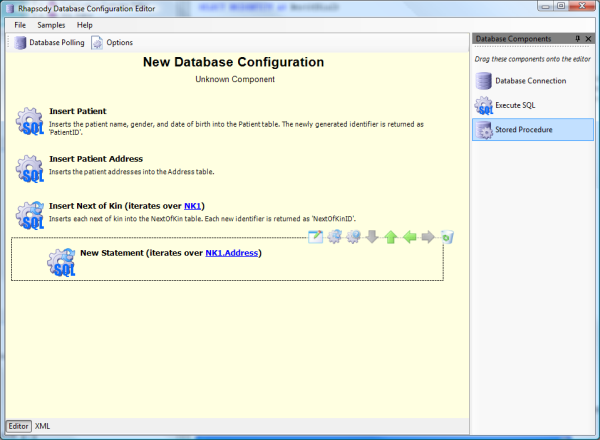
In the overview editor, create a new statement by dragging it underneath the Insert Next Of Kin statement. As all addresses for each next of kin need to be inserted, use the Indent icon to move the new statement in one level. Then click the Statement Iteration icon and select the repeating NK1/Address field. Press the OK button to close the dialog. The result of this is shown in the following diagram:
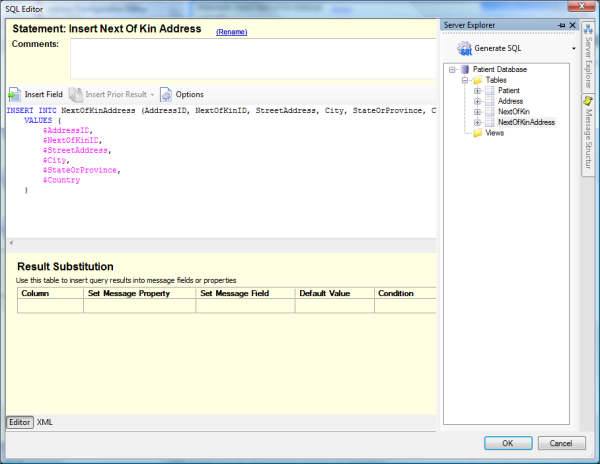
Open the new statement, rename it to Insert Next Of Kin Address, then generate an INSERT statement by selecting the NextOfKin table in the Server Explorer and clicking the Generate button. The result of this is shown below:
Modify the SQL by removing the reference to the AddressID (as it is automatically generated by the database), and change the value to be inserted into the NextOfKinID column to @NextOfKinID to use the identifier generated by the previous statement. Then update all the remaining values to the appropriate values in the NK1/Address field (NK1/Address/StreetAddress, NK1/Address/City, NK1/Address/StateOrProvince, and NK1/Address/Country). The result of this is shown in the following diagram:
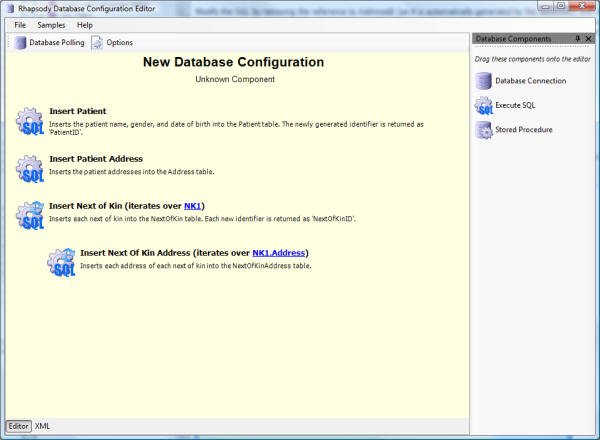
Finally, give the statement a summary to describe its behavior, and close the SQL Editor. The final configuration is shown in the following diagram:
