User 

To open this page, go to Users Control->User.
Use this page to create and manage users that will have access to the Admin UI.
Here you can:
- Create new Admin UI users
- Edit Admin UI users
- Change user status to active, deleted, deactivated
- Activate, deactivate, delete Admin UI users
- Assign online shop customers to Admin UI users
- Assign a language to an Admin UI user account
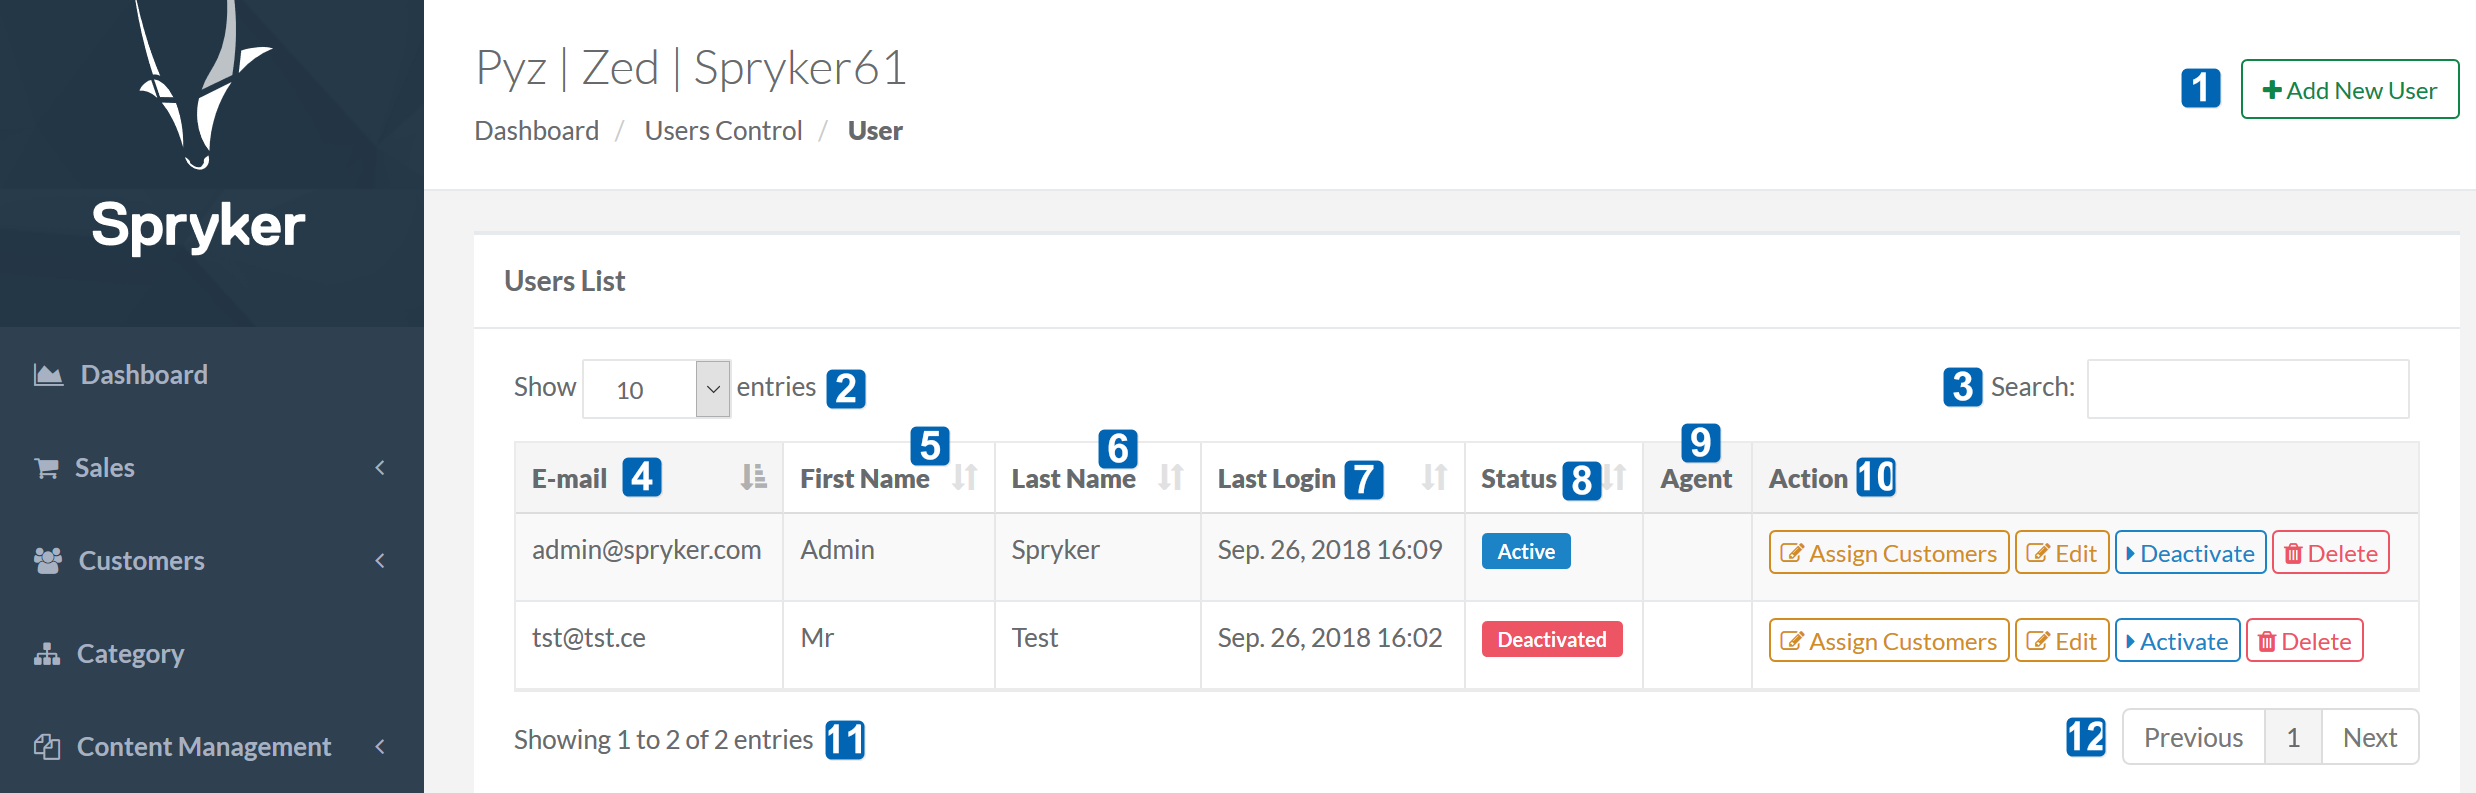
Graphic User Interface
Hover your mouse over the numbers to view their description.
Adding New Users
To create a new user, do the following:
- Click +Add New User in the top right corner.
- On the Create new User page, enter all required information: E-mail, Password, Repeat Password, First Name, Last Name and Assigned groups. To be able to assign groups to users, make sure you preliminary created the groups on Groups page. If you want a user to an agent, check the Agent checkbox.
- Click Save. The newly created user will appear in the User List table on User page.
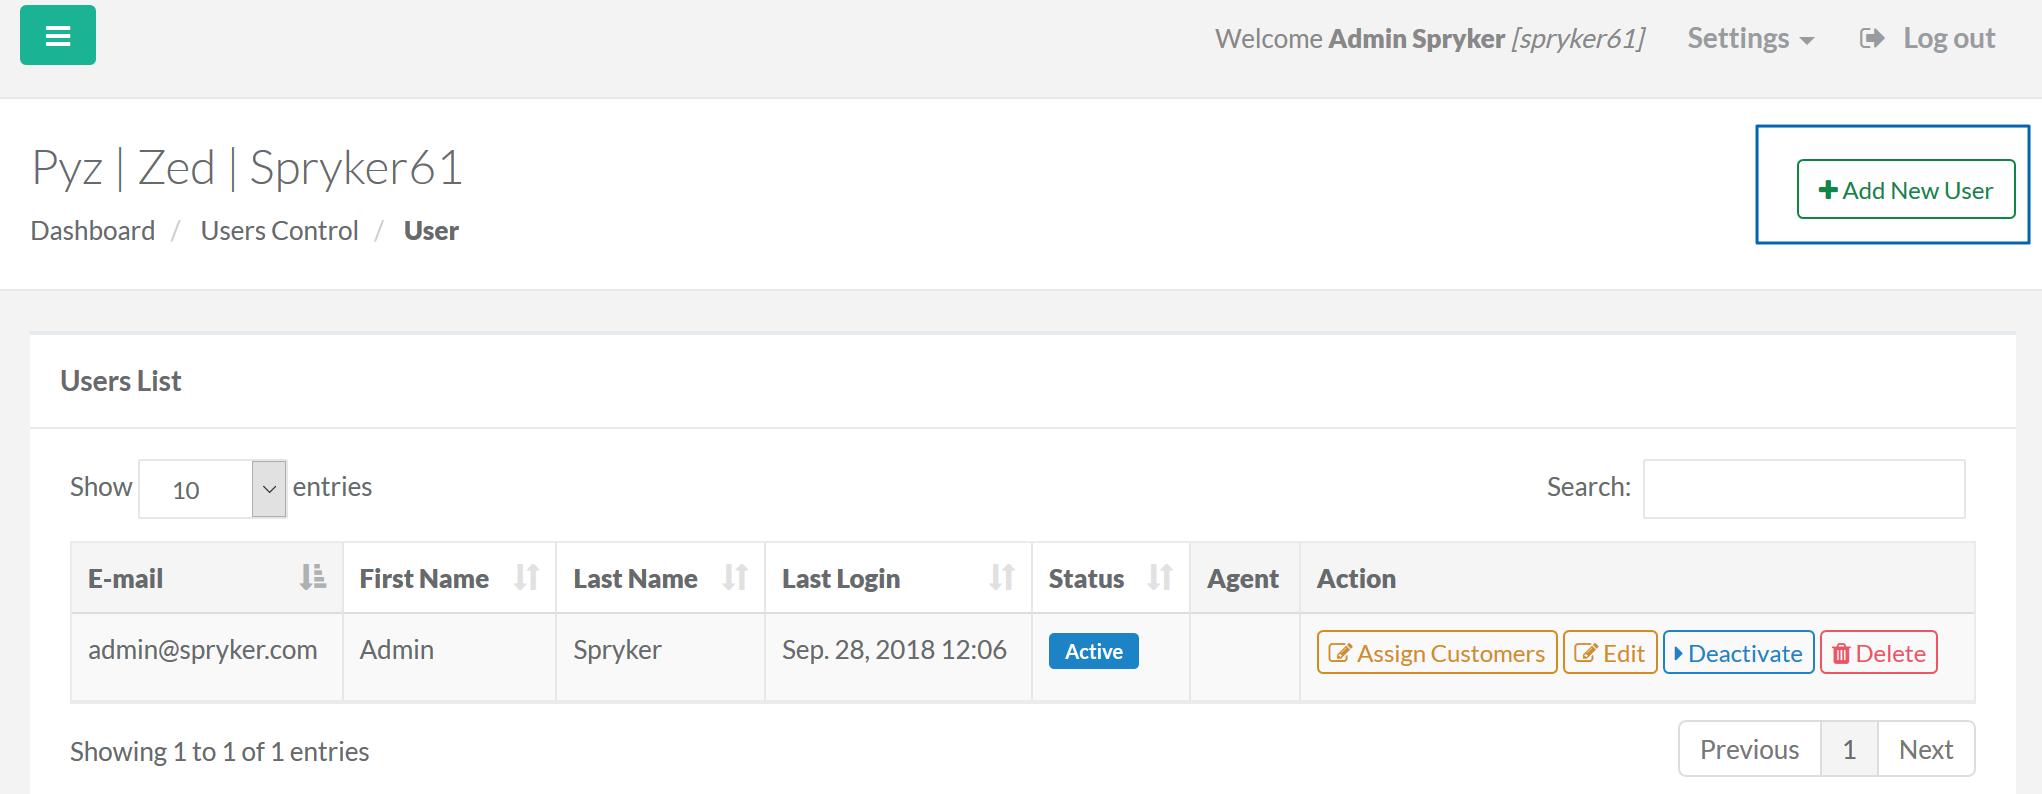
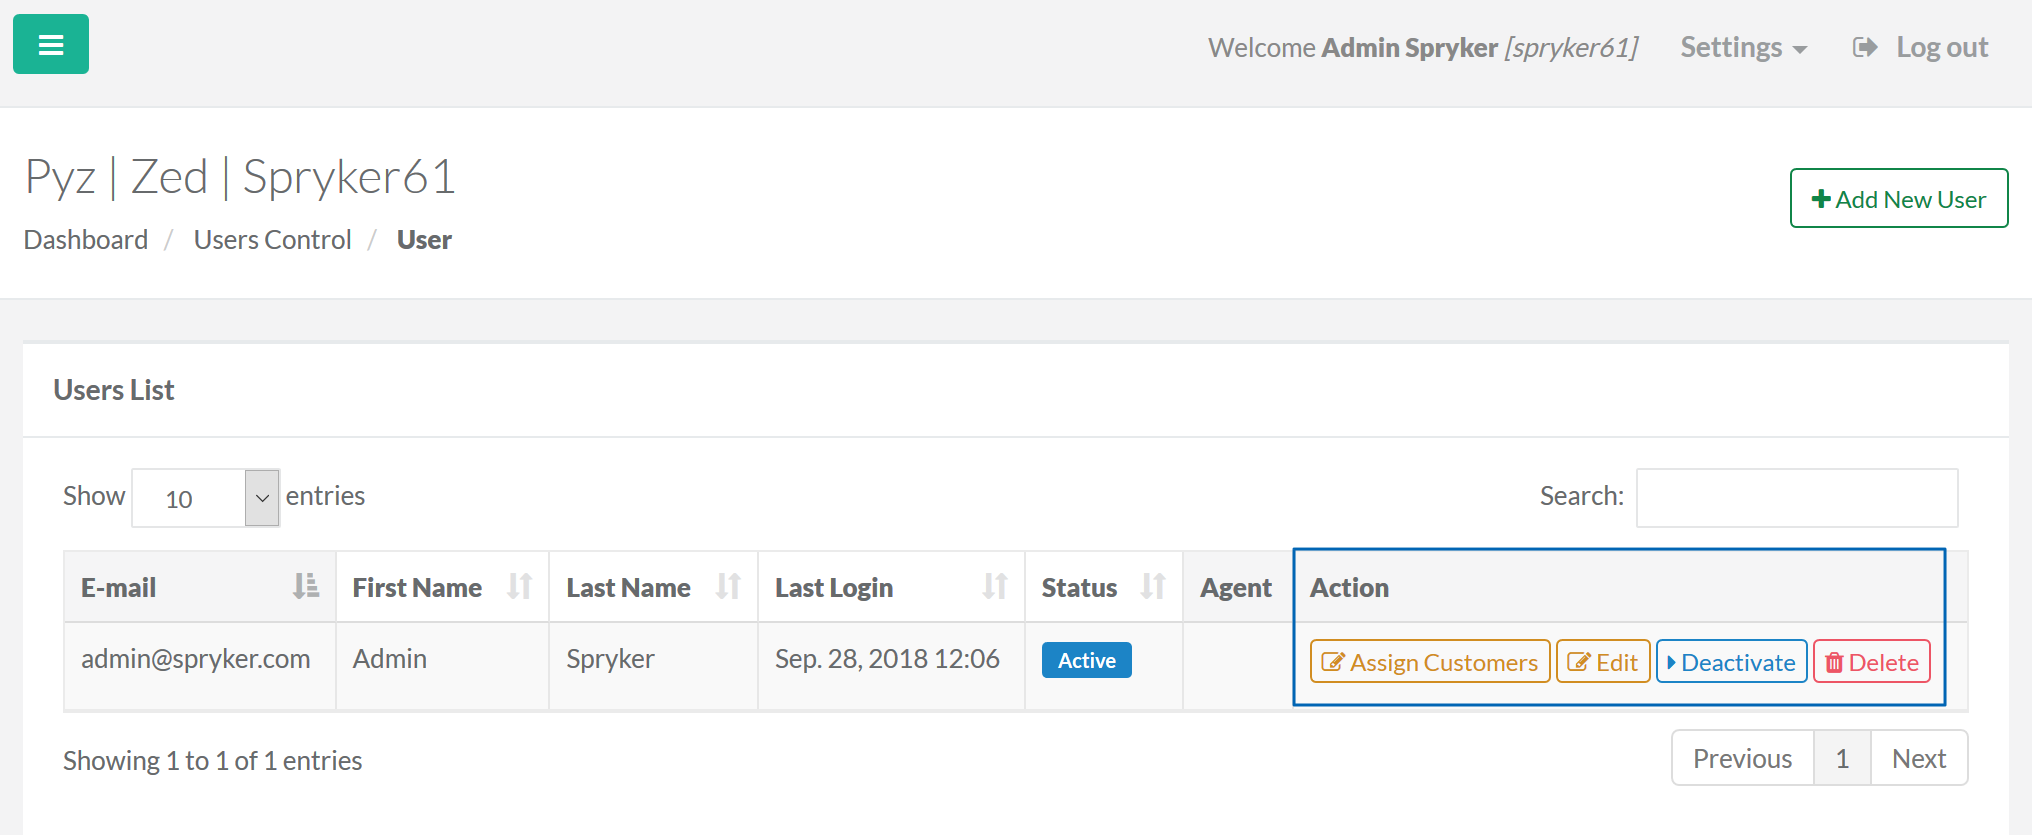
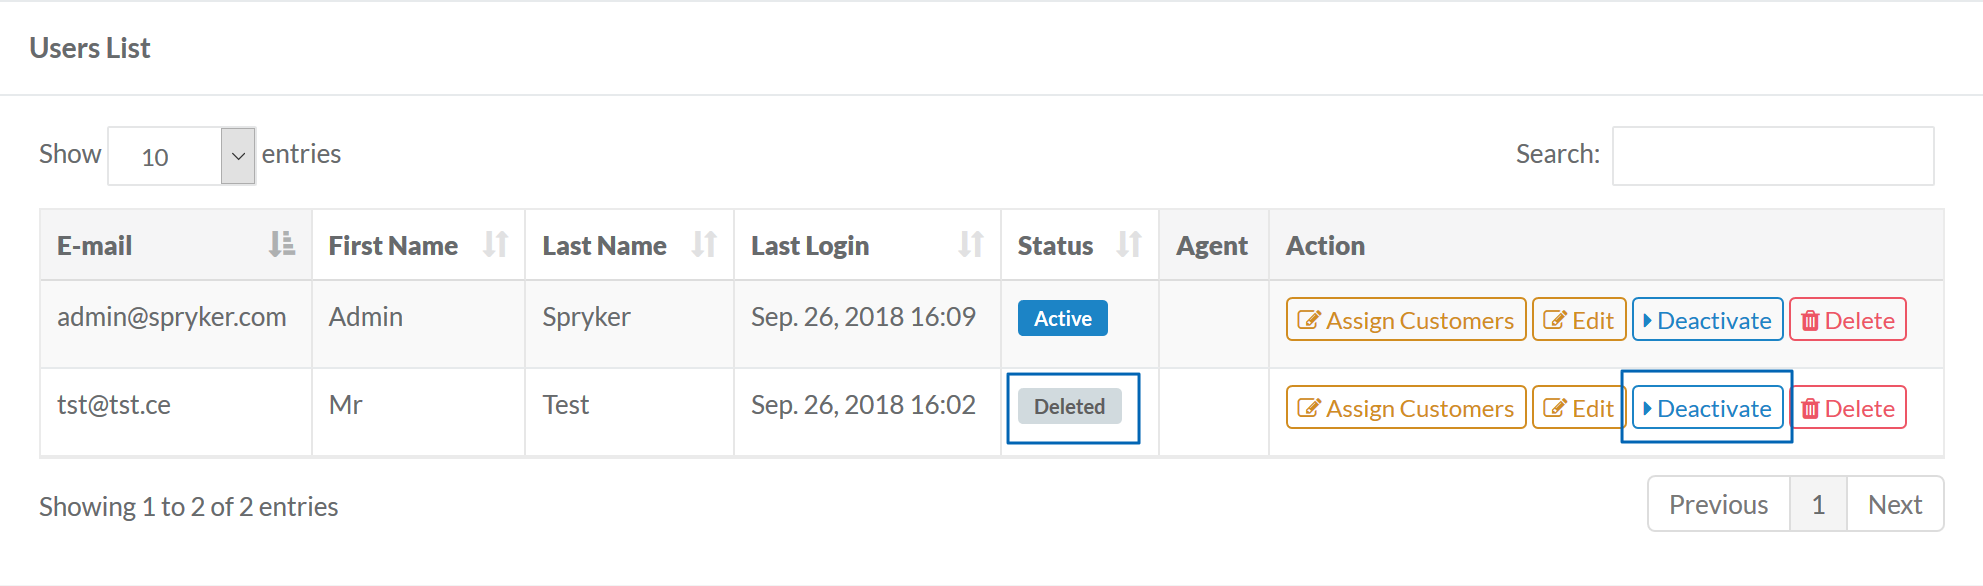
Managing Users
The users can be managed by triggering certain actions in the Actions column in User List table on User page. Specifically, users can be (De)Activated, Edited, Deleted and Assigned Customers there.
Assigning Customers
You can assign Zed Users to specific Yves Users. You need to do that only when you want to preview a CMS page that you plan to publish. The Assign Customers action is just for that purpose, and for nothing else. Check Previewing a Page section in Pages to learn how to assign customers to Zed users.
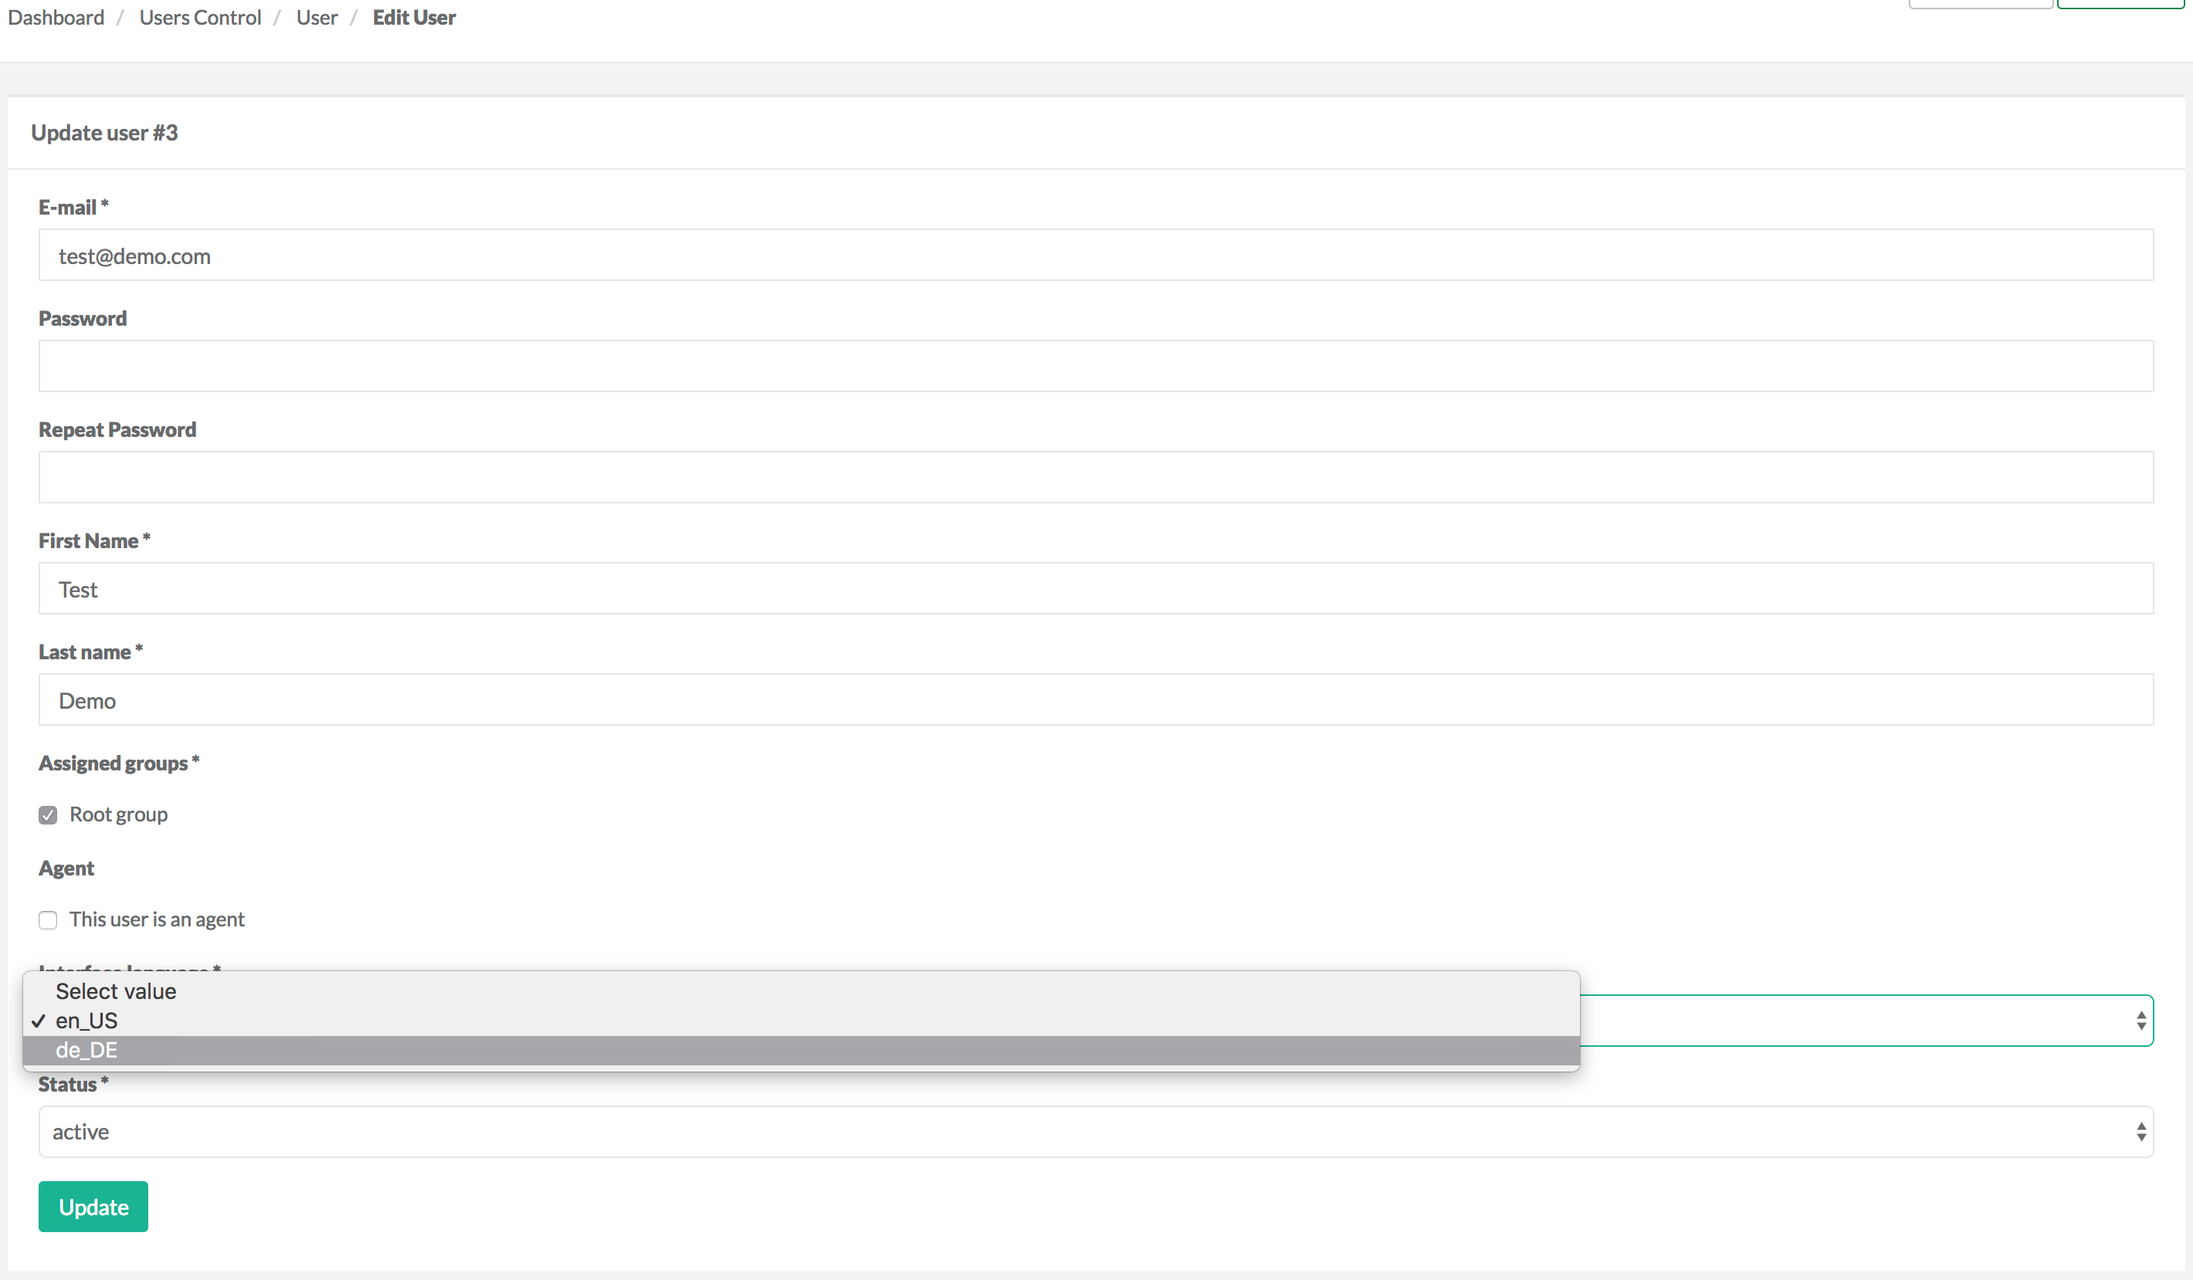
Editing a User
Click Edit in Actions column if you want to change user's personal details such as First Name, Last Name, Password, Assigned groups and Status. The Status field has the following options:
active: sets the user status to Active
blocked: sets the user status to Deactivated
deleted: deletes the user and sets their status to Deleted
The statuses can also be changed by triggering respective actions under Action column: Activate/Deactivate and Delete. Read on to learn how to do that.
De(Activating) a User
If user is currently deactivated, there will be the Activate button in the Actions column. Click it to activate the user.
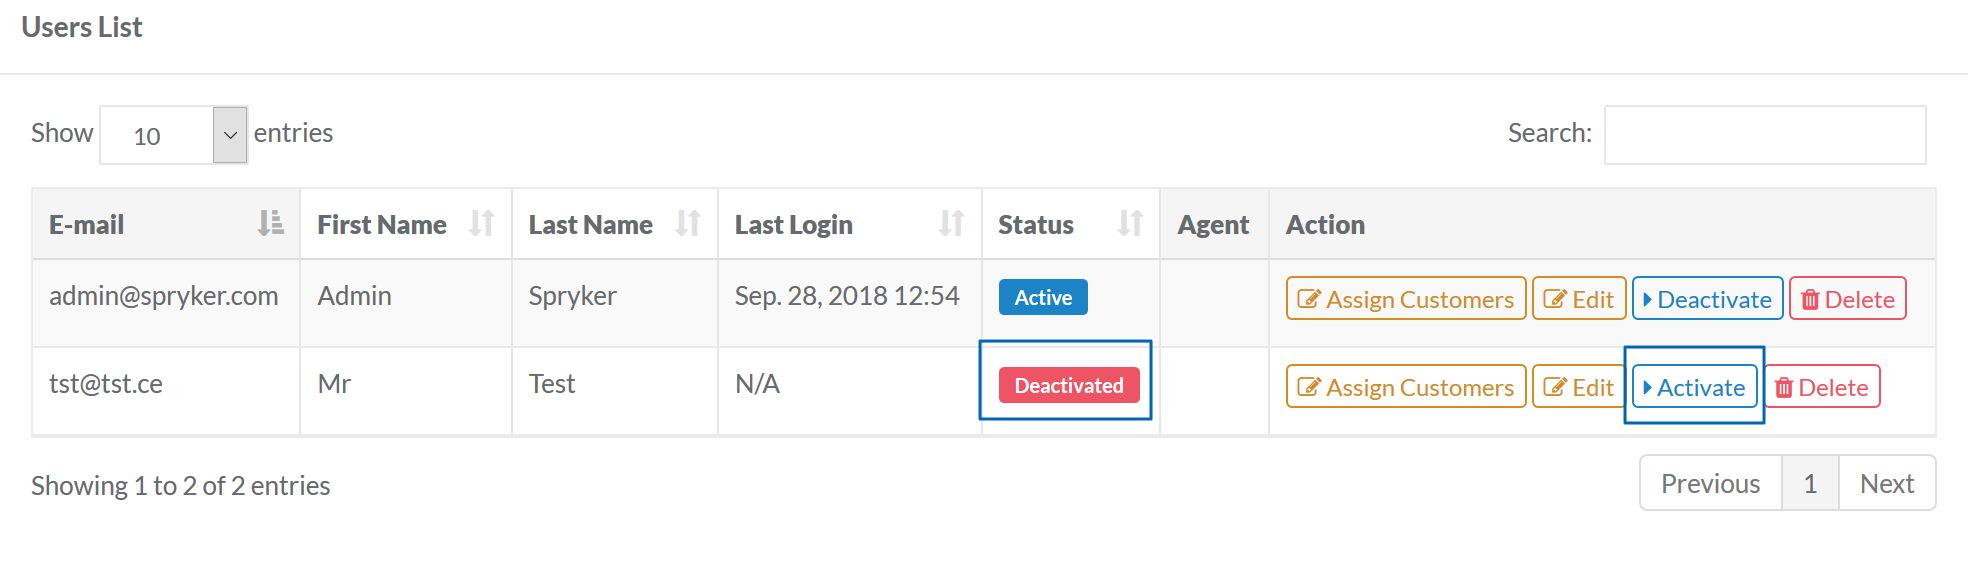
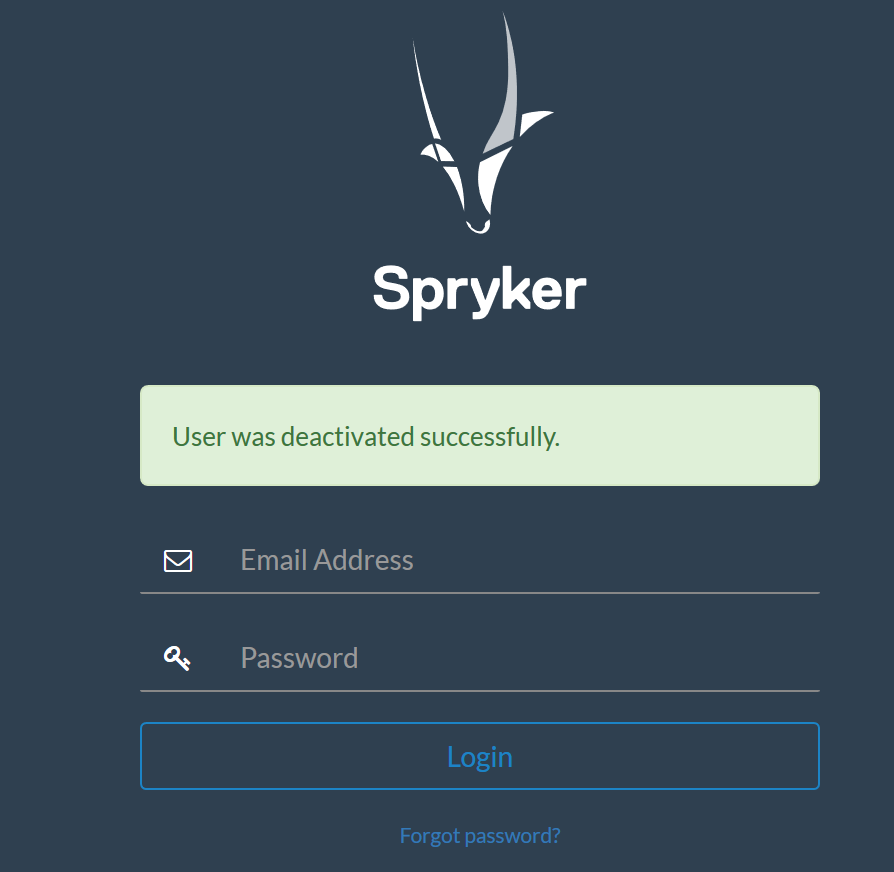
And vice versa, if user is activated, they can be deactivated there. If user has deactivated themselves, this user will get logged out immediately and message about the successful deactivation will be shown.
Deleting a User
If you want to delete an existing customer, click Delete in the Actions column. The user's status will change to Deleted, however the user will still stay in the Users List table.
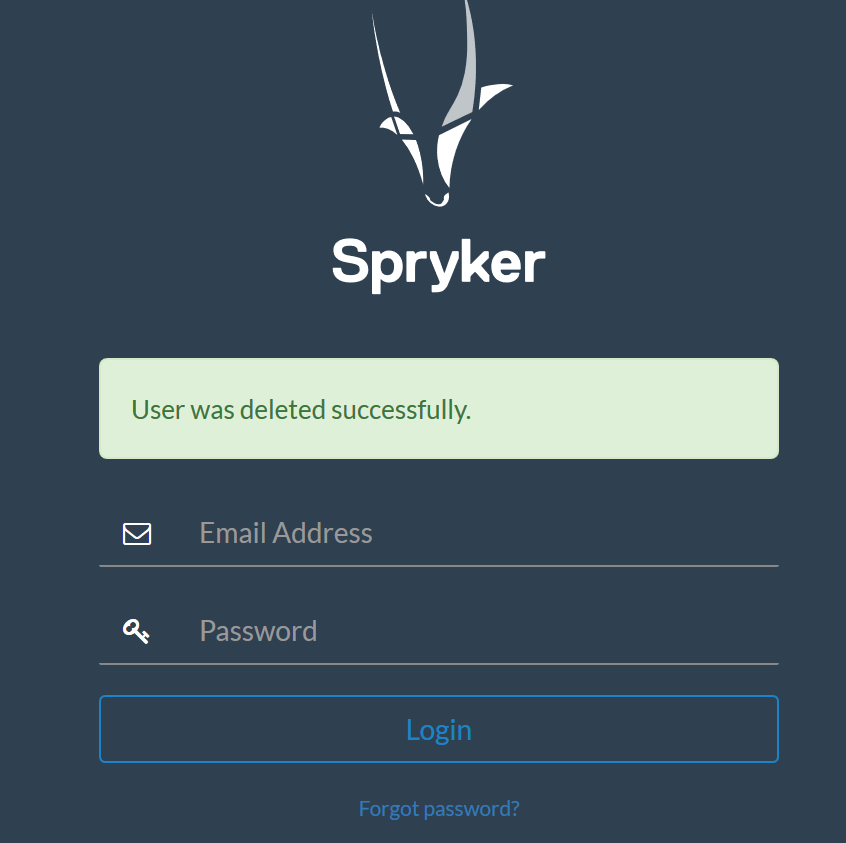
If user has deleted themselves, this user will get logged out immediately and message about the successful deletion will be shown.
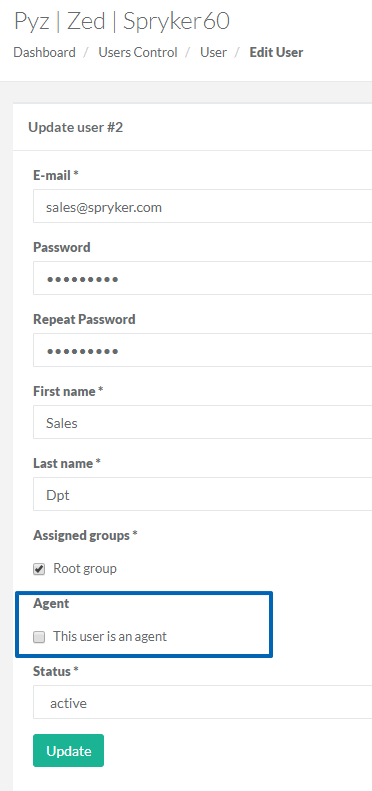
Making a User an Agent
To set a user as an agent, tick This user is an agent on Create/Edit User page:
Assigning languages
There are two ways to assign a language to a user account:
- From the Create new User page of User Control>User section:
- From the Edit User page of User Control>User section if the user is already created:

Once the account language is changed, the respective user will see that their interface is translated into the corresponding language upon their next login.
There is no way for a user to switch language from within their account.
Next steps:
Create user roles
Current Constraints
Currently, the feature has the following functional constraints which are going to be resolved in the future.
-
back office user entity does not have a store relation
-
in the Backoffice, back office users have access to data retrieved from all available stores
Last review date: Dec 3, 2018