A notification is a message you can display to the user outside of your application's normal UI. When you tell the system to issue a notification, it first appears as an icon in the notification area. To see the details of the notification, the user opens the notification drawer. Both the notification area and the notification drawer are system-controlled areas that the user can view at any time.
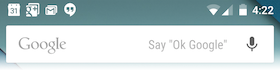
Figure 1. Notifications in the notification area.
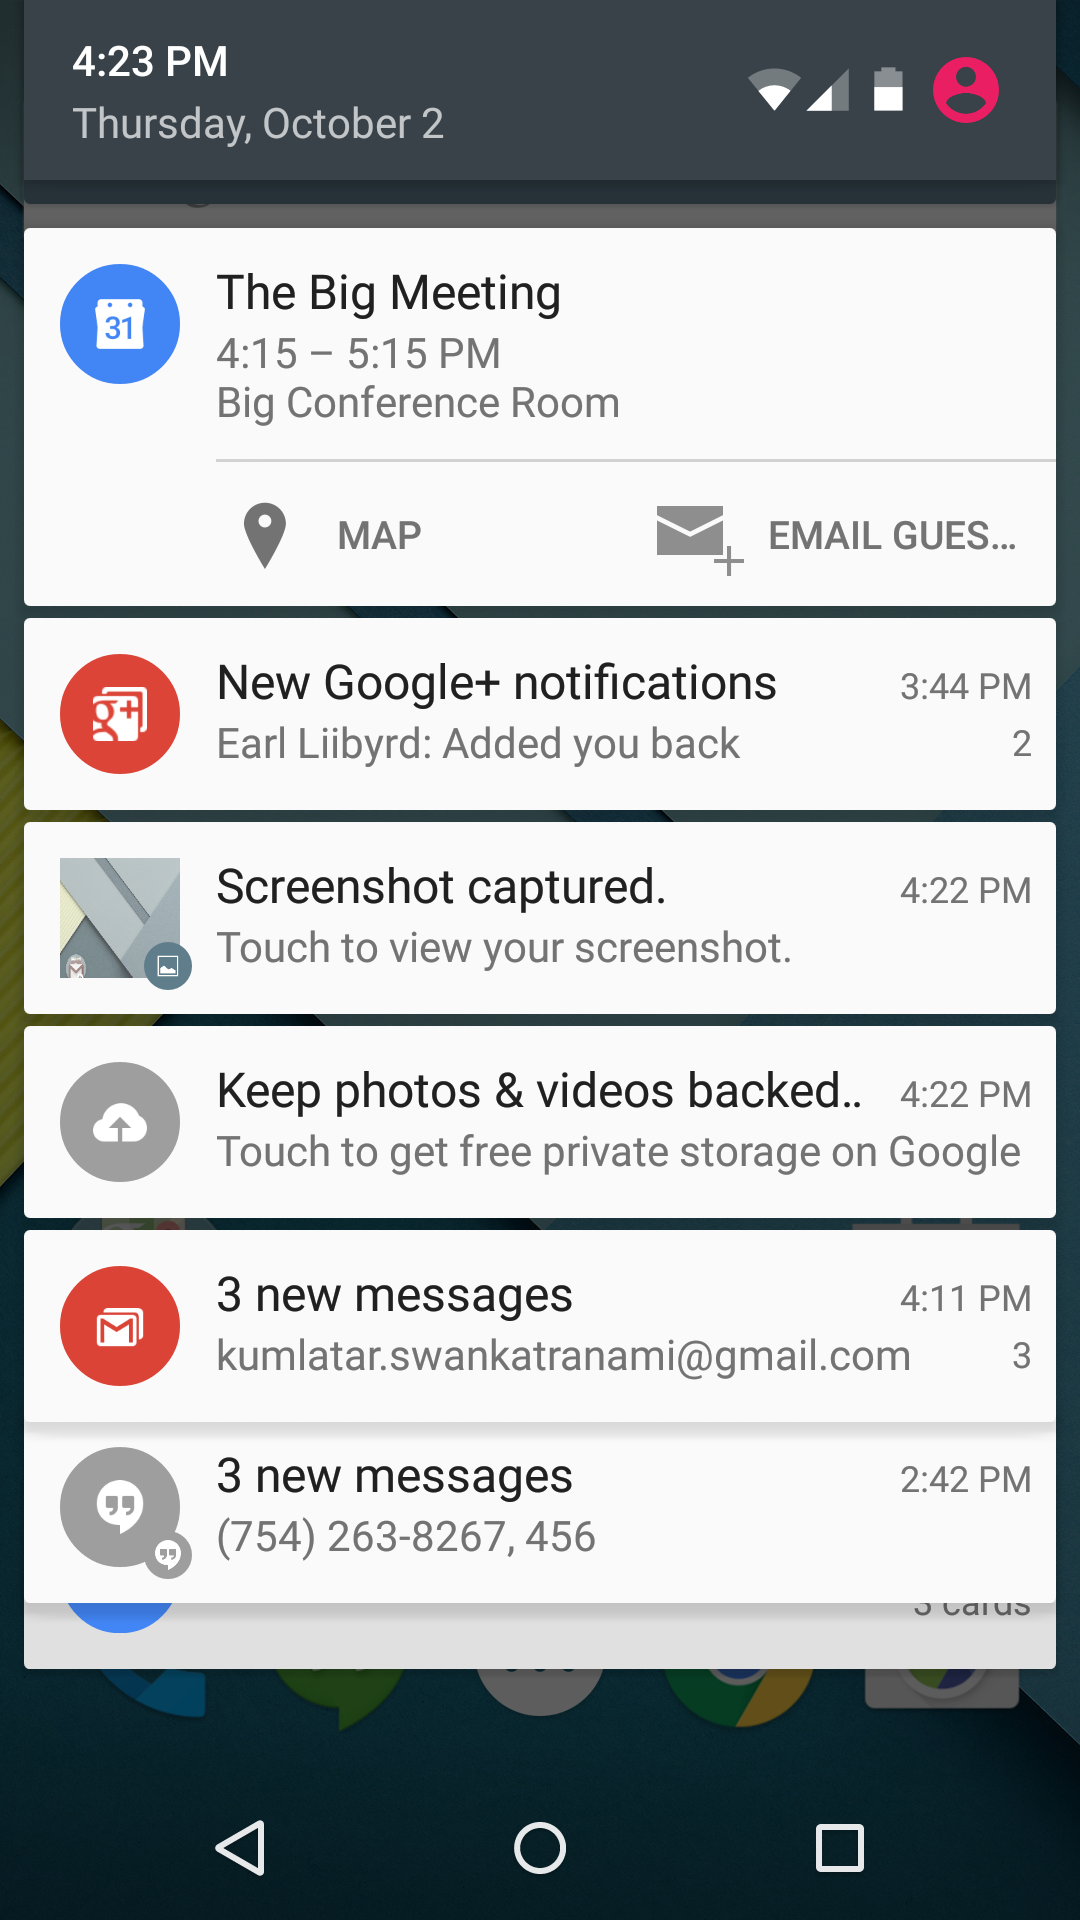
Figure 2. Notifications in the notification drawer.
Note: Except where noted, this guide refers to the
NotificationCompat.Builder class
in the version 4 Support Library.
The class Notification.Builder was added in Android
3.0 (API level 11).
Design Considerations
Notifications, as an important part of the Android user interface, have their own design guidelines. The material design changes introduced in Android 5.0 (API level 21) are of particular importance, and you should review the Material Design training for more information. To learn how to design notifications and their interactions, read the Notifications design guide.
Creating a Notification
You specify the UI information and actions for a notification in a
NotificationCompat.Builder object.
To create the notification itself, you call
NotificationCompat.Builder.build(),
which returns a Notification object containing your specifications. To issue the
notification, you pass the Notification object to the system by calling
NotificationManager.notify().
Required notification contents
A Notification object must contain the following:
-
A small icon, set by
setSmallIcon() -
A title, set by
setContentTitle() -
Detail text, set by
setContentText()
Optional notification contents and settings
All other notification settings and contents are optional. To learn more about them,
see the reference documentation for NotificationCompat.Builder.
Notification actions
Although they're optional, you should add at least one action to your notification.
An action allows users to go directly from the notification to an
Activity in your application, where they can look at one or more events
or do further work.
A notification can provide multiple actions. You should always define the action that's
triggered when the user clicks the notification; usually this action opens an
Activity in your application. You can also add buttons to the notification
that perform additional actions such as snoozing an alarm or responding immediately to a text
message; this feature is available as of Android 4.1. If you use additional action buttons, you
must also make their functionality available in an Activity in your app; see
the section Handling compatibility for more details.
Inside a Notification, the action itself is defined by a
PendingIntent containing an
Intent that starts
an Activity in your application. To associate the
PendingIntent with a gesture, call the appropriate method of
NotificationCompat.Builder. For example, if you want to start
Activity when the user clicks the notification text in
the notification drawer, you add the PendingIntent by calling
setContentIntent().
Starting an Activity when the user clicks the notification is the most
common action scenario. You can also start an Activity when the user
dismisses a notification. In Android 4.1 and later, you can start an
Activity from an action button. To learn more, read the reference guide for
NotificationCompat.Builder.
Notification priority
If you wish, you can set the priority of a notification. The priority acts
as a hint to the device UI about how the notification should be displayed.
To set a notification's priority, call NotificationCompat.Builder.setPriority() and pass in one of the NotificationCompat priority constants. There are
five priority levels, ranging from PRIORITY_MIN (-2) to PRIORITY_MAX (2); if not set, the
priority defaults to PRIORITY_DEFAULT (0).
For information about setting an appropriate priority level, see "Correctly set and manage notification priority" in the Notifications Design guide.
Creating a simple notification
The following snippet illustrates a simple notification that specifies an activity to open when
the user clicks the notification. Notice that the code creates a
TaskStackBuilder object and uses it to create the
PendingIntent for the action. This pattern is explained in more detail
in the section
Preserving Navigation when Starting an Activity:
NotificationCompat.Builder mBuilder =
        new NotificationCompat.Builder(this)
        .setSmallIcon(R.drawable.notification_icon)
        .setContentTitle("My notification")
        .setContentText("Hello World!");
// Creates an explicit intent for an Activity in your app
Intent resultIntent = new Intent(this, ResultActivity.class);

// The stack builder object will contain an artificial back stack for the
// started Activity.
// This ensures that navigating backward from the Activity leads out of
// your application to the Home screen.
TaskStackBuilder stackBuilder = TaskStackBuilder.create(this);
// Adds the back stack for the Intent (but not the Intent itself)
stackBuilder.addParentStack(ResultActivity.class);
// Adds the Intent that starts the Activity to the top of the stack
stackBuilder.addNextIntent(resultIntent);
PendingIntent resultPendingIntent =
        stackBuilder.getPendingIntent(
            0,
            PendingIntent.FLAG_UPDATE_CURRENT
        );
mBuilder.setContentIntent(resultPendingIntent);
NotificationManager mNotificationManager =
    (NotificationManager) getSystemService(Context.NOTIFICATION_SERVICE);
// mId allows you to update the notification later on.
mNotificationManager.notify(mId, mBuilder.build());
That's it. Your user has now been notified.
Applying an expanded layout to a notification
To have a notification appear in an expanded view, first create a
NotificationCompat.Builder object with the normal view options
you want. Next, call Builder.setStyle() with an expanded layout object as its argument.
Remember that expanded notifications are not available on platforms prior to Android 4.1. To learn how to handle notifications for Android 4.1 and for earlier platforms, read the section Handling compatibility.
For example, the following code snippet demonstrates how to alter the notification created in the previous snippet to use the expanded layout:
NotificationCompat.Builder mBuilder = new NotificationCompat.Builder(this)
    .setSmallIcon(R.drawable.notification_icon)
    .setContentTitle("Event tracker")
    .setContentText("Events received")
NotificationCompat.InboxStyle inboxStyle =
        new NotificationCompat.InboxStyle();
String[] events = new String[6];
// Sets a title for the Inbox in expanded layout
inboxStyle.setBigContentTitle("Event tracker details:");
...
// Moves events into the expanded layout
for (int i=0; i < events.length; i++) {

    inboxStyle.addLine(events[i]);
}
// Moves the expanded layout object into the notification object.
mBuilder.setStyle(inBoxStyle);
...
// Issue the notification here.
Handling compatibility
Not all notification features are available for a particular version, even though
the methods to set them are in the support library class
NotificationCompat.Builder.
For example, action buttons, which depend on expanded notifications, only appear on Android
4.1 and higher, because expanded notifications themselves are only available on
Android 4.1 and higher.
To ensure the best compatibility, create notifications with
NotificationCompat and its subclasses,
particularly NotificationCompat.Builder. In addition, follow this process when you implement a notification:
-
Provide all of the notification's functionality to all users, regardless of the version
they're using. To do this, verify that all of the functionality is available from an
Activityin your app. You may want to add a newActivityto do this.For example, if you want to use
addAction()to provide a control that stops and starts media playback, first implement this control in anActivityin your app. -
Ensure that all users can get to the functionality in the
Activity, by having it start when users click the notification. To do this, create aPendingIntentfor theActivity. CallsetContentIntent()to add thePendingIntentto the notification. -
Now add the expanded notification features you want to use to the notification. Remember
that any functionality you add also has to be available in the
Activitythat starts when users click the notification.
Managing Notifications
When you need to issue a notification multiple times for the same type of event, you should avoid making a completely new notification. Instead, you should consider updating a previous notification, either by changing some of its values or by adding to it, or both.
For example, Gmail notifies the user that new emails have arrived by increasing its count of unread messages and by adding a summary of each email to the notification. This is called "stacking" the notification; it's described in more detail in the Notifications Design guide.
Note: This Gmail feature requires the "inbox" expanded layout, which is part of the expanded notification feature.
The following section describes how to update notifications and also how to remove them.
Updating notifications
To set up a notification so it can be updated, issue it with a notification ID by
calling NotificationManager.notify().
To update this notification once you've issued
it, update or create a NotificationCompat.Builder object,
build a Notification object from it, and issue the
Notification with the same ID you used previously. If
the previous notification is still visible, the system updates it from the contents of
the Notification object. If the previous notification has been dismissed, a
new notification is created instead.
The following snippet demonstrates a notification that is updated to reflect the number of events that have occurred. It stacks the notification, showing a summary:
mNotificationManager =
        (NotificationManager) getSystemService(Context.NOTIFICATION_SERVICE);
// Sets an ID for the notification, so it can be updated
int notifyID = 1;
mNotifyBuilder = new NotificationCompat.Builder(this)
    .setContentTitle("New Message")
    .setContentText("You've received new messages.")
    .setSmallIcon(R.drawable.ic_notify_status)
numMessages = 0;
// Start of a loop that processes data and then notifies the user
...
    mNotifyBuilder.setContentText(currentText)
        .setNumber(++numMessages);
    // Because the ID remains unchanged, the existing notification is
    // updated.
    mNotificationManager.notify(
            notifyID,
            mNotifyBuilder.build());
...
Removing notifications
Notifications remain visible until one of the following happens:
- The user dismisses the notification either individually or by using "Clear All" (if the notification can be cleared).
-
The user clicks the notification, and you called
setAutoCancel()when you created the notification. -
You call
cancel()for a specific notification ID. This method also deletes ongoing notifications. -
You call
cancelAll(), which removes all of the notifications you previously issued.
Replying to notifications
Starting in Android 7.0 (API level 24), users can respond directly to text messages or update task lists from within the notification dialog. On a handheld, the inline reply action appears as an additional button displayed in the notification. When a user replies via keyboard, the system attaches the text response to the intent you had specified for the notification action and sends the intent to your handheld app.
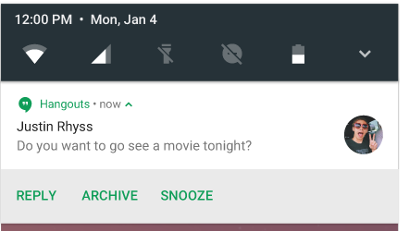
Figure 1. The Reply action button.
Adding inline reply actions
To create a notification action that supports direct reply:
- Create an instance of
RemoteInput.Builderthat you can add to your notification action. This class's constructor accepts a string that the system uses as the key for the text input. Later, your handheld app uses that key to retrieve the text of the input.// Key for the string that's delivered in the action's intent. private static final String KEY_TEXT_REPLY = "key_text_reply"; String replyLabel = getResources().getString(R.string.reply_label); RemoteInput remoteInput = new RemoteInput.Builder(KEY_TEXT_REPLY) .setLabel(replyLabel) .build(); - Attach the
RemoteInputobject to an action usingaddRemoteInput().// Create the reply action and add the remote input. Notification.Action action = new Notification.Action.Builder(R.drawable.ic_reply_icon, getString(R.string.label), replyPendingIntent) .addRemoteInput(remoteInput) .build(); - Apply the action to a notification and issue the notification.
// Build the notification and add the action.
Notification newMessageNotification =
        new Notification.Builder(mContext)
                .setSmallIcon(R.drawable.ic_message)
                .setContentTitle(getString(R.string.title))
                .setContentText(getString(R.string.content))
                .addAction(action))
                .build();

// Issue the notification.
NotificationManager notificationManager =
        NotificationManager.from(mContext);
notificationManager.notify(notificationId, newMessageNotification);
The system prompts the user to input a response when they trigger the notification action.
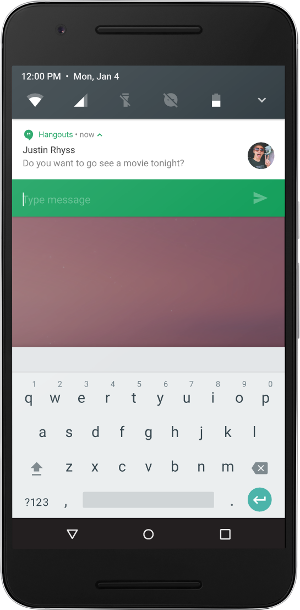
Figure 2. The user inputs text from the notification shade.
Retrieving user input from the inline reply
To receive user input from the notification interface to the activity you declared in the reply action's intent:
- Call
getResultsFromIntent()by passing the notification action’s intent as the input parameter. This method returns aBundlethat contains the text response.Bundle remoteInput = RemoteInput.getResultsFromIntent(intent);
- Query the bundle using the result key (provided to the
RemoteInput.Builderconstructor). You can complete this process and retrieve the input text by creating a method, as in the following code snippet:// Obtain the intent that started this activity by calling // Activity.getIntent() and pass it into this method to // get the associated string. private CharSequence getMessageText(Intent intent) { Bundle remoteInput = RemoteInput.getResultsFromIntent(intent); if (remoteInput != null) { return remoteInput.getCharSequence(KEY_TEXT_REPLY); } return null; } - Build and issue another notification, using the same notification ID that
you provided for the previous notification. The progress indicator
disappears from the notification interface to inform users of a successful
reply. When working with this new notification, use the context that gets
passed to the receiver's
onReceive()method.// Build a new notification, which informs the user that the system // handled their interaction with the previous notification. Notification repliedNotification = new Notification.Builder(context) .setSmallIcon(R.drawable.ic_message) .setContentText(getString(R.string.replied)) .build(); // Issue the new notification. NotificationManager notificationManager = NotificationManager.from(context); notificationManager.notify(notificationId, repliedNotification);
For interactive apps, such as chats, you can include additional
context when handling retrieved text. For example, these apps could show
multiple lines of chat history. When the user responds via RemoteInput, you can update the reply history
using the setRemoteInputHistory() method.
The notification must be either updated or cancelled after the app has
received remote input. When the user replies to a remote update
using Direct Reply,
do not cancel the notification. Instead, update the notification
to display the user's reply.
For notifications using MessagingStyle, you should add
the reply as the latest message. When using other templates, you can
append the user's reply to the remote-input history.
Bundling notifications
Starting in Android 7.0 (API level 24),
Android provides developers with a new way to represent
a queue of notifications: bundled notifications. This is similar to the
Notification
Stacks feature in Android Wear. For example, if your app
creates notifications
for received messages, when more than one message is received, bundle the
notifications together as a single group. You can
use the Builder.setGroup() method to bundle similar notifications.
A notification group imposes a hierarchy on the notifications comprising it. At the top of that hierarchy is a parent notification that displays summary information for the group. The user can progressively expand the notification group, and the system shows more information as the user drills deeper. When the user expands the bundle, the system reveals more information for all its child notifications; when the user expands one of those notifications, the system reveals its entire content.
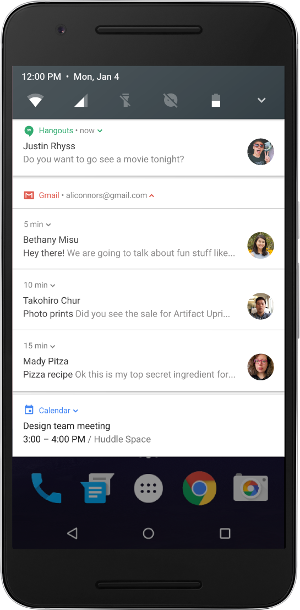
Figure 3. The user can progressively expand the notification group.
Note: If the same app sends four or more notifications and does not specify a grouping, the system automatically groups them together.
To learn how to add notifications to a group, see Add Each Notification to a Group.
Best practices for bundled notifications
This section provides guidelines about when to use notification groups instead
of the InboxStyle
notifications available in Android 6.0 and previous versions.
When to use bundled notifications
You should use notification groups only if all of the following conditions are true for your use case:
- The child notifications are complete notifications and can be displayed individually without the need for a group summary.
- There is a benefit to surfacing the child notifications individually. For example:
- They are actionable, with actions specific to each child.
- There is more information to the child that the user wants to read.
Examples of good use cases for notification groups include: a messaging app displaying a list of incoming messages, or an email app displaying a list of received emails.
Examples of cases where a single notification is preferable
include individual messages from a single person, or a list representation of
single-line text items. You can use
(InboxStyle or
BigTextStyle) to accomplish
this.
Displaying bundled notifications
The app should always post a group summary, even if the group contains just a single child. The system will suppress the summary and directly display the child notification if it only contains a single notification. This ensures that the system can provide a consistent experience when the user swipes away children of a group.
Peeking notifications
While the system usually displays child notifications as a group, you can set them to temporarily appear as heads-up notifications. This feature is especially useful because it allows immediate access to the most recent child and the actions associated with it.
Backwards compatibility
Both notification groups and remote input have been a part of the Notification API since Android 5.0 (API level 21) to support
Android Wear devices. If you've already built notifications with these APIs,
the only action you must take is to verify that the app behavior corresponds
to the guidelines described above, and to consider implementing setRemoteInputHistory().
In order to support backward compatibility, the same APIs are available with
the support library's NotificationCompat
class, allowing you to build notifications that works on versions of Android
less than 5.0 (API level 21).
On handhelds and tablets, users only see the summary notification,
so an app should still have an inbox style or an equivalent notification
representative for the whole information content of the group. As Android
Wear devices allow users to see all child notifications even on older
platform levels, you should build child notifications regardless of API
level.
Preserving Navigation when Starting an Activity
When you start an Activity from a notification, you must preserve the
user's expected navigation experience. Clicking Back should take the user back through
the application's normal work flow to the Home screen, and clicking Recents should show
the Activity as a separate task. To preserve the navigation experience, you
should start the Activity in a fresh task. How you set up the
PendingIntent to give you a fresh task depends on the nature of the
Activity you're starting. There are two general situations:
- Regular activity
-
You're starting an
Activitythat's part of the application's normal workflow. In this situation, set up thePendingIntentto start a fresh task, and provide thePendingIntentwith a back stack that reproduces the application's normal Back behavior.Notifications from the Gmail app demonstrate this. When you click a notification for a single email message, you see the message itself. Touching Back takes you backwards through Gmail to the Home screen, just as if you had entered Gmail from the Home screen rather than entering it from a notification.
This happens regardless of the application you were in when you touched the notification. For example, if you're in Gmail composing a message, and you click a notification for a single email, you go immediately to that email. Touching Back takes you to the inbox and then the Home screen, rather than taking you to the message you were composing.
- Special activity
-
The user only sees this
Activityif it's started from a notification. In a sense, theActivityextends the notification by providing information that would be hard to display in the notification itself. For this situation, set up thePendingIntentto start in a fresh task. There's no need to create a back stack, though, because the startedActivityisn't part of the application's activity flow. Clicking Back will still take the user to the Home screen.
Setting up a regular activity PendingIntent
To set up a PendingIntent that starts a direct entry
Activity, follow these steps:
-
Define your application's
Activityhierarchy in the manifest.-
Add support for Android 4.0.3 and earlier. To do this, specify the parent of the
Activityyou're starting by adding a<meta-data>element as the child of the<activity>.For this element, set
android:name="android.support.PARENT_ACTIVITY". Setandroid:value="<parent_activity_name>"where<parent_activity_name>is the value ofandroid:namefor the parent<activity>element. See the following XML for an example. -
Also add support for Android 4.1 and later. To do this, add the
android:parentActivityNameattribute to the<activity>element of theActivityyou're starting.
The final XML should look like this:
<activity android:name=".MainActivity" android:label="@string/app_name" > <intent-filter> <action android:name="android.intent.action.MAIN" /> <category android:name="android.intent.category.LAUNCHER" /> </intent-filter> </activity> <activity android:name=".ResultActivity" android:parentActivityName=".MainActivity"> <meta-data android:name="android.support.PARENT_ACTIVITY" android:value=".MainActivity"/> </activity> -
Add support for Android 4.0.3 and earlier. To do this, specify the parent of the
-
Create a back stack based on the
Intentthat starts theActivity:-
Create the
Intentto start theActivity. -
Create a stack builder by calling
TaskStackBuilder.create(). -
Add the back stack to the stack builder by calling
addParentStack(). For eachActivityin the hierarchy you've defined in the manifest, the back stack contains anIntentobject that starts theActivity. This method also adds flags that start the stack in a fresh task.Note: Although the argument to
addParentStack()is a reference to the startedActivity, the method call doesn't add theIntentthat starts theActivity. Instead, that's taken care of in the next step. -
Add the
Intentthat starts theActivityfrom the notification, by callingaddNextIntent(). Pass theIntentyou created in the first step as the argument toaddNextIntent(). -
If you need to, add arguments to
Intentobjects on the stack by callingTaskStackBuilder.editIntentAt(). This is sometimes necessary to ensure that the targetActivitydisplays meaningful data when the user navigates to it using Back. -
Get a
PendingIntentfor this back stack by callinggetPendingIntent(). You can then use thisPendingIntentas the argument tosetContentIntent().
-
Create the
The following code snippet demonstrates the process:
...
Intent resultIntent = new Intent(this, ResultActivity.class);
TaskStackBuilder stackBuilder = TaskStackBuilder.create(this);
// Adds the back stack
stackBuilder.addParentStack(ResultActivity.class);
// Adds the Intent to the top of the stack
stackBuilder.addNextIntent(resultIntent);
// Gets a PendingIntent containing the entire back stack
PendingIntent resultPendingIntent =
        stackBuilder.getPendingIntent(0, PendingIntent.FLAG_UPDATE_CURRENT);
...
NotificationCompat.Builder builder = new NotificationCompat.Builder(this);
builder.setContentIntent(resultPendingIntent);
NotificationManager mNotificationManager =
    (NotificationManager) getSystemService(Context.NOTIFICATION_SERVICE);
mNotificationManager.notify(id, builder.build());
Setting up a special activity PendingIntent
The following section describes how to set up a special activity
PendingIntent.
A special Activity doesn't need a back stack, so you don't have to
define its Activity hierarchy in the manifest, and you don't have
to call
addParentStack() to build a
back stack. Instead, use the manifest to set up the Activity task options,
and create the PendingIntent by calling
getActivity():
-
In your manifest, add the following attributes to the
<activity>element for theActivity-
android:name="activityclass" - The activity's fully-qualified class name.
-
android:taskAffinity="" -
Combined with the
FLAG_ACTIVITY_NEW_TASKflag that you set in code, this ensures that thisActivitydoesn't go into the application's default task. Any existing tasks that have the application's default affinity are not affected. -
android:excludeFromRecents="true" - Excludes the new task from Recents, so that the user can't accidentally navigate back to it.
This snippet shows the element:
<activity android:name=".ResultActivity" ... android:launchMode="singleTask" android:taskAffinity="" android:excludeFromRecents="true"> </activity> ... -
-
Build and issue the notification:
-
Create an
Intentthat starts theActivity. -
Set the
Activityto start in a new, empty task by callingsetFlags()with the flagsFLAG_ACTIVITY_NEW_TASKandFLAG_ACTIVITY_CLEAR_TASK. -
Set any other options you need for the
Intent. -
Create a
PendingIntentfrom theIntentby callinggetActivity(). You can then use thisPendingIntentas the argument tosetContentIntent().
The following code snippet demonstrates the process:
// Instantiate a Builder object. NotificationCompat.Builder builder = new NotificationCompat.Builder(this); // Creates an Intent for the Activity Intent notifyIntent = new Intent(this, ResultActivity.class); // Sets the Activity to start in a new, empty task notifyIntent.setFlags(Intent.FLAG_ACTIVITY_NEW_TASK | Intent.FLAG_ACTIVITY_CLEAR_TASK); // Creates the PendingIntent PendingIntent notifyPendingIntent = PendingIntent.getActivity( this, 0, notifyIntent, PendingIntent.FLAG_UPDATE_CURRENT ); // Puts the PendingIntent into the notification builder builder.setContentIntent(notifyPendingIntent); // Notifications are issued by sending them to the // NotificationManager system service. NotificationManager mNotificationManager = (NotificationManager) getSystemService(Context.NOTIFICATION_SERVICE); // Builds an anonymous Notification object from the builder, and // passes it to the NotificationManager mNotificationManager.notify(id, builder.build()); -
Create an
Displaying Progress in a Notification
Notifications can include an animated progress indicator that shows users the status of an ongoing operation. If you can estimate how long the operation takes and how much of it is complete at any time, use the "determinate" form of the indicator (a progress bar). If you can't estimate the length of the operation, use the "indeterminate" form of the indicator (an activity indicator).
Progress indicators are displayed with the platform's implementation of the
ProgressBar class.
To use a progress indicator on platforms starting with Android 4.0, call
setProgress(). For
previous versions, you must create your own custom notification layout that
includes a ProgressBar view.
The following sections describe how to display progress in a notification using
setProgress().
Displaying a fixed-duration progress indicator
To display a determinate progress bar, add the bar to your notification by calling
setProgress(max, progress, false) and then issue the notification. As your operation proceeds,
increment progress, and update the notification. At the end of the operation,
progress should equal max. A common way to call
setProgress()
is to set max to 100 and then increment progress as a
"percent complete" value for the operation.
You can either leave the progress bar showing when the operation is done, or remove it. In
either case, remember to update the notification text to show that the operation is complete.
To remove the progress bar, call
setProgress(0, 0, false). For example:
...
mNotifyManager =
        (NotificationManager) getSystemService(Context.NOTIFICATION_SERVICE);
mBuilder = new NotificationCompat.Builder(this);
mBuilder.setContentTitle("Picture Download")
    .setContentText("Download in progress")
    .setSmallIcon(R.drawable.ic_notification);
// Start a lengthy operation in a background thread
new Thread(
    new Runnable() {
        @Override
        public void run() {
            int incr;
            // Do the "lengthy" operation 20 times
            for (incr = 0; incr <= 100; incr+=5) {
                    // Sets the progress indicator to a max value, the
                    // current completion percentage, and "determinate"
                    // state
                    mBuilder.setProgress(100, incr, false);
                    // Displays the progress bar for the first time.
                    mNotifyManager.notify(0, mBuilder.build());
                        // Sleeps the thread, simulating an operation
                        // that takes time
                        try {
                            // Sleep for 5 seconds
                            Thread.sleep(5*1000);
                        } catch (InterruptedException e) {
                            Log.d(TAG, "sleep failure");
                        }
            }
            // When the loop is finished, updates the notification
            mBuilder.setContentText("Download complete")
            // Removes the progress bar
                    .setProgress(0,0,false);
            mNotifyManager.notify(ID, mBuilder.build());
        }
    }
// Starts the thread by calling the run() method in its Runnable
).start();
Displaying a continuing activity indicator
To display an indeterminate activity indicator, add it to your notification with
setProgress(0, 0, true)
(the first two arguments are ignored), and issue the notification. The result is an indicator
that has the same style as a progress bar, except that its animation is ongoing.
Issue the notification at the beginning of the operation. The animation will run until you
modify your notification. When the operation is done, call
setProgress(0, 0, false)
and then update the notification to remove the activity indicator.
Always do this; otherwise, the animation will run even when the operation is complete. Also
remember to change the notification text to indicate that the operation is complete.
To see how activity indicators work, refer to the preceding snippet. Locate the following lines:
// Sets the progress indicator to a max value, the current completion
// percentage, and "determinate" state
mBuilder.setProgress(100, incr, false);
// Issues the notification
mNotifyManager.notify(0, mBuilder.build());
Replace the lines you've found with the following lines:
 // Sets an activity indicator for an operation of indeterminate length
mBuilder.setProgress(0, 0, true);
// Issues the notification
mNotifyManager.notify(0, mBuilder.build());
Notification Metadata
Notifications may be sorted according to metadata that you assign with the
following NotificationCompat.Builder methods:
setCategory()tells the system how to handle your app notifications when the device is in Priority mode (for example, if your notification represents an incoming call, instant message, or alarm).setPriority()causes notifications with the priority field set toPRIORITY_MAXorPRIORITY_HIGHto appear in a small floating window if the notification also has sound or vibration.addPerson()allows you to add a list of people to a notification. Your app can use this to signal to the system that it should group together notifications from the specified people, or rank notifications from these people as being more important.
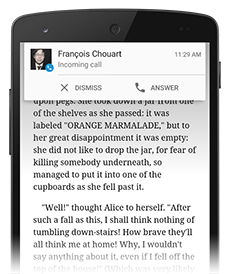
Figure 3. Fullscreen activity showing a heads-up notification
Heads-up Notifications
With Android 5.0 (API level 21), notifications can appear in a small floating window (also called a heads-up notification) when the device is active (that is, the device is unlocked and its screen is on). These notifications appear similar to the compact form of your notification, except that the heads-up notification also shows action buttons. Users can act on, or dismiss, a heads-up notification without leaving the current app.
Examples of conditions that may trigger heads-up notifications include:
- The user's activity is in fullscreen mode (the app uses
fullScreenIntent), or - The notification has high priority and uses ringtones or vibrations
Lock Screen Notifications
With the release of Android 5.0 (API level 21), notifications may now appear on the lock screen. Your app can use this functionality to provide media playback controls and other common actions. Users can choose via Settings whether to display notifications on the lock screen, and you can designate whether a notification from your app is visible on the lock screen.
Setting Visibility
Your app can control the level of detail visible in notifications displayed on a secure
lock screen. You call setVisibility()
and specify one of the following values:
VISIBILITY_PUBLICshows the notification's full content.VISIBILITY_SECRETdoesn't show any part of this notification on the lock screen.VISIBILITY_PRIVATEshows basic information, such as the notification's icon and the content title, but hides the notification's full content.
When VISIBILITY_PRIVATE is set, you can also
provide an alternate version of the notification content which hides certain details. For example,
an SMS app might display a notification that shows You have 3 new text messages, but hides the
message contents and senders. To provide this alternative notification, first create the replacement
notification using NotificationCompat.Builder. When you create the
private notification object, attach the replacement notification to it through the
setPublicVersion()
method.
Controlling Media Playback on the Lock Screen
In Android 5.0 (API level 21) the lock screen no longer displays media
controls based on the RemoteControlClient, which is
now deprecated. Instead, use the NotificationCompat.MediaStyle template with the
addAction() method, which converts actions into clickable icons.
To display media playback controls on the lock screen in Android 5.0, set
the visibility to VISIBILITY_PUBLIC, as described
above. Then add the actions and set the NotificationCompat.MediaStyle template, as described
in the following sample code:
Notification notification = new NotificationCompat.Builder(context)
    // Show controls on lock screen even when user hides sensitive content.
    .setVisibility(NotificationCompat.VISIBILITY_PUBLIC)
    .setSmallIcon(R.drawable.ic_stat_player)
    // Add media control buttons that invoke intents in your media service
    .addAction(R.drawable.ic_prev, "Previous", prevPendingIntent) // #0
    .addAction(R.drawable.ic_pause, "Pause", pausePendingIntent)  // #1
    .addAction(R.drawable.ic_next, "Next", nextPendingIntent)     // #2
    // Apply the media style template
    .setStyle(new NotificationCompat.MediaStyle()
        .setShowActionsInCompactView(1 /* #1: pause button */)
        .setMediaSession(mMediaSession.getSessionToken()))
    .setContentTitle("Wonderful music")
    .setContentText("My Awesome Band")
    .setLargeIcon(albumArtBitmap)
    .build();
Note: The deprecation of RemoteControlClient
has further implications for controlling media. See
Media Playback Control
for more information about the new APIs for managing the media session and controlling playback.
Custom Notification Layouts
The notifications framework allows you to define a custom notification layout, which
defines the notification's appearance in a RemoteViews object.
Custom layout notifications are similar to normal notifications, but they're based on a
RemoteViews defined in a XML layout file.
The height available for a custom notification layout depends on the notification view. Normal view layouts are limited to 64 dp, and expanded view layouts are limited to 256 dp.
To define a custom notification layout, start by instantiating a
RemoteViews object that inflates an XML layout file. Then,
instead of calling methods such as
setContentTitle(),
call setContent(). To set
content details in the custom notification, use the methods in
RemoteViews to set the values of the view's children:
-
Create an XML layout for the notification in a separate file. You can use any file name
you wish, but you must use the extension
.xml -
In your app, use
RemoteViewsmethods to define your notification's icons and text. Put thisRemoteViewsobject into yourNotificationCompat.Builderby callingsetContent(). Avoid setting a backgroundDrawableon yourRemoteViewsobject, because your text color may become unreadable.
The RemoteViews class also includes methods that you can use to easily
add a Chronometer or ProgressBar
to your notification's layout. For more information about creating custom layouts for your
notification, refer to the RemoteViews reference documentation.
Caution: When you use a custom notification layout, take special care to ensure that your custom layout works with different device orientations and resolutions. While this advice applies to all View layouts, it's especially important for notifications because the space in the notification drawer is very restricted. Don't make your custom layout too complex, and be sure to test it in various configurations.
Using style resources for custom notification text
Always use style resources for the text of a custom notification. The background color of the notification can vary across different devices and versions, and using style resources helps you account for this. Starting in Android 2.3, the system defined a style for the standard notification layout text. If you use the same style in applications that target Android 2.3 or higher, you'll ensure that your text is visible against the display background.
Custom Views
Starting from Android 7.0 (API level 24), you can customize notification views and still obtain system decorations like notification headers, actions, and expandable layouts.
To enable this capability, Android provides the following APIs to style your custom view:
-
DecoratedCustomViewStyle() - Styles notifications other than media notifications.
-
DecoratedMediaCustomViewStyle() - Styles media notifications.
To use this API, call the setStyle() method, passing to it
the desired custom view style.
This snippet shows how to construct a custom notification object with the
DecoratedCustomViewStyle() method.
Notification notification = new Notification.Builder()
           .setSmallIcon(R.drawable.ic_stat_player)
           .setLargeIcon(albumArtBitmap))
           .setCustomContentView(contentView);
           .setStyle(new Notification.DecoratedCustomViewStyle())
           .build();
Messaging Style
Starting in Android 7.0 (API level 24),
Android provides an API for customizing the style of a notification.
Using the MessagingStyle class, you can change several of the
labels displayed on the notification, including the conversation title,
additional messages, and the content view for the notification.
The following code snippet demonstrates how to customize a notification's
style using the MessagingStyle class.
  Notification notification = new Notification.Builder()
             .setStyle(new Notification.MessagingStyle("Me")
                 .setConversationTitle("Team lunch")
                 .addMessage("Hi", timestamp1, null) // Pass in null for user.
                 .addMessage("What's up?", timestamp2, "Coworker")
                 .addMessage("Not much", timestamp3, null)
                 .addMessage("How about lunch?", timestamp4, "Coworker"))
             .build();