To manage lookup tables, refer to:
Adding a Lookup Table
Adding a lookup table for code translation involves defining the properties (metadata) and structure (columns) of the table, and entering data for the columns you have defined.
To add a lookup table:
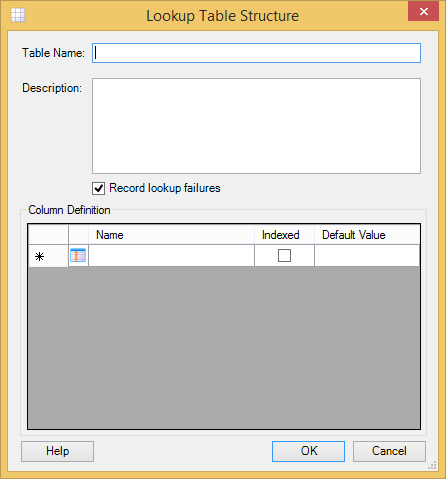
On the Rhapsody Lookup Tables manager, select the Add icon . The Lookup Table Structure dialog is displayed:
Enter a name and description for the lookup table.
Lookup table names:
- Are case-insensitive. For example, you cannot add two tables called
Doctorsanddoctors. - Can only contain alphanumeric characters and underscores.
- Cannot begin with numbers or an underscore.
- Have a maximum length of 120 characters.
- Are case-insensitive. For example, you cannot add two tables called
- If you want Rhapsody to record all the searches for which it cannot find a match, ensure the Record lookup failures checkbox is selected.
- Define the structure of your table.
- Select the OK button to save your changes.
- In the Rhapsody Lookup Tables manager, select the Edit Values icon .
- Enter a value for each column. Alternatively, import a
.csvfile that contains the table values. - Select the Check In icon to check in your changes.
Lookup table queries require a minimum database cache size (in terms of number of statements) to run. As of Rhapsody 6.4, the default cache size is 500. If you anticipate having more than 500 lookup tables in your configuration, ensure you increase the cache size accordingly. The cache size is set via a JVM setting in the wrapper-local.conf file:
wrapper.java.additional.200=-Dderby.language.statementCacheSize=500
The engine needs to be restarted to pick up any changes.
Deleting a Lookup Table
To delete a lookup table:
- On the Rhapsody Lookup Tables dialog, select a lookup table, and then select the Delete icon . The Confirm Delete dialog is displayed.
- Select the Yes button to confirm that you want to delete the lookup table. If you have not checked out the table, Rhapsody automatically checks it out for you.
- Select the components you want to check in, then select the Check In button to check in your changes.


