A conditional connector test consists of an input test message and a matching (or not-matching) condition. You can configure the input test message's message body, encoding, properties and the definition to parse the message. Message bodies can be created from files on a disk, or entered using either hexadecimal or ASCII mode.
A conditional connector's tests are stored with its source filter. Furthermore, all tests configured on a conditional connector are shared by all other conditional connectors connected to the same source filter. Therefore, for conditional connectors sharing the same source filter, if you add or modify tests for one conditional connector, you accordingly affect all conditional connectors; additionally, if you check tests for selection for one conditional connector, the corresponding tests are checked for all conditional connectors. One exception, however, is that you can individually set the Expected Result option for each conditional connector test on the same source filter.
As tests configured on a conditional connector are shared by all other conditional connectors connected to the same source filter:
When you copy-paste a conditional connector from one source filter to another, the connector's tests are not copied.
When you copy-paste a source filter, any conditional connector tests stored within it are also copied.
When you copy-paste a conditional connector to the same source filter, it shares the same tests as the original connector, however the Expected Result for every test is reset to
Condition Matched.
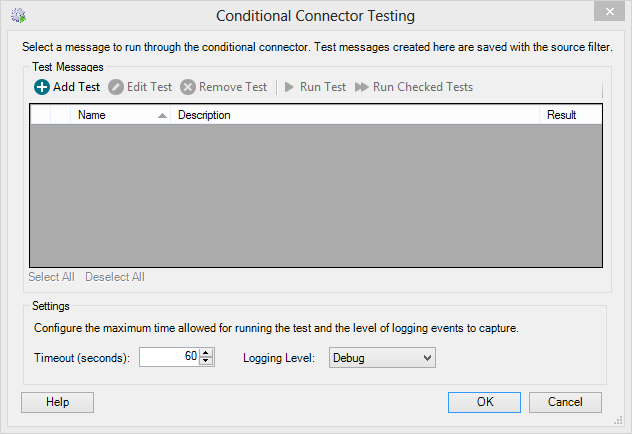
The process of testing a conditional or JavaScript connector is similar to the process of testing a filter configuration. You can create new tests, and edit or delete existing tests through the Conditional Connector Testing dialog:
The Conditional Connector Testing dialog displays the following information:
| Field | Description |
|---|---|
| Name | The user-defined name of the test. |
| Description | The user-defined description of the test. |
| Result | The test result:
|
The Conditional Connector Testing dialog provides the following actions:
| Action | Description |
|---|---|
| Add Test | Add a new test. Tests are shared by all conditional connectors for a particular connection. |
| Edit Test | Edit a test. |
| Remove Test | Delete a test. |
| Run Test | Run a test you have selected. |
| Run Checked Tests | Run all tests you have checked. |
| Select All | Select all tests by checking their checkboxes. |
Deselect All |
Deselect all tests by unchecking their checkboxes. |
Timeout |
Set the maximum time in seconds allowed for running the tests. |
| Logging Level | Set the level of logging events to capture. |
When you modify tests, the associated route is automatically checked out.
Viewing Conditional Connector Tests
To view tests added to a conditional connector:
- Double-click a conditional or JavaScript connector that you want to test to display the Edit Conditional Connector dialog or Properties dialog for the JavaScript connector.
Click the Test Conditional Connector link to display the Conditional Connector Testing dialog.
If conditional connector testing is not supported by the engine, or if you do not have the 'Test conditional connectors' access right, then the Test Conditional Connector link is not displayed.
Adding a Conditional Connector Test
To add a test to a conditional connector:
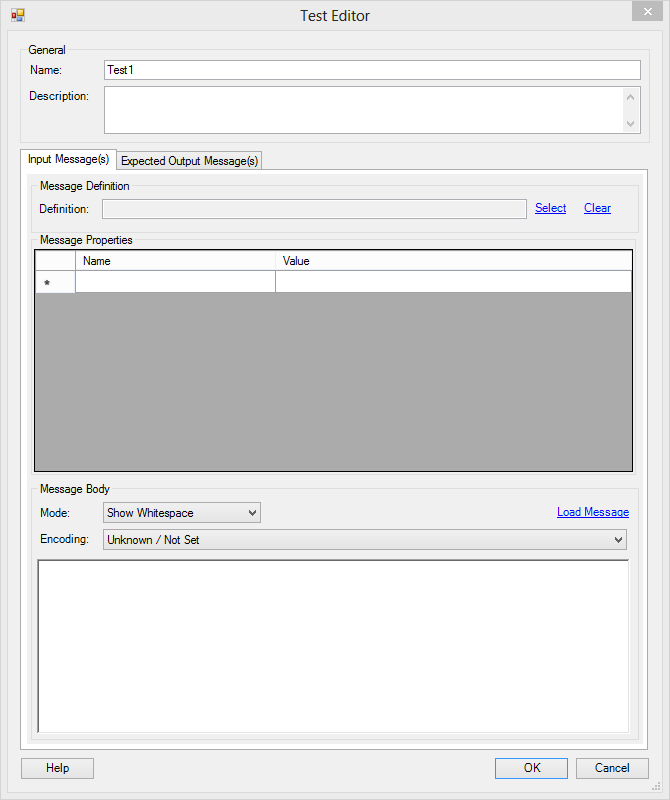
- On the Conditional Connector Testing dialog, select the Add Test button to display the Test Editor dialog:
Enter a Name and Description for your test.
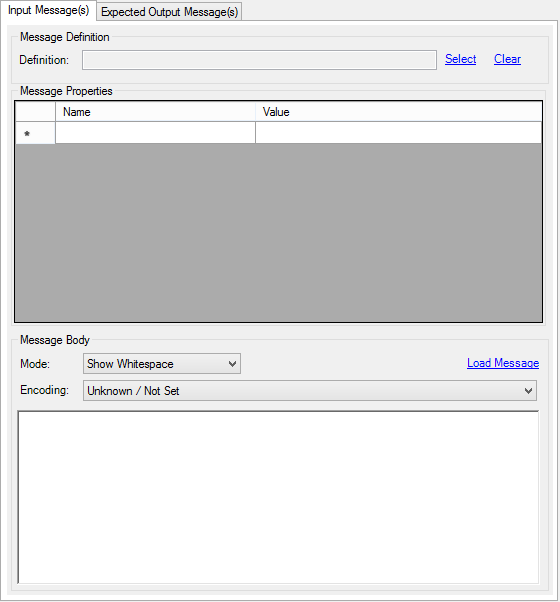
- In the Input Message tab:
- Click the Select link to select a message definition (clicking the Clear link clears the message definition).
- Add message properties.
Select the message body parameters for your test message:
Parameters Descriptions Mode The display mode of the message. The Show Whitespacemode uses Java escape characters to represent non-printable characters, whereas theRaw Hexmode enables you to edit directly the hexadecimal characters that make up the binary message. You can switch between the two modes at any time.Encoding The character encoding of the message. If
Unknown/Not Setis selected, then no encoding is stamped on the message when it is sent to the filter for testing.- Add your message using one of the following methods:
- Enter the message manually. Ensure you add
\r\n(or\ror\n) to the end of every segment in the message. - Click the Load Message link to load a message from a file.
- Enter the message manually. Ensure you add
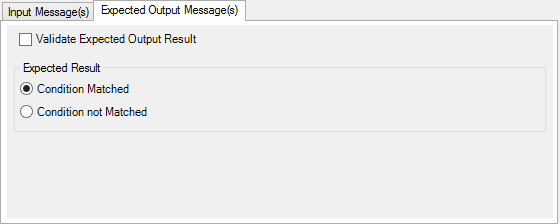
In the Expected Output Message tab, select the test parameters as required:
Parameter
Description
Validate Expected Output Result
When checked, the result of the test is compared to the expected output result and the test marked as Passed or Failed. When not checked,
testis marked as Executed and you can view the output result.
Expected Result
Whether you want the test result to be marked as passed when the test condition matches or does not match the result.
Select the OK button to add the test, or the Cancel button to abort.
Alternatively, you can copy-paste an existing test for a conditional connector on any filter to a conditional connector on another filter by using the right-click menu.
Modifying a Conditional Connector Test
To modify a conditional connector test:
- On the Conditional Connector Testing dialog, double-click a test, or select it and select the Edit Test button to display the Test Editor dialog.
Edit the test parameters as required.
Select the OK button to add the test, or the Cancel button to abort.
Deleting Conditional Connector Tests
To delete a conditional connector test:
- On the Conditional Connector Testing dialog, select the tests you want to delete by checking their checkbox, then select the Remove Test button.
- Select the Yes button when prompted to confirm the deletion.


