The Intelligent Mapper manages your mapping migration through mapping projects which are stored on the engine. Mapping projects are managed through the Intelligent Mapper's Mapping Projects Manager, and are saved to RLC files along with the rest of the configuration. Only users with the appropriate access rights can edit mapping projects.
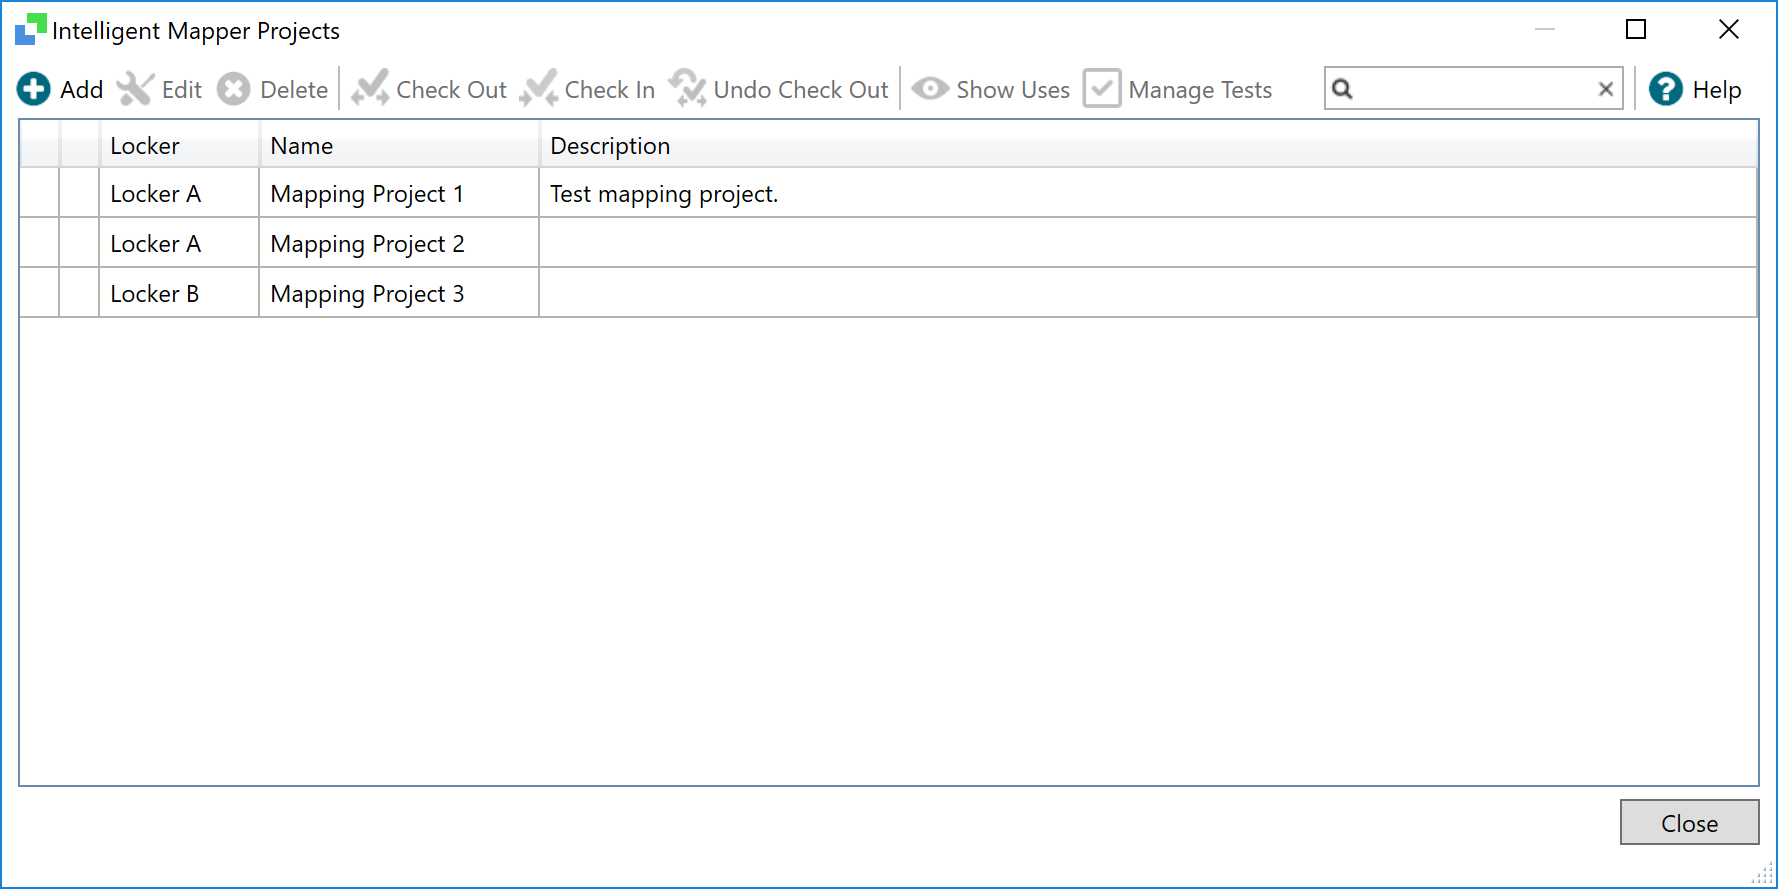
The Mapping Project Manager lists all mapping projects on the engine and enables you to add, remove, or edit mapping projects:
Mapping projects can be checked out and checked in, and an undo check-out can also be performed if you want to revert your changes. If another user is editing the mapping project, an error is displayed to other users trying to check it out.
Launching the Mapping Projects Manager
You can access the Mapping Project Manager through:
- Rhapsody IDE by navigating to View>Intelligent Mapper....
- A link on an Intelligent Mapper filter's Configuration tab on its Properties dialog.
The Mapping Project Manager displays the following information:
| Column | Description |
|---|---|
| Locker | The locker the mapping project belongs to. |
| Project Name | The user-defined name of the mapping project. |
| Description | The user-defined description of the mapping project. |
Managing Mapping Projects
You can perform the following actions through the Mapping Project Manager:
| Action | Description |
|---|---|
| Add | Create a new mapping project. |
| Edit | Configure a selected mapping project through the Mapping Project Editor. Double-clicking on a mapping project also opens the Mapping Project Editor. |
| Delete | Delete a selected mapping project. |
| Check Out | Check out the selected mapping project. |
| Check In | Check in the selected mapping project, and if necessary updates filters using this mapping project with any new mapping code. |
| Undo Check Out | Revert the check-out of any mapping projects. |
| Show Uses | Display a list of filters using the selected mapping project. |
| Run Tests | Test the Intelligent Mapper filter. |
| Filter | Perform text-based filtering to filter the list of displayed mapping projects. |
Creating a Mapping Project
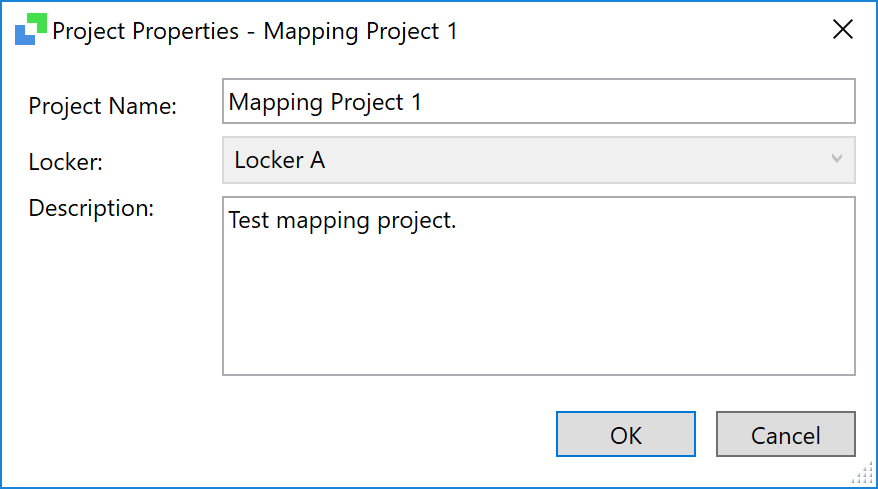
When you add a mapping project you must enter the project name, and assign it to a locker. You can also provide an optional description for the mapping project. When a mapping project has been created, you can modify its properties, except the locker it belongs to.
The Project Properties dialog contains the following fields:
| Field | Description |
|---|---|
| Project name | The user-defined name of the mapping project. |
| Locker | The locker the mapping project belongs to. |
| Description | The user-defined description of the mapping project. |
To create a new mapping project:
- Open the Mapping Project Manager.
- Select the Add button to display the Project Properties dialog.
- Enter the appropriate values in the fields.
- Select the OK button to save your project and close the Project Properties dialog.
Deleting a Mapping Project
To delete a mapping project:
- Open the Mapping Project Manager.
- Select the mapping project you want to delete.
- Select the Delete button.
Showing Uses of a Mapping Project
To display a list of filters associated with a particular mapping project, including their name and location, select the Show Uses button. Where the selected mapping project is used is displayed in the Show Uses tab in the Information panel of Rhapsody IDE:


