Opera Skinning part 1: Introduction
9th October 2012: This article is obsolete
Opera 12 and above support a new, simplified form of skinning. See our tutorial on how to make themes (skins) for Opera.
pages: 1/5: Introduction — 2/5: Skinning examples — 3/5: Skin.ini explained — 4/5: skin.ini element reference — 5/5: tips & tricks
Introduction
In my first Opera skinning article, I gave a gentle introduction to the world of Opera skinning, including where to get the skin files from, how to unpack and pack them, and some basic graphic replacement examples (eg buttons and background tiles.) In this set of articles, I will go a lot deeper into the subject, providing you with many more practical examples, a detailed guide to the skin.ini file, an element reference, and some tips and tricks for creating more effective skins. This article was last updated for Opera 9.5.
You can access all the 5 articles in this set using the links above. Don’t feel like you have to read the articles in order — there is something useful for everyone here, no matter what your level of familiarity with Opera skins is, and you should feel free to jump to the parts you consider most interesting.
The table of contents for this first part is as follows:
Index
- Locating the skin files
- Unpacking / packing skins
- Skin structure
- Introduction to skin.ini
- Native / non-native skins
- Fallbacks
- backward and forward compatibility
- Standard skin folder/file list
- Image formats
- Animations
- Image loading
Locating the skin files
Before you start editing a skin you first need to locate the actual files on your hard drive. This location varies depending on the operating system you are running Opera on, and the skin you want to edit — the default skin’s location differs from that of the alternative skin packages you can download from my.opera.com. The following list shows you the location of the different skin package files on the different operating systems:- Windows:
- The standard skin can be found in the
Skindirectory in Opera’s install directory — in most cases this should beC:\Program files\Opera\Skin. - Downloaded skins are stored in
profile\Skin. To figure out where theprofiledirectory is located, you can check out “Help > About Opera”. As a shortcut, you should also be able to access that directory by selecting “Start > Run” and entering%APPDATA%\Opera\profile\Skin.
- The standard skin can be found in the
- Linux/Unix:
- The standard skin can be found in
/usr/share/opera/skin. - Downloaded skins are stored in
~/.opera/skin. Note that.operais a hidden directory therefore you might have to type the path manually.
- The standard skin can be found in
- Mac OS X:
- The standard skin can be found in the
applicationpackage, usually in/Applications/Opera.app/Contents/Resources/Skin(basically, right click on the Opera program icon inside theApplicationsfolder, Ctrl-click on it, and selectShow Package Contentsto access the Opera application’s internal files.) - Downloaded skins are stored in
~/Library/Preferences/Opera Preferences/Skin.
- The standard skin can be found in the
Opera ships with two skins — standard_skin.zip, which is the Standard skin, and a native skin, called for example windows_skin.zip or mac_skin.zip. The native skin doesn’t contain any images; it instead uses the ones from the standard skin. For downloaded skins the filename is usually similar to the skin’s name.
Unpacking / packing skins
Skins are packed as zip files (.zip). When Opera applies a skin, it unpacks and loads the required images from the package on the fly — each image is only loaded once, even if it is called more than once from skin.ini.
Before you can start editing a skin you have to unpack it using compression software like WinZip or 7zip. You don’t have to unpack it to any specific location; you’ll have to pack it again later anyway. Try it now — find the standard Opera skin and unpack it. The folder structure of this package (as seen in Opera 9.5x) is discussed in the next section.
After editing the skin you have to pack the files again, so they can be loaded by Opera. You do this by navigating to the folder containing skin.ini and the image files/folders, selecting all the contents of this folder and adding them to a new zip file.
To load the skin in Opera you have to put the zip file into the folder for downloaded skins, mentioned above, then start Opera and select “Tools > Appearance” — you’ll then be able to select your skin from the list of skins that appears there. Note that if skin.ini is not in the root directory of the zip file, Opera will give you the error message “Unable to continue. Please select a skin made for your version of Opera”!
Skin structure
After unpacking the skins zip file you’ll find a number of folders containing images and a file called skin.ini. This ini file can be edited in any text editor, and sets skin options like the name of the skin to be displayed in Opera, which image to use for each element of the user interface, and text and background colors.
The folders contain the images to be used by the skin. Folders aren’t required for the skin to work — you could just put every image in the root level of the zip file — but they do help a great deal with keeping everything organised.
The contents of the standard Opera skin are described in the Standard skin folder/file list section in this tutorial.
Introduction to skin.ini
skin.ini — which can be found at the root level of every skin — is the control/configuration file for the skin. It specifies meta information and general options, and defines the settings for every element used in the skin.
At the beginning of the file you’ll usually find the meta info section, which is marked by the heading [Info]. The section should look similar to the following:
[Info]
Name=Opera7 Standard Skin
Author=Opera Software
Version=3
Preview Image=
NameandAuthor: The first two options set the names used for the skin itself and its author, which will be displayed in the dialog presented to you after downloading a skin and in the skin list in the “Appearance” dialog.Version=: This defines the version of skin.ini being used — it must not be used to indicate the skin version. For skins made for Opera 9.5 or later this should be set to3.Preview Image=: This is not used — the whole line may be omitted.
The next section below this one, [Options], specifies general options like whether the skin is a native one (see section below), and the rest of the sections specify skin elements. We’ll learn more about these sections later in this series.
Native / non-native skins
Opera offers two types of skins, native and normal ones. The basic difference between the two types of skin is as follows:
Normal skins are very customizable as they allow skinning of nearly everything — button images, backgrounds, dialog buttons, scrollbars and all the other elements. They allow you to give Opera its own style, independent from the operating system you’re using, and what other applications look like.
Native skins use elements from the operating system for most elements — only button images are set by the skin. All other elements like backgrounds and dialogs are drawn by the operating system it resides on. This makes Opera look more like a native application for that operating system and integrate better with other applications on the system.
Native skins are supported on all operating systems Opera runs on. On Windows the look of a native skin is controlled by the Windows Theme used; on Linux Opera draws native elements from the Qt toolkit.
To mark a skin as native you have to set the following entry in skin.ini — this will automatically set the correct native option for the operating system the skin is loaded on:
[Options]
Native Skin = 1
For non-native skins just omit this line — in this case Opera will default to non-native.
Fallbacks
If a skin is missing an element, instead of showing a blank space Opera will employ an automatic fallback and load the element from the “Opera Standard” skin. An element is considered missing if there’s no line in skin.ini that defines it — it doesn’t matter whether the image for that element exists inside the skin package or not.
Missing images are often encountered when a skin was made for a previous version of Opera and is thus missing images for recently added buttons. To avoid showing just a blank space Opera will check whether the standard skin contains this element and if it’s present, display that icon. While this can cause inconsistencies in the style of button icons, it avoids breaking functionality because of missing buttons.
This technique is also used for the native skin that comes with Opera. This skin doesn’t contain any button images — just some information to tell Opera to draw a native skin, the actual button images are then loaded from the Standard skin.
Fallbacks can be disabled independently for background and foreground images (like button images, dialog buttons, etc) using the Fallback background and Fallback foreground settings in the [Options] section:
[Options]
Fallback foreground			= 1
Fallback background			= 1
By default both settings are enabled (1) anyway, so you only need to add these lines if the settings have been changed from the default.
Note: It’s not recommended to change this setting as it can break forward compatibility!
Backward and forward compatibility
Opera can load any skin made for Opera 7 or newer. All images present in the skin will be displayed, and sections missing will be loaded from the “Opera Standard” skin thanks to the fallback option, as explained above.
Additional images — for example custom ones or ones from a newer version of Opera — will just be ignored. Opera will not stop loading a skin if such an image is encountered.
Standard skin folder/file list
If you want to create a new skin it’s often easier to start by editing an existing skin like the Standard skin.
The following folder listing is valid for the Standard skin included in Opera 9.5x, and while it will most likely apply for most of the skins you can download from MyOpera, you can’t guarantee that it will apply for all of them. If the skin you’re trying to edit has a different folder structure to the standard one, you can usually figure out where the files you’re looking for are located by looking at the folder names or previewing the image files in an image viewer. This of course assumes that the skin’s creator has used a logical naming system and file structure!
| folder | description | preview |
|---|---|---|
| a/ | Contains the border that’s drawn around the active element with keyboard navigation. Should not be customized! | |
| account/ | Not used in Opera 9.5 | |
| anims/ | Contains animations used in various places like Speed Dial and Opera Link. | |
| backgrounds/ | Contains the background images for all the toolbars. | |
| border/ | Contains border graphics for toolbar borders, separators in dialog boxes, and borders around toolbar buttons. | |
| buttons/ | Contains all the toolbar button images — these are referenced in the Boxes and Images sections in the Skin.ini file. Also contains graphics for tab buttons on tab bar. | 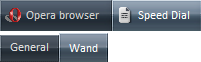 |
| caption/ | Contains the minimize, restore and close button graphics that reside at the top right of the menu bar, or top left if you are using a Mac. | |
| checkbox/ | Contains checkbox graphics. | |
| contacts/ | Contains contact icon graphics. | |
| dialog_images/ | Contains icons for several messages. | |
| dialog_page/ | Contains graphics for the border and shadows around the inner background of dialog boxes. | |
| drop_insert/ | Contains the image that appears as the target when you are dragging and dropping a button. | |
| dropdown/ | Contains the image used as the background of dropdowns. | |
| edit/ | Contains edit field graphics for the address field, search fields, treeviews, listboxes, and multiline edit fields. These are difficult to change because some unchangeable parts are applied by the operating system. | |
| expand_button/ | Contains arrow images that are used in expand elements in dialogs. | |
| header_button/ | Contains graphics for headers, for example those found on top of mail or preference treeviews. | |
| icons/ | Contains all the icons. | |
| link/ | Contains status icons for Opera Link. | |
| notifier/ | Contains the background image for popup notifiers and the inline search popup. | |
| pagebar_close_button/ | Contains the graphics for the close buttons on the tabs. | |
| panel_toggle/ | Contains the panel toggle graphics. | |
| progress/ | Contains several progress indicator graphics. | |
| radio_button/ | Contains radio button graphics. | |
| scrollbar/ | Contains the graphic for the scrollbar background and the arrows for scrollbar dropdowns and dropdown buttons in dropdown fields. | |
| scrollbar_knob/ | Contains the scrollbar knob images. | |
| selector_button/ | Contains the background graphic that goes around toolbar buttons and the panel toggle. | |
| smilies/ | Contains all the emoticon graphics. | |
| speeddial/ | Contains the graphics for the speed dial thumbs including icons, the separator for the speed dial search area, the overlay with shadows for the speed dial configuration dialog and the overlay without shadows for systems that don’t support alpha transparency. | 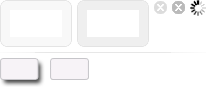 |
| trust_and_security_button/ | Contains graphics for the area around the fraud protection/security buttons inside the addressfield (green since v9.5.) |
Image formats
Opera supports PNG, JPEG, BMP and GIF images for skins. In most cases you’ll want to use PNG images as they support alpha channels, which allows for partial transparency in images. For background images JPEG is sometimes a better choice as its compression is a bit better than PNG.
Animations
Opera supports animated GIFs and animated PNGs in APNG format, APNG is to be prefered as GIF only supports 256 colors. The animations will be played in the Opera user interface upon loading. Animated images are used in skins just like any other image.
Image loading
Opera will load every image only once, no matter how often it’s referenced in skin.ini, in the same manner that you can use the same image multiple times in an HTML document. While this saves memory it does bring with it the issue. You can’t use the same image multiple times with different parameters applied to it — when loading a skin Opera will use the first instance of an image it finds, and remember it, and its parameters. Thus if you want to use the same image with different parameters, for example once with Colorize enabled and once with it disabled, you'll have to use two different copies of the image in different locations.
pages: 1/5: Introduction — 2/5: Skinning examples — 3/5: Skin.ini explained — 4/5: skin.ini element reference — 5/5: tips & tricks
This article is licensed under a Creative Commons Attribution, Non Commercial - Share Alike 2.5 license.
Comments
The forum archive of this article is still available on My Opera.
-

can i download skins to my opera web browser?
-

@eyassu yes, you can, at http://my.opera.com/community/customize/skins/.
-

It's look so fine and beautiful.
-

Can I download skin on my nokia C3? I am using opera 6.5
-

Como se instala las pieles en mi pc, es decir como instalo el aero glass en mi pc porque no entiendo como hacerlo... Gracias.
-

This article DESPERATELY needs updating! It's from 2008 for pete's sake!
-

@Supuhstar yes, I appreciate that ;-) I am planning to get this material updated asap, but it is hard to find people who know enough about this subject to do so, and have the time available.
-

opera mobile 12 di c7 apa bisa di buat skin yang lain.. Terima kasih..
-

i m not able to understand anything
-

can i download opera skin to the version of opera mobile 12? Thanks.. :)
-

does this work on nokia X2-01? And if yes, how?
-

Can I have this system back? It was so much more satisfying to skin opera rather than give it a wallpaper. I mean, I know they can both work together... I still have some old skins that I installed.
No new comments accepted.eyassu
Saturday, January 14, 2012
Chris Mills
Monday, January 23, 2012
Enock Banda
Thursday, January 26, 2012
Yakubu A. Madanfara
Sunday, February 5, 2012
Miguel Angel Guerrero
Sunday, February 26, 2012
Supuhstar
Thursday, April 5, 2012
Chris Mills
Thursday, April 5, 2012
ikhwan
Sunday, May 13, 2012
sankalp verma
Tuesday, May 15, 2012
just.call.me.JåÐë
Thursday, June 7, 2012
kigozi eric
Sunday, July 1, 2012
Supuhstar
Tuesday, February 12, 2013