Managing Orders 

When a customer buys something from your online store, the information on their order is automatically transferred to the Orders page.
This page is designed to manage all orders created by your customers.
To start managing an order, navigate to the Sales > Orders section and click View in the Actions column for a specific order.
You manage the orders by:
- setting specific statuses for the order, or specific items from the order
- commenting on the orders (the comments can be viewed by other Sales team members)
Setting Order Statuses
To set statuses for all items in the orders:
- In the Order Overview >Trigger all matching states section, click pay, which is the first status in the flow.
- Continue changing statuses following this procedure.
This will put the next status in the flow, which is ship, to all the items from the order.
To set statuses for several items in the order shipment:
- Scroll down to the Order Items > Shipment # section, select the items for which the status needs to be changed by selecting the checkbox on the left of the product image.
- In the Trigger all matching states of order inside this shipment section, click the status that needs to be assigned to those items
To set statuses for a specific item in the order:
In the Order Items section, click the status icon in the Trigger event column for a specific shipment item.
To learn more about the order statuses, see Orders: Reference Information.
Claiming Orders
You can create a reclamation for individual orders on the Overview of Orders page. Creating a reclamation means that the order is flagged as "Reclamation," and the reclamations will not be linked to neither an order status nor to a state machine. There are two reasons for this: first is that this would be different in every project and second is that claims have to be checked on an individual basis and may not influence order item status at all.
To create a new reclamation for order:
- On the Overview of Orders page, find the order you want to create a reclamation for and click Claim in the Actions column.
- On the Create Reclamation page, select either all or individual products for which you want to create the reclamation and click Create Reclamation.
The appropriate record is created in the Reclamations section.
Clicking Back to Orders in the top right corner of the page prior to saving the changes will discard all the changes and take you to the Overview of Orders page.
Commenting the Orders
You can leave notes for a specific order by commenting it.
For example, if you want your team members to know that you are responsible for managing a specific order, you can leave a comment about that.
As another example, the customer may contact you to provide additional details about his order. You can leave the comments you receive in the Comments section.
To comment the order:
- On the View Order: [Order ID] page, scroll down to the Comments section at the bottom of the page.
- Enter the comment in the Message field.
- Click Send Message.
Your message appears in the Comments section.
Tips & Tricks
You can send an email to the customer, review the customer details, and edit the customer addresses.
To send an email to your customer:
On the Overview of Orders page, click the hyperlinked customer email in the Email column.
To view or edit the customer details stored in the Customers > Customers section:
- On the Overview of Orders page, click hyperlinked customer name in the Customer Full Name column.
- On the View Order page, scroll down to the Customer section and click the hyperlinked Order Reference.
(You are redirected to the Customers > Customers section, View Customer page).
To edit the Billing address:
- On the View Order page, scroll down to the Customer section.
- Click Edit under the Billing address. The Edit Address for Order page opens.
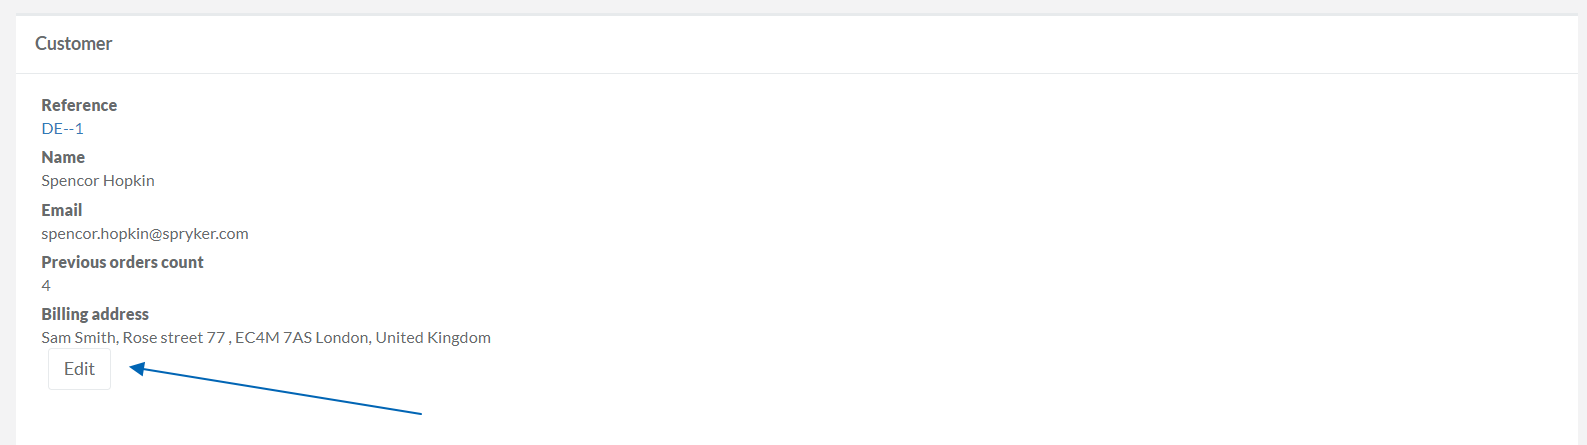
- Make the updates and click Save.
Last review date: Sep 24, 2019