Reference: Download the tutorial presentation
Source code
Get the pre-compiled code, if you have not done so.
WRFDA/var/build/da_wrfvar.exe is the executable that will be used in this session.
Choice of your working directory
We recommend running each session in a separate directory, so that it will be easier to check for the necessary input files and look for what output files are created after a successful run.
We recommend you create /classroom/users/${USER}/DA/radar and cd there to be your working directory for this session.
mkdir /classroom/users/${USER}/DA/radar
cd /classroom/users/${USER}/DA/radar
Input files
|
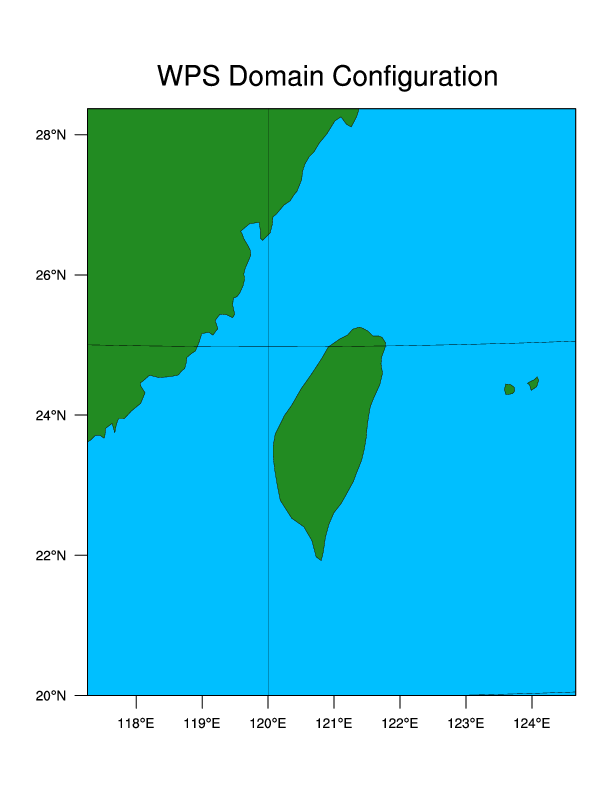
The radar case is different from the CONUS60 case you have used in obsproc, running WRFDA-3DVAR and gen_be sessions. It utilizes a medium-resolution domain over Taiwan, 61x51 gridpoints, 30 vertical levels, and 15km resolution (it can be found at /classroom/wrfhelp/DATA/WRFDA/Radar).
It features Typhoon Fanapi striking the island on September 19, 2010.
The procedure is the same as Running WRFDA-3DVAR except for an extra radar input file and adding and changing some namelist.input settings.
ob.radar is in plain text format. Open it with a text editor to see the content. Its format is simple, but the radar data preprocessing is not trivial and it is user's responsibility.
|
 |
cp /classroom/wrfhelp/DATA/WRFDA/Radar/ob.radar ./ob.radar
ln -fs /classroom/wrfhelp/DATA/WRFDA/Radar/ob.ascii ./ob.ascii
ln -fs /classroom/wrfhelp/DATA/WRFDA/Radar/wrfinput_d01 ./fg
ln -fs /classroom/wrfhelp/DATA/WRFDA/Radar/be.dat ./be.dat
ln -fs /classroom/users/${USER}/DA/WRFDA/run/LANDUSE.TBL ./LANDUSE.TBL
In this exercise, be.dat was created for cv_options=7.
Edit namelist.input
A sample namelist for this test case is provided in /classroom/wrfhelp/DATA/WRFDA/Radar/namelist.input
cp /classroom/wrfhelp/DATA/WRFDA/Radar/namelist.input ./namelist.input
vi namelist.input
&wrfvar2
calc_w_increment = .true.
/
&wrfvar4
use_radarobs = .true.
use_radar_rv = .true.
use_radar_rf = .true.
use_radar_rqv = .false.
use_radar_rhv = .false.
/
&wrfvar7
cv_options=7,
/
Note that in this exercise, be.dat was created for cv_options=7. It is important that if you use cv_options=7, you are sure to specify that option when you create the be.dat file with GEN_BE
Run WRFDA
mpirun -np 6 /classroom/users/${USER}/DA/WRFDA/var/build/da_wrfvar.exe
Check output
Use ncdiff and the ncl scripts introduced in previous exercises to analyze the output.
Note the existance of a number of extra diagnostic files (for example, gts_omb_oma_02, qcstat_conv_02, etc.). This is because of the setting "max_ext_its = 2" in the namelist: this run of WRFDA used two outer loops. For many of the diagnostics, each outer loop gets its own separate file.
Check analysis increments of moisture fields.
Check the statistics file.
Other practice
Compare the results using different settings:
use_radar_rv = .true. only
use_radar_rf = .true. only
both use_radar_rv = .true. and use_radar_rf = .true.
You can now move on to the next exercise, or try the 4DVAR radar assimilation exercise below.
Source code
WRFDA/var/build/da_wrfvar.exe
is the executable that will be used in the 4D-VAR session.
You should create a separate working directory /classroom/users/${USER}/DA/radar_4dvar so that you can compare the two methods.
mkdir /classroom/users/${USER}/DA/radar_4dvar
cd /classroom/users/${USER}/DA/radar_4dvar
Input data
As in the regular 4DVAR case with conventional obs, more files are needed than just for 3DVAR. Observations need to be processed into multiple time-slot files. The naming convention for different time slots is also the same as for conventional obs (ob01.radar, ob02.radar, etc.)
Test data for this case are in the same directory as the 3dvar case, /classroom/wrfhelp/DATA/WRFDA/Radar.
ln -fs /classroom/wrfhelp/DATA/WRFDA/Radar/ob01.radar ./ob01.radar
ln -fs /classroom/wrfhelp/DATA/WRFDA/Radar/ob02.radar ./ob02.radar
ln -fs /classroom/wrfhelp/DATA/WRFDA/Radar/ob03.radar ./ob03.radar
ln -fs /classroom/wrfhelp/DATA/WRFDA/Radar/ob04.radar ./ob04.radar
cp /classroom/wrfhelp/DATA/WRFDA/Radar/wrfinput_d01 ./wrfinput_d01
ln -fs wrfinput_d01 ./fg
cp /classroom/wrfhelp/DATA/WRFDA/Radar/wrfbdy_d01 ./wrfbdy_d01
cp /classroom/wrfhelp/DATA/WRFDA/Radar/be.dat ./be.dat
ln -fs /classroom/users/${USER}/DA/WRFDA/run/RRTM_DATA_DBL ./RRTM_DATA
ln -fs /classroom/users/${USER}/DA/WRFDA/run/*.TBL .
A sample namelist for this test case is provided in /classroom/wrfhelp/DATA/WRFDA/Radar/namelist.input.4dvar
cp /classroom/wrfhelp/DATA/WRFDA/Radar/namelist.input.4dvar ./namelist.input
&wrfvar1
var4d=true,
var4d_bin=600,
/
&wrfvar4
use_radarobs = .true.
use_radar_rv = .true.
use_radar_rf = .false.
use_radar_rqv = .false.
use_radar_rhv = .true.
/
&wrfvar6
max_ext_its=1,
ntmax=4,
/
&wrfvar7
cv_options=7,
/
Run WRFDA
Since the assimilation windows for this case are only 10 minutes, and we have set ntmax=4 (only 4 inner loop minimization steps), this test should only take about 5 minutes to run on the classroom computers. Remember, you can always use "ctrl-z" followed by the "bg" command to make WRFDA run in the background.
mpirun -np 6 /classroom/users/${USER}/DA/WRFDA/var/build/da_wrfvar.exe
Compare the output of the 3dvar test to the 4dvar test using ncdiff. Is the difference significant? Remember, we only did 4 inner loop minimization steps, so we haven't reached 4DVAR's full potential!
You have finished the radar assimilation tutorial. You can now move on to the next exercise.
