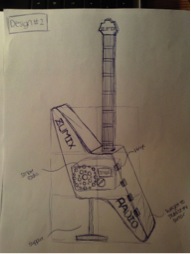
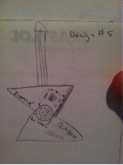
This past week has been a busy one for the ZUMIX team – particularly for our builders! This stemmed largely from our team thinking that it was on the same page, while actually being a few pages apart (same chapter, at least!). We met for a while after last week’s class to “finalize” the design of the guitar-radio casing design. We had several ideas:
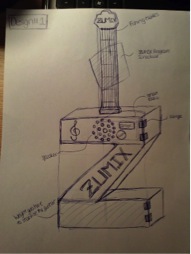
As usual, we decided to combine the two and create a “Flying Z” a la the famed flying v style of guitar. Carrie, our main Computer-Aided-Designer went off to work on what I now know is a time-consuming, and at times tedious, job of meticulously designing the product on the computer, so that the lasers can then cut the acrylic.
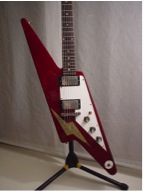
On Thursday, Carrie shared her CAD model with the group, but it didn’t look like what some of us were expecting. Turns out, we didn’t come up with the flying Z. It already exists, so when Carrie googled it, she found one after which she modeled hers:
When she checked in with the group (phew!) we recognized our original miscommunication and set ourselves to righting it with much clearer, more defined language and agreements. We exchanged a few more ideas:
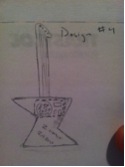
And finally agreed on Design #4, which we ALL expressly agreed upon. Carrie remade the CAD model (props to Carrie!) and rendered this pretty amazing final design:
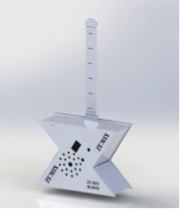
While Ashwin and Courtney were gathering paint supplies and facilitating another design workshop with the ZUMIX Radio youth DJs, Carrie and Qian spent much of Monday laser cutting acrylic to make the rendering you see above real. We’re still in the process of designing and constructing a base for the guitar-radio to rest on, so we’ve ordered more acrylic and will have some more cutting to do. Onward!
Meeting with Zumix Radio Youth on Dec 2nd
We had our last design meeting with the Zumix youth today. Eight young people attended, seven of who had been in attendance for the previous design meetings. In our Nov 4th meeting, we had a design workshop with the youth to develop a design for the shape and functions of the radio. The final design is in the shape of a “Flying-Z” guitar. The goal of the meeting today was for the youth to generate and draw ideas for painting and decorating the radio, and to come to consensus on a final design iteration for the casing’s exterior.
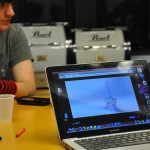
At the beginning of the meeting, Lucia brought up the CAD model of the “Flying Z” on a laptop and passed it around for the youth to look at. They had questions about the size and stability of the radio, and how they will be able to paint on it. They also had ideas for additional parts for the radio casing, such as a slot for suggestions, which we will try and incorporate into the final product.
After the youth commented on the CAD model, we introduced the young people to the materials that will be used to make the casing, such as acrylic panels, acrylic paints, and sandpaper. They youth passed around the materials and got a sense for how the final product will feel, and what kind of surface they will be painting and decorating on. They also sanded the panel to understand how to make the paint hold onto the surface.
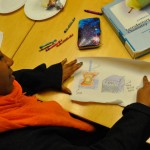
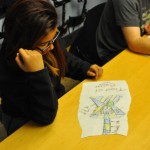
We then transitioned to drawing out design ideas for how to paint/decorate the casing. The youth worked on their drawings for about 25-30mins using crayons and paper. During this time, they also came up with more ideas for functions. After the drawing session, the youth presented their ideas to the whole group. Here are some of the ideas they came up with:
• Decorate the neck of the guitar with Zumix radio guitar pics
• Create slots on the sides of the casing for flyers and information about radio shows
• Decorate the sides with mirrors
• Make the radio’s base look like an amp
• Have a slot in the amp for people to drop suggestions for Zumix Radio DJs such as song preferences
• Have a slot for people to leave photos or notes that reflect what they love about Zumix
• Design the sides of the guitar casing with piano keys
• Decorate the exterior with a collage of photos of Zumix radio youth doing their thing
• Decorate the exterior with stickers you would find on the street outside of Zumix
• Paint the basecoat with the Zumix colors – Yellow and Blue!
After the presentation session, we transitioned into discussion about what ideas the group likes the most, and how we could tie different ideas together in a final design. The final design will likely include the Zumix colors as the basecoat, a suggestion box, the base painted as an amplifier, a collage of Zumix photos, the Zumix Dalmatian mascot, and Zumix guitar pics.
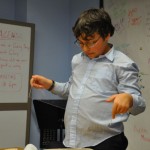
We will have our final meeting next Monday (Dec. 9th) to paint, decorate, and finalize the construction of the acrylic. In the mean time, the youth are working on some drawings they want to paint/paste onto the final casing. We will have the laser-cut acrylic “Flying-Z” ready for the next meeting. We are going to sand the acrylic before the meeting and apply the basecoats so that it will be ready for the youth to decorate. Check out some of the photos from our workshop:

Stay tuned for the final project next week!
Again great documentation. Looking forward to reading about the final work session on Monday!