Modelling requirements in JUnit
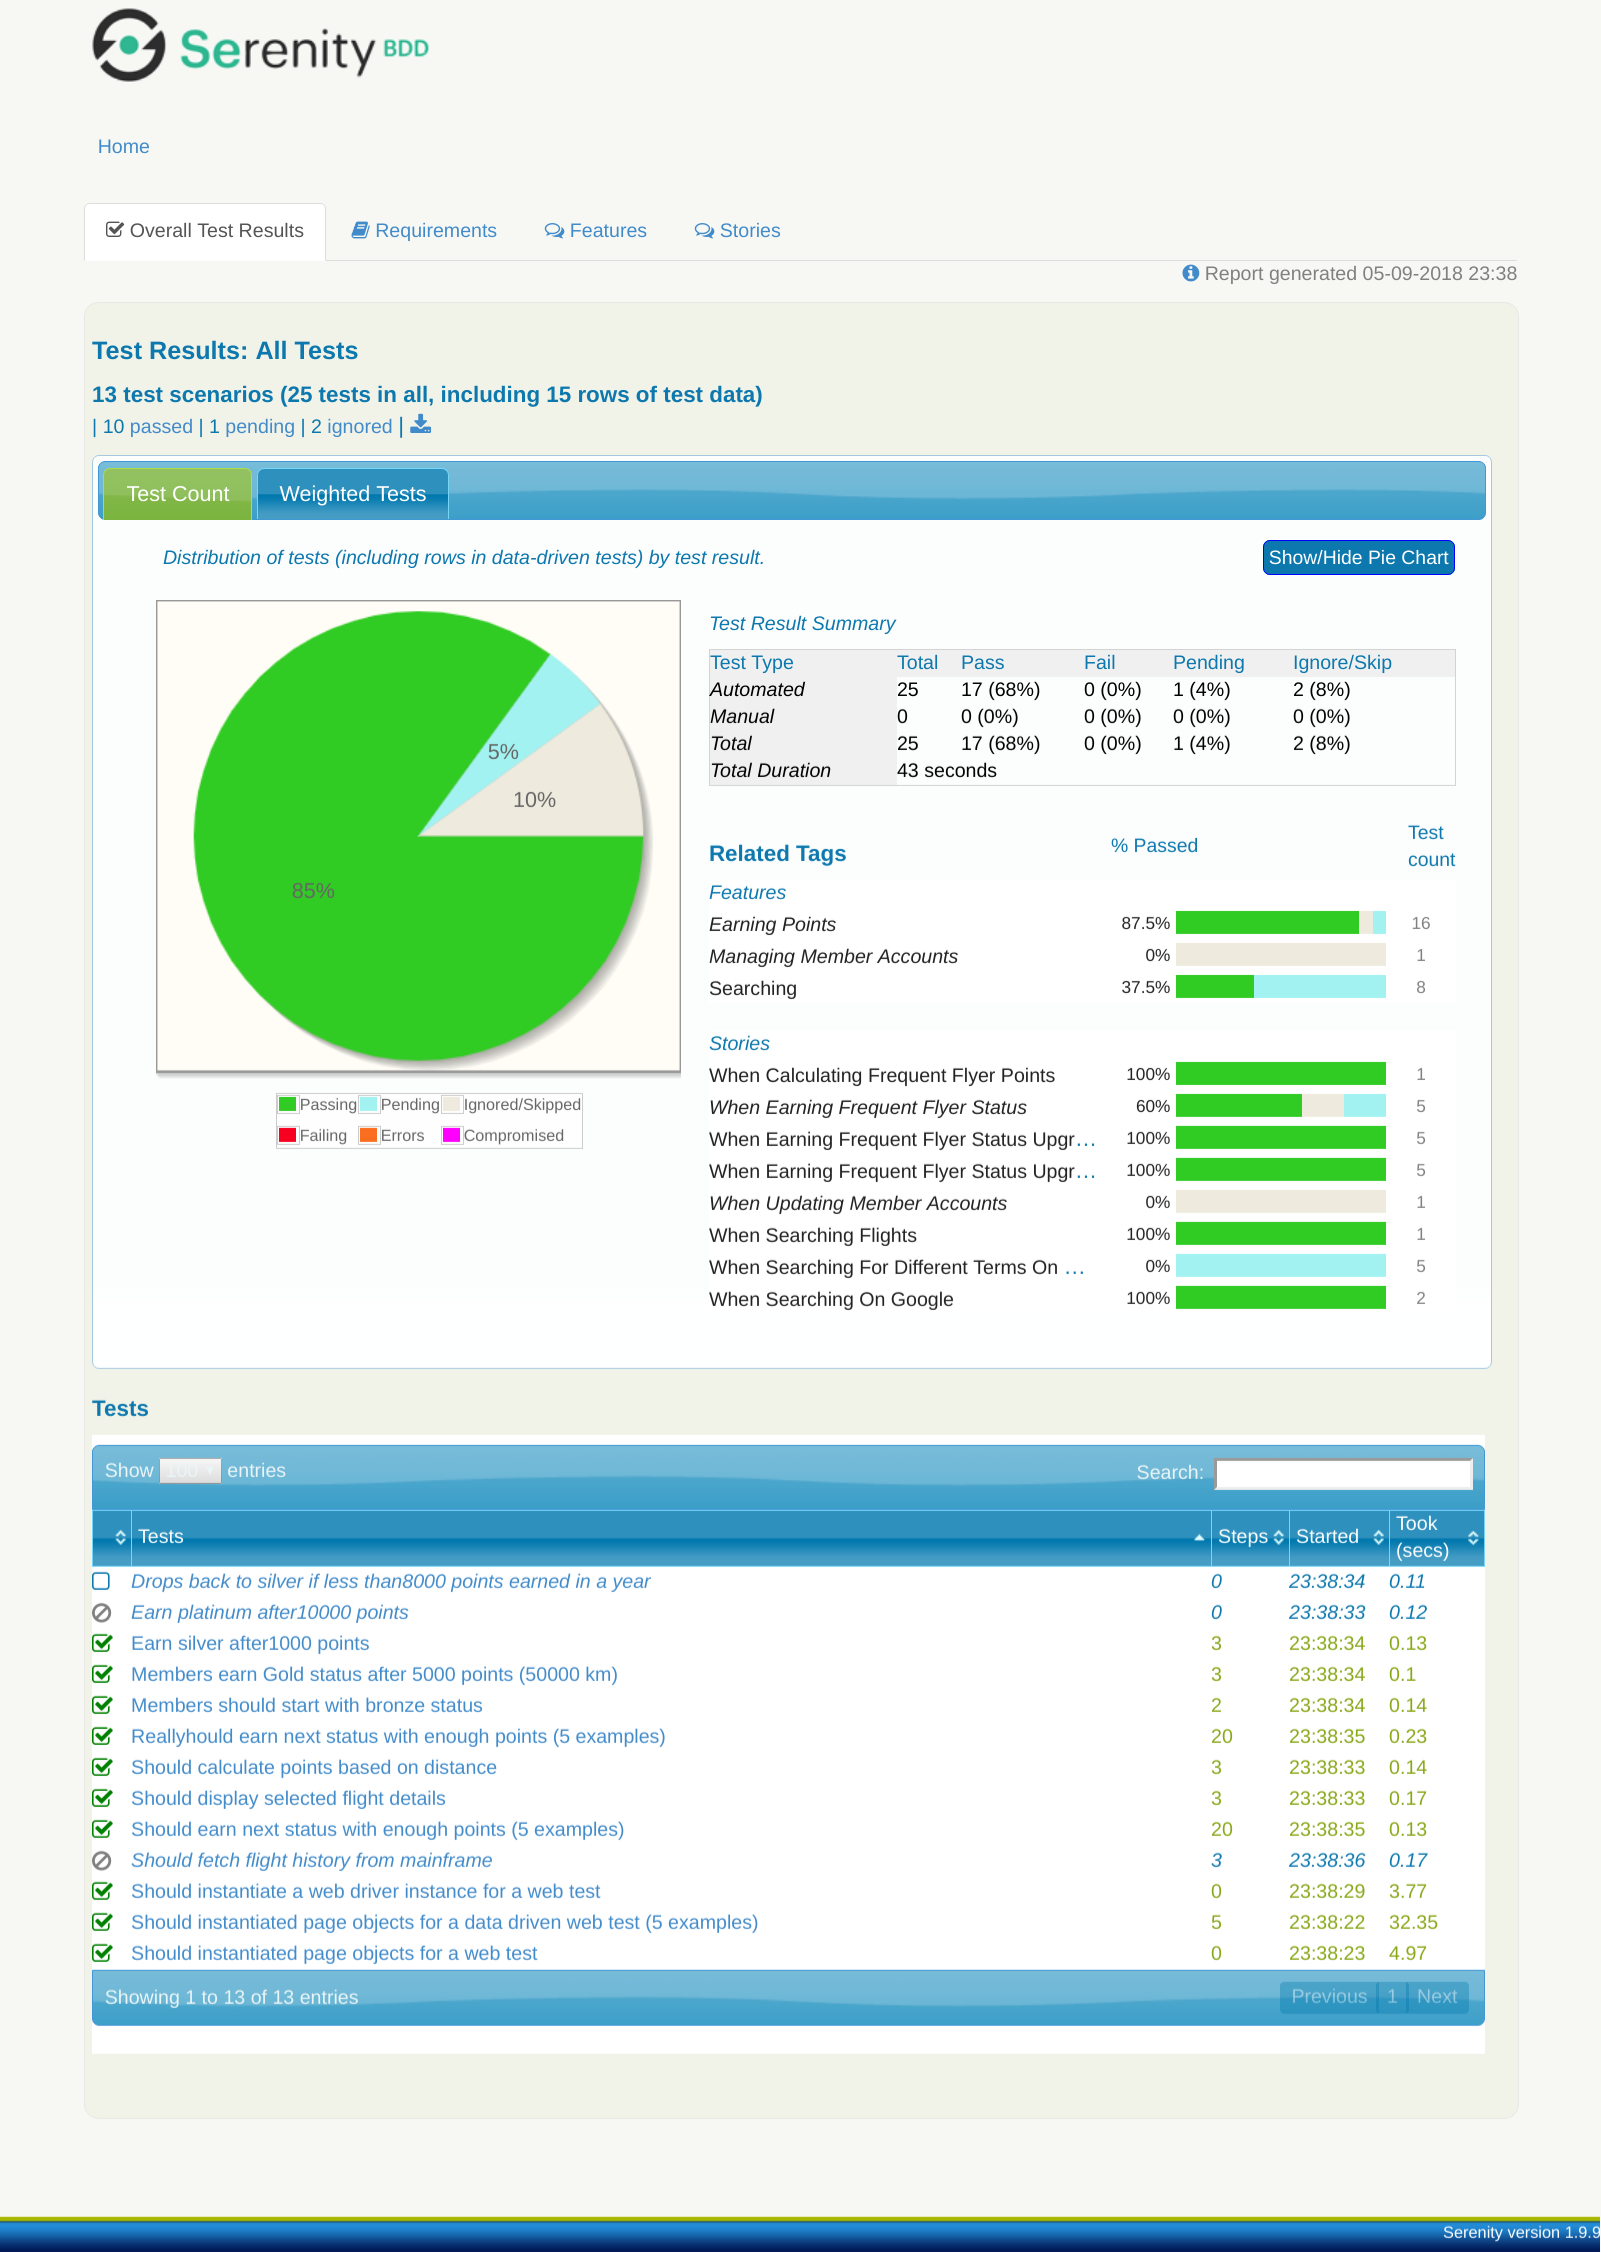
As we have seen previously, Serenity produces reports that summarize the test results, going into details about the steps that were executed within each test. Serenity also produces an overall list of the test results, as shown below:
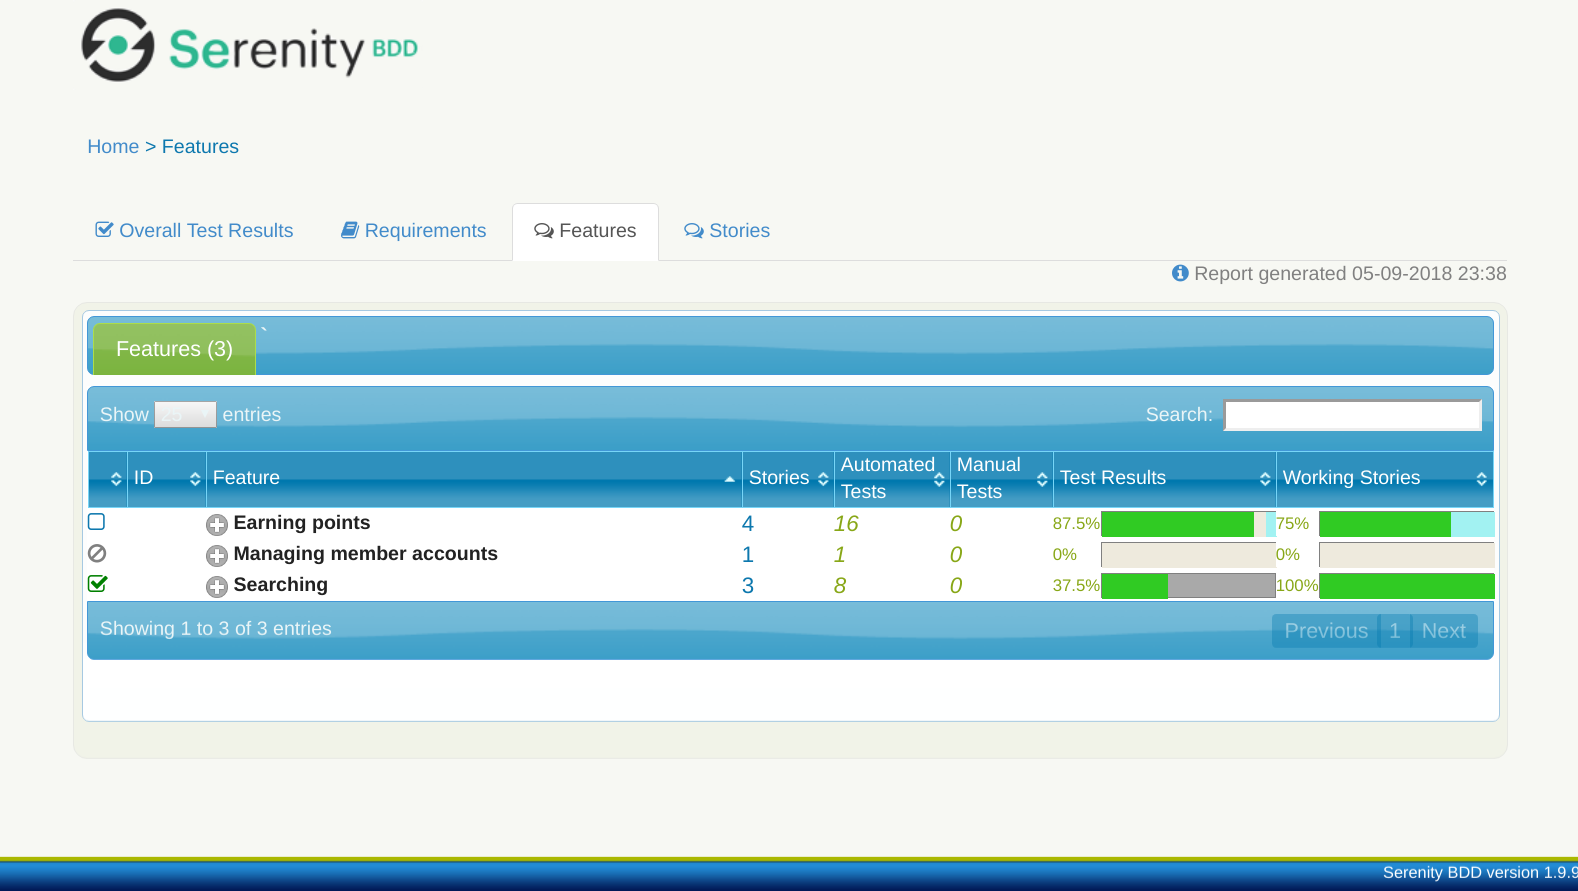
But Serenity also lets you group your tests in terms of features or user stories, in order to get a better high-level picture of the state of your application. The Requirements tab provides a high-level overview of your requirements.
For this to work, you need to organize your JUnit tests into meaningful packages. For example, you might group create packages for high-level features, and group your test cases by feature. By default, a test case is considered to represent a User Story in agile terms, and the tests within the test case correspond to the acceptance criteria for that user story.
Serenity uses the test package structure to discover the requirements organization. For example, suppose your package structure looks like this:
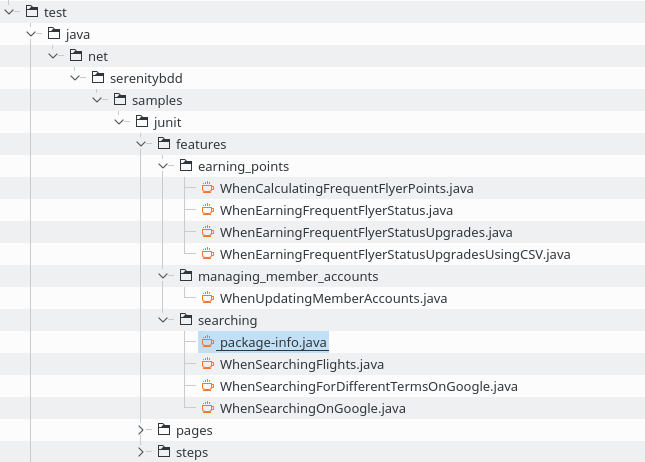
In this structure, the test cases are organized by feature, in a number of directories under the features parent directory.
For this to work properly, you need to tell Serenity the root package that you are using, and what terms you use for your requirements. You do this in a special file called serenity.properties, which lives in the root directory of your project, e.g.
serenity.test.root=net.serenitybdd.samples.junit.featuresThe way Serenity will report your requirements depends on the depth of the directory structure you use to store your requirements. By default, if you group your test cases in a single level of directories (as in the example above), Serenity will treat each directory as a feature. If there are two levels, the first level directories will be considered capabilities, and the second features.
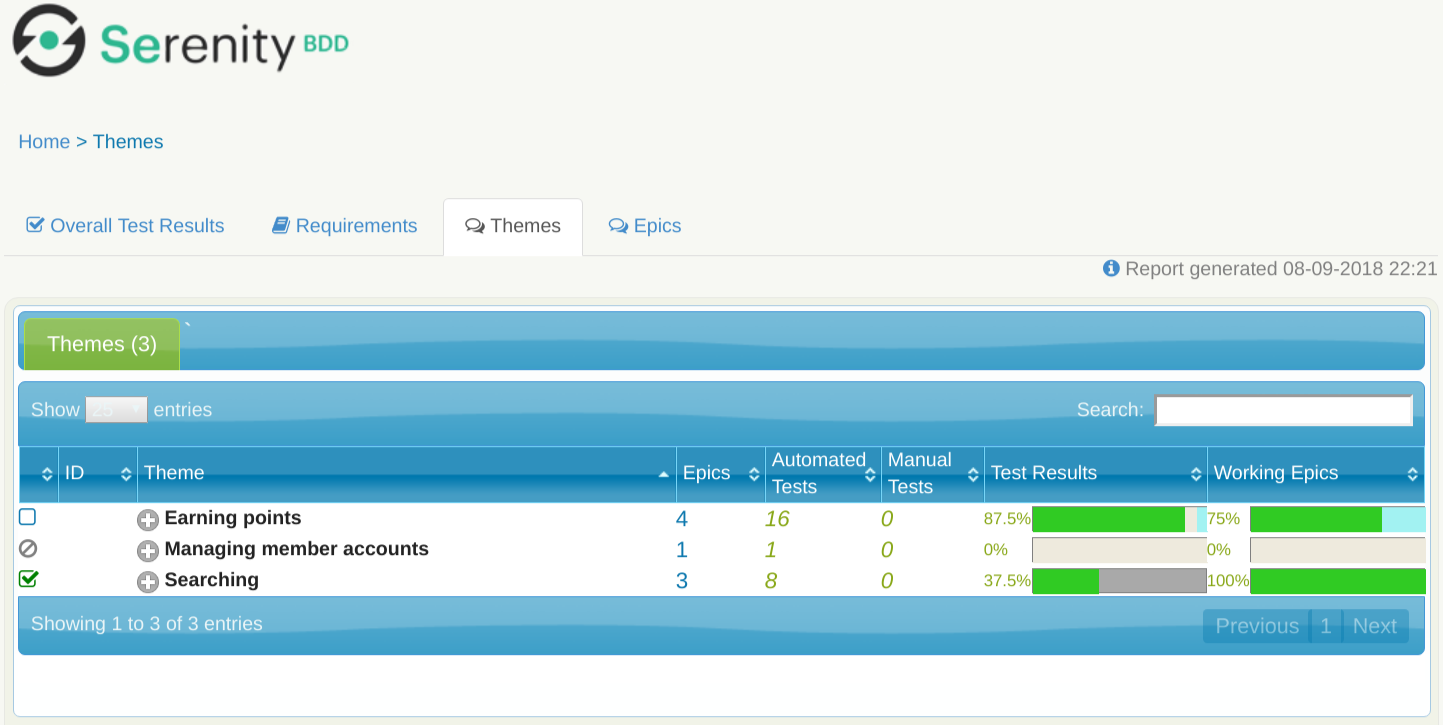
You can define your own way of naming your requirements using the serenity.requirement.types property. For example, if you wanted top-level directories to represent themes, and have a second level epics that actually contains the test cases, you could set this property to the following value:
serenity.requirement.types=theme,epicIn this case, the generating report using this requirements naming will look like this
You can provide extra information about stories and requirements in several ways. One is to use the @Narrative annotation in the test case, as shown here:
@Narrative(text={"In order to choose the best flight for my travels",                      (1)
                 "As a traveller",
                 "I want to be able to search for flights between specific destinations"})
@RunWith(SerenityRunner.class)
public class WhenSearchingFlights {

    @Managed(driver = "chrome")
    WebDriver driver;

    @Steps
    FlightSearchSteps theCustomer;

    @Test
    public void should_display_selected_flight_details() {
        // GIVEN
        theCustomer.searches_for_flights_between("Sydney", "London");
        // WHEN
        theCustomer.view_flight_details_for_flight(1);
        // THEN
        theCustomer.should_see_the_destination_city_in_the_summary();
    }
}| 1 | A narrative text, represented as an array of Strings |
This will produce a report like the following:
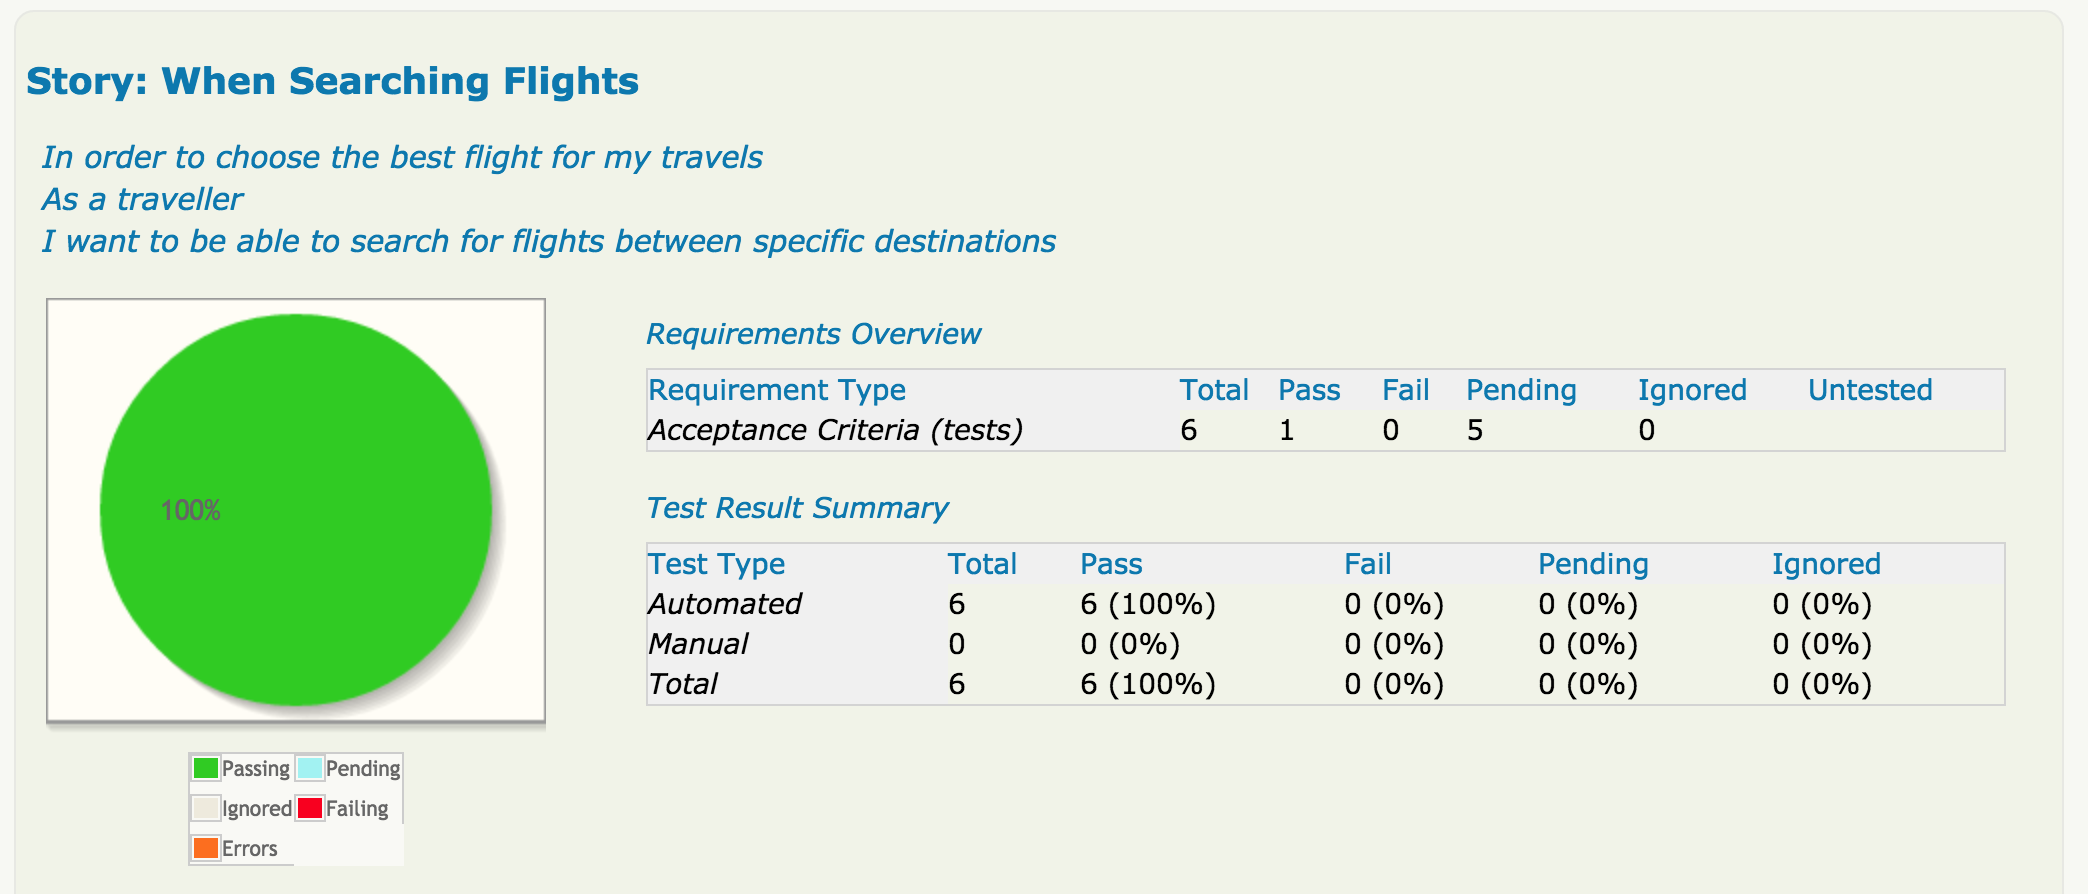
@Narrative annotation lets you add a narrative text to story reportsYou can also add the @Narrative annotation to a package-info.java file. This will add a narrative to the requirement represented by this package in the requirements reports, e.g.
@Narrative(
        text = {"Search-related functionality"}
)
package net.serenitybdd.samples.junit.features.searching;

import net.thucydides.core.annotations.Narrative;