Enabling authentication using Facebook, Google and other external providers
By Rick Anderson, Pranav Rastogi, and Valeriy Novytskyy
This tutorial demonstrates how to build an ASP.NET Core app that enables users to log in using OAuth 2.0/1.0a with credentials from external authentication providers.
Facebook, Twitter, Google, and Microsoft providers are covered in the following sections. See AspNet.Security.OAuth.Providers and AspNet.Security.OpenId.Providers for additional providers.

Enabling users to sign in with their existing credentials is convenient for the users and shifts many of the complexities of managing the sign-in process onto a third party. For examples of how social logins can drive traffic and customer conversions, see case studies by Facebook and Twitter.
备注
Packages presented here abstract a great deal of complexity of the OAuth authentication flow, but understanding the details may become necessary when troubleshooting. Many resources are available; for example, see Introduction to OAuth 2 or Understanding OAuth 2. Some issues can be resolved by looking at the ASP.NET Core source code for the provider packages.
Create a New ASP.NET Core Project
备注
This tutorial requires the latest update (Update 3) for Visual Studio 2015 and ASP.NET Core.
- In Visual Studio, create a new project (from the Start Page, or via File > New > Project):

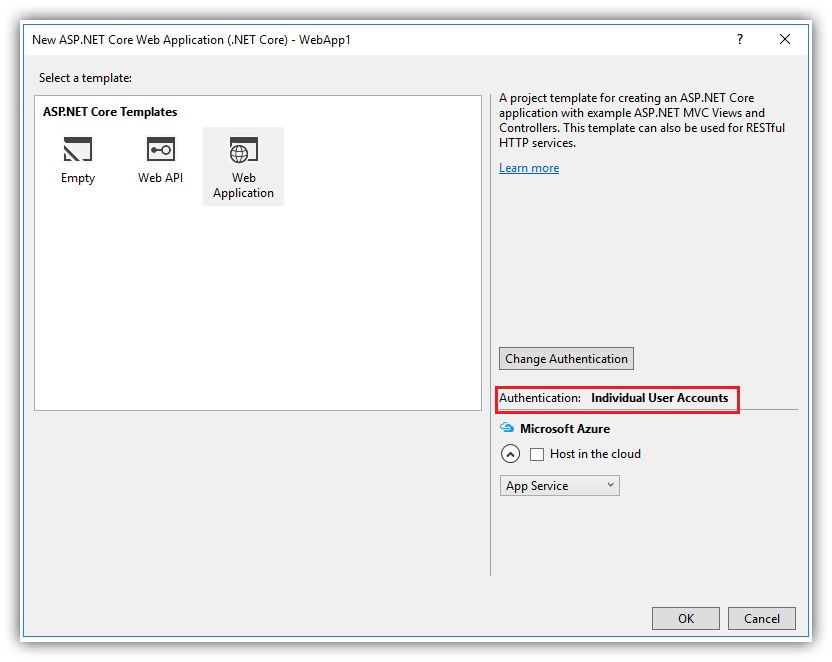
- Tap Web Application and verify Authentication is set to Individual User Accounts:

Enable SSL
Some external authentication providers reject requests coming from origins that don't use the https protocol. This reflects the trend of major providers like Google moving their public API services to https and discontinuing the use of unencrypted endpoints. We encourage you to follow this trend and enable SSL for your entire site. For Visual Studio 2017 RC1, see instructions below.
In Solution Explorer, right-click the project and select Properties.
On the left pane, tap Debug.
Check Enable SSL.
Copy the SSL URL and paste it into the App URL:

Visual Studio 2017 RC1:
Edit the properties/launchsettings.json file. Add an sslPort between 44300 and 44399:
{
  "iisSettings": {
    "windowsAuthentication": false,
    "anonymousAuthentication": true,
    "iisExpress": {
      "applicationUrl": "http://localhost:62183/",
      "sslPort": 0
    }
  },
- Modify the
services.AddMvc();code inStartup.csunderConfigureServicesto reject all requests that are not coming over https:
services.AddMvc(options =>
{
    options.SslPort = 44321;
    options.Filters.Add(new RequireHttpsAttribute ());
});
- Test the app to ensure that static files are still being served and publicly exposed routes are accessible.
- There shouldn't be any warnings logged to the browser console in Developer Tools.
- Attempting to navigate to the previous URL that used the http protocol should now result in connection rejected errors from the browser or a blank page.
Use SecretManager to store tokens assigned by login providers
The template used to create the sample project in this tutorial has code in Startup.cs which reads the configuration values from a secret store:
public Startup(IHostingEnvironment env)
{
    var builder = new ConfigurationBuilder()
        .SetBasePath(env.ContentRootPath)
        .AddJsonFile("appsettings.json", optional: true, reloadOnChange: true)
        .AddJsonFile($"appsettings.{env.EnvironmentName}.json", optional: true);

    if (env.IsDevelopment())
    {
        // For more details on using the user secret store see http://go.microsoft.com/fwlink/?LinkID=532709
        builder.AddUserSecrets<Startup>();
    }

    builder.AddEnvironmentVariables();
    Configuration = builder.Build();
}
As a best practice, it is not recommended to store the secrets in a configuration file in the application since they can be checked into source control which may be publicly accessible.
The SecretManager tool stores sensitive application settings in the user profile folder on the local machine. These settings are then seamlessly merged with settings from all other sources during application startup.
备注
Most login providers assign Application Id and Application Secret during the registration process. These values are effectively the user name and password your application uses to access their API, and constitute the "secrets" linked to your application configuration with the help of Secret Manager instead of storing them in configuration files directly.
Install the Secret Manager tool so that you can use it to store tokens assigned by each login provider below.
Setup login providers required by your application
Use the following pages to configure your application to use the respective providers:
- Facebook instructions
- Twitter instructions
- Google instructions
- Microsoft instructions
- Other provider instructions
备注
Call app.UseIdentity (in Configure) before any other external providers.
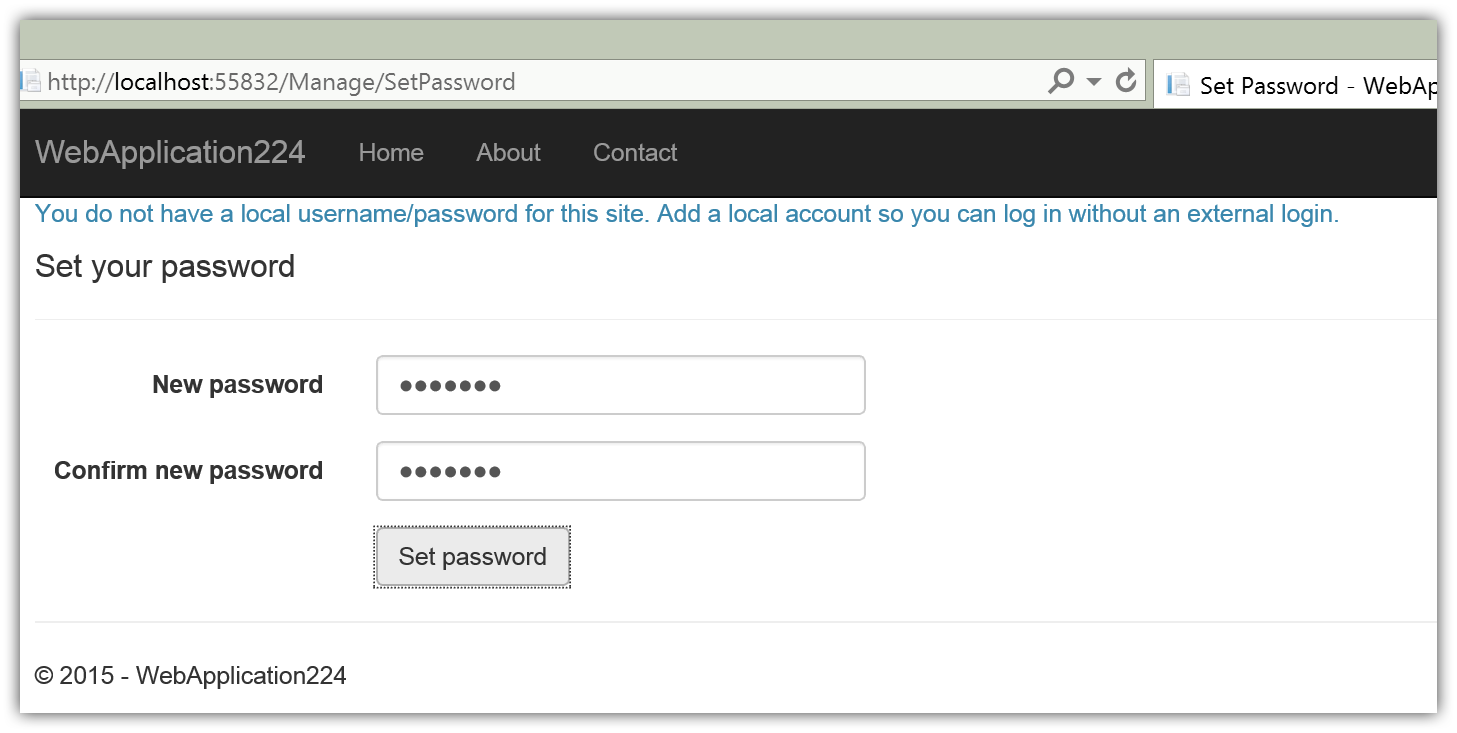
Optionally set password
When you register with an external login provider, you do not have a password registered with the app. This alleviates you from creating and remembering a password for the site, but it also makes you dependent on the external login provider. If the external login provider is unavailable, you won't be able to log in to the web site.
To create a password and sign in using your email that you set during the sign in process with external providers:
- Tap the Hello
link at the top right corner to navigate to the Manage view.

- Tap Create

- Set a valid password and you can use this to sign in with your email.
Next steps
This article introduced external authentication and explained the prerequisites required to add external logins to your ASP.NET Core app.
Reference provider-specific pages to configure logins for the providers required by your app.