LoRaWAN Nano-Gateway
This example allows to connect a LoPy to a LoRaWAN network such as The Things Network (TTN) or Loriot to be used as a nano-gateway.
This specific example uses settings specifically for connecting to TTN within the European 868 MHz region. To set this up for a specific usage, please see the config.py file.
Up to date versions of these snippets can be found at the following GitHub Repository. For more information and discussion about this code, see this forum post.
Nano-Gateway
The Nano-Gateway code is split into 3 files, main.py, config.py and nanogateway.py. These are used to configure and specify how the gateway will connect to a preferred network and how it can act as packet forwarder.
Main (main.py)
This file runs at boot and calls the library and config.py files to initalise the nano-gateway. Once configuration is set, the nano-gateway is then started.
""" LoPy LoRaWAN Nano Gateway example usage """

import config
from nanogateway import NanoGateway


nanogw = NanoGateway(id=config.GATEWAY_ID, frequency=config.LORA_FREQUENCY,
                datarate=config.LORA_DR, ssid=config.WIFI_SSID,
                password=config.WIFI_PASS, server=config.SERVER,
                port=config.PORT, ntp=config.NTP, ntp_period=config.NTP_PERIOD_S)

nanogw.start()
Configuration (config.py)
This file contains the specific settings for the server and network it is connecting to. Depending on the nano-gateway region and provider (TTN, Loriot, etc.) these will vary. For specific settings, check the forum for others who may have configured their nano-gateway under different configurations.
""" LoPy LoRaWAN Nano Gateway configuration options """

GATEWAY_ID = '11aa334455bb7788' # specified in when registering your gateway

SERVER = 'router.eu.thethings.network' # server address & port to forward received data to
PORT = 1700

NTP = "pool.ntp.org" # NTP server for getting/setting time
NTP_PERIOD_S = 3600 # NTP server polling interval

WIFI_SSID = 'my-wifi'
WIFI_PASS = 'my-wifi-password'

LORA_FREQUENCY = 868100000 # check your specifc region for LORA_FREQUENCY and LORA_DR (datarate)
LORA_DR = "SF7BW125"   # DR_5
Library (nanogateway.py)
The nano-gateway library controls all of the packet generation and forwarding for the LoRa data. This does not require any user configuration and the latest version of this code should be downloaded from the Pycom GitHub Repository.
""" LoPy Nano Gateway class """

from network import WLAN
from network import LoRa
from machine import Timer
import os
import binascii
import machine
import json
import time
import errno
import _thread
import socket


PROTOCOL_VERSION = const(2)

PUSH_DATA = const(0)
PUSH_ACK = const(1)
PULL_DATA = const(2)
PULL_ACK = const(4)
PULL_RESP = const(3)

TX_ERR_NONE = "NONE"
TX_ERR_TOO_LATE = "TOO_LATE"
TX_ERR_TOO_EARLY = "TOO_EARLY"
TX_ERR_COLLISION_PACKET = "COLLISION_PACKET"
TX_ERR_COLLISION_BEACON = "COLLISION_BEACON"
TX_ERR_TX_FREQ = "TX_FREQ"
TX_ERR_TX_POWER = "TX_POWER"
TX_ERR_GPS_UNLOCKED = "GPS_UNLOCKED"

STAT_PK = {"stat": {"time": "", "lati": 0,
                   "long": 0, "alti": 0,
                   "rxnb": 0, "rxok": 0,
                   "rxfw": 0, "ackr": 100.0,
                   "dwnb": 0, "txnb": 0}}

RX_PK = {"rxpk": [{"time": "", "tmst": 0,
                  "chan": 0, "rfch": 0,
                  "freq": 868.1, "stat": 1,
                  "modu": "LORA", "datr": "SF7BW125",
                  "codr": "4/5", "rssi": 0,
                  "lsnr": 0, "size": 0,
                  "data": ""}]}

TX_ACK_PK = {"txpk_ack":{"error":""}}


class NanoGateway:

    def __init__(self, id, frequency, datarate, ssid, password, server, port, ntp='pool.ntp.org', ntp_period=3600):
            self.id = id
        self.frequency = frequency
        self.sf = self._dr_to_sf(datarate)
        self.ssid = ssid
        self.password = password
        self.server = server
        self.port = port
        self.ntp = ntp
        self.ntp_period = ntp_period

        self.rxnb = 0
        self.rxok = 0
                self.rxfw = 0
                self.dwnb = 0
                self.txnb = 0

        self.stat_alarm = None
                self.pull_alarm = None
                self.uplink_alarm = None

        self.udp_lock = _thread.allocate_lock()

        self.lora = None
        self.lora_sock = None

    def start(self):
        # Change WiFi to STA mode and connect
        self.wlan = WLAN(mode=WLAN.STA)
        self._connect_to_wifi()

        # Get a time Sync
        self.rtc = machine.RTC()
        self.rtc.ntp_sync(self.ntp, update_period=self.ntp_period)

        # Get the server IP and create an UDP socket
        self.server_ip = socket.getaddrinfo(self.server, self.port)[0][-1]
        self.sock = socket.socket(socket.AF_INET, socket.SOCK_DGRAM, socket.IPPROTO_UDP)
        self.sock.setsockopt(socket.SOL_SOCKET, socket.SO_REUSEADDR, 1)
        self.sock.setblocking(False)

        # Push the first time immediatelly
        self._push_data(self._make_stat_packet())

        # Create the alarms
        self.stat_alarm = Timer.Alarm(handler=lambda t: self._push_data(self._make_stat_packet()), s=60, periodic=True)
        self.pull_alarm = Timer.Alarm(handler=lambda u: self._pull_data(), s=25, periodic=True)

        # Start the UDP receive thread
        _thread.start_new_thread(self._udp_thread, ())

        # Initialize LoRa in LORA mode
        self.lora = LoRa(mode=LoRa.LORA, frequency=self.frequency, bandwidth=LoRa.BW_125KHZ, sf=self.sf,
                        preamble=8, coding_rate=LoRa.CODING_4_5, tx_iq=True)
        # Create a raw LoRa socket
        self.lora_sock = socket.socket(socket.AF_LORA, socket.SOCK_RAW)
        self.lora_sock.setblocking(False)
        self.lora_tx_done = False

        self.lora.callback(trigger=(LoRa.RX_PACKET_EVENT | LoRa.TX_PACKET_EVENT), handler=self._lora_cb)

    def stop(self):
        # TODO: Check how to stop the NTP sync
        # TODO: Create a cancel method for the alarm
        # TODO: kill the UDP thread
        self.sock.close()

    def _connect_to_wifi(self):
        self.wlan.connect(self.ssid, auth=(None, self.password))
        while not self.wlan.isconnected():
            time.sleep(0.5)
        print("WiFi connected!")

    def _dr_to_sf(self, dr):
        sf = dr[2:4]
        if sf[1] not in '0123456789':
            sf = sf[:1]
        return int(sf)

    def _sf_to_dr(self, sf):
        return "SF7BW125"

    def _make_stat_packet(self):
        now = self.rtc.now()
        STAT_PK["stat"]["time"] = "%d-%02d-%02d %02d:%02d:%02d GMT" % (now[0], now[1], now[2], now[3], now[4], now[5])
        STAT_PK["stat"]["rxnb"] = self.rxnb
        STAT_PK["stat"]["rxok"] = self.rxok
        STAT_PK["stat"]["rxfw"] = self.rxfw
        STAT_PK["stat"]["dwnb"] = self.dwnb
        STAT_PK["stat"]["txnb"] = self.txnb
        return json.dumps(STAT_PK)

    def _make_node_packet(self, rx_data, rx_time, tmst, sf, rssi, snr):
        RX_PK["rxpk"][0]["time"] = "%d-%02d-%02dT%02d:%02d:%02d.%dZ" % (rx_time[0], rx_time[1], rx_time[2], rx_time[3], rx_time[4], rx_time[5], rx_time[6])
        RX_PK["rxpk"][0]["tmst"] = tmst
        RX_PK["rxpk"][0]["datr"] = self._sf_to_dr(sf)
        RX_PK["rxpk"][0]["rssi"] = rssi
        RX_PK["rxpk"][0]["lsnr"] = float(snr)
        RX_PK["rxpk"][0]["data"] = binascii.b2a_base64(rx_data)[:-1]
        RX_PK["rxpk"][0]["size"] = len(rx_data)
        return json.dumps(RX_PK)

    def _push_data(self, data):
        token = os.urandom(2)
        packet = bytes([PROTOCOL_VERSION]) + token + bytes([PUSH_DATA]) + binascii.unhexlify(self.id) + data
        with self.udp_lock:
            try:
                self.sock.sendto(packet, self.server_ip)
            except Exception:
                print("PUSH exception")

    def _pull_data(self):
        token = os.urandom(2)
        packet = bytes([PROTOCOL_VERSION]) + token + bytes([PULL_DATA]) + binascii.unhexlify(self.id)
        with self.udp_lock:
            try:
                self.sock.sendto(packet, self.server_ip)
            except Exception:
                print("PULL exception")

    def _ack_pull_rsp(self, token, error):
        TX_ACK_PK["txpk_ack"]["error"] = error
        resp = json.dumps(TX_ACK_PK)
        packet = bytes([PROTOCOL_VERSION]) + token + bytes([PULL_ACK]) + binascii.unhexlify(self.id) + resp
        with self.udp_lock:
            try:
                self.sock.sendto(packet, self.server_ip)
            except Exception:
                print("PULL RSP ACK exception")

    def _lora_cb(self, lora):
        events = lora.events()
        if events & LoRa.RX_PACKET_EVENT:
            self.rxnb += 1
            self.rxok += 1
            rx_data = self.lora_sock.recv(256)
            stats = lora.stats()
            self._push_data(self._make_node_packet(rx_data, self.rtc.now(), stats.timestamp, stats.sf, stats.rssi, stats.snr))
            self.rxfw += 1
        if events & LoRa.TX_PACKET_EVENT:
            self.txnb += 1
            lora.init(mode=LoRa.LORA, frequency=self.frequency, bandwidth=LoRa.BW_125KHZ,
                     sf=self.sf, preamble=8, coding_rate=LoRa.CODING_4_5, tx_iq=True)

    def _send_down_link(self, data, tmst, datarate, frequency):
        self.lora.init(mode=LoRa.LORA, frequency=frequency, bandwidth=LoRa.BW_125KHZ,
                      sf=self._dr_to_sf(datarate), preamble=8, coding_rate=LoRa.CODING_4_5,
                      tx_iq=True)
        while time.ticks_us() < tmst:
            pass
        self.lora_sock.send(data)

    def _udp_thread(self):
        while True:
            try:
                data, src = self.sock.recvfrom(1024)
                _token = data[1:3]
                _type = data[3]
                if _type == PUSH_ACK:
                    print("Push ack")
                elif _type == PULL_ACK:
                    print("Pull ack")
                elif _type == PULL_RESP:
                    self.dwnb += 1
                    ack_error = TX_ERR_NONE
                    tx_pk = json.loads(data[4:])
                    tmst = tx_pk["txpk"]["tmst"]
                    t_us = tmst - time.ticks_us() - 5000
                    if t_us < 0:
                        t_us += 0xFFFFFFFF
                    if t_us < 20000000:
                        self.uplink_alarm = Timer.Alarm(handler=lambda x: self._send_down_link(binascii.a2b_base64(tx_pk["txpk"]["data"]),
                                                                                              tx_pk["txpk"]["tmst"] - 10, tx_pk["txpk"]["datr"],
                                                                                              int(tx_pk["txpk"]["freq"] * 1000000)), us=t_us)
                    else:
                        ack_error = TX_ERR_TOO_LATE
                        print("Downlink timestamp error!, t_us:", t_us)
                    self._ack_pull_rsp(_token, ack_error)
                    print("Pull rsp")
            except socket.timeout:
                pass
            except OSError as e:
                if e.errno == errno.EAGAIN:
                    pass
                else:
                    print("UDP recv OSError Exception")
            except Exception:
                print("UDP recv Exception")
            # Wait before trying to receive again
            time.sleep(0.025)
Registering with TTN
To set up the gateway with The Things Network (TTN), navigate to their website and create/register an account. Enter a username and an email address to verify with their platform.
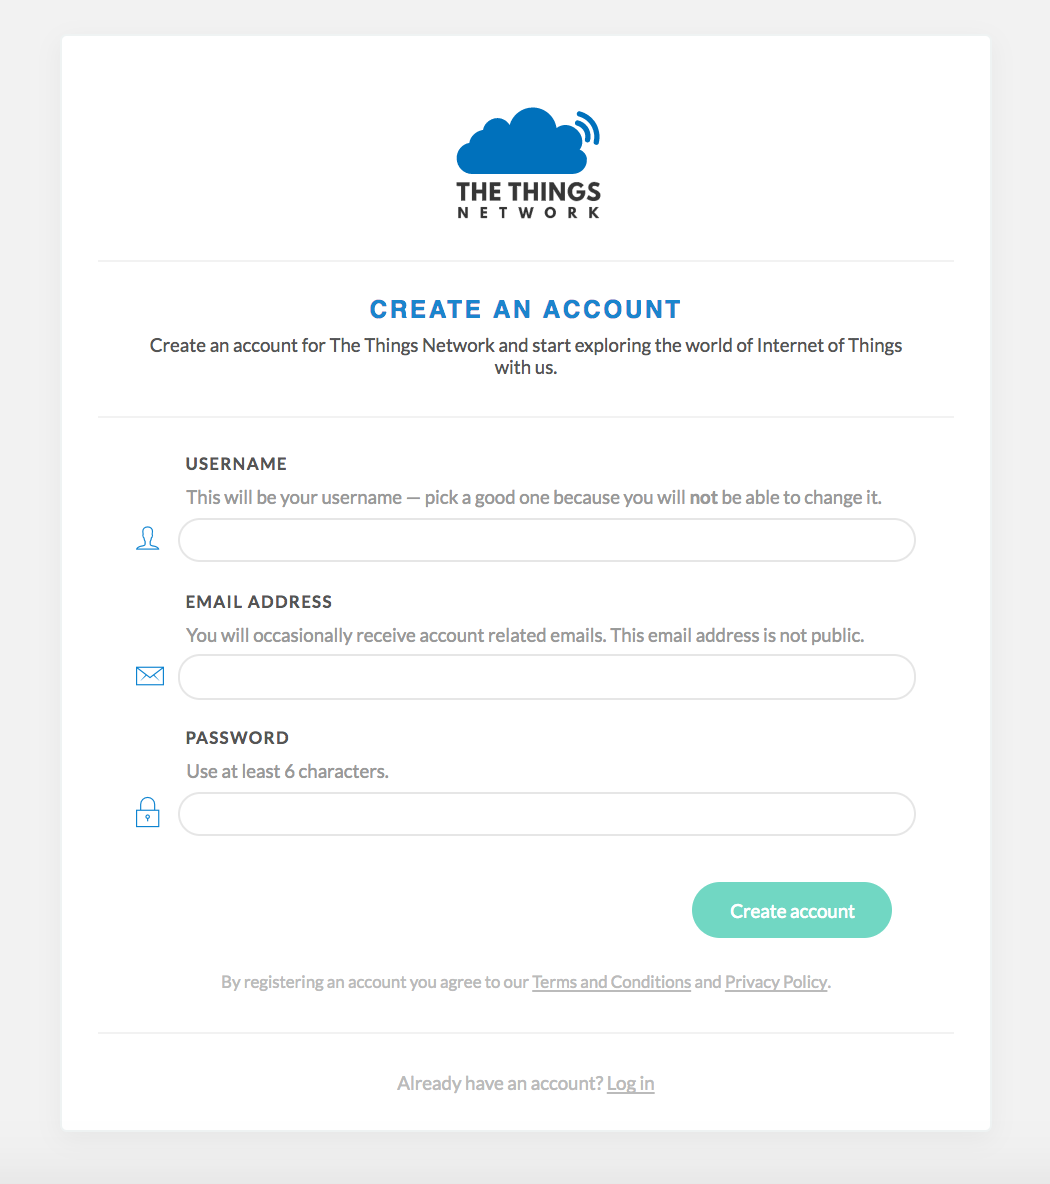
Once an account has been registered, the nano-gateway can then be registered. To do this, navigate to the TTN Console web page.
Registering the Gateway
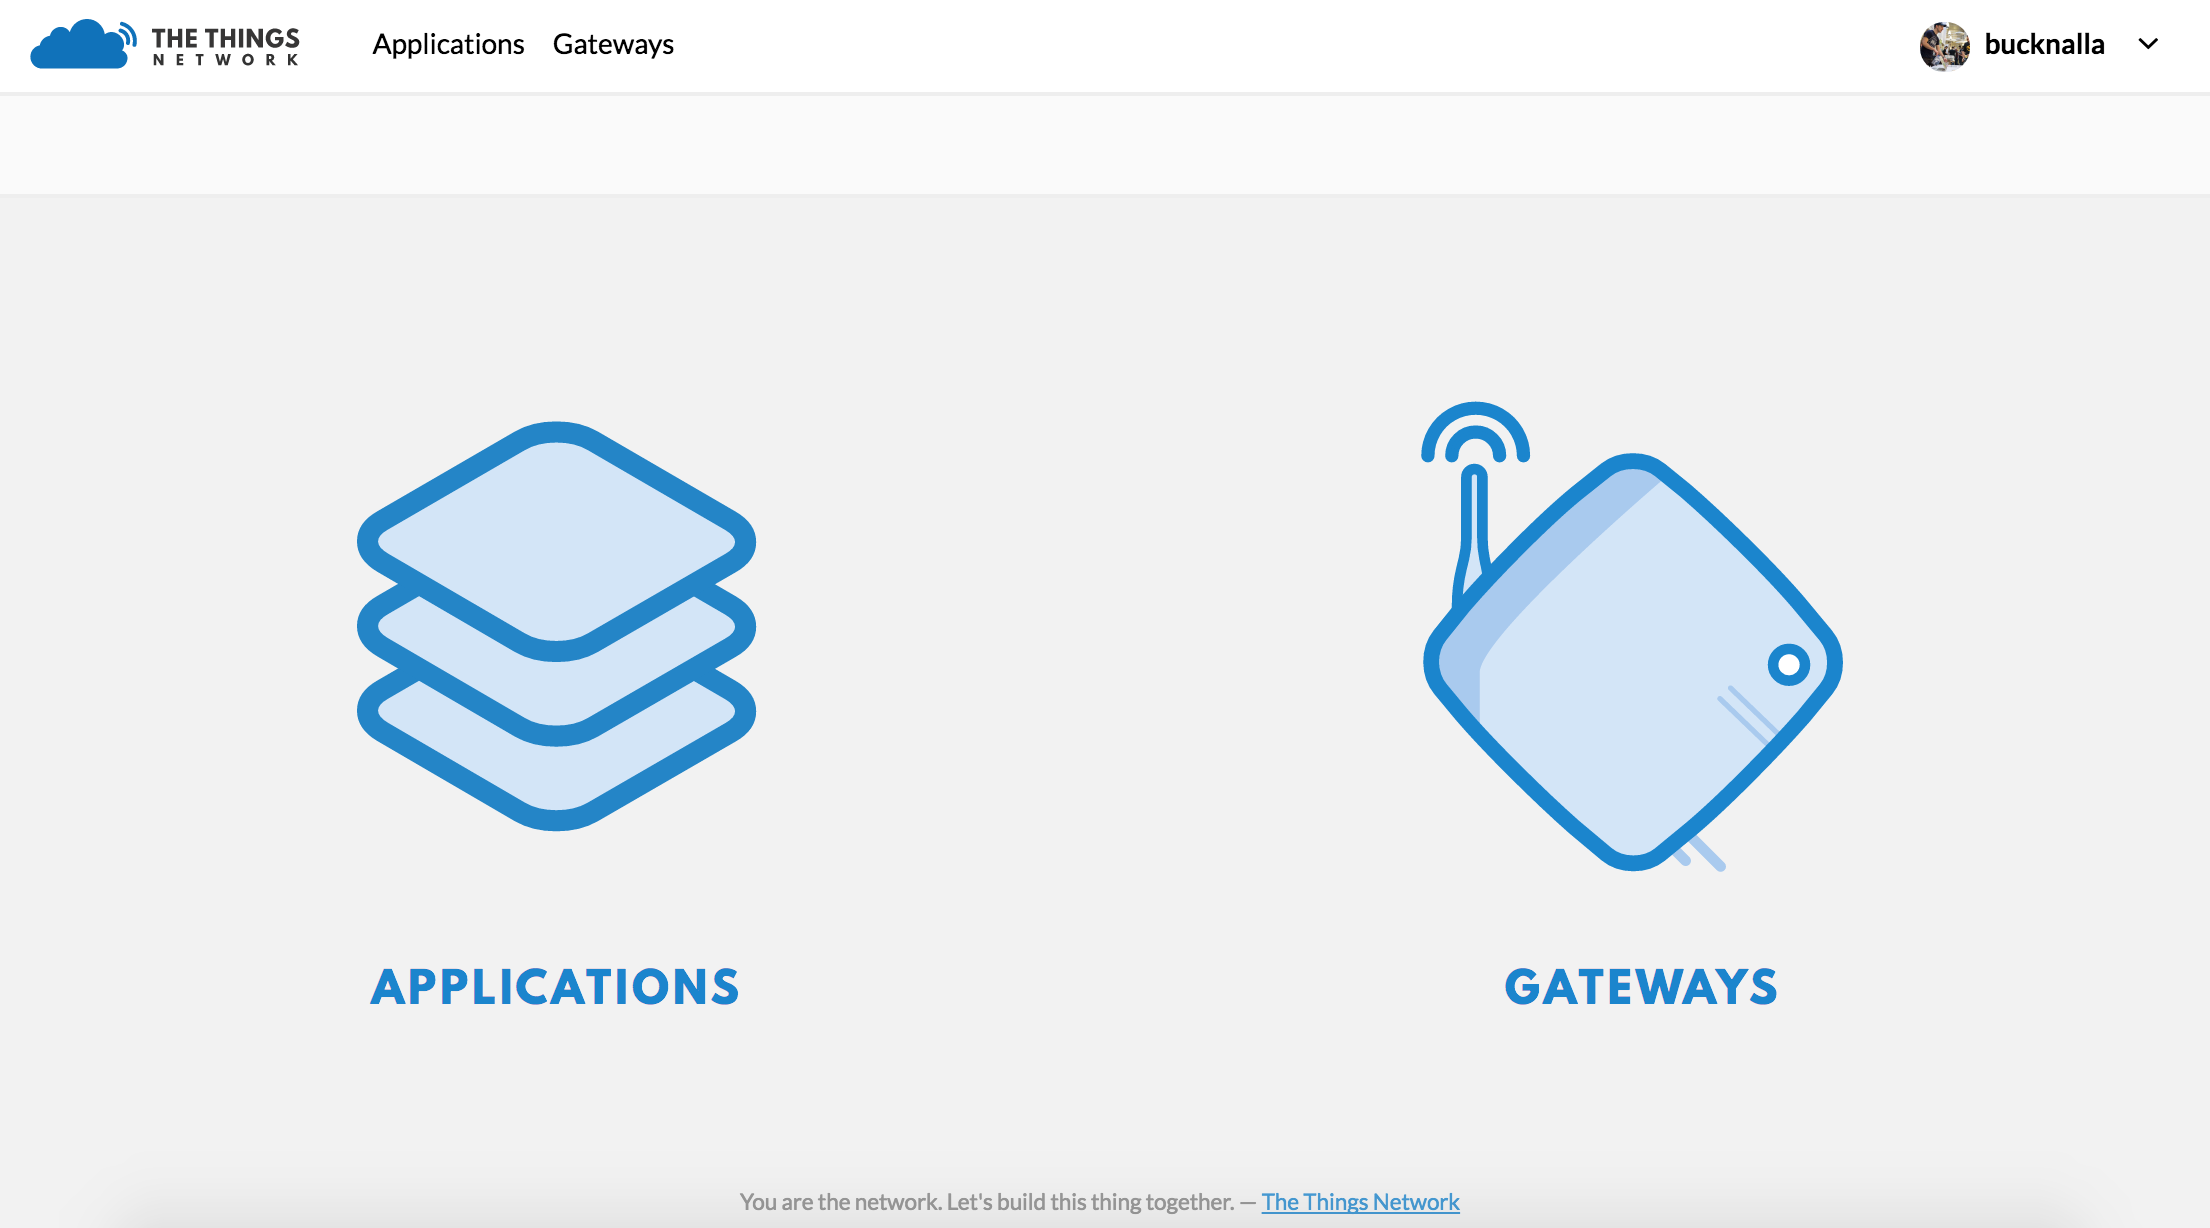
Inside the TTN Console, there are two options, applications and gateways. Select gateways and then click on register gateway. This will allow for the set up and registration of a new nano-gateway.
On the Register Gateway page, you will need to set the following settings:
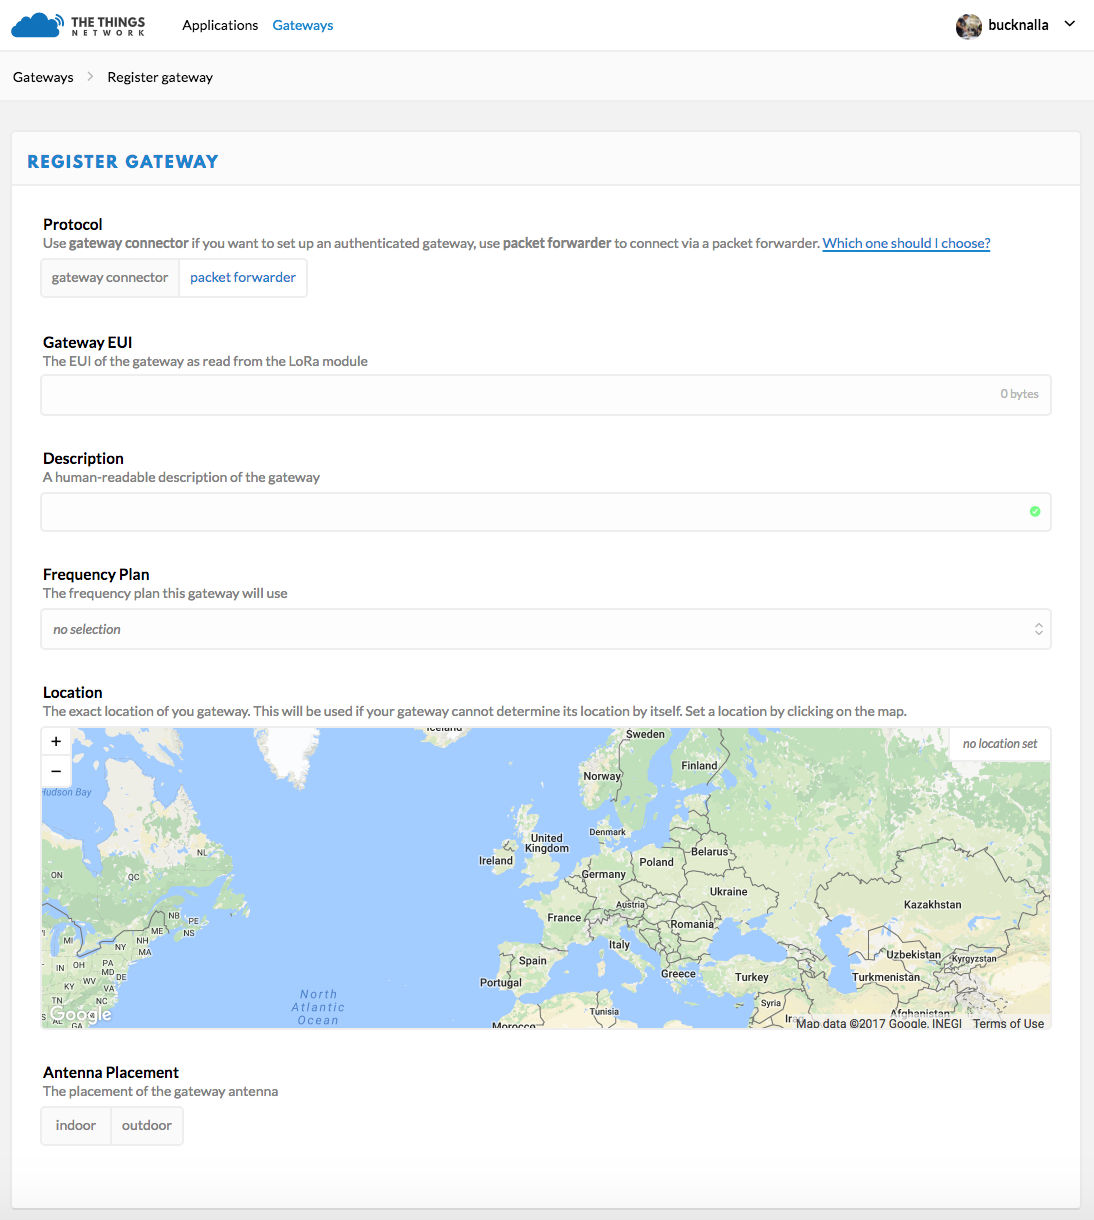
These are unique to each gateway, location and country specific frequency. Please verify that correct settings are selected otherwise the gateway will not connect to TTN.
| Option | Value |
|---|---|
| Protocol | Packet Forwarder |
| Gateway EUI | User Defined (must match config.py) |
| Description | User Defined |
| Frequency Plan | Select Country (e.g. EU - 868 MHz) |
| Location | User Defined |
| Antenna Placement | Indoor or Outdoor |
Once these settings have been applied, click Register Gateway. A Gateway Overview page will appear, with the configuration settings showing. Next click on the Gateway Settings and configure the Router address to match that of the gateway (default - router.eu.thethings.network).
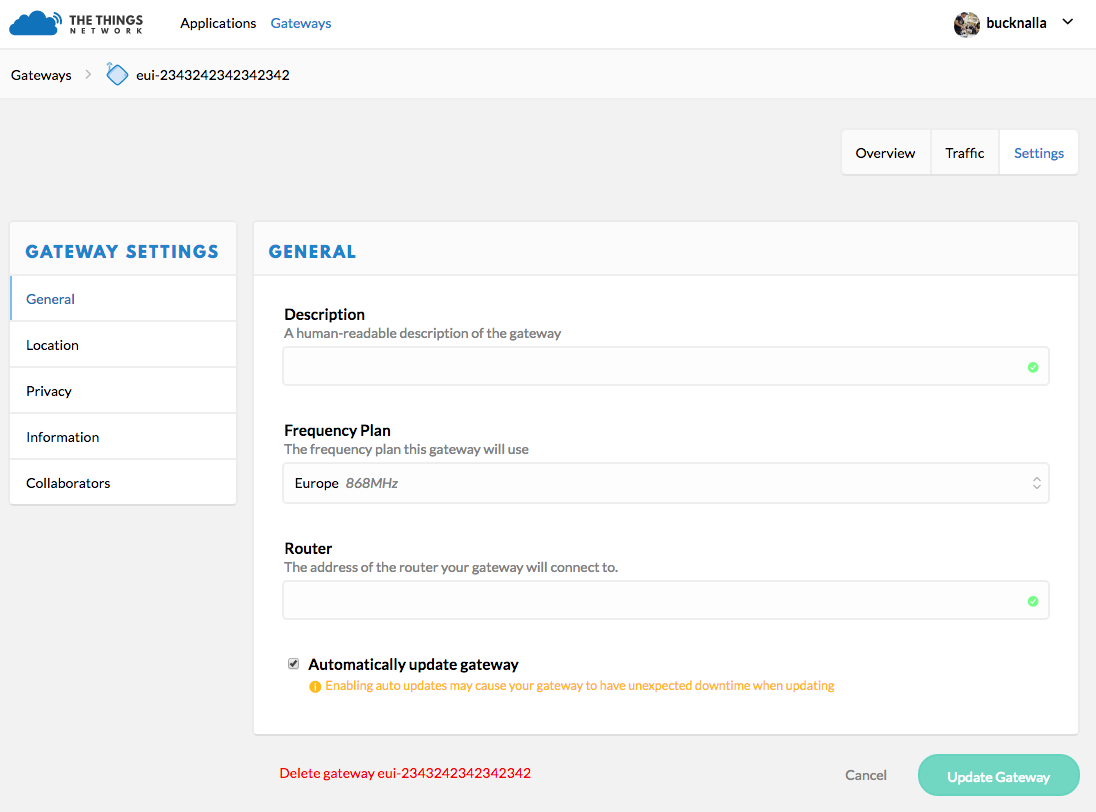
The Gateway should now be configured. Next one or more nodes can now be configured to use the nano-gateway and TTN applications may be built.
LoPy Node
There are two methods of connecting LoPy devices to the nano-gateway, Over the Air Activation (OTAA) and Activation By Personalisation (ABP). The code and instructions for registering these methods are shown below, followed by instruction for how to connect them to an application on TTN.
It’s important that the following code examples (also on GitHub) are used to connect to the nano-gateway as it only supports single channel connections.
OTAA (Over The Air Activation)
When the LoPy connects an application (via TTN) using OTAA, the network configuration is derived automatically during a handshake between the LoPy and network server. Note that the network keys derived using the OTAA methodology are specific to the device and are used to encrypt and verify transmissions at the network level.
""" OTAA Node example compatible with the LoPy Nano Gateway """

from network import LoRa
import socket
import binascii
import struct
import time

# Initialize LoRa in LORAWAN mode.
lora = LoRa(mode=LoRa.LORAWAN)

# create an OTA authentication params
dev_eui = binascii.unhexlify('AA BB CC DD EE FF 77 78'.replace(' ','')) # these settings can be found from TTN
app_eui = binascii.unhexlify('70 B3 D5 7E F0 00 3B FD'.replace(' ','')) # these settings can be found from TTN
app_key = binascii.unhexlify('36 AB 76 25 FE 77 77 68 81 68 3B 49 53 00 FF D6'.replace(' ','')) # these settings can be found from TTN

# set the 3 default channels to the same frequency (must be before sending the OTAA join request)
lora.add_channel(0, frequency=868100000, dr_min=0, dr_max=5)
lora.add_channel(1, frequency=868100000, dr_min=0, dr_max=5)
lora.add_channel(2, frequency=868100000, dr_min=0, dr_max=5)

# join a network using OTAA
lora.join(activation=LoRa.OTAA, auth=(dev_eui, app_eui, app_key), timeout=0)

# wait until the module has joined the network
while not lora.has_joined():
    time.sleep(2.5)
    print('Not joined yet...')

# remove all the non-default channels
for i in range(3, 16):
    lora.remove_channel(i)

# create a LoRa socket
s = socket.socket(socket.AF_LORA, socket.SOCK_RAW)

# set the LoRaWAN data rate
s.setsockopt(socket.SOL_LORA, socket.SO_DR, 5)

# make the socket blocking
s.setblocking(False)

time.sleep(5.0)

""" Your own code can be written below! """

for i in range (200):
    s.send(b'PKT #' + bytes([i]))
    time.sleep(4)
    rx = s.recv(256)
    if rx:
        print(rx)
    time.sleep(6)
ABP (Activation By Personalisation)
Using ABP join mode requires the user to define the following values and input them into both the LoPy and the TTN Application:
- Device Address
- Application Session Key
- Network Session Key
""" ABP Node example compatible with the LoPy Nano Gateway """

from network import LoRa
import socket
import binascii
import struct
import time

# Initialize LoRa in LORAWAN mode.
lora = LoRa(mode=LoRa.LORAWAN)

# create an ABP authentication params
dev_addr = struct.unpack(">l", binascii.unhexlify('26 01 14 7D'.replace(' ','')))[0] # these settings can be found from TTN
nwk_swkey = binascii.unhexlify('3C74F4F40CAE2221303BC24284FCF3AF'.replace(' ','')) # these settings can be found from TTN
app_swkey = binascii.unhexlify('0FFA7072CC6FF69A102A0F39BEB0880F'.replace(' ','')) # these settings can be found from TTN

# join a network using ABP (Activation By Personalization)
lora.join(activation=LoRa.ABP, auth=(dev_addr, nwk_swkey, app_swkey))

# remove all the non-default channels
for i in range(3, 16):
    lora.remove_channel(i)

# set the 3 default channels to the same frequency
lora.add_channel(0, frequency=868100000, dr_min=0, dr_max=5)
lora.add_channel(1, frequency=868100000, dr_min=0, dr_max=5)
lora.add_channel(2, frequency=868100000, dr_min=0, dr_max=5)

# create a LoRa socket
s = socket.socket(socket.AF_LORA, socket.SOCK_RAW)

# set the LoRaWAN data rate
s.setsockopt(socket.SOL_LORA, socket.SO_DR, 5)

# make the socket blocking
s.setblocking(False)

""" Your own code can be written below! """

for i in range (200):
    s.send(b'PKT #' + bytes([i]))
    time.sleep(4)
    rx = s.recv(256)
    if rx:
        print(rx)
    time.sleep(6)
TTN Applications
Now that the gateway & nodes have been setup, a TTN Application can be built; i.e. what happens to the LoRa data once it is received by TTN. There are a number of different setups/systems that can be used, however the following example demonstrates the HTTP request integration.
Registering an Application
Selecting the Applications tab at the top of the TTN console, will bring up a screen for registering applications. Click register and a new page, similar to the one below, will open.
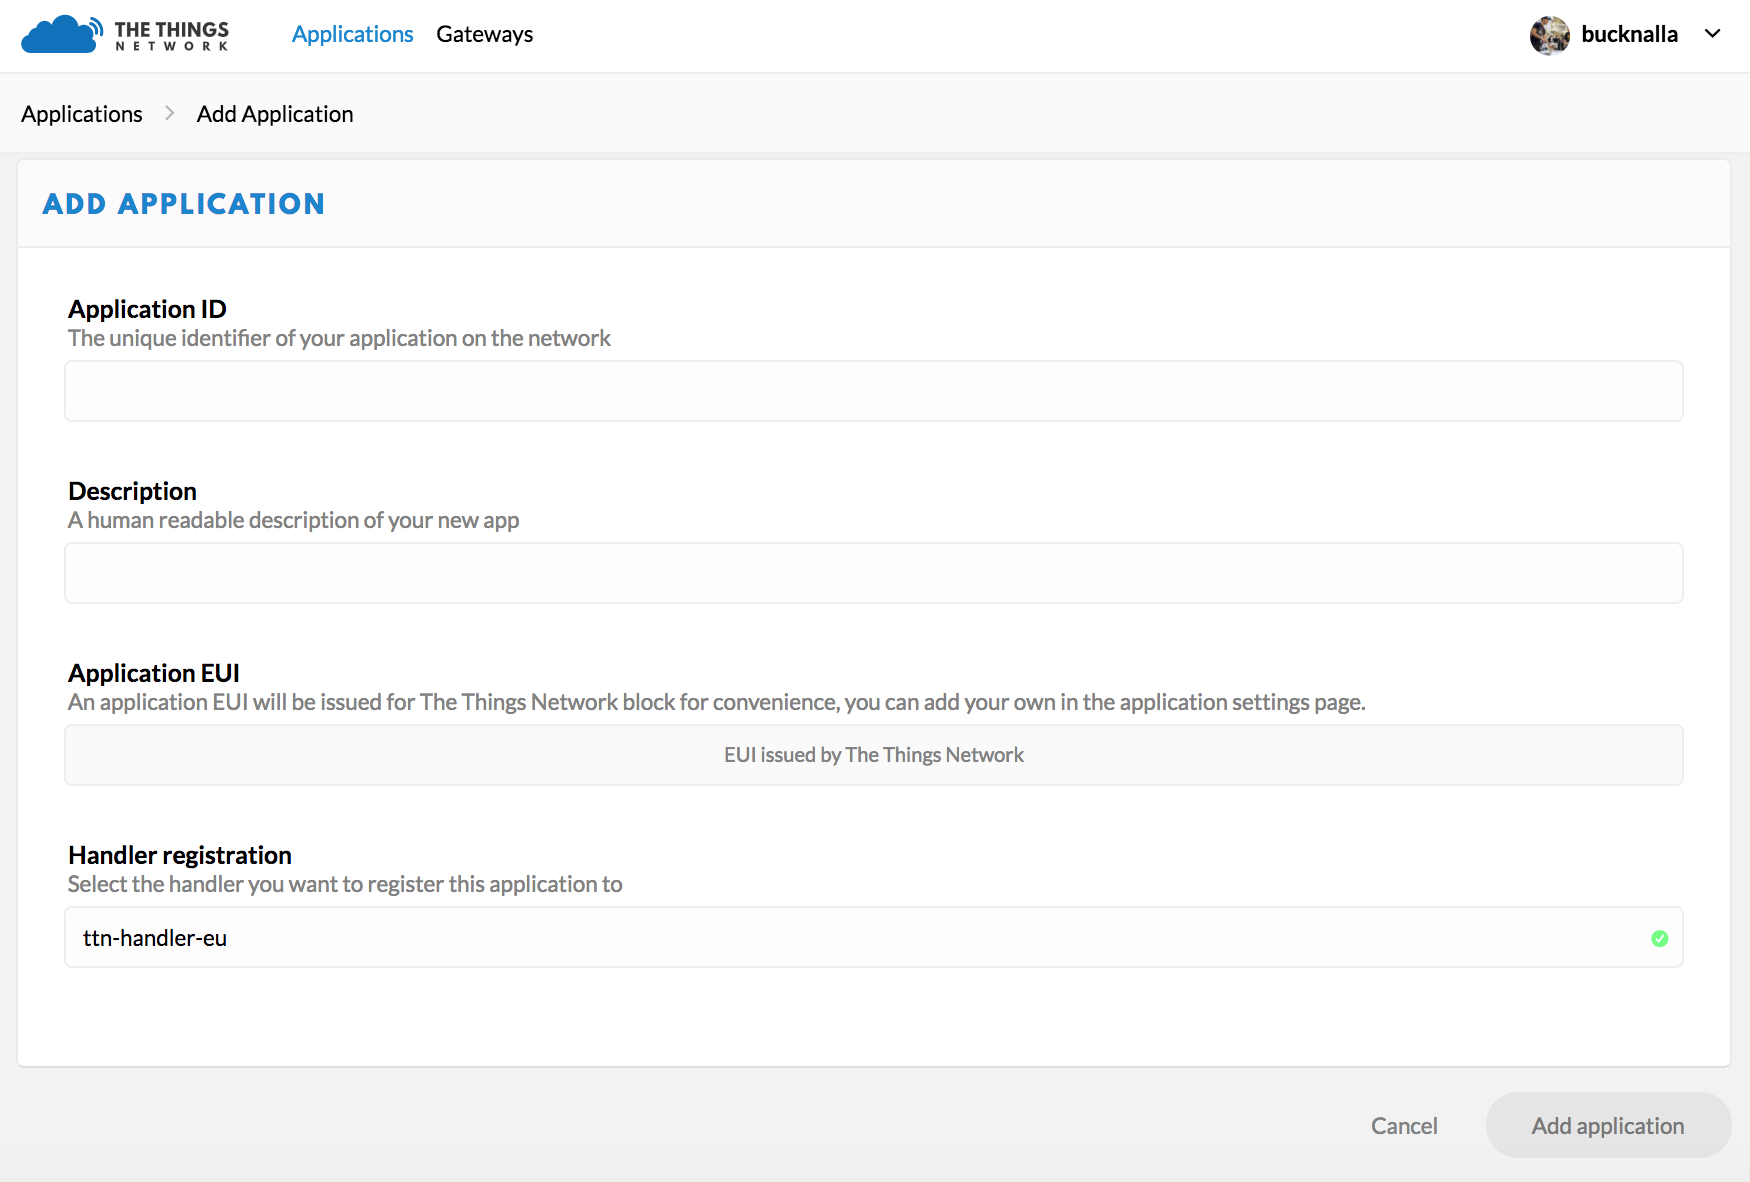
Enter a unique Application ID as well as a Description & Handler Registration.
Now the LoPy nodes must be registered to send data up to the new Application.
Registering Devices (LoPy)
To connect nodes to the nano-gateway, devices need to be added to the application. To do this, navigate to the Devices tab on the Application home page and click the Register Device button.

In the Register Device panel, complete the forms for the Device ID and the Device EUI. The Device ID is user specified and is unique to the device in this application. The Device EUI is also user specified but must consist of exactly 8 bytes, given in hexadecimal.
Once the device has been added, change the Activation Method between OTAA and ABP depending on user preference. This option can be found under the Settings tab.
Adding Application Integrations
Now that the data is arriving on the TTN Backend, TTN can be managed as to where data should be delivered to. To do this, use the Integrations tab within the new Application’s settings.
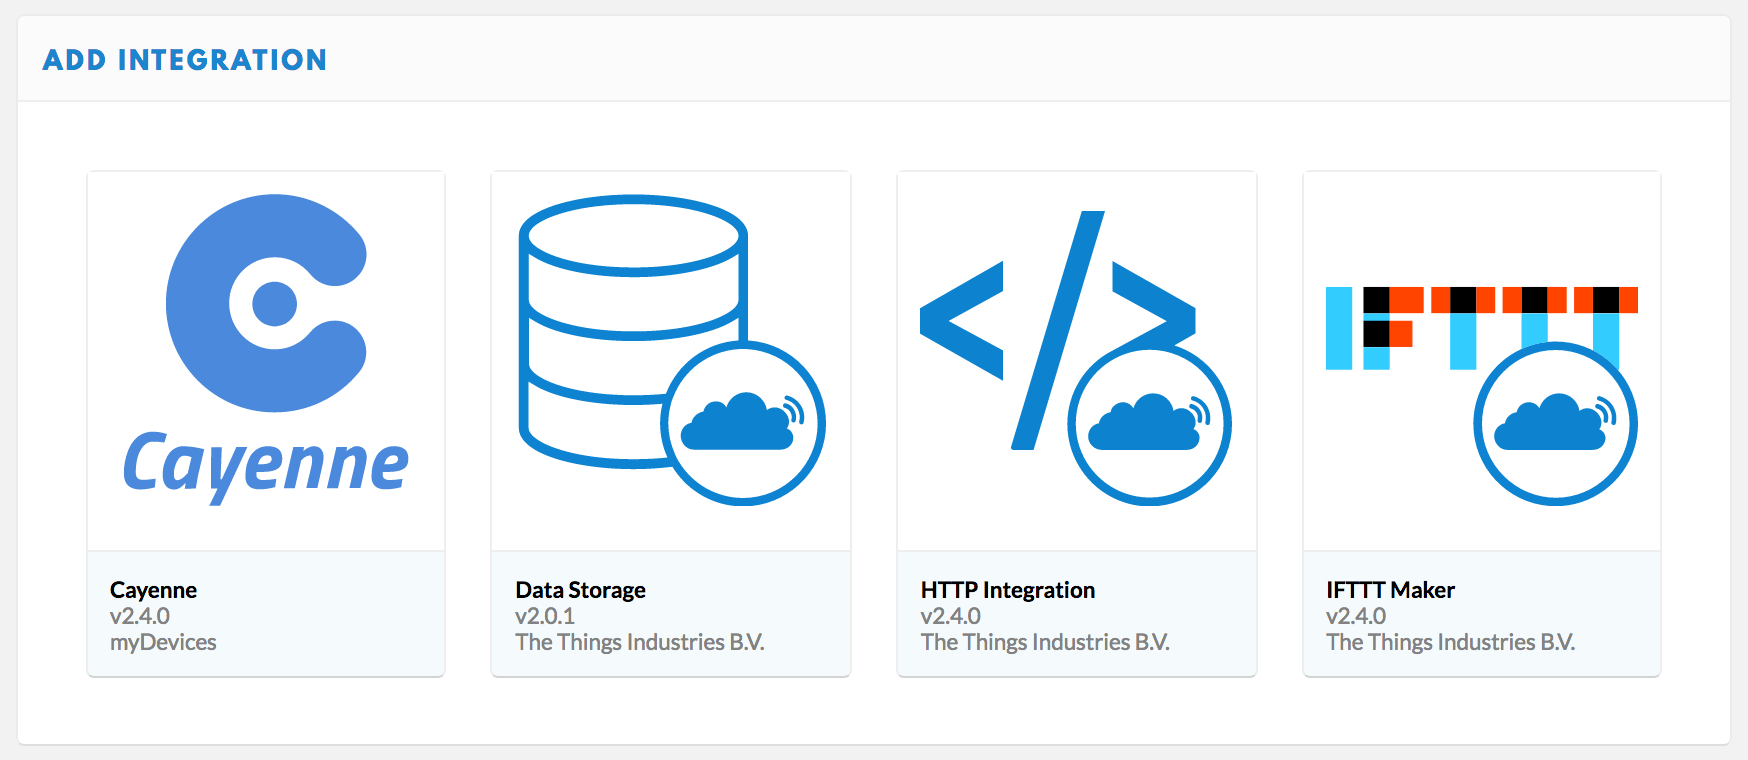
Upon clicking add integration, a screen with 4 different options will appear. These have various functionality and more information about them can be found on the TTN website/documentation.
For this example, use the HTTP Integration to forward the LoRaWAN Packets to a remote server/address.
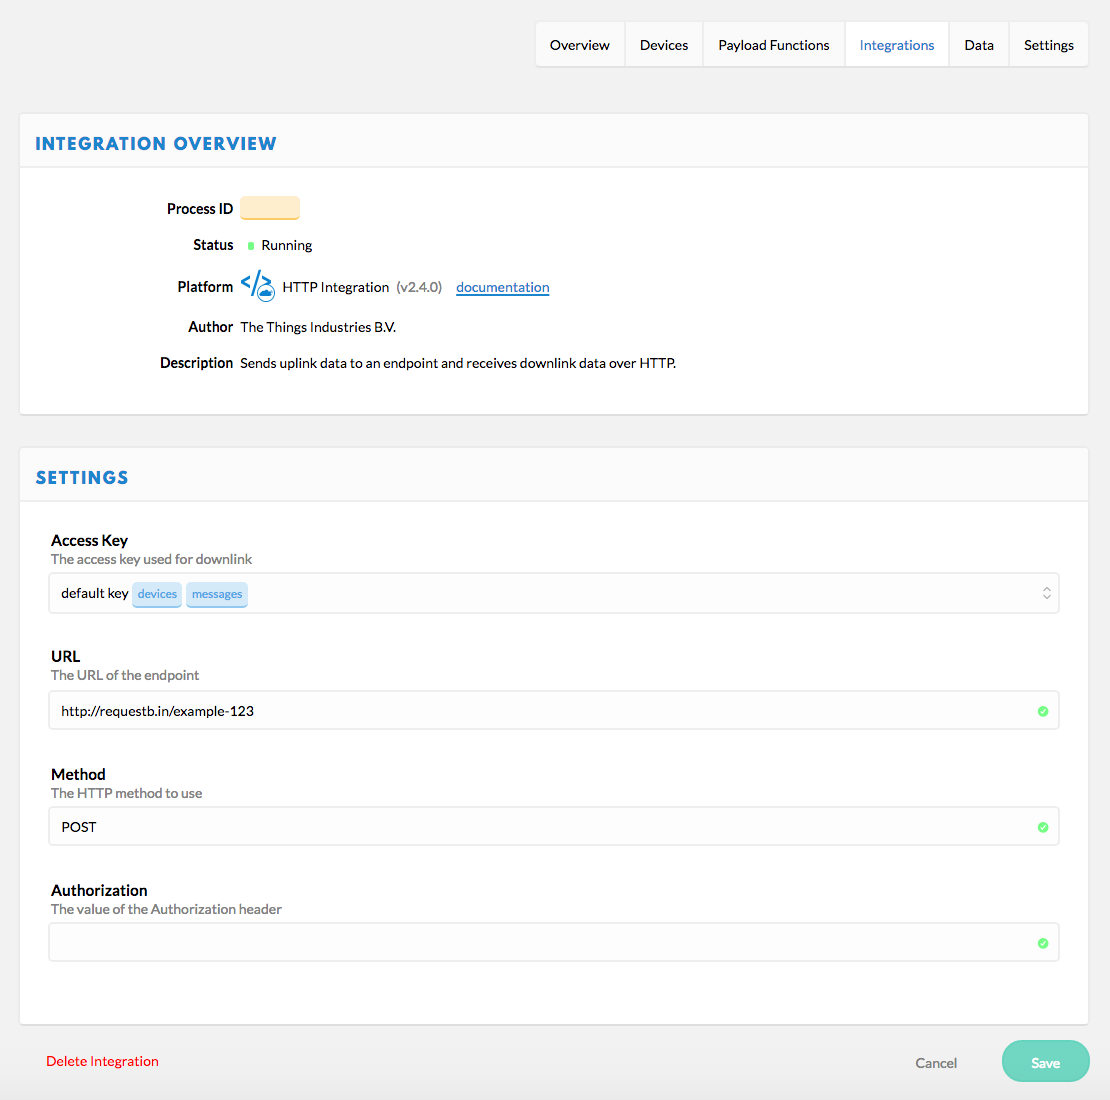
Click HTTP Integration to connect up an endpoint that can receive the data.
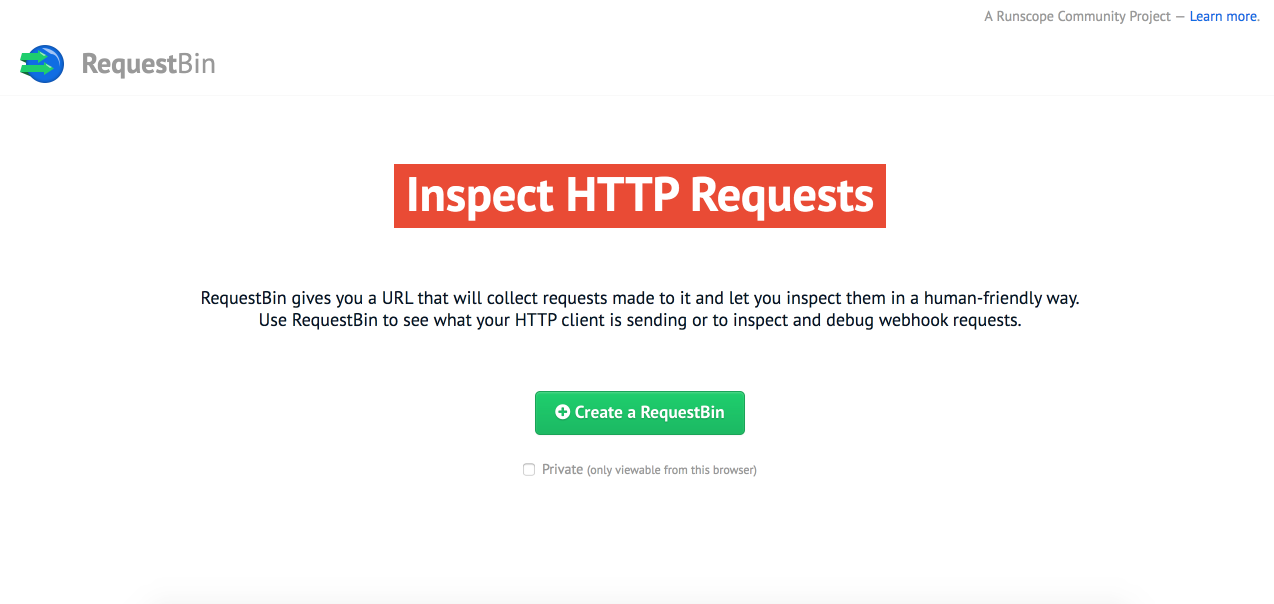
For testing, a website called RequestBin may be used to receive the data that TTN forwards (via POST Request). To set this up, navigate to RequestBin and click the Create a RequestBin.
Copy the URL that is generated and past this into the URL form under the Application Settings.

This is the address that TTN will forward data onto. As soon as a LoPy starts sending messages, TTN will forward these onto RequestBin and they will appear at the unique RequestBin URL.