My Blog: projects, sketches, works in progress, thoughts, and inspiration.

Tagged: generative

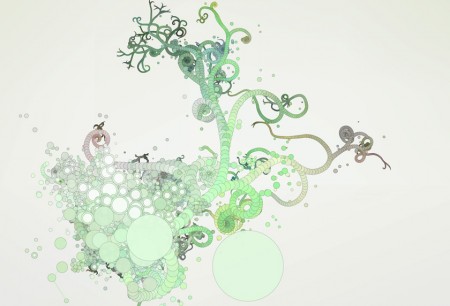
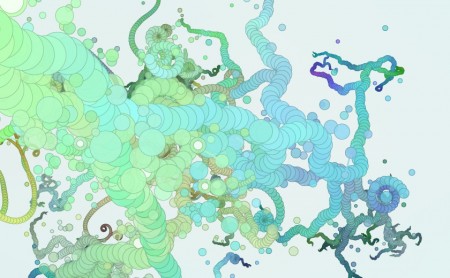
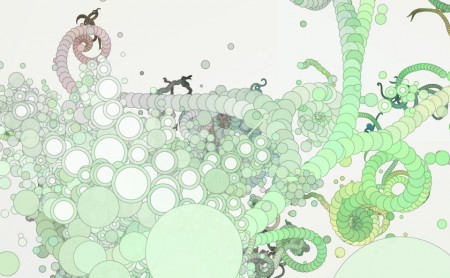
Generative Image created in ProcessingGenerative Images created in Processing. Click to Enlarge.

I was recently asked to create some work for a collaborative project. I decided to create some generative work in Processing and try out some ideas I’ve had in the back of my mind. The script wraps a number of different generative patterns into one system. Each circle has instructions for how it behaves and creates new circles and these instructions change as they grow. The images it creates are more complex and dynamic that a lot of my preview sketches.

A slightly more technical explanation: The script has an array of objects, I’ll call them nodes. Each node has a couple of functions for initializing itself, branching new nodes, updating, and rendering. The container creates a new node which grows, branches, and then becomes inactive. The newly branched nodes grow and branch and the cycle continues, growing the image.

The fun part is that the basic ‘node’ object can be extended to any number of variations all of which can still be handled as the generic type by the container in the same way. The container tells a node to ‘branch’ and it may create new nodes randomly around itself or touching it’s sides or in a set direction to grow tendrils. Each variation of node also sometimes branches to different types so one structure will morph into another. Other functions, like rendering, can also be extended or overwritten to create different behavior.

Generative Image created in Processing

Modular Generative Image created in Processing

Generative Work created in Processing

I think there’s a lot of potential in this kind of polymorphic system. I’ll play around with it some more and maybe post some more technical examples.

Post Page »

Wide Angle of Exhibition of Generative Works

I have an exhibition up at the Maryland Institute College of Art. One of a number of exhibitions awarded to students. The exhibitions consists of a number of large scale prints of work I have done with Processing over the last two years. These works are largely based on particle systems which create intricate and organic patterns. Many of the programs written to generate these images can be played with at anthonymattox.com/interactive.

More information on particular works can be found in my portfolio and in related posts in my blog

The exhibition runs until Oct. 15. There will be a reception (with snacks!) on Friday Sept. 24 from 5-7pm.

It’s located in the Gateway building at MICA, 1501 Mt. Royal Ave, Baltimore MD.

The prints in the show are for sale. Contact me if you are interested. The large prints are all unique compositions and are for sale for $300. The smaller poster prints are in editions of 20 prints for $40′s each. All are high quality ink jet prints on archival matte paper.

Close up on Large Print of Processing Work

Exhibition

Exhibition with Cell Cluster Prints

Post Page »

On my way to developing my 3d tree script I first added a function to my basic particle system to cause the particles to branch. I went back and polished up the rendering of this as it looked interesting in 2d.

As usual, the script is built in Processing. Particles are generated by clicking on the screen and then they spread out pushing each other away. A slight perlin noise field gives the strands a more interesting motion and texture. Each frame is drawn successively on the screen, tracing the particles motion, without clearing the background. Each particle is rendered as a filled ellipse with a lighter transparent outline, creating a slightly 3d feel as the outlines get denser toward the edges.

To render the images with a higher resolution I created a global scale variable. The width and height of the applet are multiplied by this variable and then the scale function is called with that variable at the beginning of the draw loop. This lets me switch quickly between a manageable size to see what’s going on and the high res version. On my mac, entering expose fits the oversize window onto my screen. It’s far from a perfect system but it works. Exporting vectors is a much better rout, but this application is to complex for that to be feasible.

Now pictures. Click to see them bigger.

filaments: budding particles 0

filaments: budding particles 1
Read On »

Read On (Post Continues) »

Wave Pool 2

09-15-09

Tagged: , ,

This sketch builds off one of my recent experimentations in wave motion. In the script an array of waves is created by various inputs. Each wave effects the array of ‘fluid’ and creates a rippling structure. Here the structure is rendered not just after all the waves have been calculated but after each wave is processed.

The result is a stack of rippling points flowing between each other. I first just rendered each wave as a thin bar, to make sure everything was working properly, and then added a color property to the wave class. I dropped the symmetry to avoid some unintended interpretations. The script runs much slower, as I should have expected. I’ll try and streamline things a little (although it’s already very simple) and put it onto my interactive site. I might just have to put some limits on it so people don’t crash their.

Now a bunch of pictures!

waves_2-medium

waves_3-medium

waves_6-medium

Read On »

Read On (Post Continues) »

I cracked open the old Processing Particle System again and tried something a little bit different.

Beginning with particles moving through a Perlin Flow Field I moved them into 3d. Since my particle system is built on the PVector class, adding the third dimension was a simple matter of adding a third parameter to every call to a new PVector and adding either the P3D or OpenGL (used for all the images here) rendering engine. An extra force pushes the particles up through space an array stores the previous locations for each particle. As particles die an instance of another object is created, exclusively for storing and rendering these paths.

Another addition causes the growing strands to bud. The budded particles inherit the properties from the parent. Changing the forces between particles, the branching rate, and the environmental properties creates many different structures.

Processing Particle Generated Tree

Processing Particle Generated Tree

As the script runs, a cloud of particles drifts up through space leaving behind a colorful twisted shrubbery. Using the mouse and keyboard the camera can be moved around the structure while it generates itself.

Read On »

Read On (Post Continues) »

Until recently I’ve just been saving all of my images out of Processing using a simple saveFrame command and throwing all of my images into one giant folder. Looking into this folder I see a few key problems. I’ve come up with a little system to help me keep better track of renderings of my generative works. Unfortunately it won’t work retroactively, but it’ll be useful for future work, and perhaps it can be helpful to some other Processors.

This very adding this very simple snipped to a Processing sketch will save out an png of the render window whenever the ‘s’ key is pressed. #### will be replaced by the current frame number.

void keyPressed() {
  if (key=='s') {
    saveFrame("name_of_sketch-####.png");
  }
}

This works out pretty nicely, but if you run the sketch twice and just happen to press ‘s’ on the same frame the first image will be overwritten. Another issue, which might not seem to bad until you have a huge library of images built up, is the order of the files. If the sketch is run many times, all the saved images will be mixed together. Ideally images saved from one run of the sketch should be named sequentially so all the images from one run can be seen together.

Adding an arbitrary value to the particular run and sticking it into the file name fixes these two issues. Many of my scripts include a function to reset the program so it can be run a few times without being completely restarted. In this case, incrementing this arbitrary global value maintains the order of a set of runs.

int G;

void setup() {
  G=floor(random(10000,90000));
  //noiseSeed(G);

}

void draw() {
}

void keyPressed() {
  if (key=='s') {
    saveFrame("name_of_sketch-"+G+"-####.png");
  } else
  if (keyCode==BACKSPACE || keyCode==DELETE) {
    // code to reset script
    G++;
  }
}

This system isn’t perfect, but is a vast organizational improvement for just a few extra lines of code

Another useful trick, if you have a script which utilizes a lot of Perlin Noise, is the set the noiseSeed to a random integer (like G in the script above), and include that in the file name. This way, if you want to rerun the script with the same parameters later, you can always set G to the integer in the file name of a particular saved image.

Post Page »

After playing with binary cellular automata I thought I’d expand the script a little to accommodate more than two states of a pixel. Three loops are nested and each is iterated once for each state. If the index of each loop equals the three values above the current point the function returns the current state of a counter which is incremented in the innermost loop. In a binary system this is a little more complex than just testing each of the eight possible combinations, but is almost necessary when dealing with more states. I’ll post my code at the bottom of this post. But first, some pretty pictures.

processing cellular automata 4

processing cellular automata 3

processing cellular automata 2

Read On »

Read On (Post Continues) »

cellular automata evolutions

This afternoon I played around with 1d cellular automata. The program is creates an array of cells which corresponds to a row of pixels on the screen. Each new generation of the structure is represented by the next row of pixels and the value (black or white) of each pixel is based on the three directly above it. There are eight possibilities for the pattern of the three parent pixels and an array of eight values stores the results to each of these possibilities. Changing the rule-set and the values of the first generation creates vastly different images. The script I was using was very much based off of Dan Shiffman’s code.

cellular_automata-6333

Read On »

Read On (Post Continues) »

line wave

Here’s another rendering of my line wave script iterated quite a few times. In this rendering the image is blurred before each new set of lines and also inverted to create complimentary colors. There are two desktop wallpapers one of the pictured rendering and a similar one in light blue. Click the thumbnail on the left to download a zip file containing fullscreen and widescreen versions of the wallpaper. They might be a little busy for some, but I like them. What do you think?

Post Page »