The purpose of this page is to walk you through the steps to install your CPU on your motherboard. If at any point
the steps are not clear enough, and you don't know exactly what to do, consult the manual, DO NOT guess.
Even though AMD and Intel CPUs have different sockets the process of installing the CPUs is practically the same.
So, there is no need to have two separate lists. The steps for installing the CPU are as follows:
-
First you want to take a look at the CPU Socket, you want to look for an arrow in one of the corners that
looks something like the image to the right. There is a similar arrow on the CPU, and using the the two
arrows is how you know the correct orientation for the CPU to be in for installation as it matters.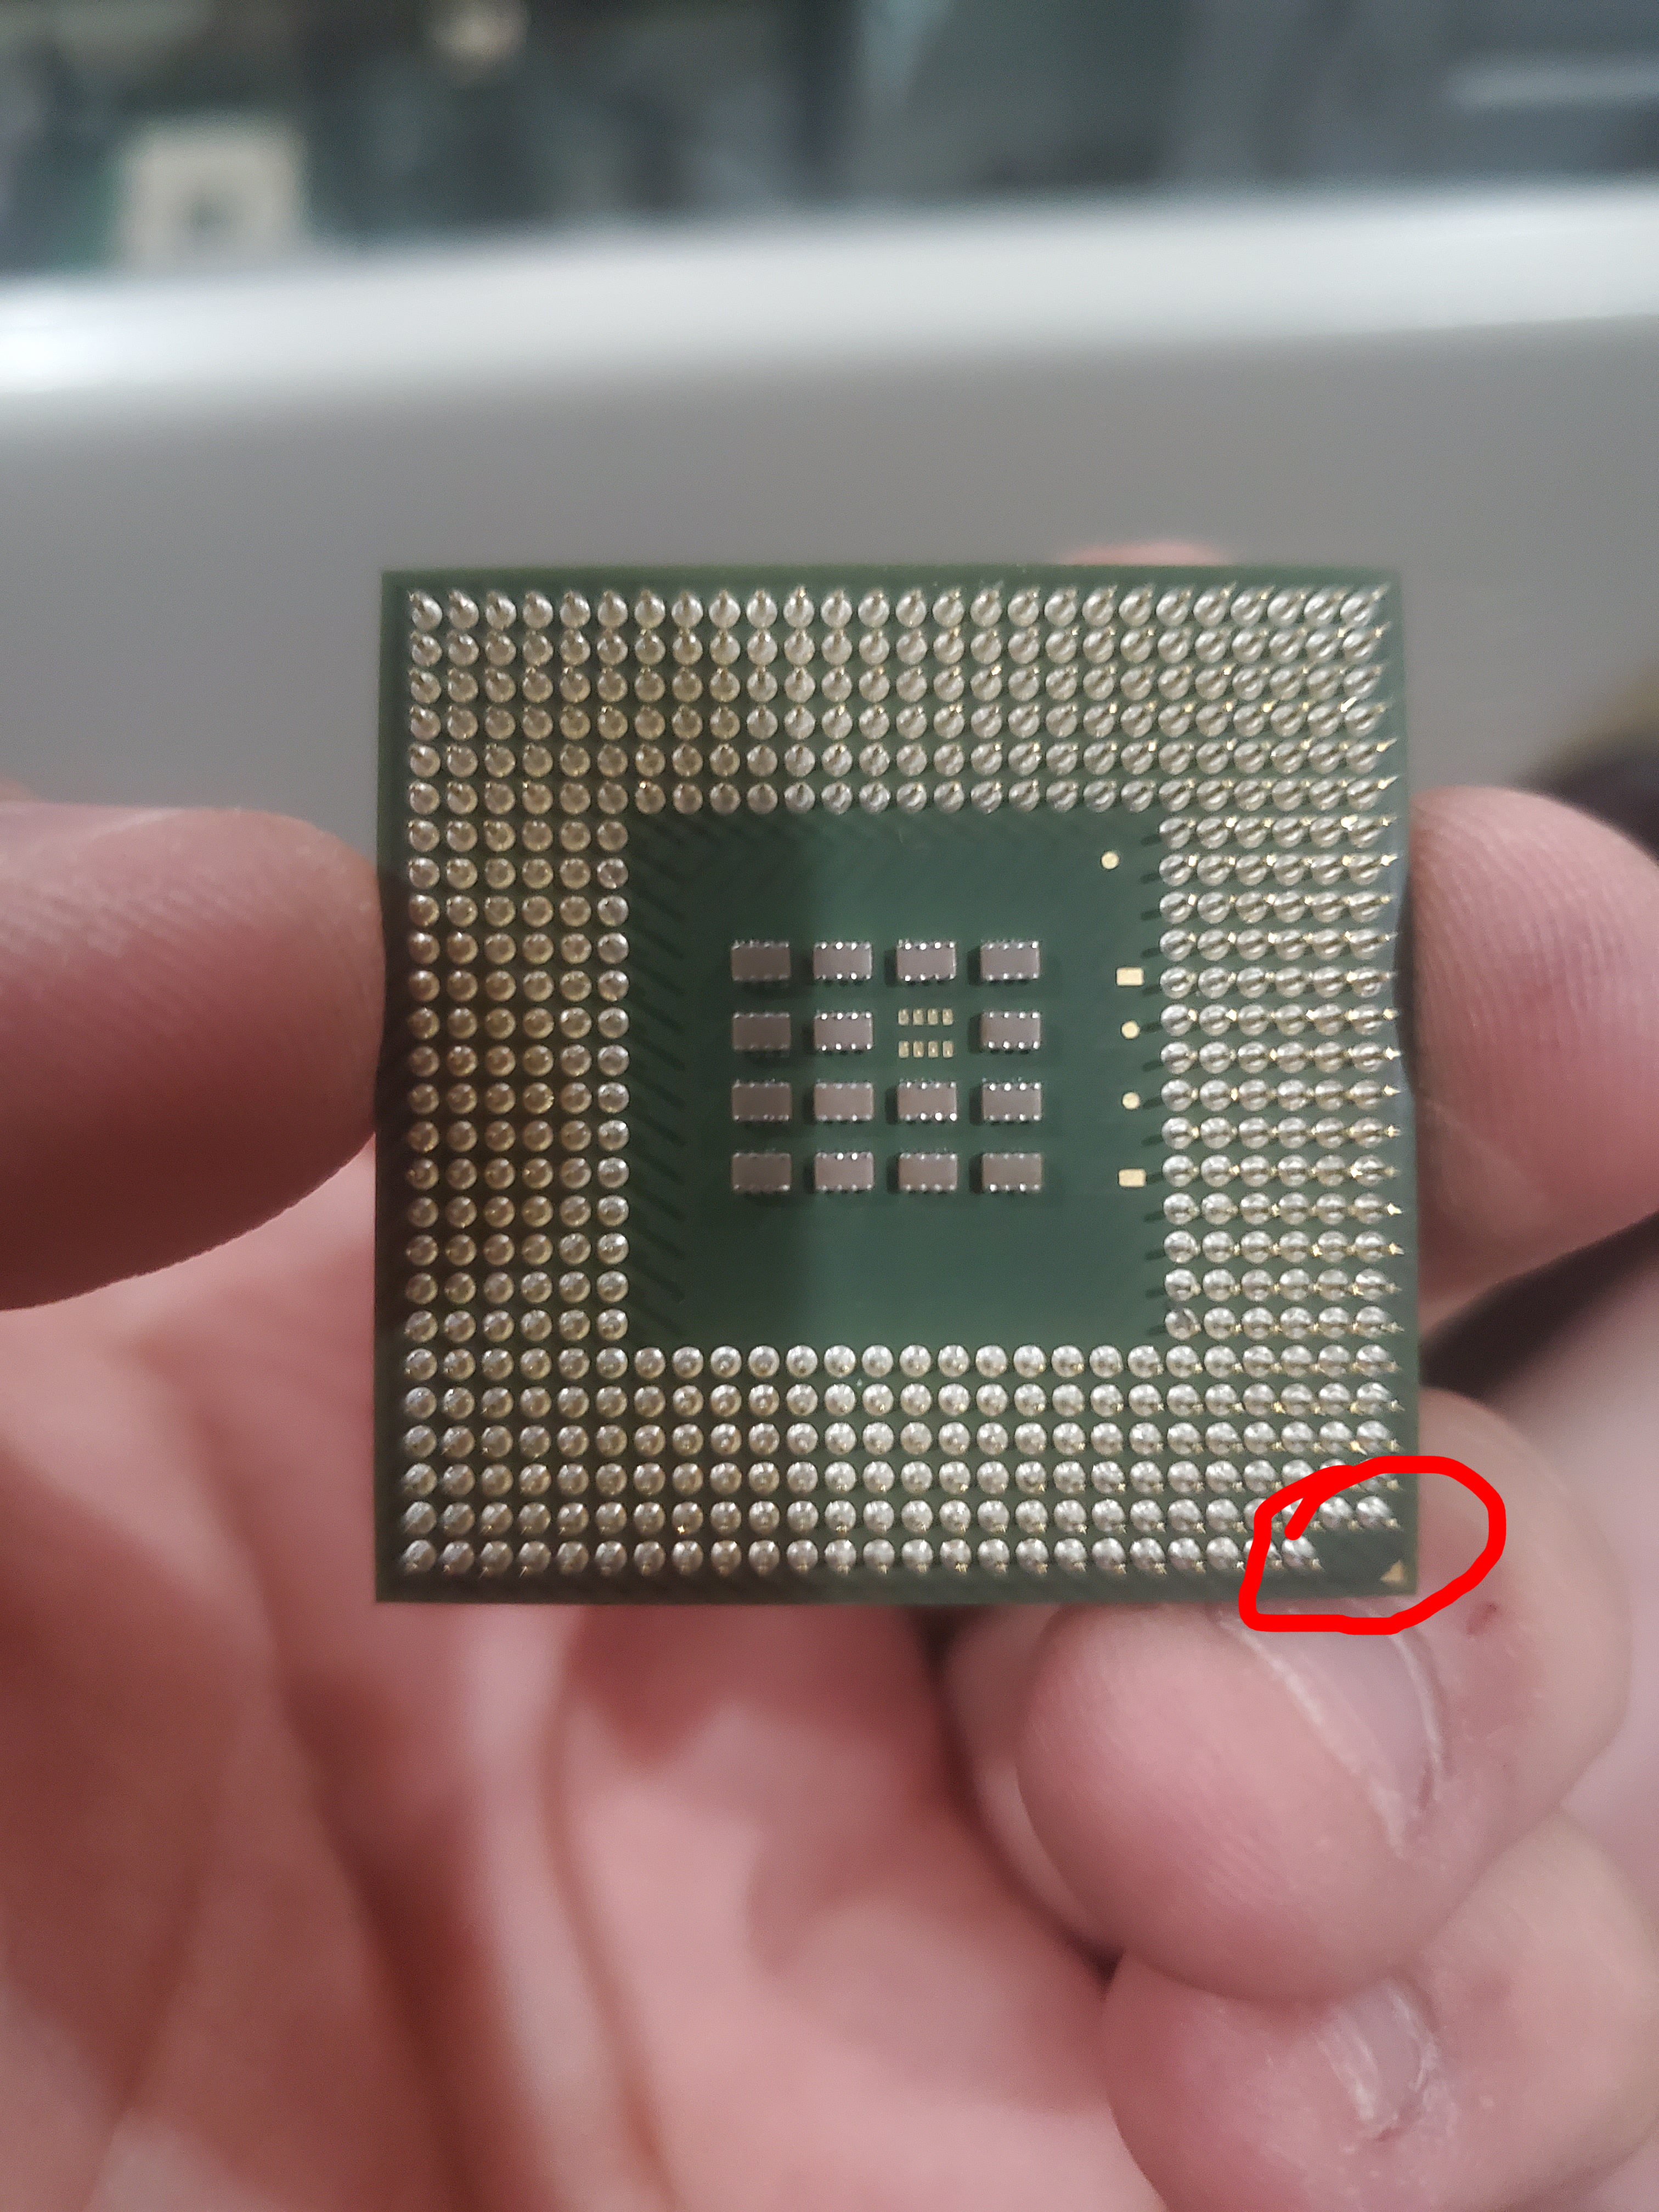
-
Next you want to lift-up the latch that is what anchors the CPU into the socket, and if it is an Intel CPU
lift up the cover as well. -
Lay down the CPU into the socket using the arrows in the corners of the socket and CPU to make sure it is
aligned correctly. - Finally pull down the cover (if an Intel Socket), and pull down the latch until you hear a click.
Congratulations, your CPU is now installed.