The goal of this page is to walk you through the process of installing the motherboard.
To reiterate, this is NOT a replacement for using the manual as the manuals provide
the specific instructions for your chosen component. It's just meant to lay down a path for
you to follow, so you have a general idea to where to go; the manuel's are your map so you
know exactly what you need to do next.
- Now that you are ready to install the motherboard, first lay the tower on its side, with the open side up.
Also, from the box of screws that came with the tower, grab all the screws that will be used to anchor the
the motherboard to the tower. To figure out what screws those are, reference the manual that came with the
case; it'll have a table in it that lists all the different types of screws, the number you should have
and what they are used for. -
Once you have the screws and the case is on its side, locate the holes in the tower that will be how the
motherboard is anchored to the case.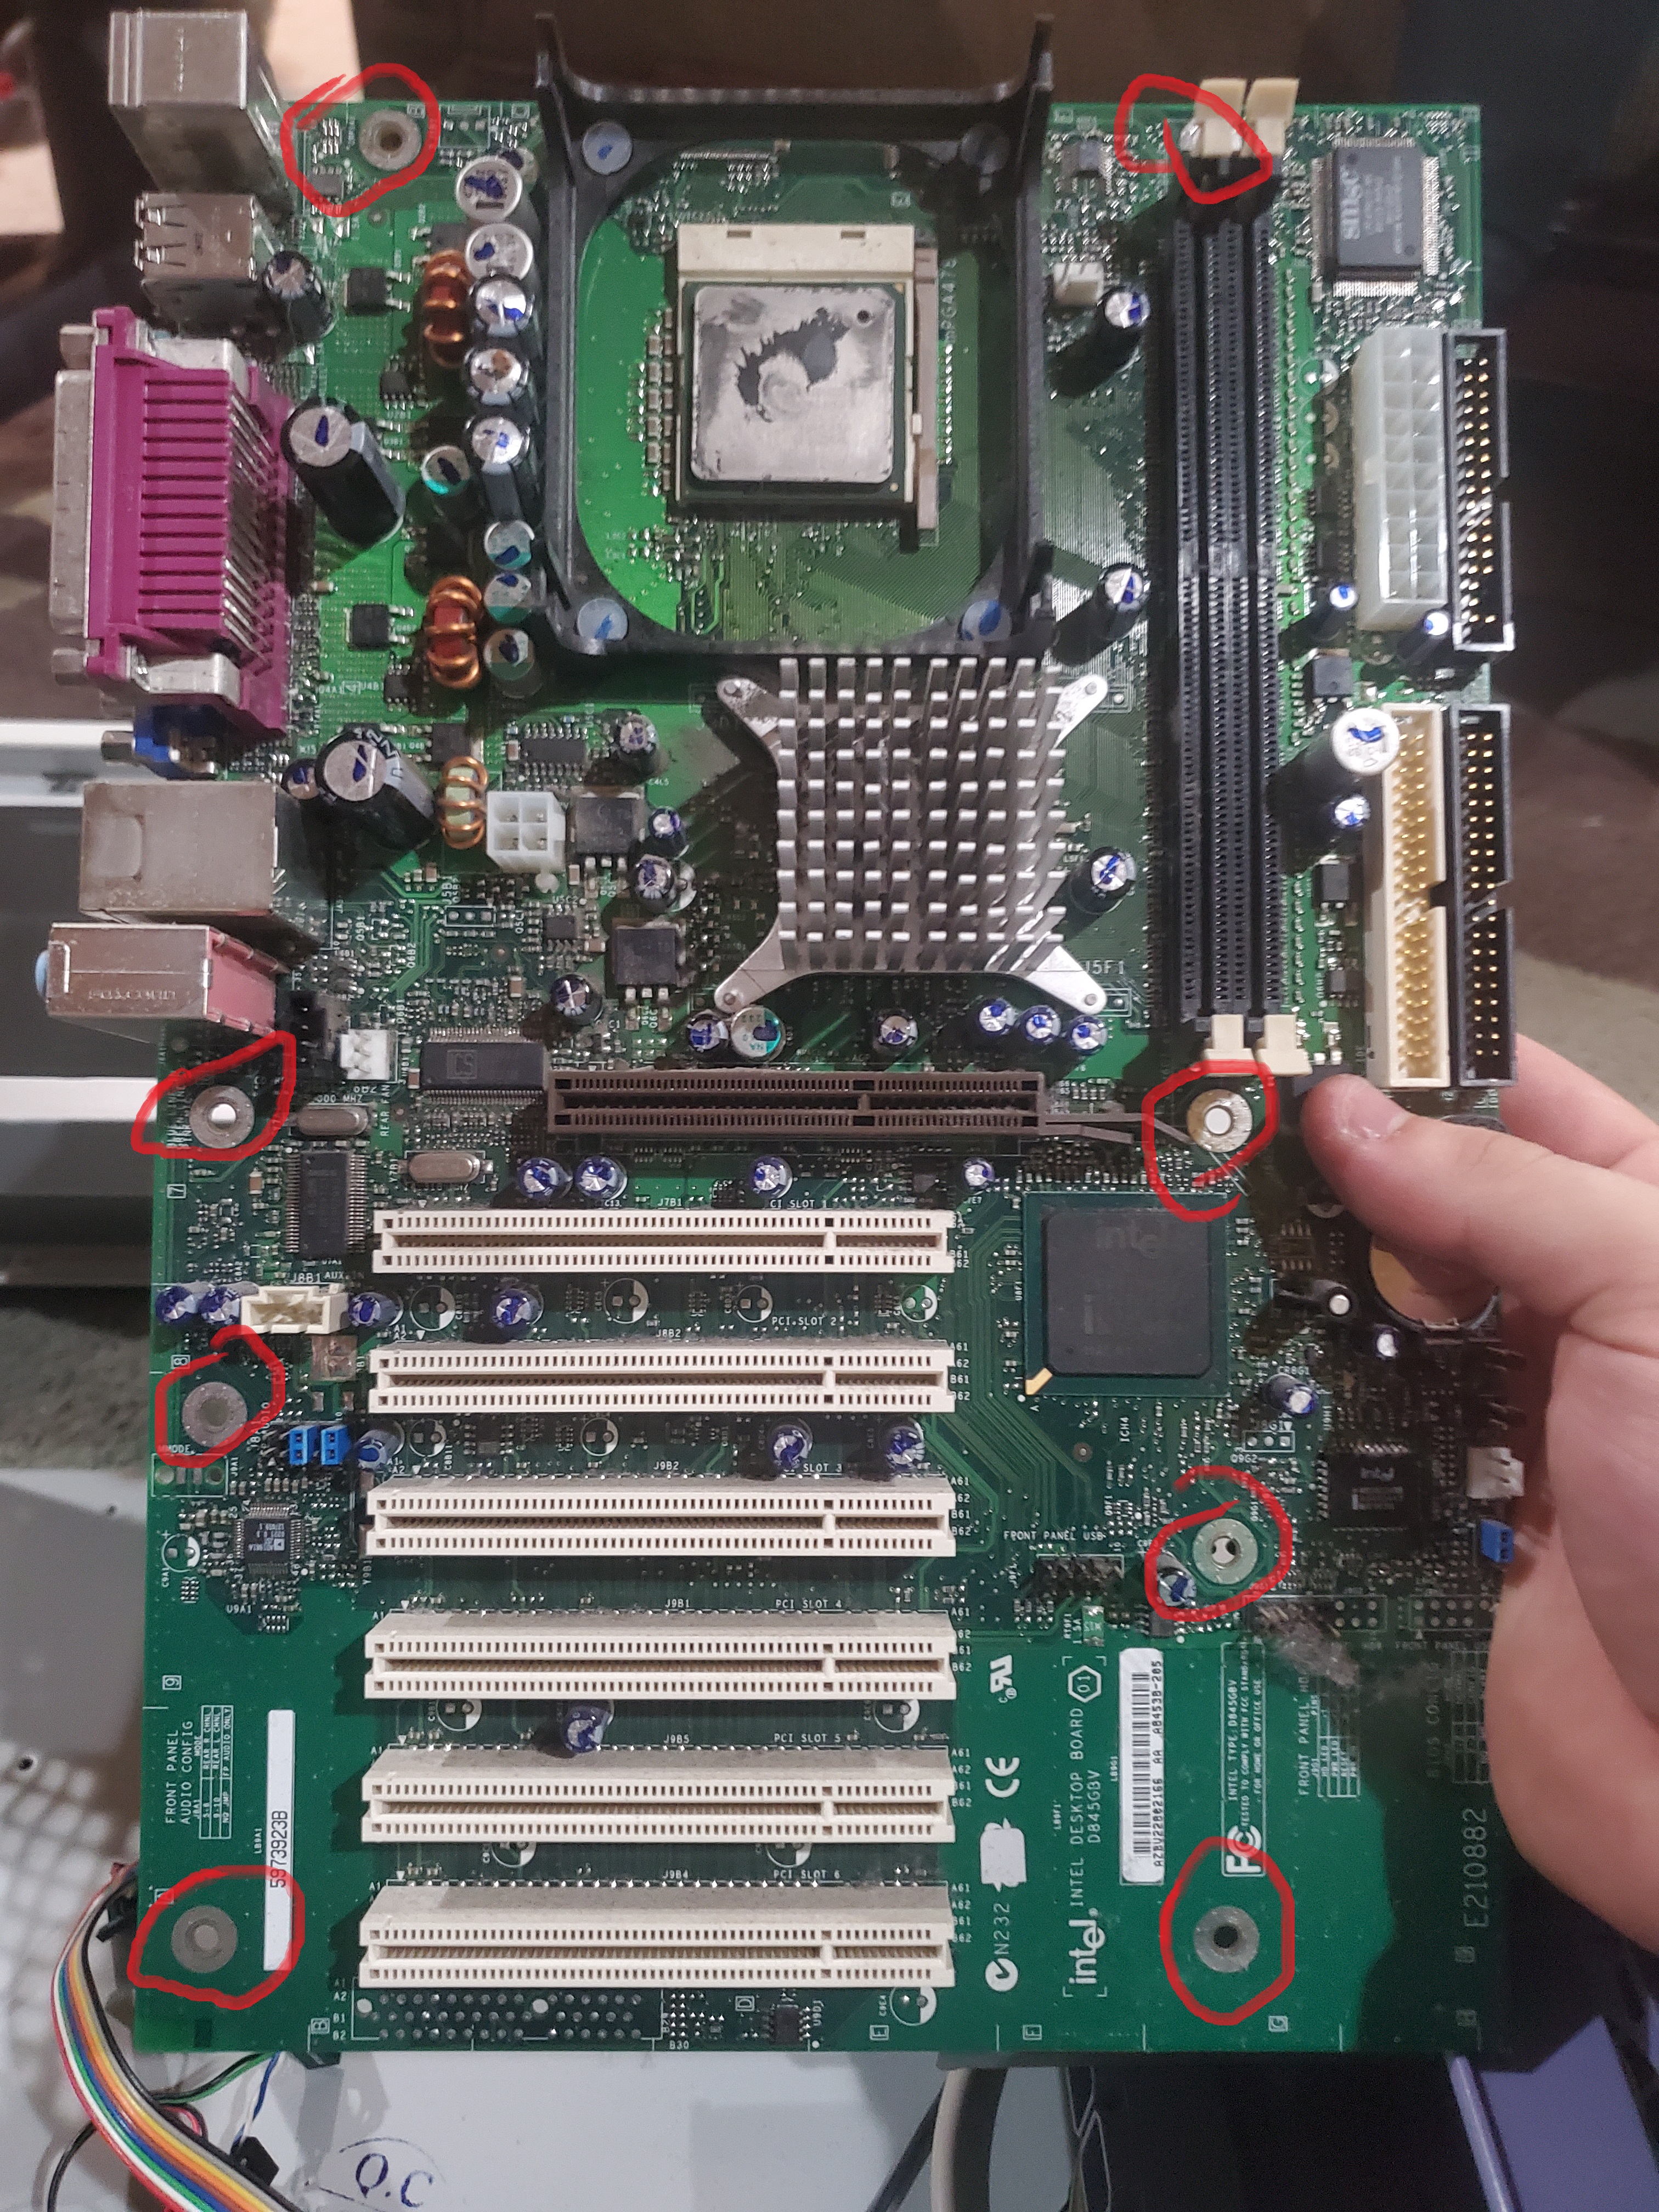
-
Now that you've identified the places where the motherboard will anchor to the tower, find the holes in
motherboard that will align to the holes in the tower.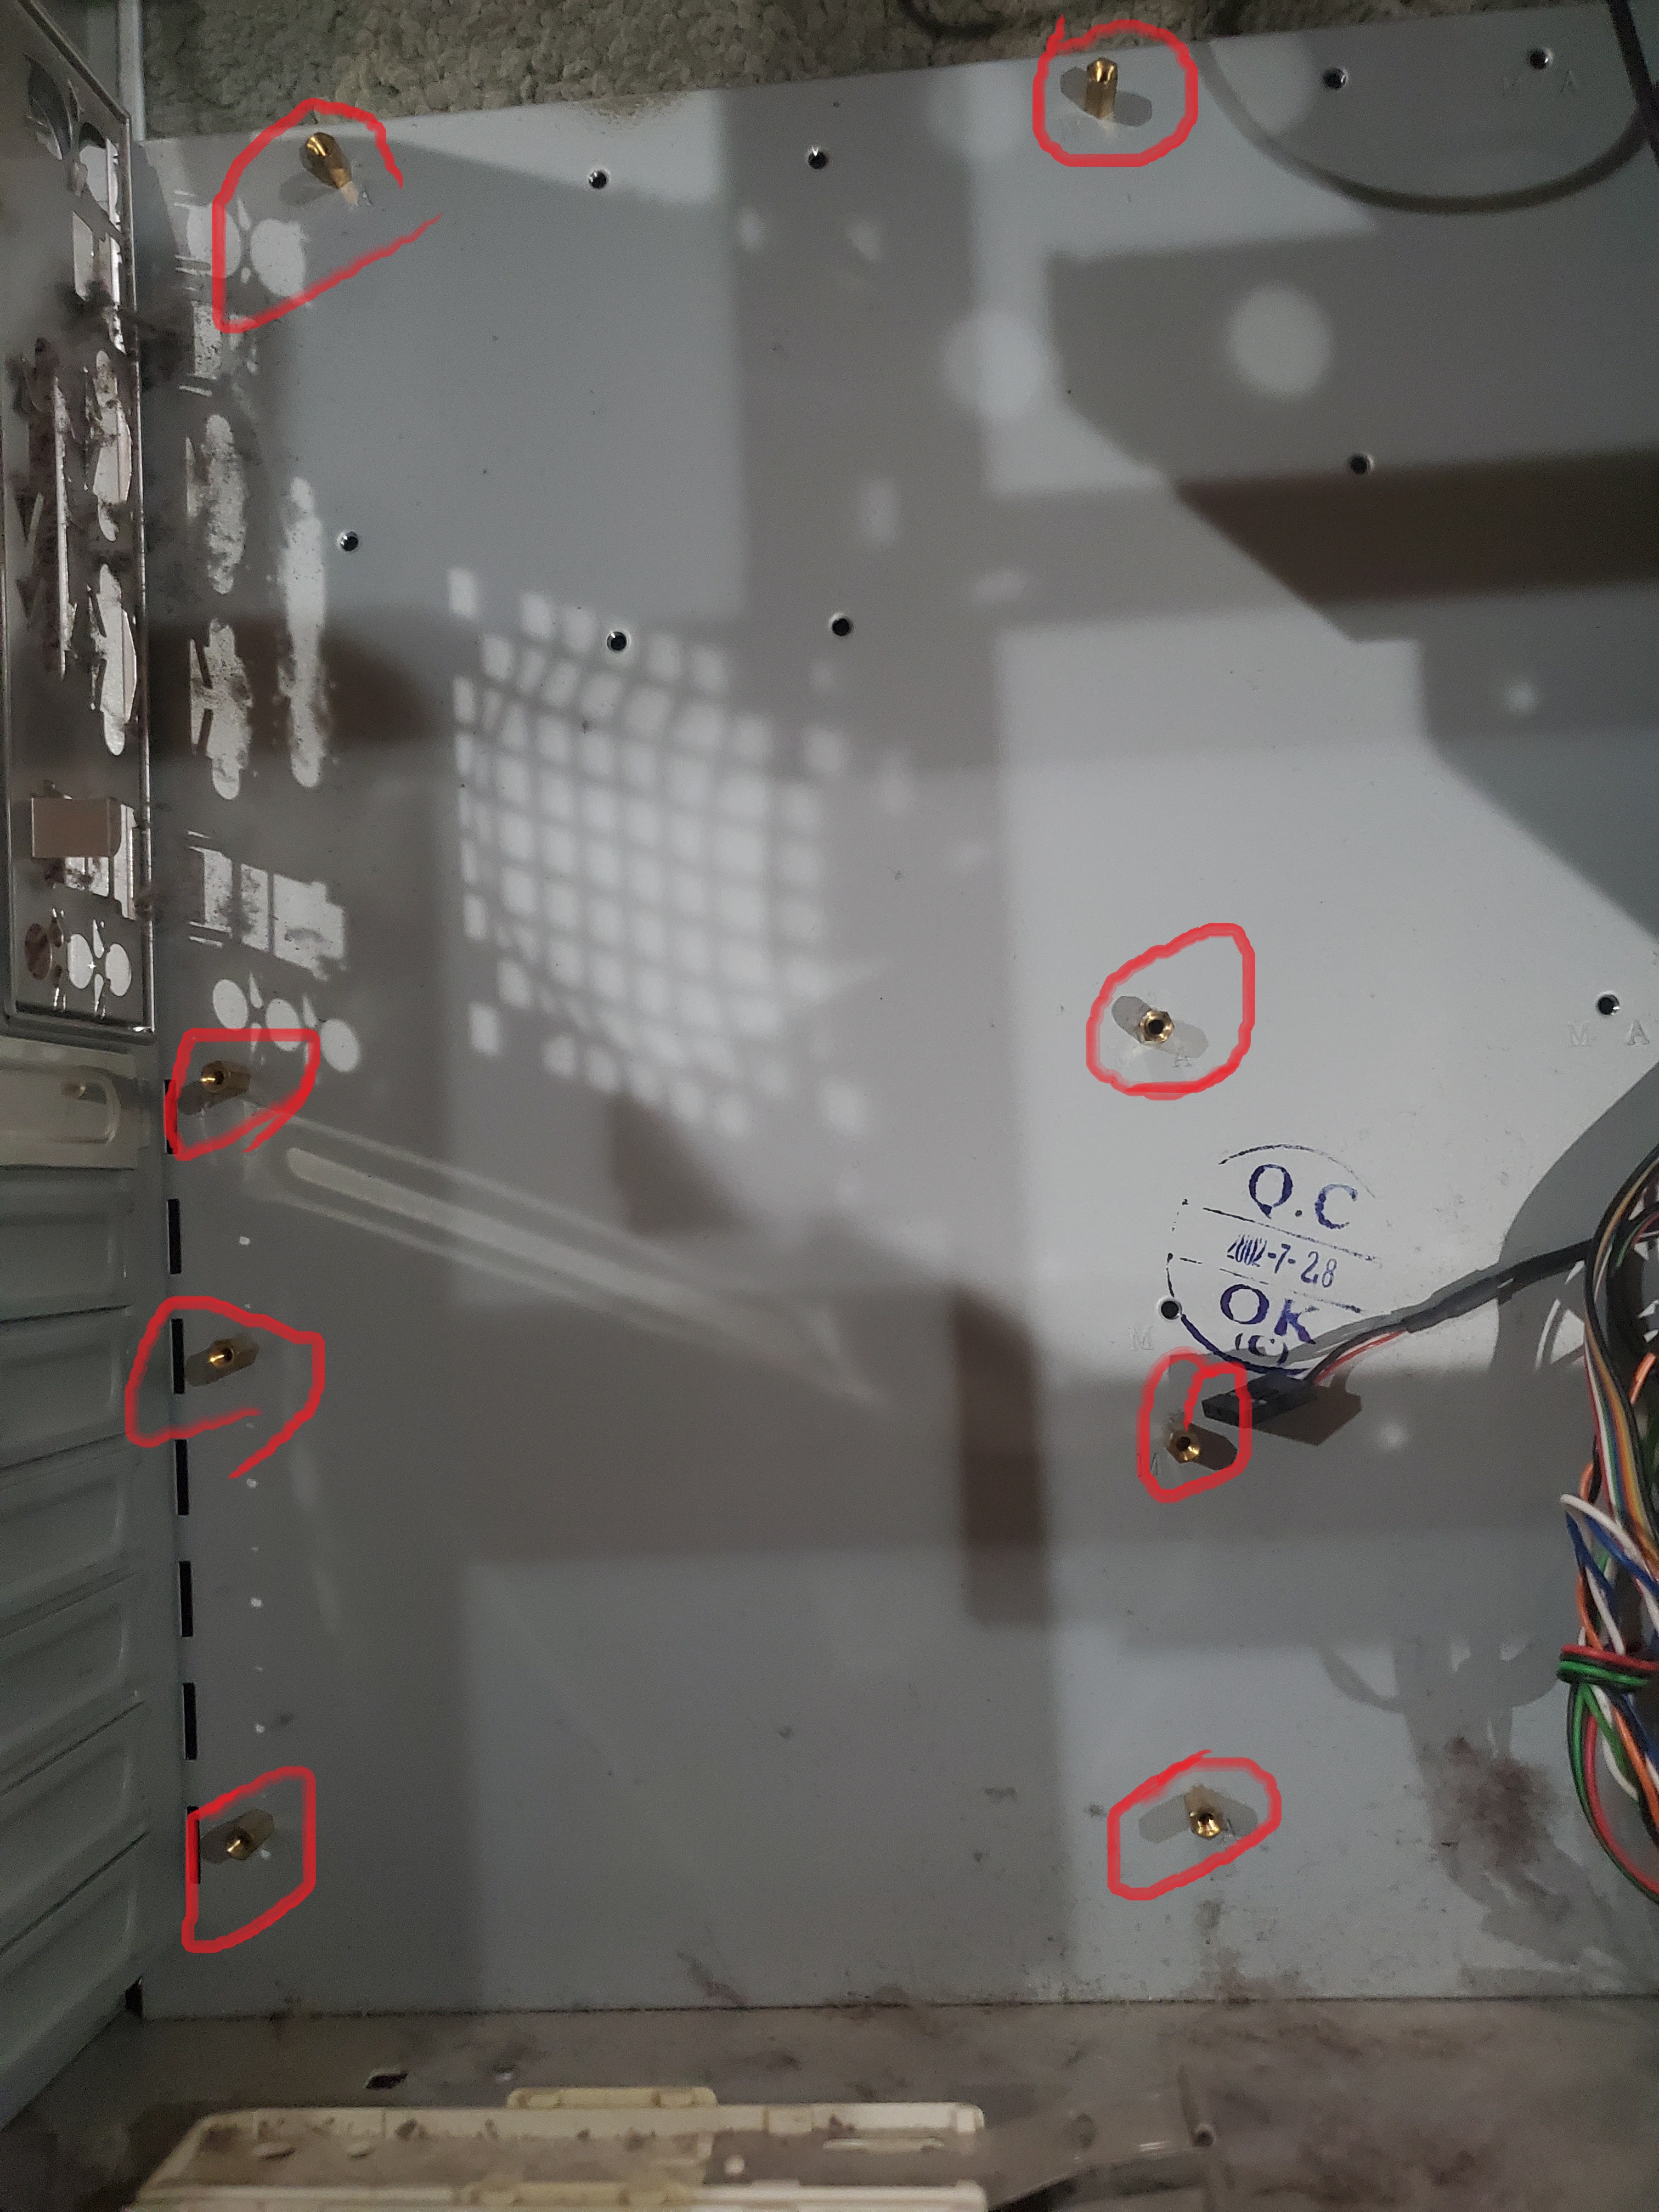
- Once you find both sets of holes carefully place the motherboard into case making sure the two sets of holes line up
After the motherboard is in place, anchor the motherboard to the tower by putting a screw in each hole
and use a screwdriver to tighten the screw take care not to accidentally touch the motherboard with the
screwdriver lest you risk damaging the board. -
Now that the motherboard is in place, we can connect the motherboard to the front panel of the tower using
using the wires coming from the front panel. Connecting the motherboard to the front panel makes the
power-on and reset buttons, headphone and microphone jacks, and USB ports on the front panel work.
To correctly connect the wires, you need to reference the motherboard manuel and look for something like
the image to the right. After that, it's a simple matching game, the female connectors from the front panel
are labelled, so put them in the right spot according to the motherboards manual.
Congratulations, you've now successfully installed your motherboard.