In-App Payments with Google Wallet for Digital Goods
You can use Google Wallet for Digital Goods to sell digital and virtual goods within your Chrome App or Chrome Extension. The Google Wallet for Digital Goods client app, which is embedded in Chrome, communicates with the Google Wallet servers and handles all of the financial transactions, including charging the buyer and distributing the proceeds to you.
The Chrome Web Store Developer Dashboard makes it easy to easy to create and manage virtual goods. You can provide localized descriptions for each product and offer items in local currencies. It also can help you to verify and manage licenses for the digital goods purchased by each user.
In order to sell digital goods, you'll need to:
- Create a Google Wallet Merchant account.
- Create the items you wish to sell via the Developer Dashboard in the Chrome Web Store.
-
Include the appropriate
buy.jsfile in your package. - Wire up the sales flow.
The buy.js
file provides three functions:
google.payments.inapp.getSkuDetails- Returns an array of active items provided by your product from the Chrome Web Store. Maps to the Web Store API In-App Products List Method.
google.payments.inapp.getPurchases- Returns an array of items purchased by the user. Maps to the Web Store API Payments List Method.
Note: See Payments: Regions, fees and tiers for more information about fees and locations where you can sell your digital goods.
Purchase flow
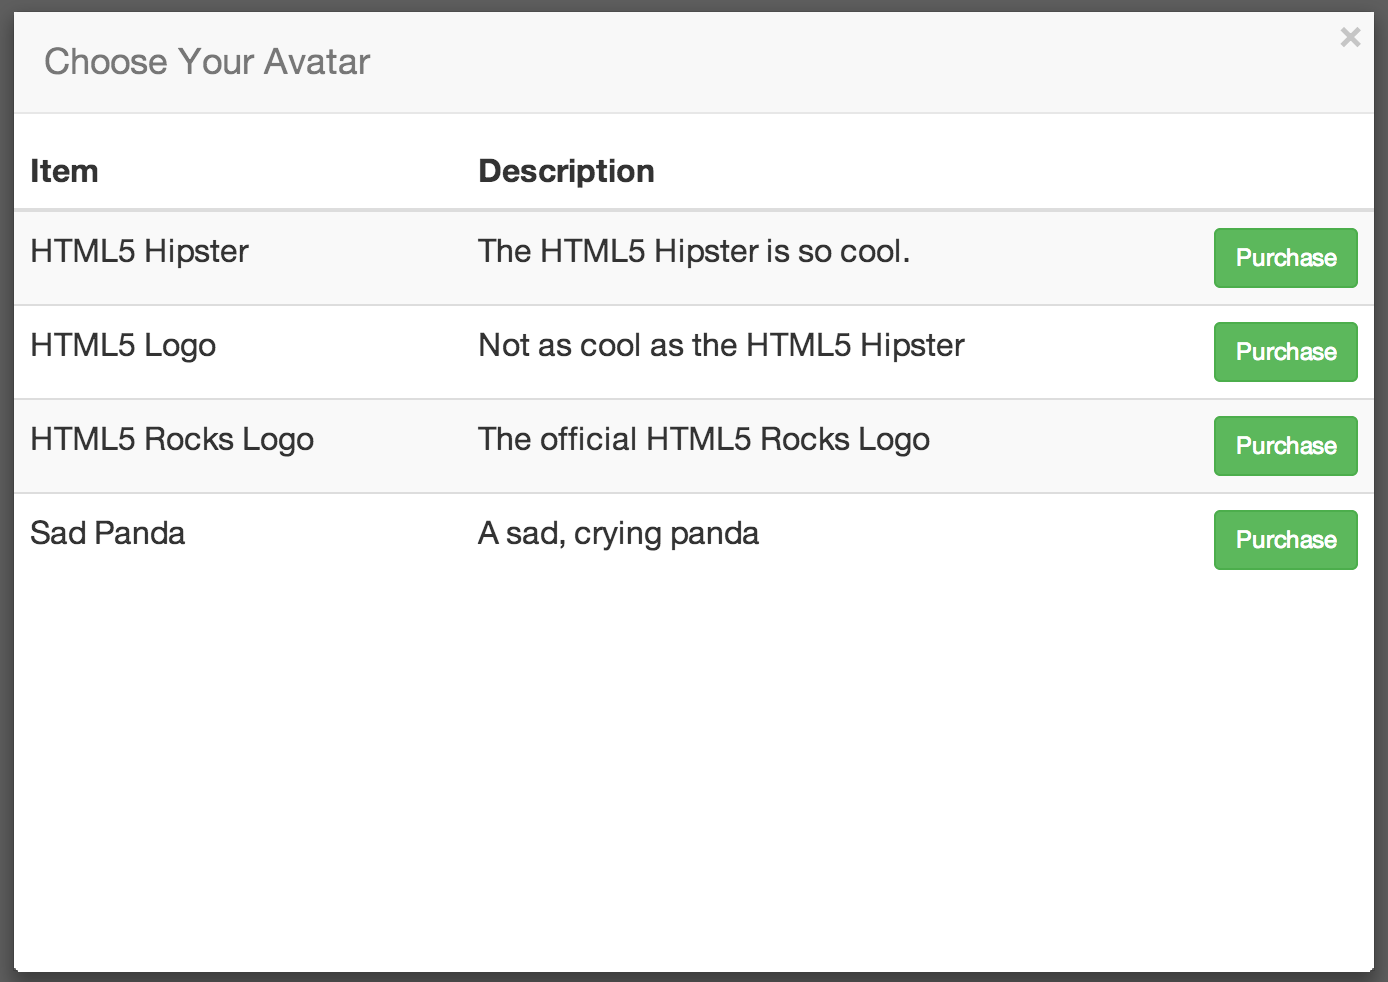
You can use google.payments.inapp.getSkuDetails to get the list
of available products, and then show those to the user.

Best Practice: Before showing the user all of the items
that are available, compare the list of items that they've already purchased
(using google.payments.inapp.getPurchases) and provide some
indication that the items have already been purchased.
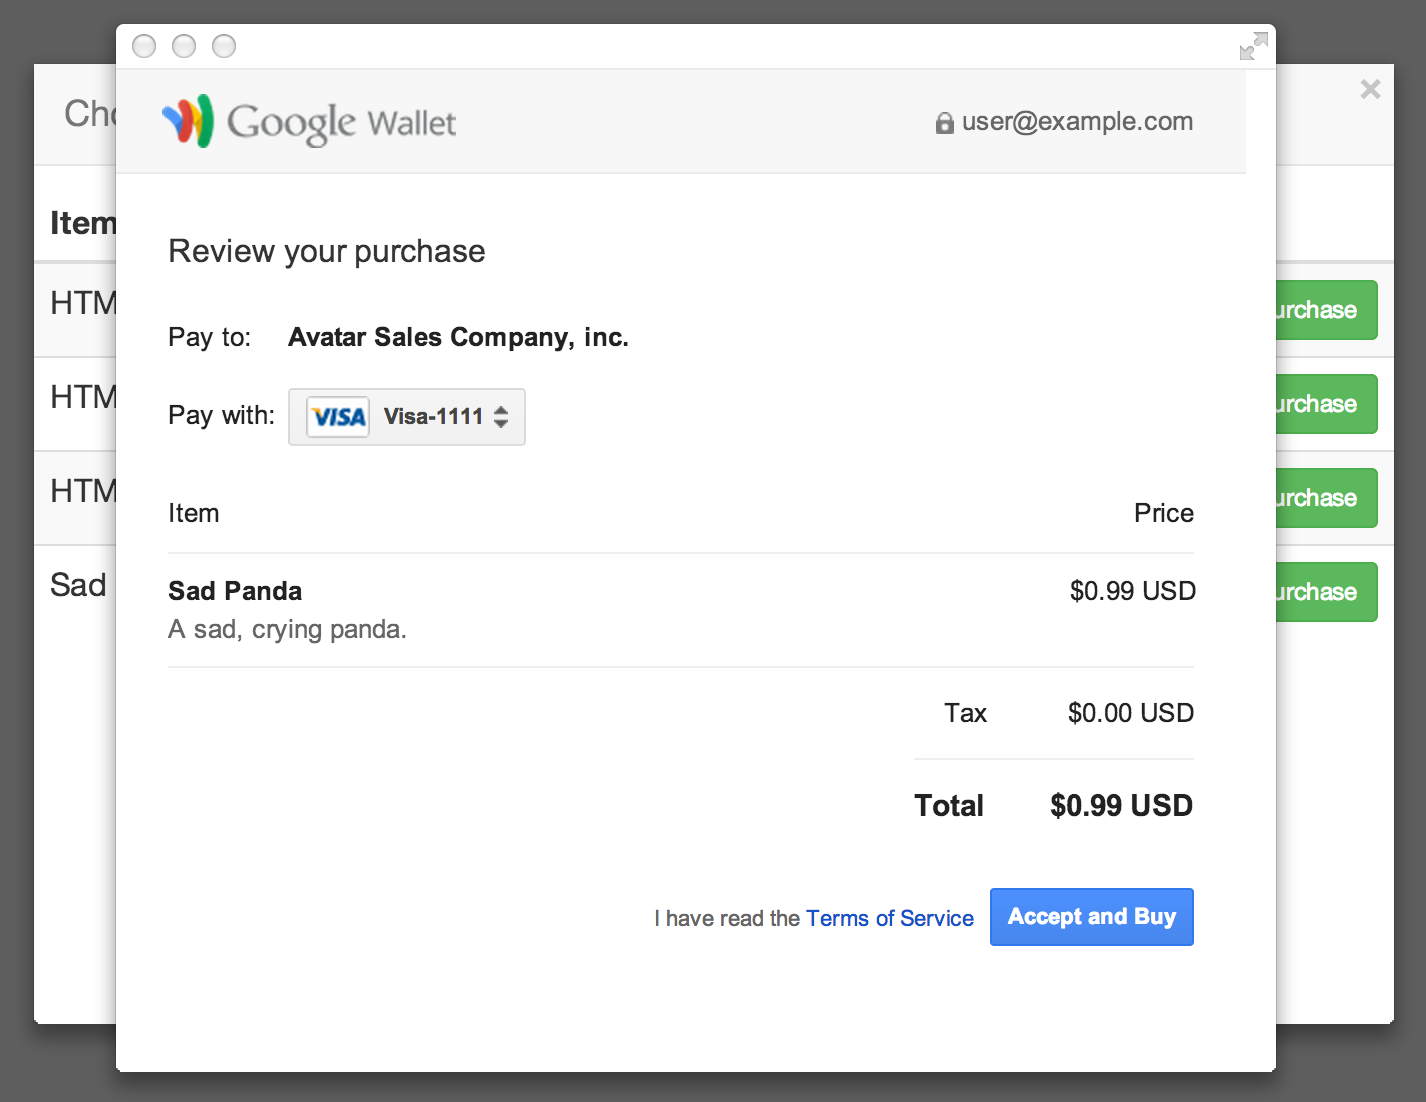
When a customer clicks a Purchase button within your Chrome App or Extension, Chrome uses the Google Wallet account of the user signed into Chrome to display the Google Wallet for Digital Goods payment processing window:

When the user clicks the Accept and Buy button in the payment
processing window,
the Google Wallet server processes the payment and displays a purchase
confirmation dialog to the user, as shown below. The success
or failure callback is invoked appropriately.
Note: if the user is not signed up for Google Wallet, Google Wallet for Digital Goods takes the user through the sign-up flow.
Using Google Wallet for Digital Goods
Using Google Wallet for Digital Goods is similar to using the Google Wallet for Digital Goods API in a website, except no server side code is needed. The differences are summarized below and described in detail in the integration steps.
- The Chrome Web Store handles the list of digital goods available for sale, eliminating the need to create, store, or manage JSON Web Tokens.
-
You can get the list of available digital goods through the
getSkuDetailsfunction. -
You must include the
buy.jslibrary with your package, and load the library from its location in your package. -
You must call the
buy()method with an extra parameter calledparameters. - The UI to process payments is displayed in a separate window, rather than in an iframe.
-
The Chrome Web Store manages the list of purchased digital goods
(licenses) for each user and exposes that list to you through
the
getPurchases()function.
Setting up your account
In order to use Google Wallet for Digital Goods, you'll need to visit the Google Wallet for digital goods signup page and create a merchant account. For more information on creating your Wallet Merchant account, along with step by step instructions, see the help page for signup for Google Wallet for Digital Goods.
Once you've created the Merchant account, you'll need to associate it with your Chrome App or Extension listing in the Chrome Web Store.
- Open the Chrome Web Store Developer Dashboard and edit the listing for your Chrome App or Extension.
- Under the In-app Products tab, click link a Google Checkout merchant account and complete the process.
Note: You can always update your Google Wallet Merchant account by following the steps in the Google Wallet for Digital Goods Web Tutorial.
Create the digital goods
Before you can sell any digital goods, you need to create the list of
items that are available for purchase. The Chrome Web Store
Developer Dashboard simplifies this process for us by providing an
interface for creating digital goods and license management. This means
in addition to the buy() function, you can also query to
determine what items are available for sale, and what items the user has
purchased.
You can also choose to create your own digital goods, though you'll need to manage your own inventory and licensing service.
Through the Chrome Web Store
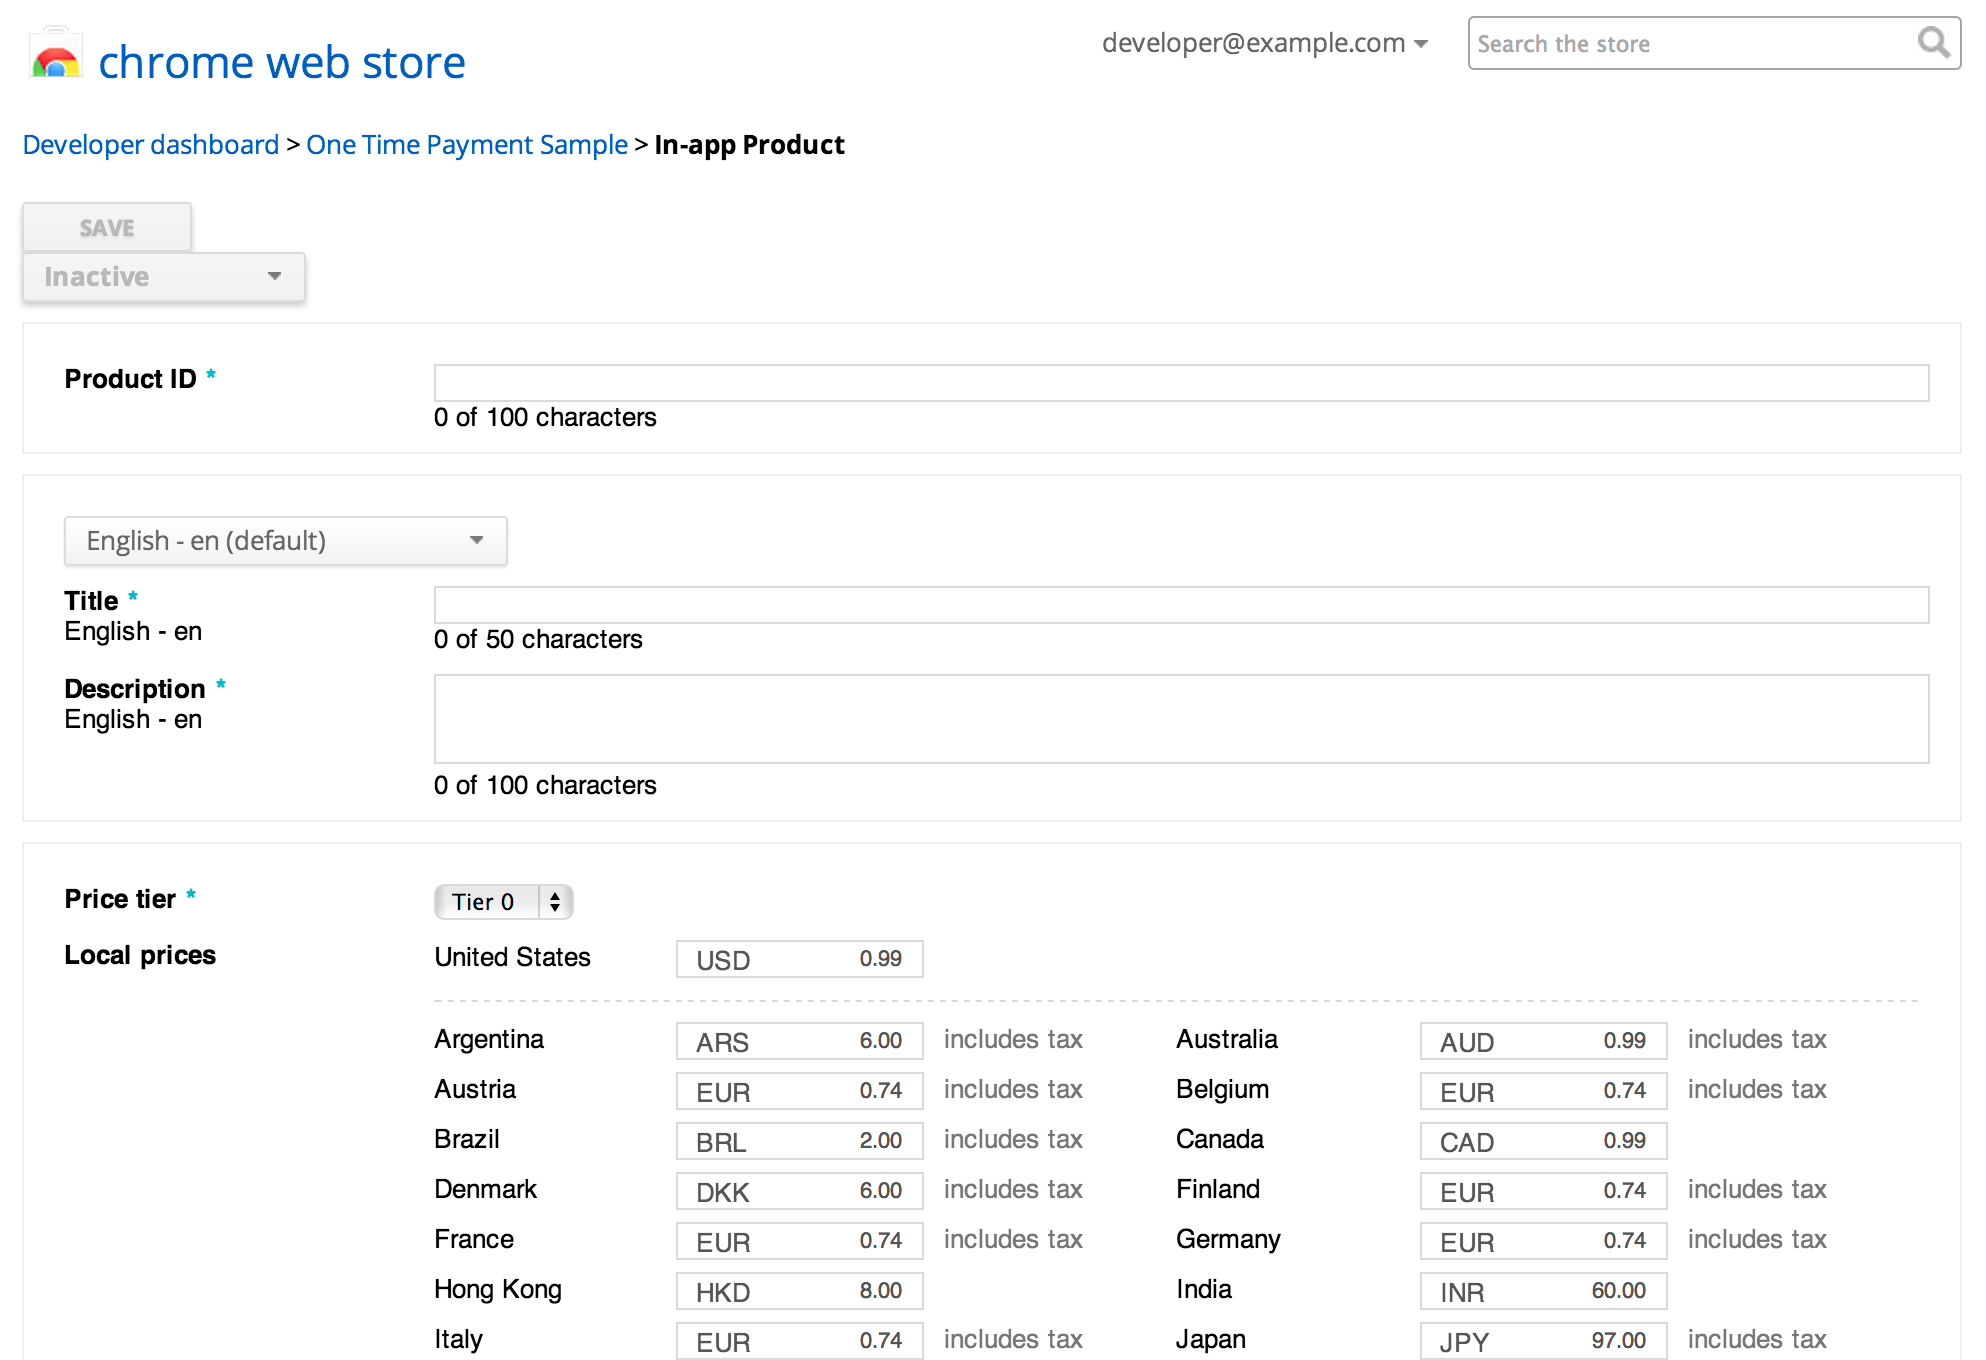
You can manage your digital goods through the In-app Products tab in the listing page of the Chrome Web Store Developer Dashboard.

- Open the Chrome Web Store Developer Dashboard and edit the listing.
- Switch to the In-app Products tab at the top of the page.
- Click Add new product.
-
Provide the necessary information:
- Product ID
- An identifier (SKU) you'll use to identify that specific product. Product IDs must start with a lowercase letter or number and can only contain lowercase letters(a-z), numbers(0-9), dots(.) and underscores(_).
- Title
- A friendly name of your product that will be shown to users on the purchase confirmation page.
- Description
- A short description of the item that will be shown to users on the purchase confirmation page.
- Choose the price tier that you wish to sell the item for.
- Click Save to save the item.
- Activate by changing the state to Active.
If you want to prepare digital goods for release on a specific day, you
can leave the state set to Inactive until you're ready to
make those available. This means you can launch new features or levels,
but keep them hidden until you're ready.
- You can have up to 100 items (active, inactive, or archived) at any given time.
- You should move older items that are no longer for sale to archived.
- Be careful when deleting items as users may already have purchased them and may lose their license.
- Once a product ID has been used, it cannot be used again, even if it has been deleted.
Note: Recurring payments are not currently supported through the Chrome Web Store interface; instead you'll need to manually create and sign a Subscription JWT and use that in your app instead.
Manually managing your own digital good
Each item is identified by a JSON Web Token or JWT, pronounced like the English word jot. The JWT is a Base64 encoded, signed JSON object. Since each JWT is signed with your seller secret, you should always generate the JWT outside of your Chrome App or Extension and include only the generated token. If a dynamically generated token is required, you should create it on the server and serve it to the app via an XHR.
You can generate JWTs using a server, or you can pre-generate JWTs for use in your Chrome App or Extension. See the Create an order step of the Wallet for Digital Goods Tutorial for more information about how to create your own JWTs.
Remember: If you use JWTs, you should generate the JWTs outside of your Chrome App or Extension and include the generated tokens in your package. If you need to generate JWTs dynamically or at run time, you should use a server. NEVER include the Seller secret you use to generate tokens in your app.
If you manage your own digital goods, you'll need to manage your own
inventory and licensing for those items and will not be able to use
the getSkuDetails or getPurchases
functions
provided
by Chrome.
Query what items are available
The getSkuDetails function returns a list of all active digital
goods available from the Chrome Web Store available for purchase by the
user, including the product ID (SKU), title, description, and price.
You can provide an optional SKU argument to the function, which will then
return only the details for that specific item.
google.payments.inapp.getSkuDetails({
  'parameters': {'env': 'prod'},
  'success': onSkuDetails,
  'failure': onSkuDetailsFail
});
Note: The parameters field is required and must be set to
{'env': 'prod'} to tell Chrome to use the production
instance of the API. Review the Testing your
app
section for details on how to test your app without incurring a charge.
You can learn about adding trusted testers when you
publish your app here.
The response will look like:
{
  "response": {
    "details": {
      "kind": "chromewebstore#inAppProductList",
      "inAppProducts": [
        {
          "kind": "chromewebstore#inAppProduct",
          "sku": "70darkchocolate",
          "item_id": "aaaaaaaaaaaaaaaaaaaaaaaaaaaaaaaa",
          "state": "ACTIVE",
          "prices": [
            {
              "valueMicros": "990000",
              "currencyCode": "USD",
              "regionCode": "US"
            }
          ],
          "localeData": [
            {
              "title": "Dark Chocolate (70%)",
              "description": "The best chocolate available.",
              "languageCode": "all"
            }
          ]
        },
        {
          ...
        }
      ]
    }
  }
}
You can find the full description of In-App Products Representation and Methods in the Web Store API Reference.
For example, you might want to list the details of each object you get back from the function:
function onSkuDetails(skus) {
  var products = response.response.details.inAppProducts;
  var count = products.length;
  for (var i = 0; i < count; i++) {
    addProductToUI(products[i]);
  }
}
Responding to a purchase request
The following code snippet shows how to initiate the purchase flow for an item managed through the Chrome Web Store:
var sku = "giant_tv";
google.payments.inapp.buy({
  'parameters': {'env': 'prod'},
  'sku': sku,
  'success': onPurchase,
  'failure': onPurchaseFail
});
If you're managing your own JWTs, replace the sku parameter with the appropriate jwt parameter. For example:
var jwt = /* huge ugly JWT string */;
google.payments.inapp.buy({
  'parameters': {'env': 'prod'},
  'jwt': jwt,
  'success': onPurchase,
  'failure': onPurchaseFail
});
When the purchase completes, Chrome will call the defined callback with the a parameter that looks like:
{
  "jwt": "eyJhb...0oFuU",
  "request": {
    "cartId": "00000000000000000000.0000000000000000000"
  },
  "response": {
    "orderId": "00000000000000000000.0000000000000000000"
  }
}
Verifying what items the user has purchased
If you want to verify that the user has purchased an item and has a
current license, you can call
google.payments.inapp.getPurchases. The function will always
return the most up to date information, and will reflect if the purchase
was cancelled by the user, or refunded through the
Wallet Merchant console.
google.payments.inapp.getPurchases({
  'success': onLicenseUpdate,
  'failure': onLicenseUpdateFail
});
The Chrome Web Store will return the list of SKUs that the user has purchased:
{
  "response": {
    "details": [
      {
        "kind": "chromewebstore#payment",
        "itemId": "aaaaaaaaaaaaaaaaaaaaaaaaaaaaaaaa",
        "sku": "giant_tv",
        "createdTime": "1387221267248",
        "state": "ACTIVE"
      }
    ]
  }
}
Note: See the Web Store API Reference for more details on the payment methods.
function onLicenseUpdate(licenses) {
  var licenses = response.response.details;
  var count = licenses.length;
  for (var i = 0; i < count; i++) {
    var license = licenses[i];
    saveLicense(license);
  }
}
In some cases, you may want to verify a user's purchase outside of a Chrome App, in this case, you can call the Chrome Web Store licensing server directly. For more information, see Verifying the license in the One Time Payment documentation. Note that you will need to enable the Chrome Web Store APIs in the Google Developers Console to enable this scenario.
Testing purchases
Prior to publishing your app to the world, you can test the In-App Payment experience by publishing it only to trusted testers. When your app is published to trusted testers, the purchase flow will proceed normally, except they will not be charged.
Sample Chrome App
For a simple app that demonstrates how to use Google Wallet for Digital Goods, you can download the source code here.
Note, this app is not published in the Chrome Web Store to prevent accidental purchases.
