Magento Open Source, 1.9.x
Magento 1.x Security Patch Notice
For Magento Open Source 1.5 to 1.9, Magento is providing software security patches through June 2020 to ensure those sites remain secure and compliant. Visit our information page for more details about our software maintenance policy and other considerations for your business.
Setting Up a Flat Catalog
Before you enable a flat catalog for a live store, make sure to test the configuration in a development environment.
| 1. | On the Admin menu, select System > Configuration. Then in the panel on the left under Catalog, select Catalog. |
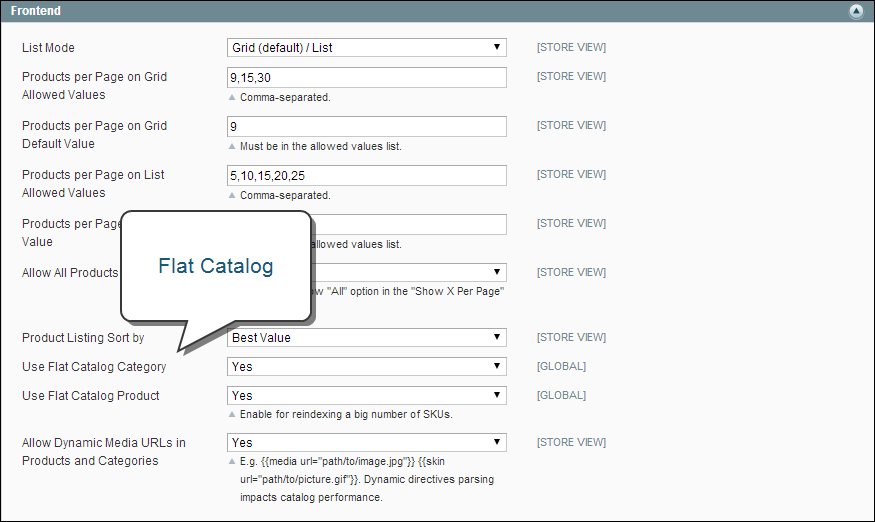
| 2. | Click to expand the Frontend section. Then, do the following: |
| a. | Set Use Flat Catalog Category to “Yes.” |
| b. | Set Use Flat Catalog Product to “Yes.” |
| 3. | When complete, click the Save Config button. |
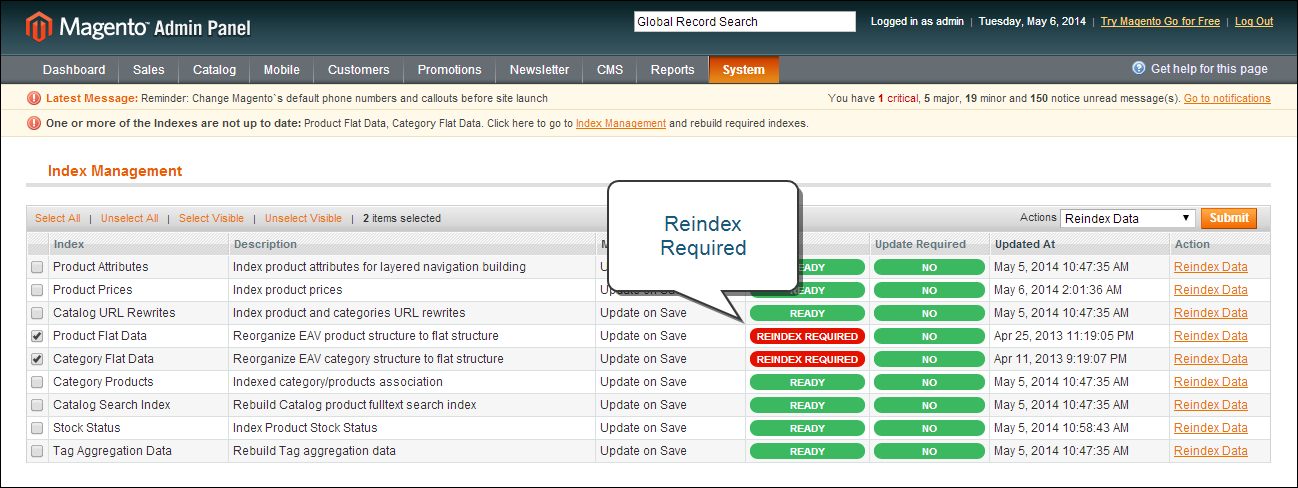
| 4. | When prompted to refresh the indexes, click the Index Management link in the message at the top of the workspace and follow the instructions to reindex the data. |
| 1. | On the Admin menu, select Catalog > Manage Products. Then, do the following: |
| a. | Choose a product to modify. Then, open the product in edit mode. |
| b. | In the Name field, add the text “_DEMO” to the product name. |
| 2. | Click the Save button. |
| 3. | On a new browser tab, navigate to the home page of your store. |
| 4. | Search for the product you edited, and browse to its assigned category. |
If necessary, refresh the page to verify the results. The change will appear within the minute or according to your cron job schedule.
| 1. | On the Admin menu, select Catalog > Categories > Manage Categories. |
| 2. | In the upper-left corner, set Current Configuration Scope to one of the following: |
- All Store Views
- A specific store view
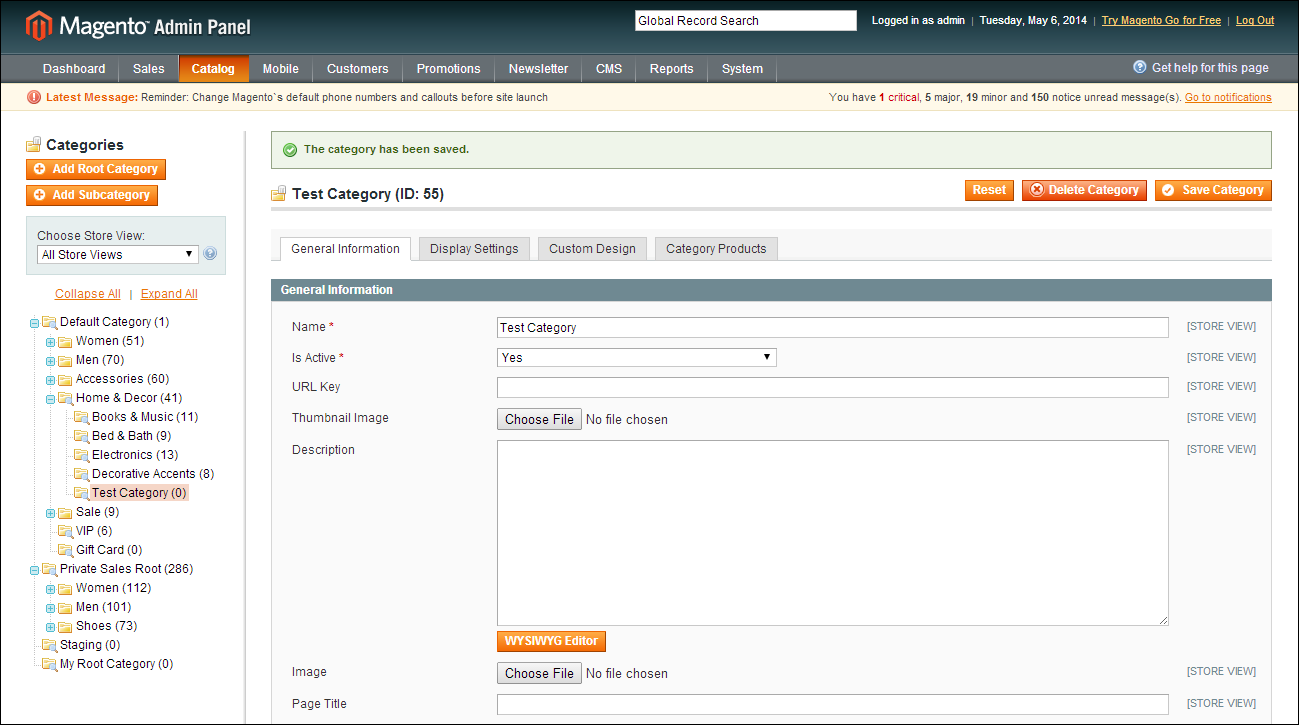
| 3. | In the panel on the left, select an existing category. Click the Add Subcategory button, and do the following: |
| a. | In the Name field, enter “Test Category.” |
| b. | Set Is Active to “Yes.” |
| c. | Click the Save Category button. |
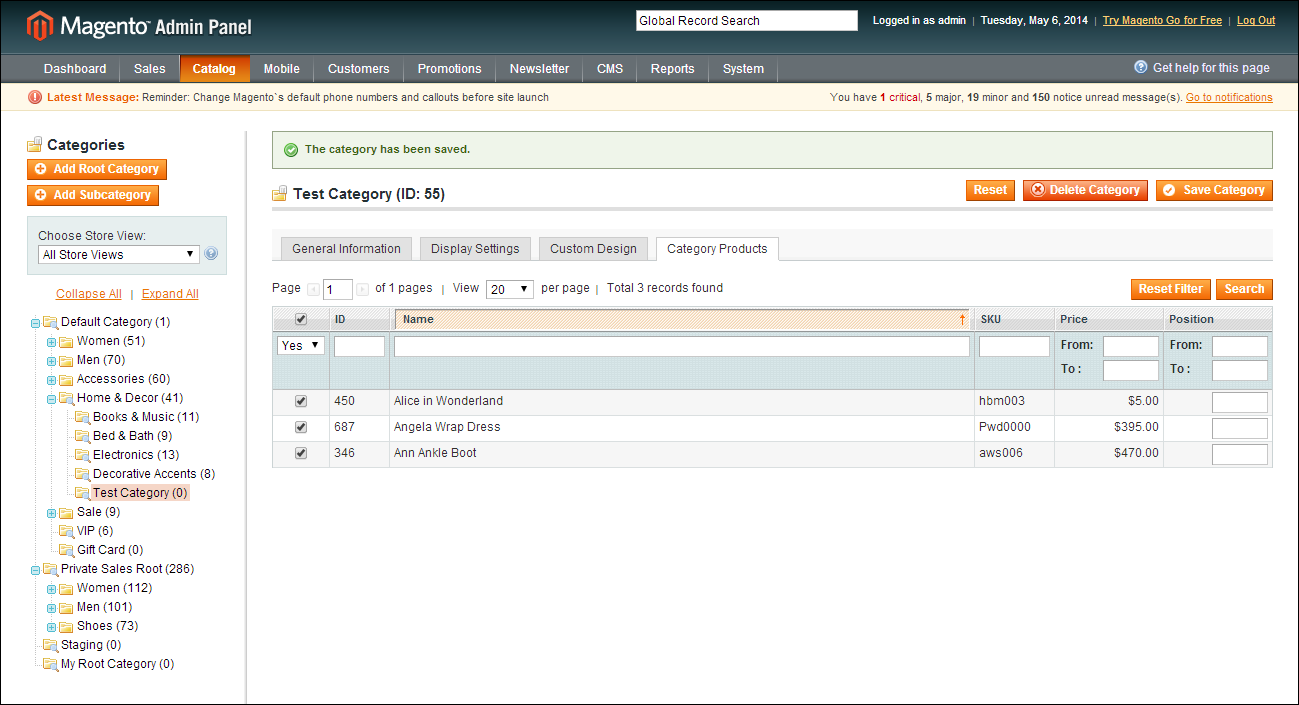
| d. | Click the Category Products tab. Then, click the Reset Filter button to display all products. |
| e. | Select the checkbox of several products to add them to the new category. Then, click the Save Category button. |
| 4. | On a new browser tab, navigate to the home page of your store. then, Find the category you created. |
If necessary, refresh the page to verify the results. The change will appear within the minute or according to your cron job schedule.


