Magento 1.x Security Patch Notice
For Magento Open Source 1.5 to 1.9, Magento is providing software security patches through June 2020 to ensure those sites remain secure and compliant. Visit our information page for more details about our software maintenance policy and other considerations for your business.
Custom Order Status
In addition to the preset order status values, you can create custom order status values of your own, assign order statuses to order states, and set a default order status for order states. For example, you might need a custom order status for orders, such as “packaging” or “backordered,” or for a status that is specific to your needs. You can create a descriptive name for the custom status, and then assign it to the associated order state in the order processing workflow.
Only the default custom order status values are applied in the order management workflow. The custom status values that are not set as default are available only in the comments section in the order view in the Admin .
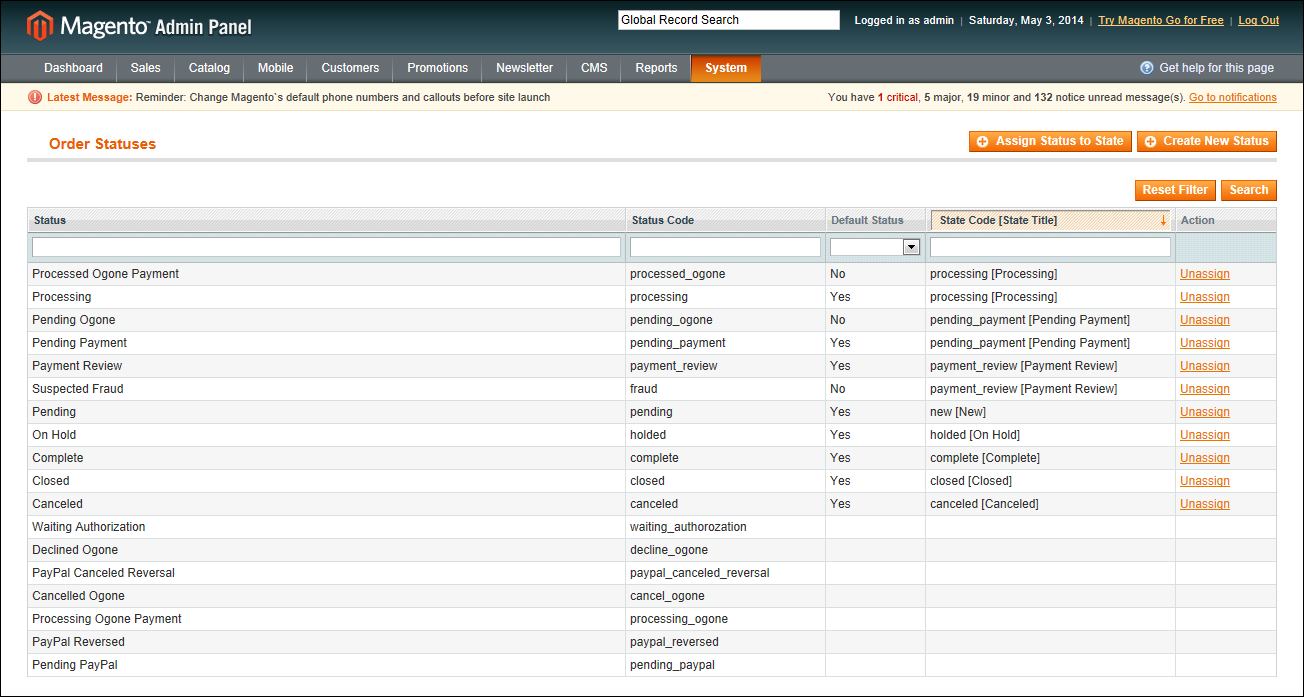
Order Statuses
 To create a custom order status:
|
1.
|
On the Admin menu, select System > Order Statuses. |
|
2.
|
In the upper-right corner, click the Create New Status button. |
|
3.
|
In the Order Status Information section, do the following: |
|
a.
|
Enter a Status Code. This value is for internal use only. The first character must be a letter (a-z), and the rest can be any combination of letters and numbers (0-9). You can use the underscore character instead of a space. |
|
b.
|
Enter a Status Label to identify the status setting in both the Admin and store. |
Order Status Information
|
4.
|
In the Store View Specific Labels section, enter any labels that you need for different store views and languages. |
|
5.
|
When complete, click the Save Status button. |
The new order status now appears in the Order Statuses list.
 To assign an order status to a state:
|
1.
|
Front the Order Statuses list, click the Assign Status to State button. |
|
2.
|
In the Assignment Information section, do the following: |
|
a.
|
Select the Order Status that you want to assign. They are listed by status label. |
|
b.
|
Select the Order State that represents where the order status belongs in the workflow. |
|
c.
|
To make this status the default for the order state, select the Use Order Status as Default checkbox. |
Assign Status to State
|
3.
|
When complete, click the Save Status Assignment button. |
 To edit an existing order status:
|
1.
|
On the Order Statuses page, click to open the status record in edit mode. |
|
2.
|
Update the status labels as needed. |
|
3.
|
When complete, click the Save Status button. |
 To remove an order status from an assigned state:
|
1.
|
On the Order Statuses page, find the order status record that you want to unassign. |
|
2.
|
In the Action column on the far right of the row, click the Unassign link. |
A message appears at the top of the workspace that the order status has been unassigned. Although the order status label still appears in the list, it is no longer assigned to a state. Order statuses cannot be deleted.


