Magento 1.x Security Patch Notice
For Magento Open Source 1.5 to 1.9, Magento is providing software security patches through June 2020 to ensure those sites remain secure and compliant. Visit our information page for more details about our software maintenance policy and other considerations for your business.
Updating Default Templates
Email templates are formatted with HTML and CSS, and can be easily edited. In addition, you can further customize the template by adding variables and widgets.
Many of the default email templates contain placeholder information that must be changed before any transactional email messages are sent to customers. When the template is ready to be used, make sure to update your system configuration, so the updated template will be used instead of the sample template.
 Step 1: Choose a Default Template
|
1.
|
On the Admin menu, select System > Transactional Emails. |
|
2.
|
Click the Add New Template button. |
|
3.
|
In the Template list, select a default template from the list of predefined templates. |
Load Default Template
|
4.
|
If necessary, set the Locale to the store language. |
|
5.
|
Click the Load Template button. |
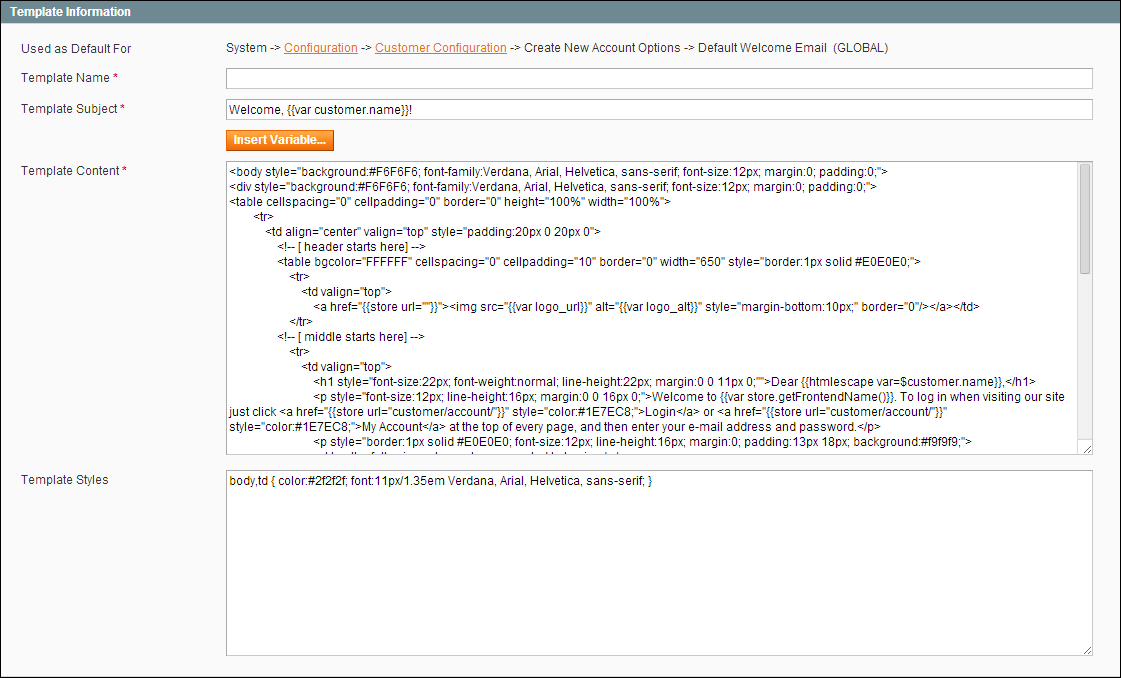
Template Information
The path to the configuration settings for each default template appears at the top of the Template Information section. Make note of this “Used as Default for” path, because you will later need to update the configuration with the name of the new template.
 Step 2: Customize the Content
|
1.
|
In the Template Information section, do the following: |
|
a.
|
Enter a Template Name for the new email template. |
|
b.
|
In the Template Subject field, type the text to appear in the Subject header of the message. |
|
c.
|
Complete the Template Content as needed. |
|
2.
|
(Optional) To insert a variable, do the following: |
|
a.
|
Position the cursor in the text where you want the variable to appear. |
|
b.
|
Click the Insert Variable button. |
|
c.
|
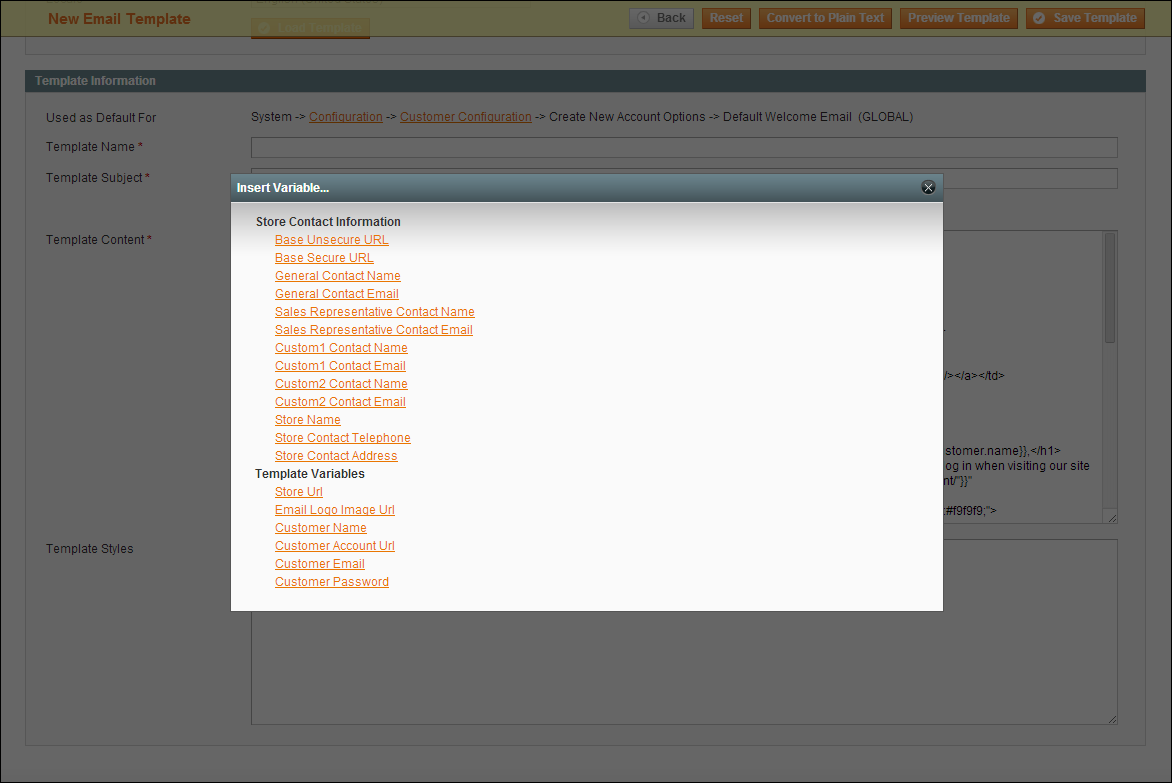
In the list of available predefined variables, click the variable you want to insert into the template. |
Insert Variable
|
3.
|
When complete, click the Save Template button. |
|
4.
|
Make sure to Preview the template before associating it with a transactional email message that is sent to customers. |
 Step 3: Update Your Configuration
Before the template can be used, the configuration must be updated with the name of the new template. Refer to the path that you recorded in Step 1 when updating your configuration with the name of the new template. To learn more, see: Configuring Email Templates.
|
1.
|
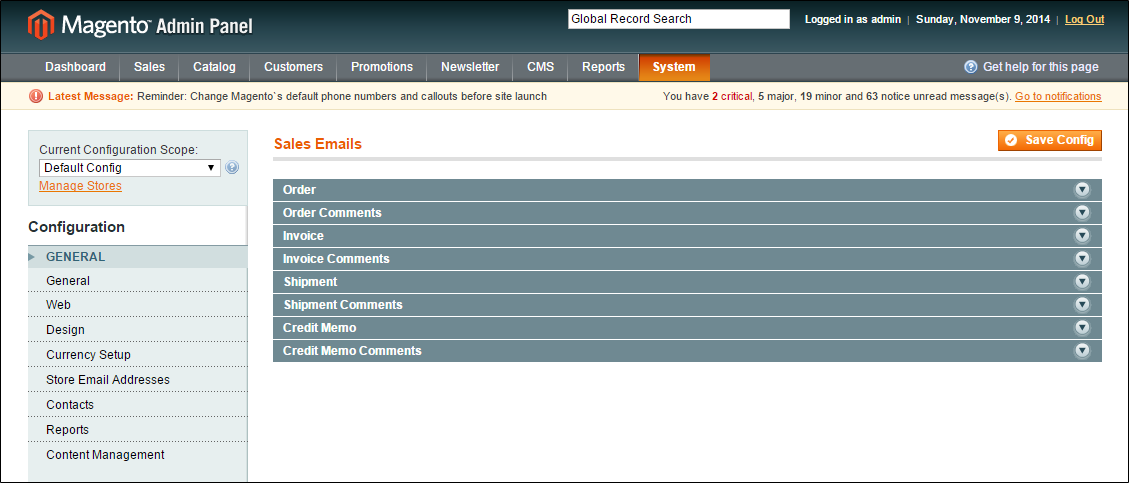
On the Admin menu, select System > Configuration. |
|
2.
|
In the panel on the left, under Sales, select Sales Emails. |
|
3.
|
Update the templates as needed. |
|
4.
|
When complete, click the Save Config button. |
-
Email Template Variables
|
Store Contact Information
Base Unsecure URL
Base Secure URL
General Contact Name
General Contact Email
Sales Representative Contact Name
Sale Representative Contact Email
Custom 1 Contact Name
Custom 1 Contact Email
Custom 2 Contact Name
Custom 2 Contact Email
Store Name
Store Contact Telephone
Store Contact Address
Template Variables
Store Url
Email Logo Image Url
Customer Name
Customer Account Url
Customer Email
Customer Password
|


