Magento 1.x Security Patch Notice
For Magento Open Source 1.5 to 1.9, Magento is providing software security patches through June 2020 to ensure those sites remain secure and compliant. Visit our information page for more details about our software maintenance policy and other considerations for your business.
Adding Facebook Plugins
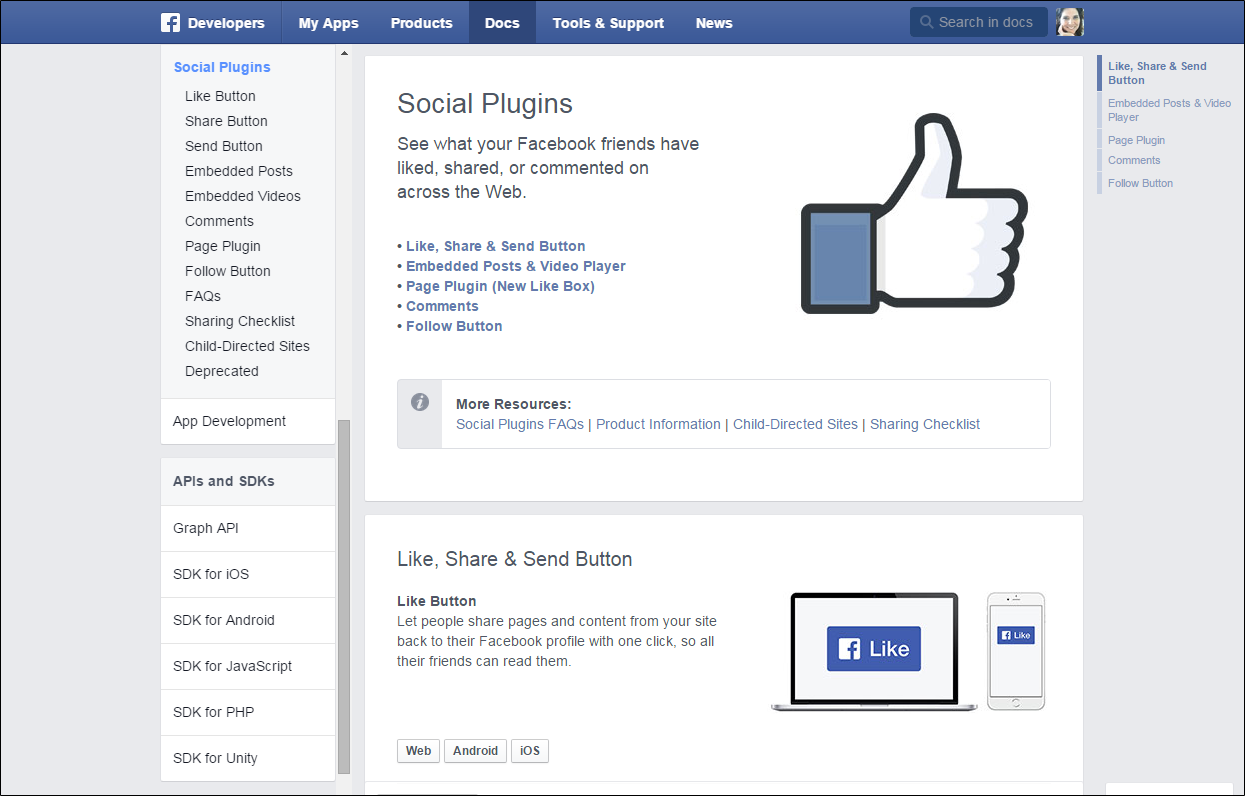
Facebook has a number of social plugins that can easily be added to your store. The following example shows how to add a Like Button to your store.
| 1. | On the Facebook site, go to the button setup page. |
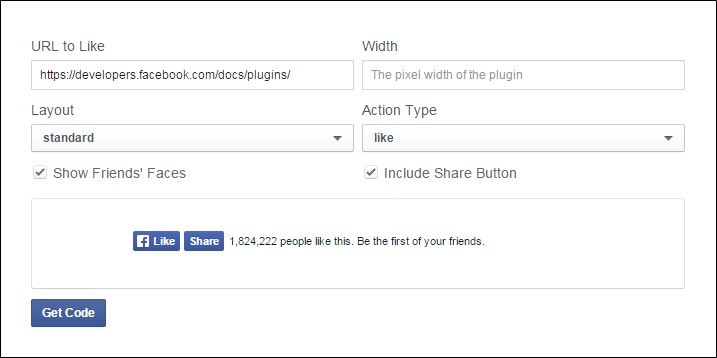
| 2. | In the URL to Like field, enter the URL of the page in your store that you want people to Like. For example, enter the URL of your store’s home page. Then, do the following: |
| a. | Choose the Layout for the button. |
| b. | Enter the Width in pixels that is available on your site for the button and any associated text message. |
| c. | Set Action Type to one of the following: |
- Like
- Recommend
| 3. | Click the Get Code button to copy the generated code to the clipboard. |
| 1. | Return to your store. On the Admin menu, select CMS > Static Blocks. |
| 2. | In the upper-right corner, click the Add New Block button. Then, do the following: |
| a. | Enter a descriptive Block Title. For example: Facebook Like Button. |
| b. | Assign a unique Identifier to the block, using all lowercase characters, with underscores instead of spaces. For example: facebook_like_button. |
| c. | Select the Store View(s) where you want the block to appear. |
| d. | Set Status to “Enabled.” |
| e. | Paste the snippet of code that you copied from Facebook into the Content box. |
| 3. | When complete, click the Save Block button. |
| 1. | On the Admin menu, select CMS > Widgets. |
| 2. | In the upper-right corner, click the Add New Widget Instance button. |
| 3. | In the Settings box, do the following: |
| a. | Set Type to “CMS Static Block.” |
| b. | Set Design Package/Theme to your current theme. |
| c. | Click the Continue button. |
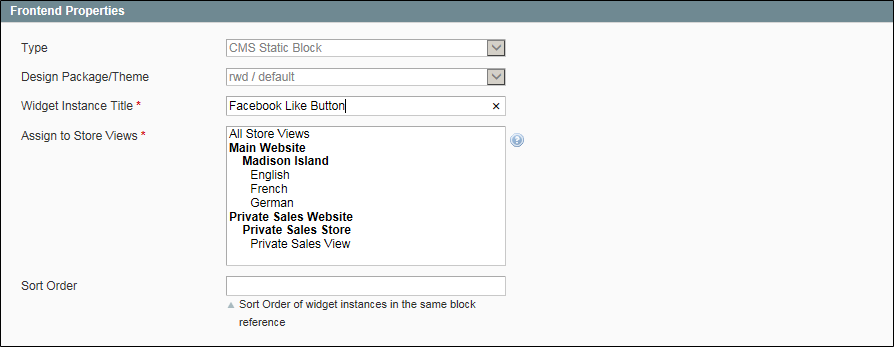
| 4. | In the Frontend Properties box, do the following: |
| a. | Enter the Widget Instance Title to appear in the list of widgets that are available in your store. For example: Facebook Like Button. |
| b. | If you want the button to appear in all views of your store, set Assign to Store Views to “All Store Views.” |
| c. | You can leave Sort Order blank for now. |
| 5. | In the Layout Updates section, click the Add Layout Update button. Then, do the following: |
| a. | Set Display On to “All Pages.” |
| b. | Set Block Reference to the place on the page where you want the button to appear. For a diagram of block references, see: Standard Block Layout. |
In general, either the header or footer are good places for a Like button because it will appear in the same place on every page of the store. Depending on your store, you might need to update the Sort Order field to position the button in relation to other content that is assigned to the same place on the page. You can try several settings to see what works best.
| c. | Click Save and Continue Edit. |
| 6. | In the panel on the left, select Widget Options. Then, do the following: |
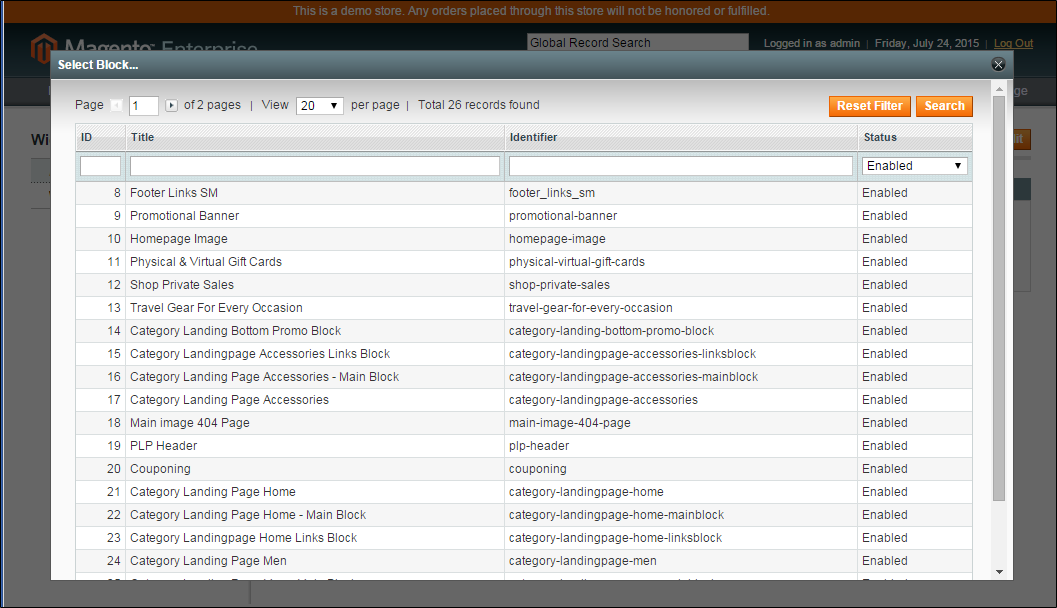
| a. | Click the Select Block button. |
| b. | In the list, find the block that you created for the Facebook Like button, and select the block. |
| c. | When complete, click Save. |
| 7. | When prompted, follow the instructions in the message at the top of the workspace to update the index and page cache. |
Return to your storefront to make sure that the Facebook Like button is in the right location. If you want to try a different place, reopen the widget and change the block reference.


