Magento 1.x Security Patch Notice
For Magento Open Source 1.5 to 1.9, Magento is providing software security patches through June 2020 to ensure those sites remain secure and compliant. Visit our information page for more details about our software maintenance policy and other considerations for your business.
Store Email Addresses
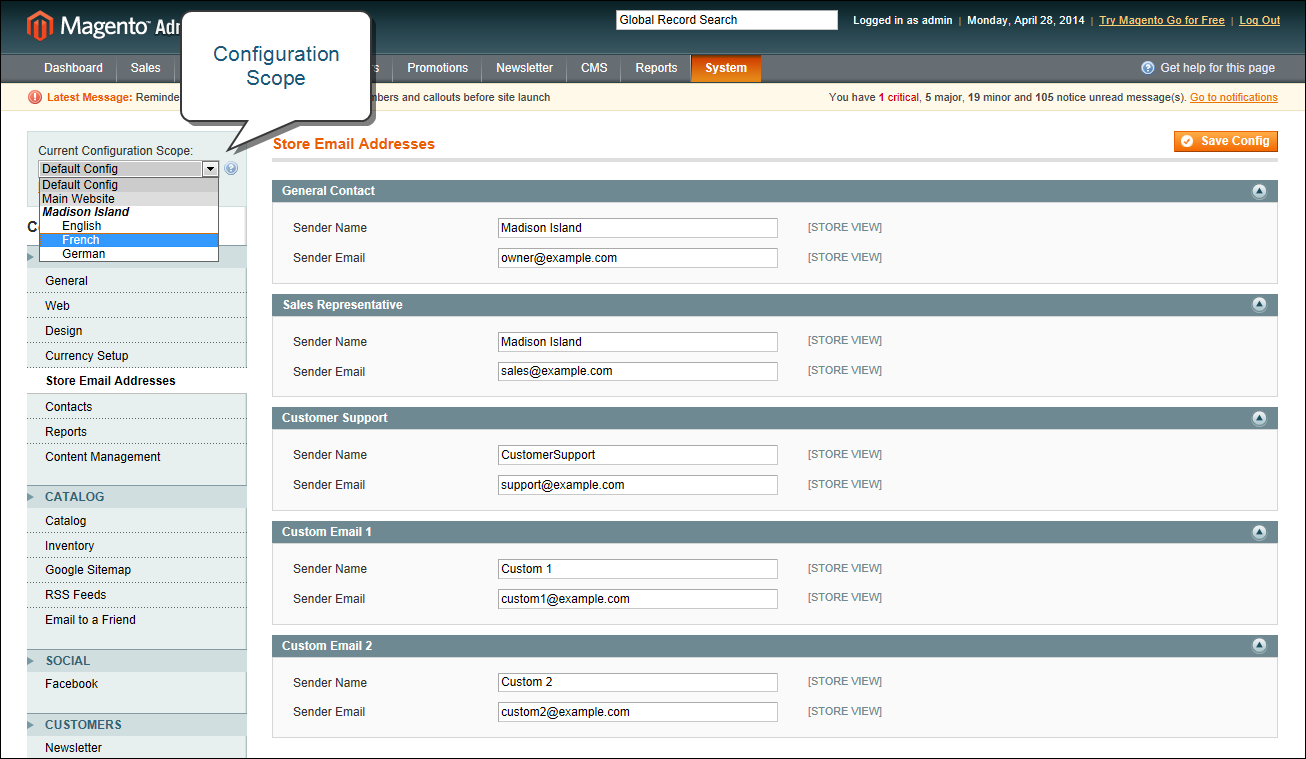
You can have up to five different email addresses to represent distinct functions or departments for each store or view. In addition to the following predefined email identities, there are two custom identities that you can set up according to your needs.
- General Contact
- Sales Representative
- Customer Support
Each identity and its associated email address can be associated with specific automated email messages and appear as the sender of email messages that are sent from your store.
 Step 1: Set Up the Email Addresses for Your Domain
Before you can configure email addresses for the store, each must be set up as a valid email address for your domain. Follow the instructions from your server administrator or email hosting provider to create the email address you need.
 Step 2: Configure the Email Addresses for Your Store
|
1.
|
On the Admin menu, select System > Configuration. |
|
2.
|
In the Configuration panel on the left, under General, select Store Email Addresses. Then, do the following: |
|
a.
|
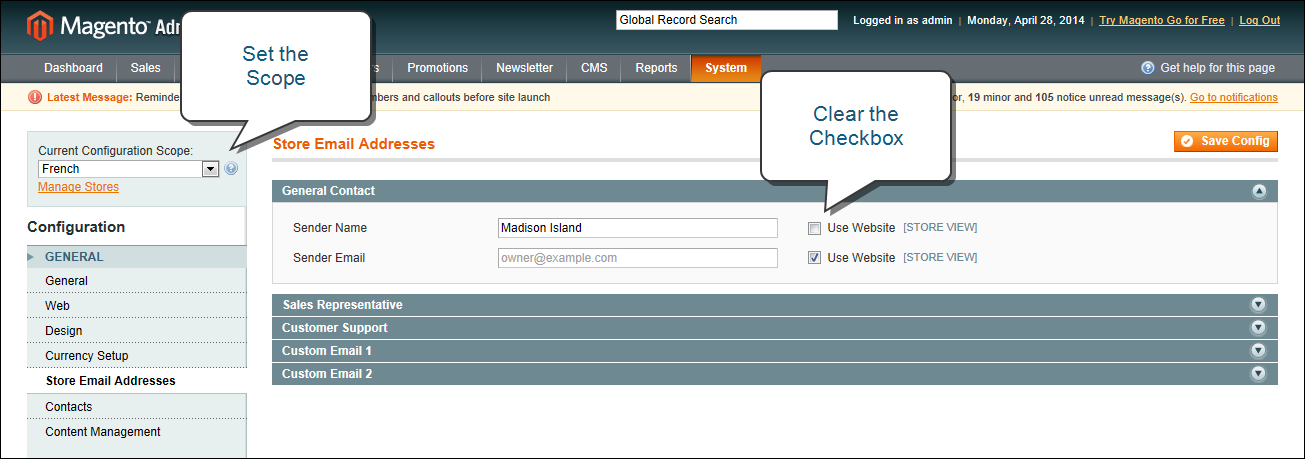
Click to expand the General Contact section. |
|
b.
|
If you have multiple stores or views, set the Current Configuration Scope in the upper-left corner to identify the store or view where the configuration applies. Then, clear the checkbox after each field so new values can be entered. |
|
c.
|
In the Sender Name field, type the name of the person that you to appear as the sender of all email messages that are associated with the General Contact. |
|
d.
|
In the Sender Email field, type the associated email address. |
|
3.
|
Repeat this process for any other email addresses that you plan to use. |
|
4.
|
When complete, click the Save Config button. |
 Step 3: Update the Sales Email Configuration as Needed
If you use custom email addresses, make sure to update the configuration of any related email messages, so the correct identity appears as the sender.
|
1.
|
In the panel on the left, under Sales, select Sales Email. |
|
2.
|
Click to expand each section, and make sure that the correct store email is selected as the sender of the message. |
|
3.
|
When complete, click the Save Config button. |


