Cookie Restriction Mode
When Cookie Restriction Mode is enabled, visitors to your store are notified that cookies are required for full-featured operations. Depending on your theme, the message might appear above the header, below the footer, or somewhere else on the page. The message links to your privacy policy for more information, and encourages visitors to click the Allow button to grant consent. After consent is granted, the message disappears. The Cookie Restriction Mode message resides in a CMS static block, and can be edited to suit your voice and style.
Your privacy policy should include the name of your store and contact information, and explain the purpose of each cookie that is used by your store. See the end of this topic for a complete list of the cookies used. See the end of this topic for a complete list of the cookies used.
If you change the URL key of the privacy policy, you must also create a custom URL rewrite to redirect traffic to the new URL key. Otherwise, the link in the Cookie Restriction Mode message will return “404 Page Not Found.”
Cookie Restriction Notice In Footer
 Step 1: Enable Cookie Restriction Mode
|
1.
|
On the Admin menu, select System > Configuration. Then in the panel on the left, under General, click Web. |
|
2.
|
Click to expand the Session Cookie Management section, and do the following: |
|
a.
|
Enter the Cookie Lifetime in seconds. |
|
b.
|
If you want to make cookies available to other folders, enter the Cookie Path. To make the cookies available anywhere in the site, enter a forward slash. |
|
c.
|
To make the cookies available to a subdomain, enter the subdomain name in the Cookie Domain field. (subdomain.yourdomain.com) To make cookies available to all subdomains, enter the domain name preceded by a period. (.yourdomain.com) |
|
d.
|
To prevent scripting languages such as JavaScript from gaining access to cookies, set Use HTTP Only to “Yes.” |
|
e.
|
Set Cookie Restriction Mode to “Yes.” |
 Step 2: Edit the Cookie Restriction Message
|
1.
|
On the Admin menu, select CMS > Static Blocks. |
|
2.
|
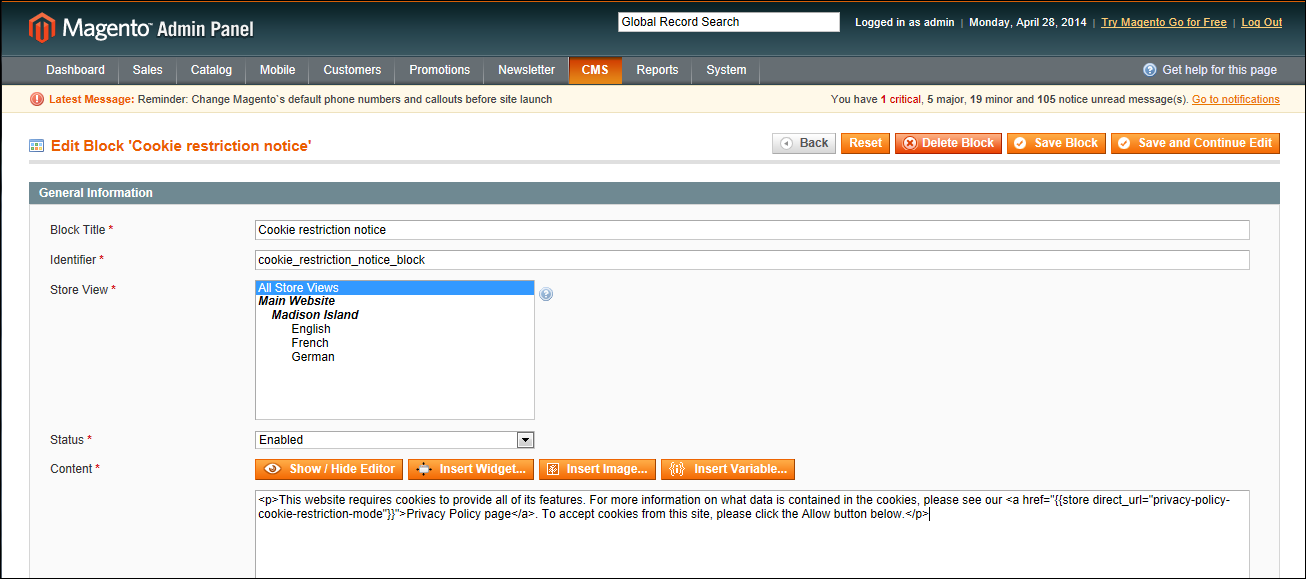
Find the Cookie Restriction Notice, and click to open the block. Then, do the following: |
Editing the Cookie Restriction Notice
|
a.
|
Select each Store View where the notice should appear. |
|
b.
|
Set Status to “Enabled.” |
|
c.
|
In the Content box, edit the message as needed. |
|
3.
|
When complete, click the Save Block button. |
 Step 3: Update Your Privacy Policy
|
1.
|
On the Admin menu, select CMS > Pages > Manage Content. |
|
2.
|
Find your Privacy Policy in the list, and click to open the page. |
|
3.
|
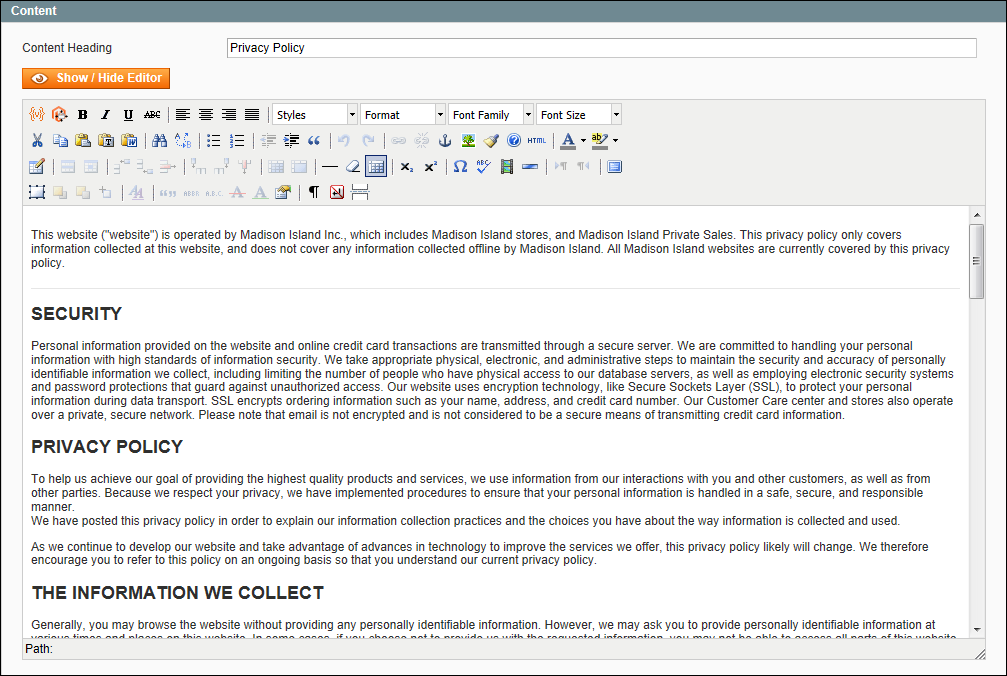
In the panel on the left, click Content. If necessary, click the Show/Hide Editor button to work in WYSIWYG mode. |
Privacy Policy
|
4.
|
Update your privacy policy to describe the information that your company collects, and how it is used. You can include the information from the tables at the end of this topic. |
|
5.
|
When complete, click the Save Page button. |


