Part II: Magento Installation
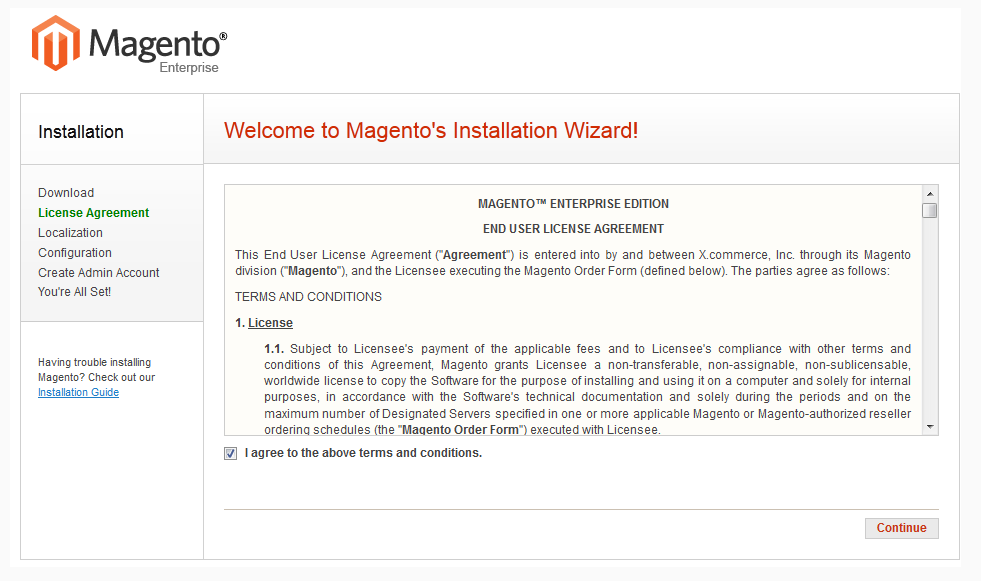
During the second part of the Magento installation, you will complete the initial configuration, and create an admin account.
From your browser, enter the path to your Magento installation. Depending on the installation location, it is similar to one of the following:
-
http://[your_domain]/magento
http://www.[your_domain]/magento
http://www.[your_domain]/[directory]/magento
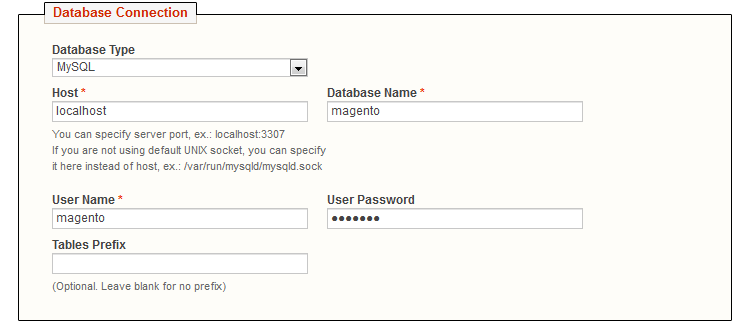
| 1. | In the Database Connection section, do the following: |
| a. | Set Database Type to “MySQL.” |
| b. | In the Host field, enter the server's fully qualified host name or IP address. If your database server is on the same host as your web server, enter “localhost.” |
| c. | Refer to the database credentials from Part 1: Step 5, and enter the following: |
- Database Name
- User Name
- User Password
| d. | (Optional) The Table prefix is used when there are multiple instances of Magento that share a single database. |
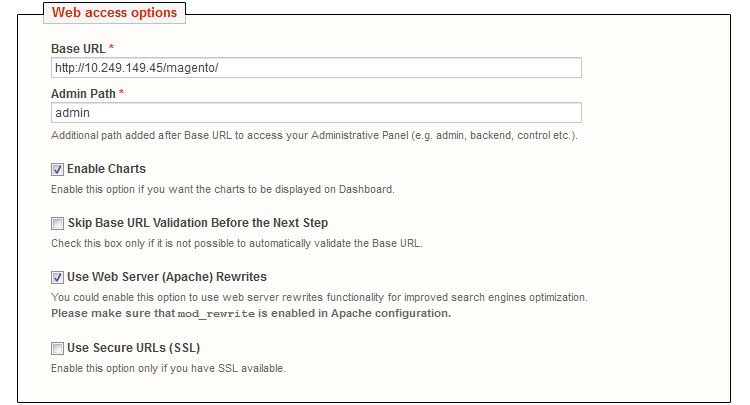
| 2. | In the Web Access Options section, do the following: |
| a. | Enter the Base URL for the Magento store. |
| b. | In the Admin Path filed, enter the base URL for the store’s Admin Panel. (The default value is “admin.”) |
| c. | To display charts in the Dashboard, select the Enable Charts checkbox. |
| d. | If you are installing Magento to a development or test environment, and the Web server is not verifiable, select the Skip Base URL Validation Before the Next Step checkbox. Otherwise, leave the checkbox unselected. |
| e. | (Recommended) To enable the Apache mod_rewrite module, select the Use Web Server (Apache) Rewrites checkbox. To learn more, see the Knowledge Base article: Installing and Configuring Required Prerequisite Software. |
| f. | (Recommended) If your server has a valid security certificate, select the Use Secure URLs (SSL) checkbox. Then, complete the following: |
-
Secure Base URL
Enter the complete base URL for the SSL connection.
Run the Admin Interface with SSL
Select the checkbox to run the store admin on the secure channel.
These initial SSL settings can be modified later.
| 3. | In the Session Storage Options section, set Save Session Data In to one of the following: |
-
File System
Stores user session data on the file system in the magento-install-dir/var/session directory. File-based session storage is the most common configuration.
Database
Stores user session data in the database. Choose database storage for a clustered database, or if system access is slow.
| 4. | When the Configuration settings are complete, click the Continue button. |
| 1. | In the Personal Information section, enter the following: |
- First Name
- Last Name
| 2. | In the Login Information section, do the following: |
| a. | Enter the Username you of the owner of the Magento store. |
| b. | Enter the Password that is associated with your Admin account. To confirm, enter it again in the Confirm Password field. |
| 3. | (Optional) If you already have one, enter the Encryption Key. Otherwise, Magento will generate one for you. |
The encryption key protects sensitive data such as passwords and personally identifiable customer information. The encryption key is stored on the server at: /app/etc/local.xml
Important! When Magento generates your encryption key, write it down and keep it in a safe place. If you ever move your data to another Magento CE site, you will need the encryption key to recover the data.
| 4. | Click the Continue button, and you’re all set! |
- To explore your new store, click the Go to Frontend button.
- To explore your store’s admin, click the Go to Backend button.


